Installation of partitions from tongue-and-groove plates (PGP) is carried out in several stages. First you need to prepare and level the surface of the floor and wall. Then a cork tape is glued on which the first one is installed. Subsequent rows are mounted in the standard way, sticking the ridges of one part into the grooves of the other. Step by step instructions with photos can be found in this article.
The content of the article
- Types and sizes of plates
- Mounting technology
Types and sizes of plates
Tongue-and-groove slabs are a common type of building material that is used only to create an interior partition, for example, to separate a toilet or a room with a shower cabin. The name of the material is associated with the presence of grooves and ridges at the ends, through which they are connected during installation (like a designer).
Understanding how to lay tongue-and-groove plates, you need to keep in mind that the material can be of 2 main types:
- standard, which are used in rooms with a normal level of humidity;
- moisture resistant, which are used, for example, in the bathroom or in the kitchen.
The laying of tongue-and-groove blocks is also carried out with the division of materials into 2 categories, depending on the structure:
- Hollow - have cavities inside, very light, so they put little pressure on the floor. They are easy to install, allow wiring and other communications to be laid inside, but at the same time they do not provide good sound insulation.
- corpulent do not have internal cavities, are a monolithic material. The principle of instructions on how to lay tongue-and-groove blocks of this type is similar. However, they have more weight and bear the load on the floor. At the same time, they protect well from noise, allow you to hang cabinets, shelves and other structures.
Another important classification is related to the composition of the material:
- Gypsum boards are affordable, but not highly resistant to moisture. Therefore, their use is limited to ordinary premises, such as living rooms.
- Silicate consist of quartz sand and lime. They can even be used in rooms with a high level of humidity, such as a bathroom.
When planning to study how to lay a tongue-and-groove, you also need to familiarize yourself with the dimensions of the material. The slabs are rectangular in shape with a width of 199 to 500 mm and a length of 500 to 900 mm. As for the thickness, it usually has one of three values: 70, 80 or 100 mm.
Mounting technology
Usually, tongue-and-groove blocks are laid with their own hands, since the technology is simple and does not require special equipment. In fact, the work is the construction of a wall, so the foundation is first prepared, after which each row is built step by step. The main steps are:
- The substrate for the GWP is being prepared - a cement or concrete screed. To do this, first determine the differences in the floor. If they are less than 20 mm, you can simply make a cement screed, if within 40 mm, you will also need reinforcement. If the defects are significant, concrete should be used.
- In order for the partitions from the tongue-and-groove to stand evenly, they prepare the base - the floor, and also the surfaces of the walls are cleaned from dust and primer, if necessary, dismantle the old screed and start marking using a laser level. Then the composition is kneaded and a new screed is laid.
- Blocks are not placed immediately - first, an elastic gasket for tongue-and-groove plates is glued to the floor. Most often, cork tape is used, which compensates for impact noise and deformation under the influence of temperature.

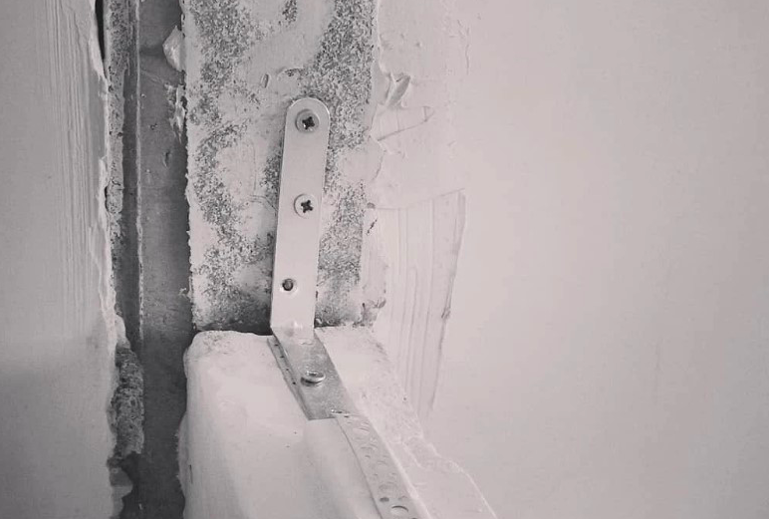
- GWP is glued to this tape and additionally fixed with fasteners. It is recommended to perform a “soft” dressing using steel corners 100 * 100 mm or direct hangers for a drywall profile. Rigid fastening will not work, because the walls of the HGP are deformed due to the temperature difference with the outer wall and, if the contact is too tight, they can become cracked.
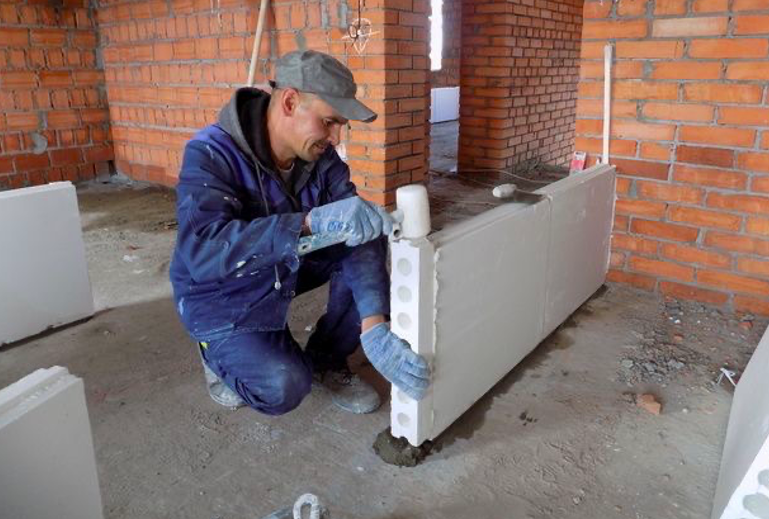
- Next, the installation of PGP Knauf or another brand begins. The first row is erected, and the installation is carried out from the wall. The plates are fixed to the cork tape with gypsum glue, applying it to horizontal and vertical surfaces. The last element is customized.
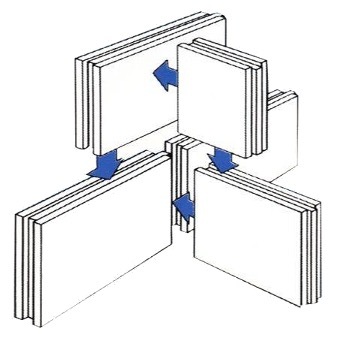
- As already mentioned, the tongue-and-groove plates are fastened to the wall using steel corners. The second row is erected with a little mixing (minimum interval 10 cm). At the same time, dressing is observed both at the corners and at the partitions, inserting the grooves into the ridges, as shown in the diagram.
- Lintels for tongue-and-groove partitions of the next row must completely overlap the seams of the previous one, i.e. installation is carried out like brickwork. Corners are placed on the outer corners and treated with putty. The inner corner must be reinforced with sickle.
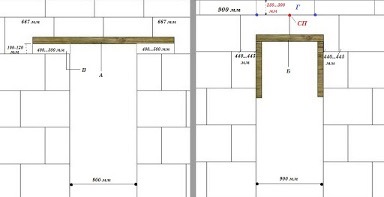
- Next, proceed to the installation of the doorway. If it is small (up to 90 cm), a jumper is made from the same blocks. Previously, a wooden support is placed in the span, which temporarily holds the slabs until the glue hardens. If the opening is wider than 90 cm, they put a permanent jumper from metal corners or a wooden beam.
- At the final stage, they put the last row of blocks, adjusting them in size depending on the distance to the ceiling. The connection with the ceiling is carried out by suspensions in the same way as it was with the floor.
Thus, it is possible to install a partition from tongue-and-groove plates in a matter of hours. First you need to prepare the surface, then perform a bunch of the first row with the floor, and then lay out the subsequent rows. If necessary, the wiring is laid inside the wall, having previously made the strobes.