Building a sleeper shed begins with careful planning and choosing the right materials. The sleepers used in railroad construction are strong and durable, making them an ideal choice for wood barn construction. It is important to ensure that the sleepers are treated and protected from rot and pests.
The content of the article
- Preparing for construction: how to build a shed without a foundation
- Step by step guide
- Alternative options
- Finishing and arrangement
- Results and recommendations
Preparing for construction: how to build a shed without a foundation
Before starting construction, you need to decide on the location and size of the shed without a foundation. For the stability of the structure, it is recommended to use a simple foundation for the shed, for example, a columnar or strip foundation. This will provide additional support and extend the life of the structure.
Before starting work, prepare the following tools and materials:
- Sleepers for the main structure.
- Tools for cutting and processing wood.
- Fastening elements: nails or screws.
- Materials for roofing and finishing.
Step by step guide
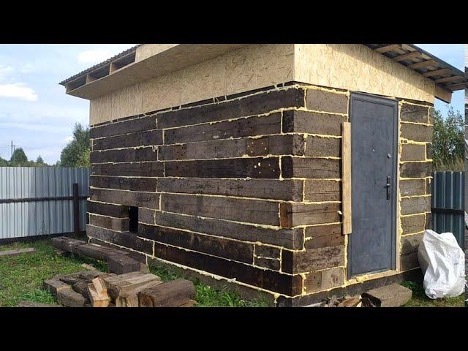
The first step to building a DIY sleeper shed is preparing the frame. Select quality sleepers and treat them with an antiseptic to protect them from moisture and pests. Lay the sleepers on the ground, forming the outline of the future barn. Make sure all sides are straight and corners are perfectly square using a level and square. The connection of sleepers in the corners must be made with maximum precision to ensure the strength and stability of the structure.
Once the frame is ready, proceed to installing the roof beams. Place them at equal distances from each other to ensure an even load on the roof. Choose a suitable roofing material - it should be lightweight, but durable and waterproof. For example, corrugated sheeting or metal tiles. Install the roofing material starting from the bottom edge of the roof and working towards the top to ensure proper drainage of water.
The final stage is the finishing and arrangement of the shed from sleepers with your own hands. Sand all visible surfaces to avoid burrs and make your shed safe and aesthetically pleasing. Apply paint or varnish to protect the wood and give your shed a neat appearance. Install doors and, if necessary, windows for ventilation and natural light. Inside the shed you can organize shelves or racks for storing tools and garden equipment.
Alternative options
The first step in building a do-it-yourself shed on stilts is selecting and installing the stilts. Piles are long posts that are driven or screwed into the ground to create a stable base for the shed. This method is especially effective on unstable or wet soils where a traditional foundation may not be effective. Choose piles made from durable materials, such as metal or treated wood, and install them evenly spaced to distribute the load evenly.
After installing the piles, proceed to the frame construction. Horizontal beams are attached to the tops of the piles, which will serve as the basis for the floor of the barn. Make sure all beams are level and securely fastened. Then begin building the shed walls and roof, following the general principles of sleeper shed construction. It is important to ensure a reliable connection between the walls and the frame on stilts to prevent deformations and collapses.
Building a DIY shed on stilts provides the unique benefit of space underneath the shed that can be used for storage or as a shelter for pets. After completing the construction of the walls and roof, proceed to the exterior and interior decoration. This may include painting, installing doors and windows, and staging the interior. Be sure to provide easy access to the space under the shed and, if necessary, protect it from the elements and pests.
Finishing and arrangement
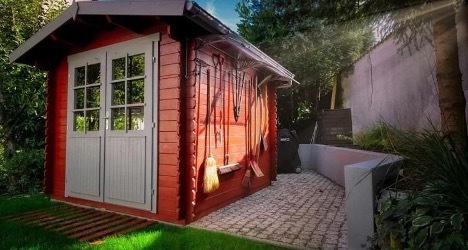
Decorating a shed from sleepers with your own hands begins with external work. It is important to ensure not only aesthetic appeal, but also protection of wooden elements from weather conditions. Use high-quality paints and antiseptics to treat sleepers. This will protect the wood from rot, moisture and pests, significantly extending the life of the structure. When choosing a color, consider the surrounding landscape and the style of your site so that the shed blends harmoniously with the overall look.
The interior arrangement of a sleeper shed includes the installation of shelves, hooks and other storage systems. This will make the most of the available space and conveniently organize the storage of tools, garden equipment and other items. It is also important to ensure good ventilation so that moisture does not accumulate inside the shed. If necessary, install additional windows or ventilation grilles.
The final aspect of finishing and furnishing is making sure your shed is safe and usable. Install secure locks on doors to prevent unauthorized access. Also consider installing lighting inside and outside your shed for easy evening work. If you plan to use power tools inside the shed, make sure the wiring is safe and there are enough outlets.
Results and recommendations
Building a simple DIY shed requires patience and attention to detail, but the result is a functional and durable structure that suits your needs perfectly. Using these recommendations, you can build a reliable and practical shed without a foundation with your own hands.