It takes ~ 3 minutes to read
Ceiling repairs require a lot of time and finances, so many decide to do the repair on their own. If you are one of them, then you need to know how to properly putty the ceiling. Without this "stage" it is impossible to carry out perfectly even painting, wallpapering the walls, and indeed any kind of decoration.

Necessary tools and materials
There are two types of putty. Both will be needed for puttying - starting and finishing.
Starting putty is needed for the initial leveling of the surface. With its help, all deep cracks and seams are filled. Its structure is rather rough - there are many large "grains". But thanks to this structure, it is possible to quickly fix obvious defects.
Finishing putty is distinguished by its smallest fraction. It gives the surface a final smoothness.
It is very important to use products (primer, putties) from one manufacturer and from one line. It has the greatest composition compatibility. Moreover, the quality of the result is noticeably higher than if products of different brands were used.
The set of tools depends on the type of putty chosen. You can choose a dry composition that requires dilution in water or a ready-made mixture. The latter is much more convenient. You don’t have to waste time mixing or rushing, fearing that the putty will harden. The finished solution retains its properties for a long time. But it will cost more.
Dry putty is no worse than finished. The only drawback is the short lifespan of the prepared mixture. It begins to harden, lose elasticity. Therefore, it is not necessary to knead the entire volume at once - dry putty is prepared in batches.
Tools to be prepared before starting work:
- Electric drill with a special nozzle for kneading putty or a construction mixer.
- Two vessels with vertical walls: the first for puttying, the second for cleaning the nozzle, water is poured into it.
- Several spatulas: wide (50cm), medium for scooping the solution and shifting it onto a wide spatula (11cm), narrow. You can do without a narrow one, but it may be needed if there are hard-to-reach areas in the room.
- Construction grater with a thin mesh (or with sandpaper). A sanding mesh or sandpaper is necessary - the ceiling is always sanded after puttying. Moreover, the initial layer is treated with a coarse-grained skin, and the last one is “zero”.
- A flute brush and sponge will be needed for ceiling skirting boards.
- Joinery or stepladder.
- Great level.
- Searchlight for illumination.

Preliminary preparation of the ceiling
The mixture must be applied to a clean and dry surface. Therefore, the entire finish is removed from the ceiling, including old putty layers. You can simplify the task - moisten the ceiling with water and leave for a while (no more than 20 minutes). The solution during this time absorbs water, and removing it is not difficult. With a painted ceiling, the task will become more complicated. A hammer will be required to handle the cleaning. If the paint was applied to the ceiling relatively recently, then it will be enough to polish the existing bumps.
After we removed the extra layers, we need to thoroughly clean the surface with a dry cloth and treat with a primer. Corners and joints need to be primed especially carefully.
The priming phase is very important. It helps not only prevent the development of mold, but also improves the adhesion of the ceiling surface to the putty solution.
In the presence of cracks and cracks in the floors, they are sealed before priming.

DIY ceiling puttying steps
You can start puttying after all the necessary materials, tools, and preparatory work have been purchased.
Knead the dry mixture
You need to take one of the containers and put in a dry putty mixture. Dilute with water at room temperature, add in small portions. The substance is stirred with a special nozzle with an electric drill or construction mixer until the consistency of thick sour cream. It will be difficult to repair all defects with a liquid solution, and it also freezes for a long time. A very dense structure is also not welcome - there should be no lumps.
At the very beginning of the batch, you need to make slow turns. Gradually, the whisk of the nozzle must be lowered and the mixing zone expanded. When the mixture becomes more or less homogeneous, you can increase the number of revolutions. Then you need to stop the batch for a couple of minutes, and then bring the mass to homogeneity. Keep in mind that if the drill speed is too high, then a lot of unnecessary air will get into the solution. Bubbles may appear on the work surface due to air.
If there is no special tool, you can knead the putty manually, using a spatula. Also, this method is suitable for starting application, since ideal smoothness is not so important there.
The life of the prepared mixture is 40 minutes. In no case do not add water to an already hardened solution - the quality will become even worse, so it is wiser to prepare a new mixture. It is very important to wash the container from the remnants of the old putty.

Putty putty on the ceiling
Consider the technology of applying the mixture to a concrete or plastered ceiling. Such a surface often has many defects. Starting putty will help to fix them.
- Using a medium spatula, we close up large flaws. If the cracks are very large, then they must be puttied in several approaches, with each subsequent drying.
- All major defects are filled and dried. Now you need to look at the level of the need for alignment on a horizontal plane. Strong differences require several putty layers.
- We collect the mixture with a middle spatula from the tank and transfer it to a wide one with sliding movements.
- The most difficult thing is to putty directly on the ceiling. If you have never done anything like this, it makes sense to work out on another surface or ask someone more experienced.
- The spatula is applied to the junction of the ceiling and the wall and with uniform pressure extends along the ceiling until almost the entire composition remains on it.
- Residues are picked up with a middle spatula, and the procedure is repeated.
- There will be stripes on the ceiling, and you need to deal with them (align) immediately. So the surplus is removed. The layer should not exceed a thickness of 3 mm.
- It is necessary to wait for solidification. After that, the same thing is done only with the finishing putty, but the layer is made thinner.
Speaking about how to properly putty the ceiling, one cannot but mention the polishing, which is the final stage of the process. Here you will need a spotlight. With it, you can see the smallest irregularities and immediately sand them.
If any defects are found at the end of all work, they should be eliminated pointwise without putting putty on the entire ceiling area.
Final finish
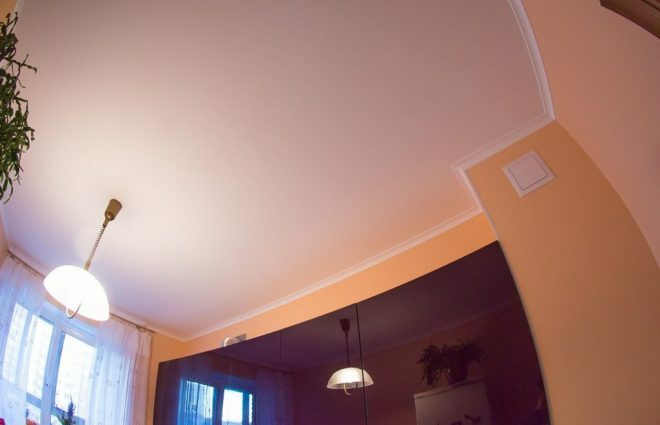
By this we mean puttying of skirting boards. These decorative elements give the room a look of "completeness." But they are not always perfectly adjacent to the wall, most often gaps form.
Large gaps (2-3 mm) are removed by starting putty, and smaller ones by finishing using a flute brush. It is very convenient to work with a brush when the baseboard has a complex relief profile.
Excesses are removed with a sponge and the surface is gently sanded.

Features of plasterboard putty
Now let's figure it out how to putty the ceiling if it is made of drywall. It is worth noting that this is much easier to do, because the drywall itself is even. Moreover, the sheets themselves are aligned in level during their installation.
We use the starting putty on the plasterboard ceiling only for sealing joints and holes from screws. It is very important to make sure that the tip of the screw does not protrude beyond the sheet.
Still need to prepare the joints. We need to deepen them, cutting off the edges at an angle of 45 degrees, and clean them of dust.
- Ground the ceiling, paying particular attention to the seams.
- Fill the joints with the starting solution, glue the sickle. It is required to "drown" in putty with a spatula. Then the seam is putty, and the surface is compared on a plane.
- The removed joints and places where the screws were fastened, we putty without reinforcing tape.
- When the putty is dry, you need to grind the seams and treat them with a primer.
- The last step is to apply a thin layer of the finishing mixture, grind the surface.
It is necessary to putty the ceiling both concrete and plasterboard. In the second case, this will create an additional protective layer, which will help to save on further repairs.
Tips & Tricks
If the ceiling was puttied for painting, the final primer had to be selected from a waterproof material. But do not be upset if you have already purchased the usual mixture. To make it waterproof we need to use a primer. It is added at the stage of kneading putty, and previously diluted in water.
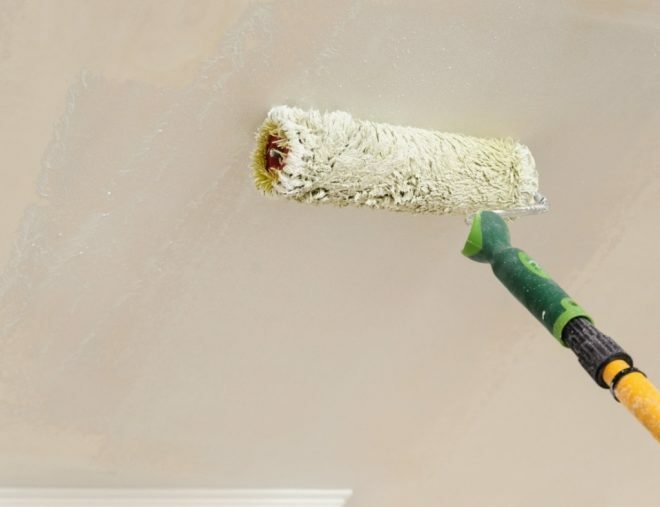
During the painting of the ceiling, it is not recommended to press on the roller and spend many times in the same place so as not to harm the putty layer.
The same waterproof primer will help prevent the putty from peeling off. Only need to be processed at the end, on top of the frozen composition.
Do not start the ceiling repair in the apartment from the largest room, if you have not done this before. It is better to work out in a small area, for example, in a bathroom or toilet. It is better to putty the ceiling of the living room or bedroom with a more "experienced" hand.
With great interest I always read your comments to my articles. If you have any questions, feel free to ask them, leave, you are welcome, Your feedback in the form below. Your opinion is very important to me. Thanks to your criticism and thanks, I can make this blog more useful and interesting.
I would be very grateful if you rate this post and share it with your friends. This is easy to do by clicking on the social media buttons above. Do not forget the article you like Add to bookmarks and subscribe to new blog posts on social networks.