Anyone trying to make the bathroom comfortable. In order that the feeling of comfort does not disappear over time, periodically it is necessary to carry out repair work. If the repair is accompanied by a change in plumbing, this is ideal. Technological progress is leaps and bounds, and the once popular cast-iron bathtubs can already be exchanged for more beautiful, comfortable and modern.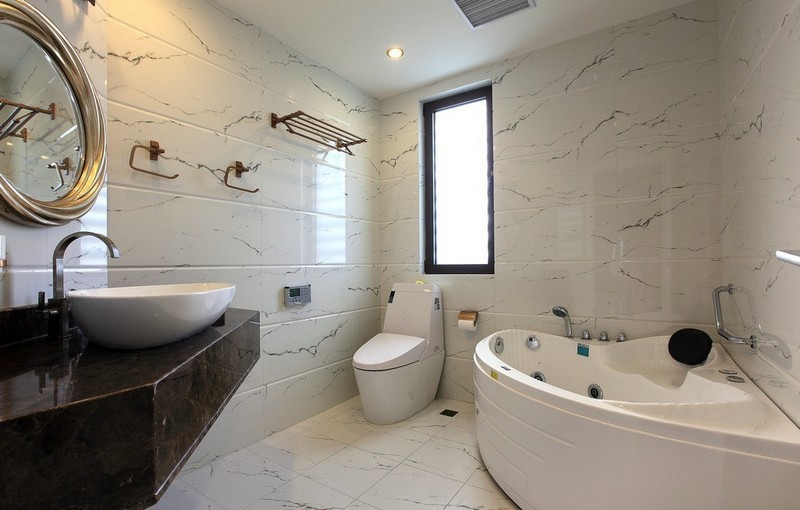
Preparation for installation
The content of the article
- Preparation for installation
- Siphon assembly
-
DIY bathtub installation
- Steel
- Acrylic
- Made of cast iron
Even if you know exactly which bath you want to purchase, do not make this purchase until the bathroom is ready.
The first step is to determine where it will stand. Although traditionally a bathtub is placed near a wall, many people prefer to place it in the center of the room.
If you plan to simultaneously carry out repairs in the entire room, then it is better to lay the tiles on the walls after installing the bathtub. Thus, you can completely close all the cracks.
Naturally, it is necessary to get rid of the old design. If it is steel or acrylic, then there will be no difficulties, but you will have to tinker with cast iron. Her weight does not allow this to be done alone, but deal with dismantling.
Attention! Check the entire sewer system without fail. Repair leaks, replace leaking pipes. If the taps are loose, tighten them.
If you miss this point and install new plumbing, you will have problems when water leaks begin.
At the preparatory stage, connect all communications. Install a tee, mount a siphon, all pipes.
Siphon assembly
Fittings not included. It must be purchased separately. It is divided into two groups:
- collapsible;
- monolithic.
Collapsible have many connections on the thread. It's like a plastic constructor. Bends have a rectangular shape. The second version of the siphon is made in the form of a curved pipe. Its bends are smooth, there are no joints. And although the non-separable siphon looks corny, it has its advantages. The fewer connections there are, the less opportunities there are for water to leak. Since the bend is smooth, it does not interfere with the flow of water, the water drains much faster and is less likely that clogging will occur.
Siphon is not needed for the exhibition. Nobody sees him anyway. Therefore, it is better to take exactly the whole option. The whole assembly will consist in screwing the overflow system.
DIY bathtub installation
The installation of the bath is more convenient to carry out with a partner. There is no difference what material it is made of - it is a rather large-sized item, and it’s very difficult for one person to install it. For installation, you must have:
- building level and rule;
- mallet;
- Adjustable wrench - required to set the legs.
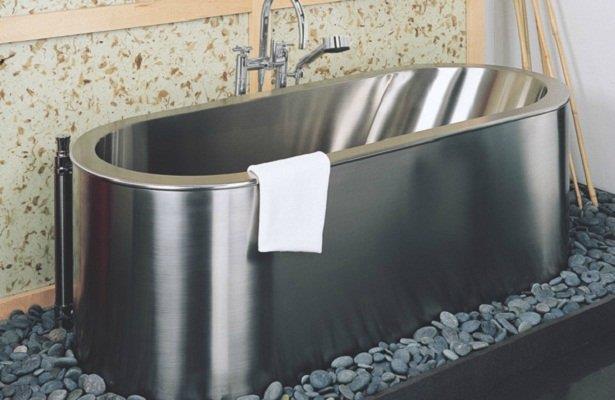
Steel
The steel bath is very light. This allows you to easily lift it, turn it around, transport it. In fact, even a partner is not required. But it will be more convenient and reliable with it. But just installing it will not work. She will not be confidently and firmly held because of her light weight.
The steel bath must be fixed on three sides. On the fourth side is a strong support. In the future, it may well be decorated with facing bricks or other material. A structure installed in this way will have a good foundation.
Often, legs are included with the steel product. They need to be set in height. The supports in this case will also be small.
When installing, you must adhere to the algorithm:
- The bath should be turned upside down. It is necessary to put a gasket under it.
- Mark the places where the supports will be installed. One of the pores should be installed near the drain hole. The second is on the opposite side.
- Supports are installed and pressed.
- Tips that are included are screwed.
- The bath should be returned to its original position, put in the intended place on the legs. Adjust them in height. It should be borne in mind that the design must have a certain slope in order to facilitate the discharge of water.
- Next, connect the sewer system and seal the joints.
- The gaps are closed with foam.
- The brick support is laid out.
- The brick is decorated with decoration.
If you managed to collect everything correctly, then this bath will delight you for a long time. It will be stable and not subject to deformation.
Acrylic
The main advantage of an acrylic bathtub is its low weight. It is smaller than steel. It is easy to install, even if there is no partner.
But low weight makes it necessary to install the structure on the frame to ensure its stability.
There are options for sale, the kit of which already includes a frame specially developed for this model, as well as all the necessary elements. Different manufacturers have different equipment. It is important not to forget to clarify this question with the seller.
Reference! Acrylic bathtubs have various configurations.
This is very convenient, as it allows you to make the choice for the most sophisticated taste, as well as optimally use the space in the room.
But this convenience can turn into a disadvantage. The more unusual and complex the form, the more difficult it is to install. The difficulty will lie in the manufacture of the frame, which will be able to repeat all the contours.
If the model you bought does not have a frame, then you have to make it yourself. To create a foundation, you will need a brick, as well as sheets of plywood and timber. Elements from wood need to be impregnated with a water-repellent.
Install the frame so that it is attached to the support. Such a support can serve as a bathroom wall. You can’t just fix the board on the structure. Thus, the load will go to the frame itself. The frame will very quickly fail.
At the corners of the bath you need to make racks. And put them on the sidewalls. The distance between the racks should not exceed half a meter. Do not make them large - the height should correspond to the height of the bath.
Installing a bath of acrylic is carried out according to the algorithm:
- a brick base is laid out, in which an opening of the drainage system is provided;
- the frame of the timber is attached;
- in those places where there will be vertical racks, bars are installed;
- racks are laid out;
- the upper base is made - a sheet of plywood is placed on it;
- the base of the brickwork is poured with a solution of cement;
- a bath is placed on the frame - it is set according to the level;
- in order for the cement mortar to take the shape of a bathtub, water is poured into it - in this state, everything is left until the mortar hardens;
- the decoration of the frame is done to hide the brick.
Made of cast iron
The most difficult to install bathtub made of cast iron. This is due to its considerable weight. Here, just one can not cope - even the two of her installation is difficult.
But the same weight that you complained about while you brought it into the room and installed, will serve as a guarantee of stability even without any support.
For proper installation, you must adhere to the following sequence of actions:
- the bath is turned on its side so that the drain hole faces the drain, and the bottom to the wall - in this position the siphon is easier to install;
- legs are fixed on the side that faces the ceiling;
- Now you need to turn the structure over and attach the legs on the other side;
- then a bath should be installed - we expose the entire structure with a bias to the drain hole;
- we move the bath close to the wall so that the gap thickness is minimal;
- with mounting foam, close the gaps;
- put the drain and fix the connection.
Without applying much effort, we fix the bolted connection to the legs.
Often such bathtubs are also placed on brick supports. This is nothing complicated. Anyone can handle it.
A brick base is laid out on the floor. The bottom of the bath should rest on it. As a rule, the base is made solid, because the weight of the bath is not small.