Any device breaks down sooner or later. An exception can be considered only those devices that are kept in a sealed form all the time and are not used. And the mixers break down with enviable regularity. There can be a huge number of reasons, but if you understand how to disassemble the switch, then it is quite possible to repair the mixer on your own and not spend money on purchasing a new one.
What are the switches on the mixer
The content of the article
- What are the switches on the mixer
-
How to disassemble and remove the shower switch on the mixer
- Suberic
- Zolotnikovy
- Ball
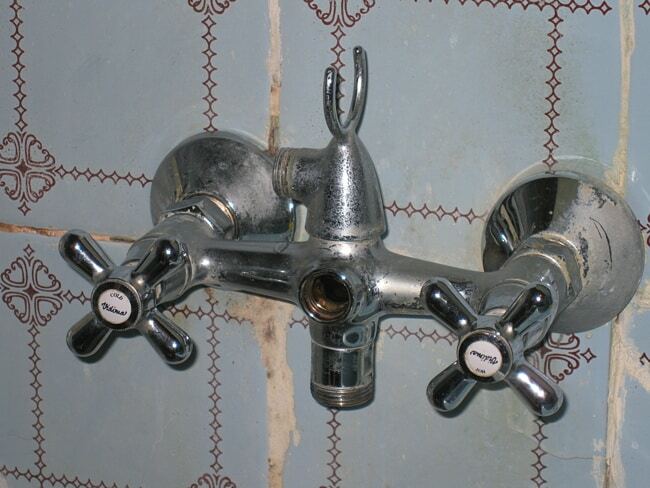
All switches that are on the faucets in the shower can be classified according to their design features and the principle of their operation. Based on the design features, the following stand out:
-
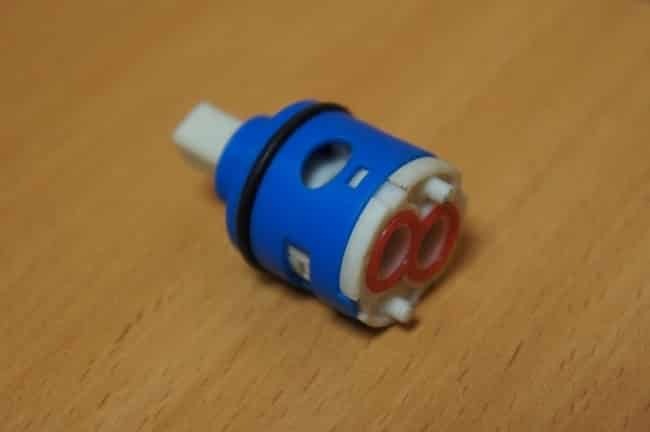
Cartridge. Most often, this is the option. The locking mechanism is represented by a cartridge; when the lever is turned, it changes its position.
-
Spool valves. They are placed on thin-walled mixers. The same ones were used in the models of the Soviet period. The regulation of the water flow is carried out by a spool.
- Cork. They are similar in design to spool valves, but are considered a newer option. Additionally, there is a spring that holds the stem. When the switch is lifted, the spring is tightened, fixing the stem, and water begins to flow into the watering can. After the next push on the switch, the stem returns to its original position, and water rushes into the tap.
Differences in design also affect the features of the repair of mixers.
How to disassemble and remove the shower switch on the mixer
As already mentioned, all devices have their own design features, and this is the reason for the differences in the disassembly and repair of products.
Suberic
Plug switches have their own division into three categories. They are:
- Manual. Switching is done by hand.
- Automatic. After a certain time, the switch itself returns to its usual state.
- In the so-called Soviet period, shifting was regulated by a swing mechanism. At the moment, a practically unused option.
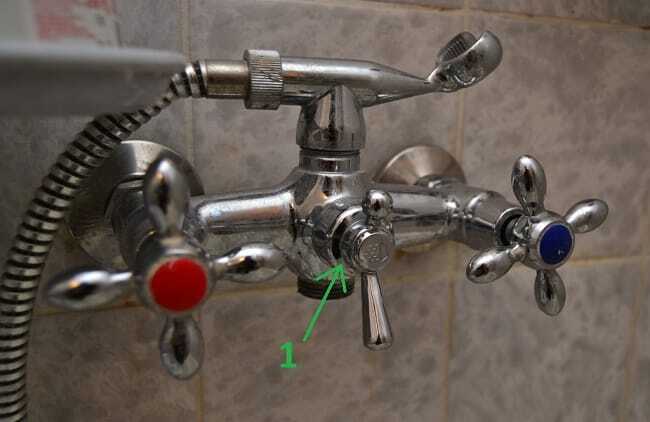
First of all, we shut off the water, unless, of course, there is a desire to start a small and not the fact that a victorious war with neighbors. Next, we get rid of the lining that acts as a decoration. Under the cover we see the connection thread. Using a screwdriver, carefully unscrew the bolt and remove the upper half of the handle.
Further, everything will depend on what type of locking mechanism is installed:
- First you need to remove the decorative nut, often it is not even screwed on. When removing it, you should not use adjustable wrenches - this way we will easily ruin the appearance.

- A decorative nut covers the locking nut. It is on it that the locking mechanism rests. In the cartridge, respectively, this is a ceramic cartridge, and in the ball it is a ball. Unscrew the fixing nut with an adjustable wrench.
- Next, you need to remove the switch itself.
- We unscrew it with the same adjustable wrench. As soon as we feel that nothing prevents the mechanism from rotating freely, put the key aside and unscrew it with our hands to the end, so as not to harm the spring and the gasket.

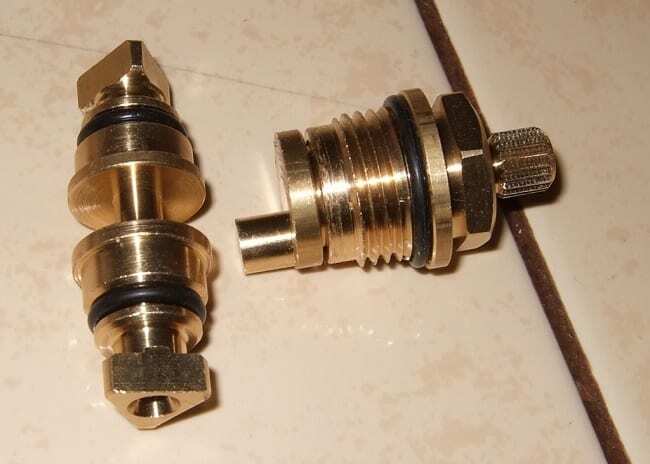
- A spring-loaded switch, or in other words, a rod switch, consists of a stem, springs and a locking mechanism, as well as O-rings. We unscrew the nut, which helps to switch the flow from the tap to the watering can. We check the spring - for the constipation to function, it must be flexible.

- Having removed the thrust nut, we get rid of the plastic washer on which the stem is held. We see a spring under it. We extract it. We do this carefully, trying not to bend it.
- Replacing the mechanism, we put everything back.
Reference. On Soviet versions of cork switches, first remove the handle, and then the switch.
Zolotnikovy
If there is a spool switch in the mixer, then the steps for disassembling it will be somewhat different:
- We unscrew the lower half, namely the hose and the switch. You can take an adjustable wrench or a suitable sized wrench.
- Unscrew the nut and remove the hose from the switch. It is easier to do this with an adjustable wrench.
- Next, unscrew the switch.
Spool-type switches are still widely used and do not need to be completely disassembled. You just need to unscrew the locking part, after which the mechanism can be removed.
Such options are not very popular, they simply cannot be repaired. Seeing a leak on such a mixer, boldly throw it away and buy another.
Ball
In mixers with two valves, as a rule, locking mechanisms in the form of a ball are installed.. It is the ball that is responsible for adjusting the pressure and temperature of the water. From it comes the connection to the stem and valves. By rotating the handle, we change the position of this ball, the pressure changes accordingly, and the direction changes from the tap to the watering can or vice versa.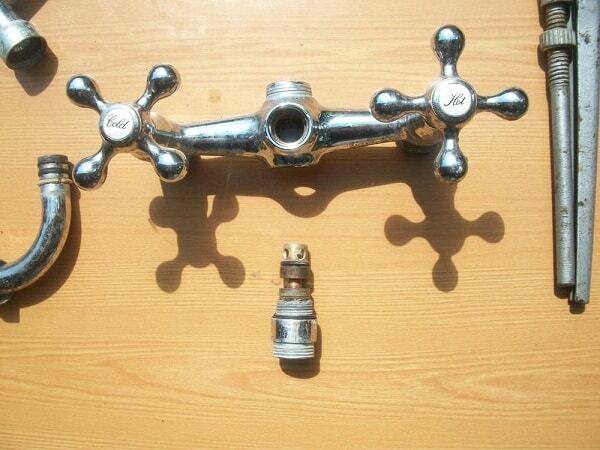
Let's see how this type of switch is parsed:
- On the upper side of the mixer we find the clamping nut and take it out. It is needed to attach the shower hose to the body. Remove it simply with an ordinary screwdriver.
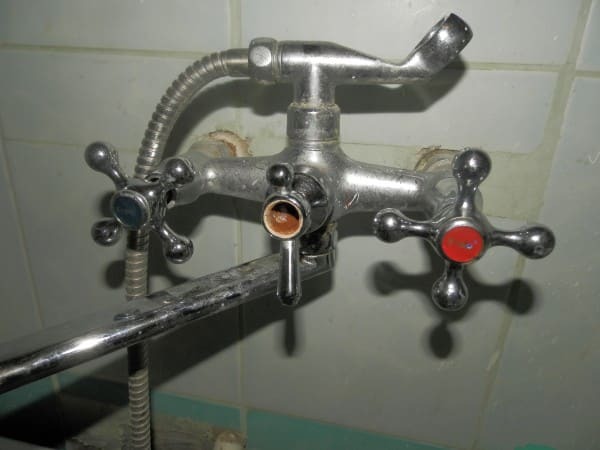
- Having removed the shower along with the nut, we get access to the hole for the bushing, where we can see the hexagon plate. She is holding a locking ball. Unscrew and remove the plate.
- Next, unscrew the knob that adjusts the ball. First you need to get rid of the plate. There is a bolt behind it that must be unscrewed.
- You do not need a key to remove the handle. It has no threaded connection. It should be noted that the handle is usually made of silumin, which is a rather fragile material.
- There is a stock under the handle itself, we unscrew it. Having unscrewed it, it will be possible to safely remove it, after which it will be possible to directly repair it.
During reassembly, do not be too lazy to wrap all threaded connections with a fum, at the same time it will be nice to change the gaskets and O-rings. It will not be superfluous to do prophylaxis every year, changing the seals if necessary.
Subscribe to our Social Networks


