Apart from the fact that the kitchen furniture carries a functional grain, it still is a design element. And if puzzled, and make it his own, then it will not just take a piece of bread for the designers, but also the rise in the eyes of the household.
For the manufacture of cabinets under the sink, you can choose a variety of materials. The form may also be different. It is not necessary to follow the standard and making furniture rectangular. Apart from the fact that the cabinet will keep on the sink itself, inside is possible to arrange additional drawers, place a container under the water and much more. Naturally, all you need to think ahead and prepare sketch.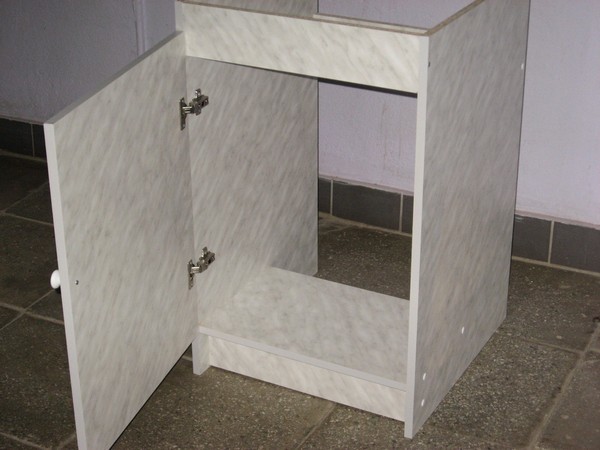
A variety of appearance and design features bollards sink
The content of the article
- A variety of appearance and design features bollards sink
- Materials and tools for assembly
- We make a stand for the sink with his hands
- Installing shell
Considering how best to place all the components of the headset, we have to rely on the dimensions of the room. You always want to fit into the limited space as much as possible all. You can arrange the furniture in different ways. You can put everything in one row or in the form of a letter T or P, create an intricate pattern.
The way will be arranged all the furniture in the kitchen, it will depend on how and where there is a stove and a sink. If you plan to make a stand with his own, then first of all think about what form it will be easier to make. Sinks come in the following forms:
-
Rectangular or straight. The easiest option in terms of manufacturing. It is believed that it is more convenient to place all the pieces of furniture along one of the walls of the room. Desk-cabinet will stand between them may turn out to put even a refrigerator. It looks very peculiar single worktop for all elements of the headset. The beauty is that with this embodiment there is no need to manufacture the top of the pedestals. You can even simplify your task and buy ready-made facades.
-
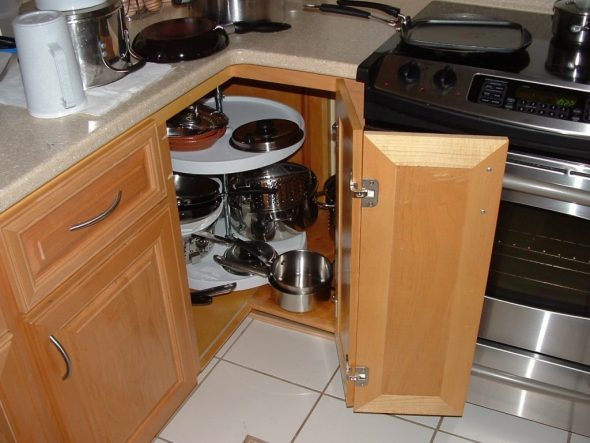
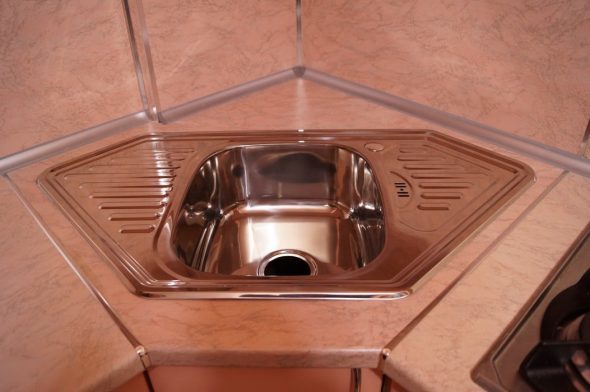
Curbstones angular shape. They are placed in the corners of the room. Among them are several subspecies - in the form of the letter T, triangle and rectangular shape. These models take up little space in the room. It is important, if the kitchen is not much headroom. If properly approach the issue of the use of space inside the cabinets, then there can be set a lot of things. If, in addition to equip all these shelves, carousel, then this option will be worthwhile. Need to create a bit more time as compared to the rectangular furniture, but it is clearly not difficult.
-
Cupboard in the form of a trapezoid. This model is characterized by a very wide top, her boxes are spacious enough. This form stands up on her free cleaning of various shapes. The only thing - it requires a lot of space for themselves.
Materials and tools for assembly
Most often, for the manufacture of furniture in the kitchen is used laminated chipboard. This material due to its coverage is not much afraid of dampness.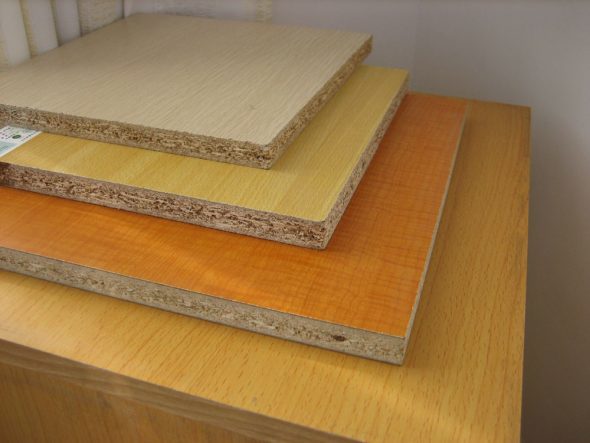
If the choice fell on him, you will need to purchase the tape edges, preventing the evaporation of the aldehyde resin, which is included in its composition. This substance is very harmful to humans.
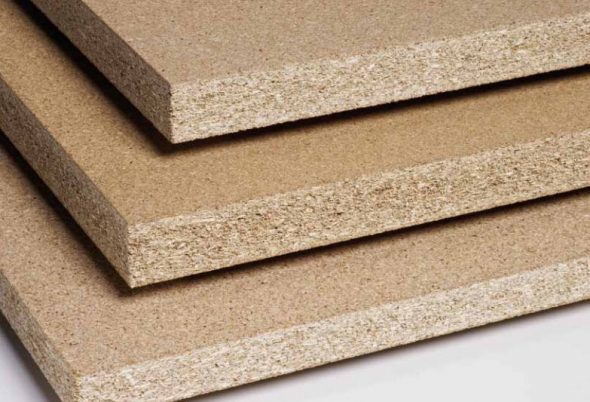
A good option would be the use of natural wood. But there are significant drawbacks in it - it's worth a lot more water in it is well absorbed and hard to care for him. However, all the shortcomings, except for the price, can be eliminated.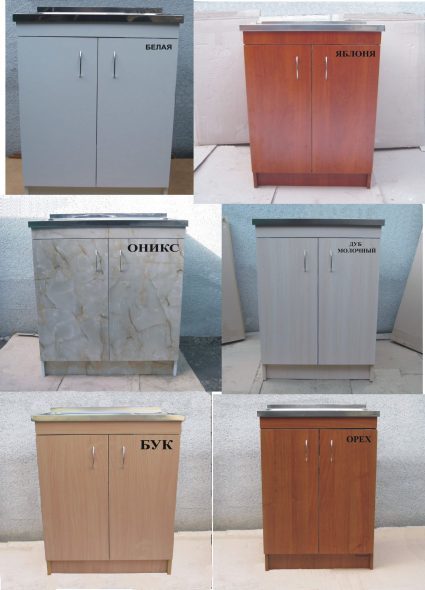
Once the material has been selected, it is time to prepare additional tools and accessories:
- to the rear of the need to buy fiberboard;
- for interior partitions - plywood;
- strip cladding - it needs to pick up in line with the basic color of stone;
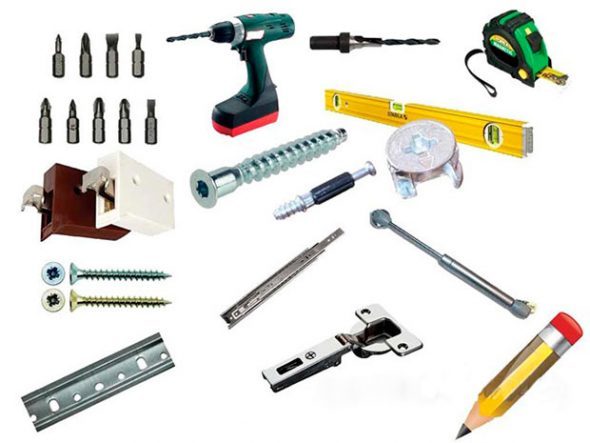
- hinges, door handles, screws and corners.
To work will need to stock up tool:
- for a marking pencil is needed for measurements - a ruler or measuring tape;
- require electric drill, rechargeable screwdriver;
- curly screwdriver;
- electric jigsaw.
We make a stand for the sink with his hands
During the entire procedure, the work on the sink following stages:
-
preparatory part. Originally developed by the drawing of the future product, with the required dimensions are applied to it.
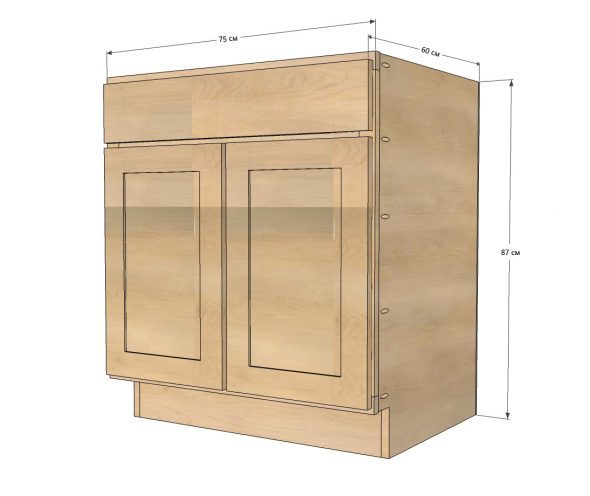
-
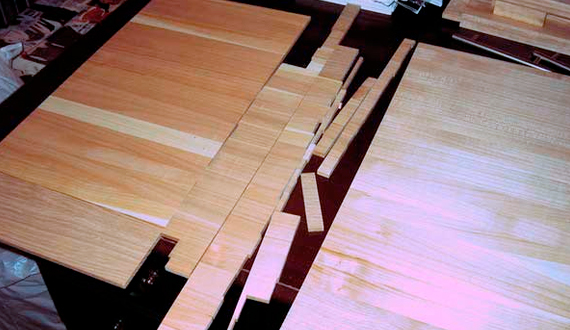
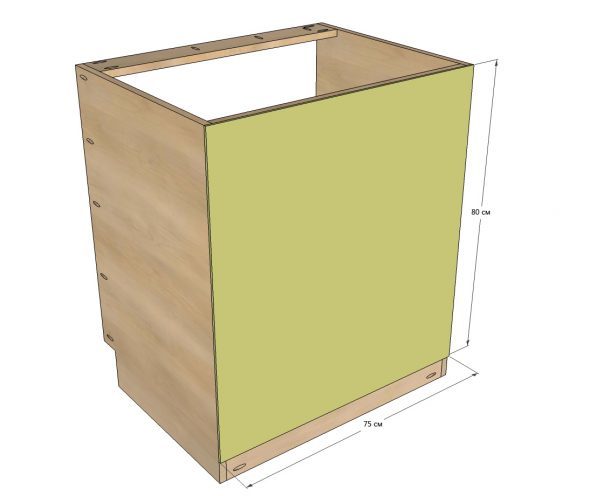
Preparation of the individual structural elements. But the basis of the drawing cut out of the side wall portions, a lower portion, and the door. If the shell surface-type, it is not necessary to do a table-top tables. If this option mortise then drawn on a countertop sink circuit, whereupon an electrical fret saw cut opening. All the other parts similarly cut jigsaw. Once everything is ready, it is recommended to treat the edges with sandpaper.

-
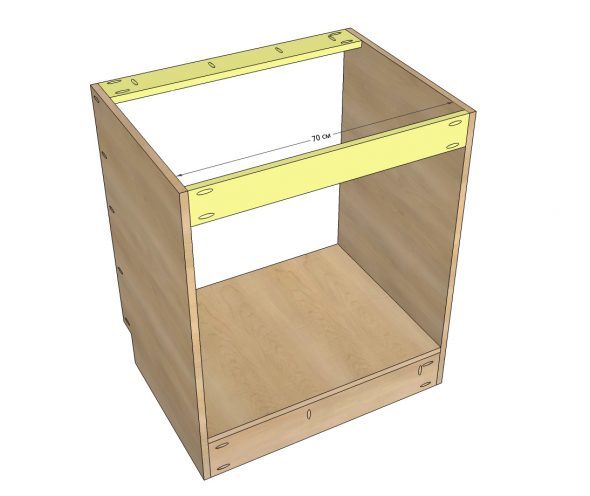
frame assembly. The assembly begins with the fact that the cross members are fixed wall. You can use the corners or screws. Thereafter screws fixed bottom.
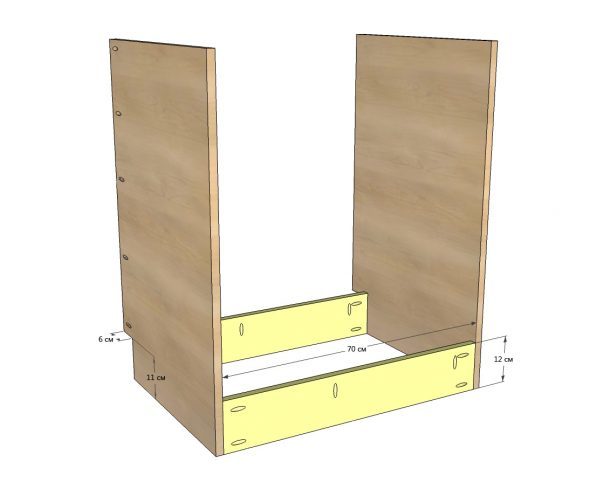
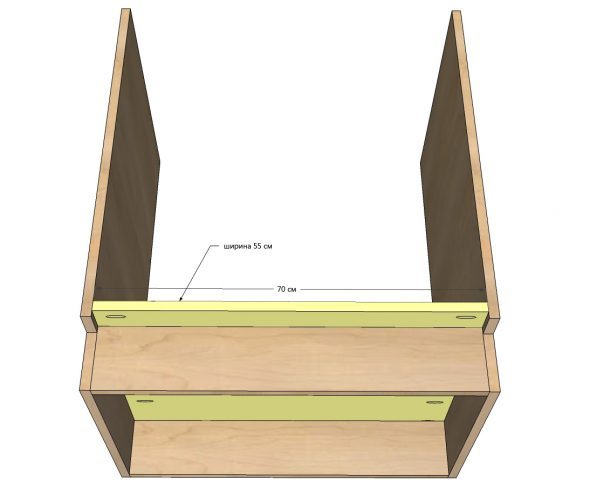
- To fix the upper frame, use the cross bars at the top. Attach the rear wall of one of the crossbars. It should therefore be sufficiently thin.
-
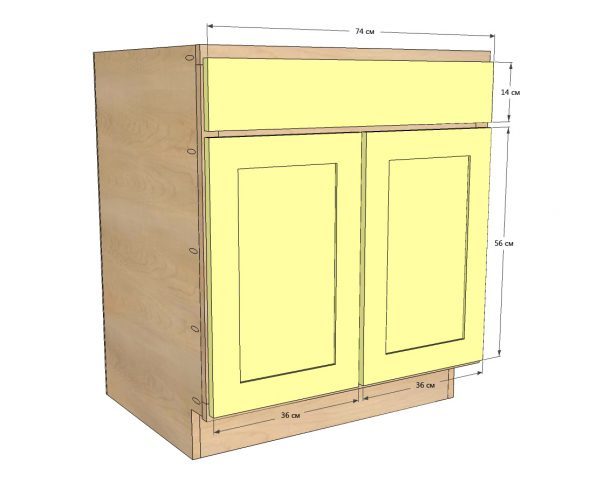
Securing the front of the. Ushers the door to the cabinet, mark the place where we will put the loop. We do for them holes and loops in the door. Once the doors are installed, they need to be adjusted. Choose a loop must be very carefully and thoughtfully. It depends on them, how widely it will be possible to open the door, and how long it will be qualitatively function.

-
Exterior finish. Once assembly is complete, you will have to somehow formalize our cabinet. It is possible to paste film, can be painted or applied lacquer. Of course, the handle will need to tie. On the inner side of the door would be superfluous to accommodate a pocket for small items. To maximize the use interior space - make the shelf.
Attention! To nightstand longer able to function, it must be raised above the floor level, for this purpose in the bottom of the need to fix the legs.
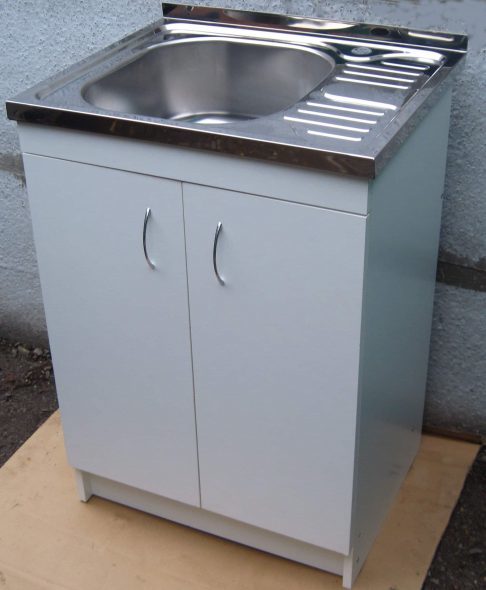
Installing shell
Most likely, this part of the work will be very easy from what has already been done. Washing of metal is fitted over pedestals. To ensure maximum rigidity and stability - washing should be fixed. If this time is not been respected, then eventually cabinet will certainly fail.
Fix the sink in two ways:
- Use conventional silicone sealant. Thus we are not only to fix the sink cabinets to the plane, but also to ensure joint tightness. All that is required of us, so it's evenly distribute the sealant around the perimeter of the upper end of the housing. Next, put the shell and presses it. Once the sealant has cured, the entire structure can be installed and connected.
- Use self-tapping screws. They are a more reliable connection. However, this does not preclude the application of the sealant. Only this time, it is necessary not so much to fix as it is to ensure the tightness of the joint.
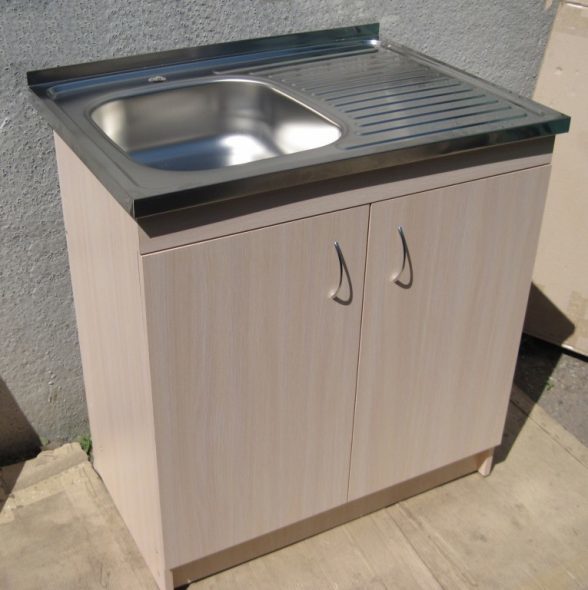
If the cabinet is going to the dimensions of the shell already acquired, it will be on the place provided for it without any problems.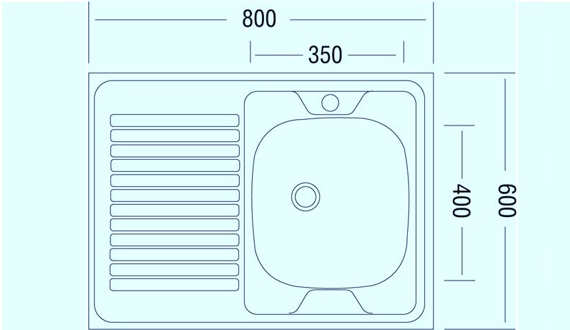
In finished form, the entire structure will look something like this.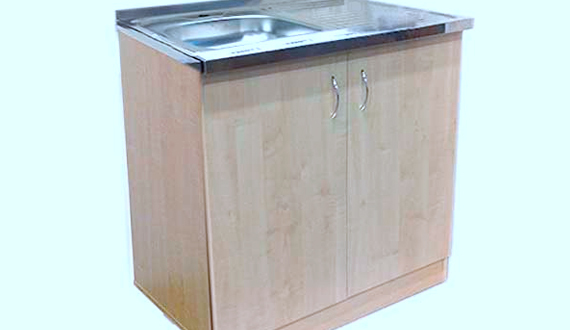
As can be seen in the independent manufacture of furniture for the kitchen is no big deal. The main thing is to consider all pre-prepare tools and materials and, of course, to work out a sketch.


