I really understand those who are not looking for easy ways and make furniture for themselves on their own. The same cabinet under the sink - you can go and buy in the store, or you can pick up the materials you like, come up with your own design, ideally fit it into the dimensions of the room, and in general, invest in it soul. So let's not postpone, let's start creating a furniture masterpiece!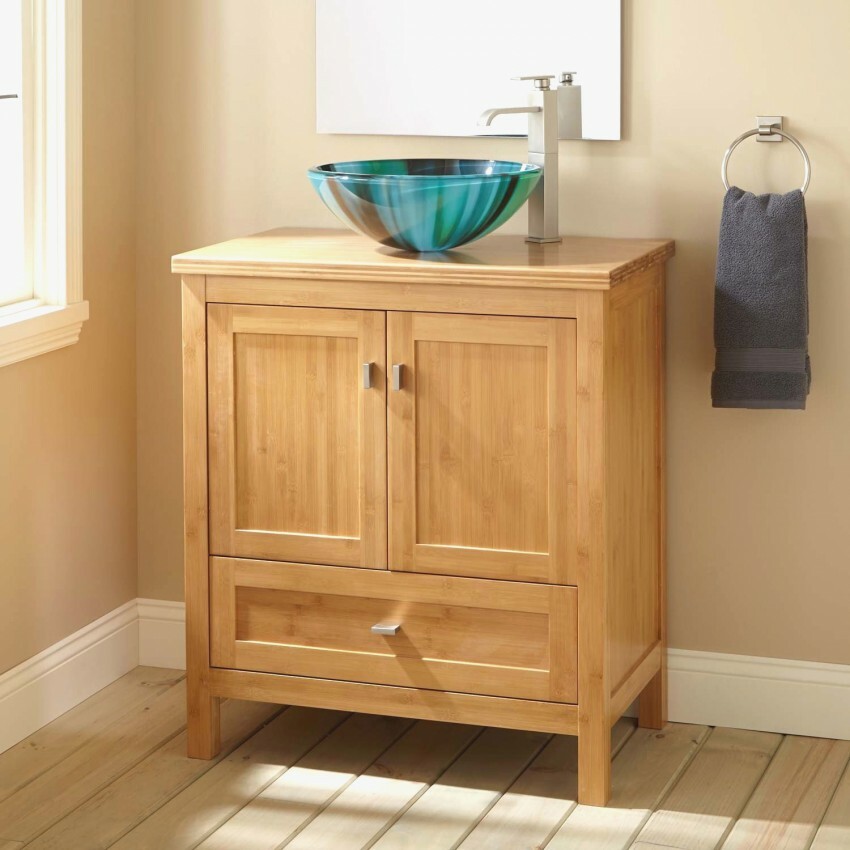
Preparation of tools and drawing of the vanity unit
The content of the article
- Preparation of tools and drawing of the vanity unit
- Manufacturing and assembly of solid wood cabinets
- Installing a cabinet under the sink with your own hands
I will make a very important footnote right away.
Attention! The sink needs to be bought BEFORE you start work, not after!
It seems ridiculous, but you can't even imagine how many would-be masters were mistaken on this and how many pedestals had to be redone after buying a sink.
So, first of all, you need to start with measurements:
- free space around the sink;
- its size;
- the height of its location;
- communications, namely: the length of the section with pipes, their diameter and the gap from the wall to their end.
Made? Further. From experience I can say that it is best to start from standard sizes, and then adjust them to fit your measurements (and your taste, of course):
- height 82 cm;
- depth 43 cm;
- width 58 cm.
Something like this should look like this: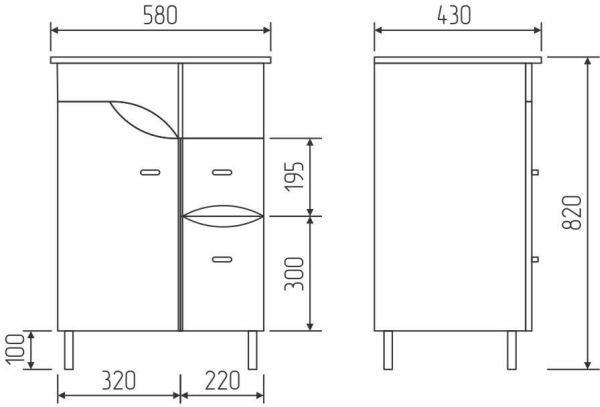
Now let's prepare all the tools that we need to create our dream table. This is:
- a hammer;
- drill;
- screwdriver;
- jigsaw;
- hacksaw;
- pliers;
- screwdrivers;
- sandpaper;
- something to measure, a tape measure will do;
- paper and pencil;
- grinding machine.
Everything is? If something is not there, you can run to the store right now and buy in addition.
Reference. If you want to use additional materials, you will need the appropriate tools in addition to these.
Ready? Let's start the sacrament.
Manufacturing and assembly of solid wood cabinets
Any of them consists of a frame base, top, side parts and additional elements - doors, shelves, drawers, awnings, etc. Some of them may have a bottom and legs attached to it. For the frame, beams from any wood you like are suitable. The top can be anything at all: plastic, plasterboard, glass, wood, etc. Ordinary plywood is suitable for the sides and bottom. Additional elements can be from any material you like.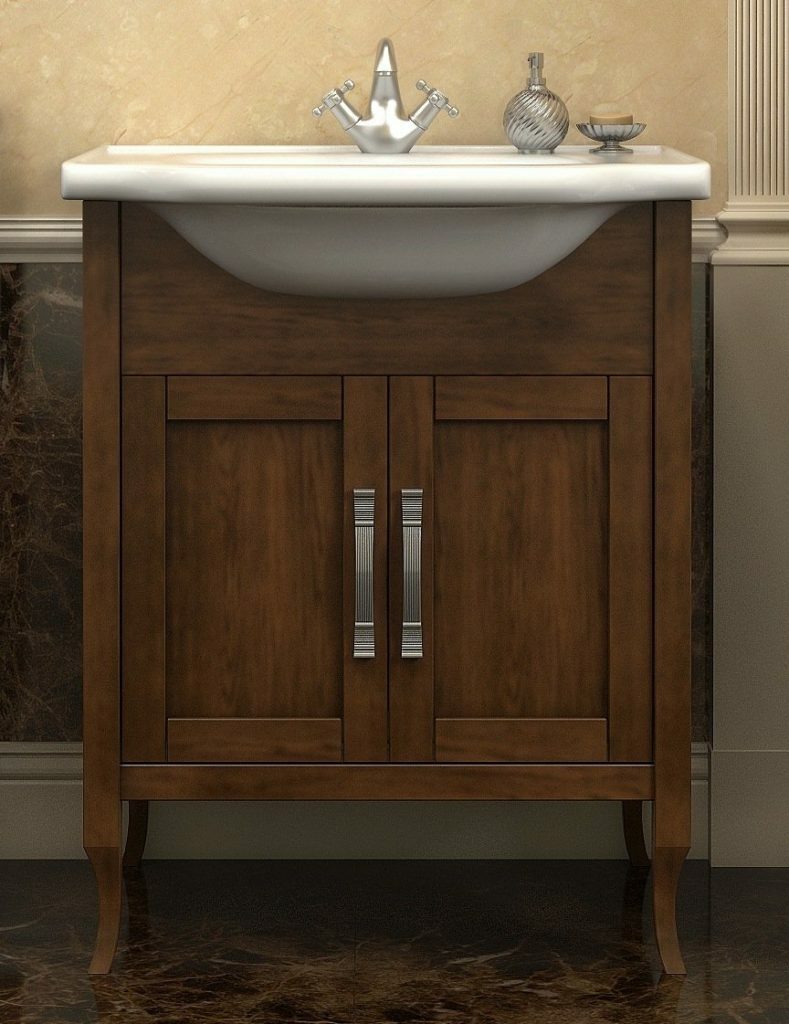
All patterns are first marked on paper, then transferred to the required surface and cut out with a jigsaw.
Important! When making cabinets with doors, they often forget about the small upper part above them. It does not carry any function other than decorative, but without it, an ugly result with a gaping hole will turn out. Do not do like this.
The assembly process starts from the wireframe. After that, all parts are cleaned with sandpaper and, if necessary, covered with special means to protect against moisture.
Side walls are attached to the frame (self-tapping screws and glue are used for this). For added strength, I highly recommend reinforcing the joints with steel or aluminum corners.
Now the top surface. Even if you have checked everything many times before: put a sink in the hole to be 100% sure that all dimensions fit correctly. There is no need to attach it yet - we will do it later, now we just see that everything fits.
Now the bottom. Some fix it last, but it is more convenient when the cabinet lies on its side, and in this case, slamming doors and sliding drawers can get in the way. Therefore, it is them that I leave for last.
Installing a cabinet under the sink with your own hands
So, our beauty is ready, it remains to connect it to the sink. It is important that by this stage the entire sink is completely assembled: with taps, handles, plumbing pipes, etc.
The curbstone is placed in the place where it will have to carry out its long and faithful service. If you have a pendant model, it's time to attach it to the wall. Remember that you will have to withstand the weight of not only the cabinet itself, but also the sinks, so the fasteners should be as reliable as possible.
Silicone or sealant is applied along the entire edge of the sink, after which it is installed in the hole. There is no need to save here. If you overdo it, you can always remove the excess. But the "shortage" will only have to be redone anew.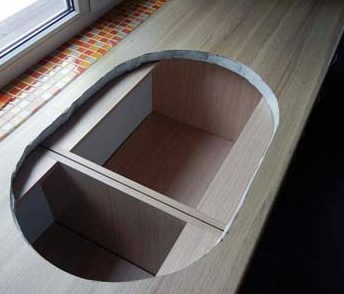
Reference. There are also models that are connected from the inside of the cabinet using a special system of fasteners, so that there are no convex elements on the surface. But to install them, it is better to contact a specialist, because the risk of error is too great.
After that, it remains only to connect the sink to the water supply. If you want to add decorative elements to the curbstone (carved patterns, painting, gilding, etc.), it's time to start. You can also stick tiles or self-adhesive tape on it.
This way, you get a unique piece of furniture created by your own in your bathroom or kitchen. hands that you can brag to guests, bequeath to descendants or admire them in proud loneliness.
Subscribe to our Social Networks


