Content
- 1 The choice of shower
- 2 Training
-
3 Installation
- 3.1 Device shower
- 3.2 The principle of the shower
- 3.3 Final inspection
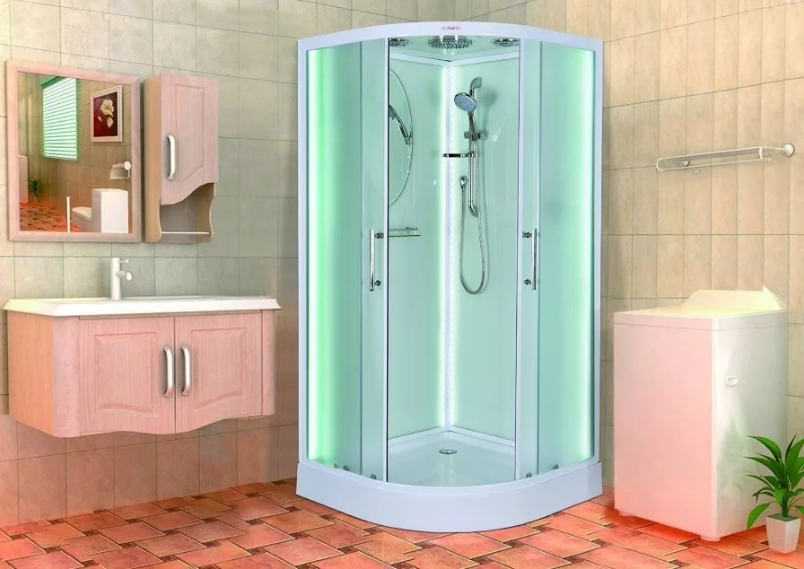
Who has not cursed these cramped and uncomfortable bathrooms and how often we look with envy at the spacious bathrooms from Western TV shows. But you need to proceed from what we have, and therefore it will be necessary to spend the available quadrature rationally. That is why our today's topic: “Self-installation of a shower cabin”, on a beautiful acrylic bathtub in domestic Khrushchevs simply does not have enough space.
Before we try to install a shower cabin on our own, it will be useful to note that such products are quite strong they differ not only in appearance, but also in the technology of their installation, but nevertheless, some moments will not go anywhere, and let's talk.

The choice of shower
It should be noted that the market today is literally filled with similar products. This was largely due to manufacturers from the Middle Kingdom, although it is easy to find Western European samples here, the price tag on the latter, however, can spoil the mood.
But in search of cheapness do not confuse a shower corner with a booth. In terms of cost, it, of course, is several times cheaper, but what kind of fish is such and yushka.

The main gadgets of a modern shower are:
- Hydromassage;
- Soundproofing;
- Sauna mode;
- And the phone.
The presence of the latter, by the way, is difficult to overestimate.

If there is the possibility of “trying on” the hydrobox, you need to make it in the store. Remember, still no one was able to wash still, so the inner space should not constrain you. If you have or plan to have small children, choose a product with a deep pan so that they can also wash there.
Training
The installation of a shower cabin on its own does not begin with the installation of a tray, or even with the analysis of boxes, namely with preparation. When the product is already selected and you familiarize yourself with its design, the bathroom will need to be prepared in advance. This refers to the supply of cold and hot water, sewage and electrical wiring. Yes, if you decide to lay the tiles on the floor yourself - now is the time, then it will be several times more difficult to do.

And now about the “unpacking the boxes”: their contents must be carefully checked, referring to the attached list. Even in very serious shopping centers, shortcomings happen, the human factor has not yet been canceled. If you want the cabin to last longer, do not forget to install hydraulic filters.

Installation
As we already agreed, we will install the shower stall strictly according to the attached instructions, but unfortunately some of the nuances are not prescribed there, and therefore we read carefully.
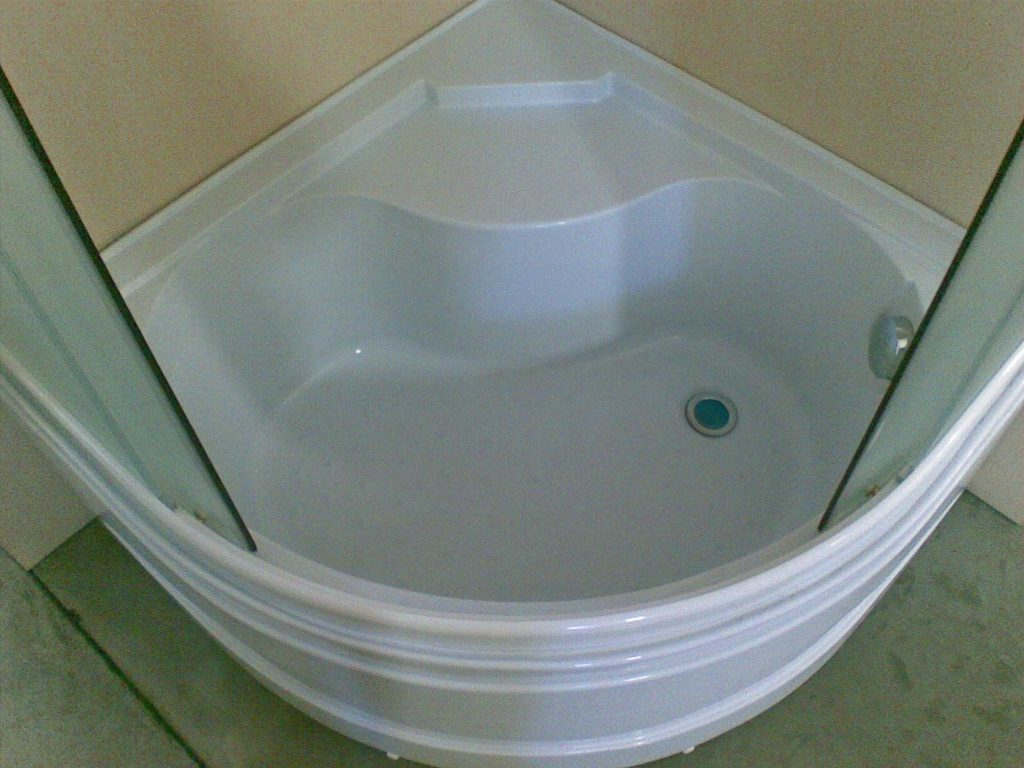
First we collect and install the pallet, try it immediately in its place and with the help of adjustable racks we achieve a stable, strictly horizontal position.
After that, the container can be turned over and a siphon with a drain pipe can be installed. This should be done at this stage, and not when the booth is already assembled. We coat all joints with silicone sealant, and where necessary we add fum tape. We check the assembled system, if there is no leak, we work on.

Device shower
Now the turn is for the fittings. Towel holders, liquid soap dispensers, hydromassagers and so on and so forth - all this do-it-yourself mount on the elements of the back wall of the box while it is still in disassembled condition. Again, doing it later will not be so easy.
Finished with accessories - we take up the facial profile. We assemble it according to the existing scheme. Everything is strictly on the screws. If the manufacturer forgot to make holes for them in advance, we drill them ourselves.
It was the turn to collect all of our workpieces into one. We start from the back wall and mount them directly on the pallet. You can, of course, do this on the floor, but who then wants to lift this weight?

The principle of the shower
Next, we fasten the front profiles to it and align the structure on the pallet, after which we fix it with screws. When we are fixed to the base, we put a “hat” on the booth, such is the cover of our box. It will be useful to recall that before its installation we connect all the terminals and connectors, so that then you do not drag a stepladder into the shower.

Final inspection
At this stage, we connect water, electricity, sewage and push the booth to its workplace. What’s called time!
The last to install the most fragile and vulnerable part of the box - glass doors. Each manufacturer has its own technology for their installation (you will learn about it from the instructions), but you must always install this element in the last place, so you will reduce the probability of breaking them to a minimum.
-
 Design features of the garden gazebo
-
 How to choose the best TV stand
-
 What should be a modern countertop
-
 Low ceilings - what to do
-
 Why do I need a swing mechanism in an office chair
-
 How to choose furniture for an elderly person
-
 The choice of furniture for a country house
-
 How to choose a desk for a student
-
 What bed to choose for a healthy sleep
-
 The advantages of solid wood furniture
-
 Original and roomy bookcase
-
 Pine bed - hit of the season
New publications are published daily on our channel in Yandex. Zen
Go to Yandex. Zen