Modern kitchens are made from simple modular elements. Ease of working with materials will make the assembly process simple and fun. As simple as playing lego. In addition, assembling furniture with your own hands will save you a decent amount of money. Firms specializing in assembly, very high value their work: up to half of the total budget.
These funds can be spent on more expensive and beautiful facades. Refusing the help of specialists, you can assemble a headset that best suits the wishes of the owner.
Attention! Earned on our website kitchen designer. You can familiarize yourself with it and design your dream kitchen for free! May also come in handy wardrobes designer.

Making your dream kitchen: varieties
 Before you start designing a headset, you should decide how it will fit into the overall layout of the room's interior. The use of simple modular elements will solve both functionality issues and ease of assembly and operation. The choice of layout also depends on the personal preference of the collector. There are the following main types of kitchen sets according to the design scheme:
- Linear. The simplest one. Used in long rooms. The entire set runs along one wall. As a rule, it is used in narrow kitchens.
- Corner. A very compact and complex option. With such a layout, it is very important to correctly calculate the corner modules in which the sink is most often placed. All the irregularities of the interior of the room have to be taken into account.
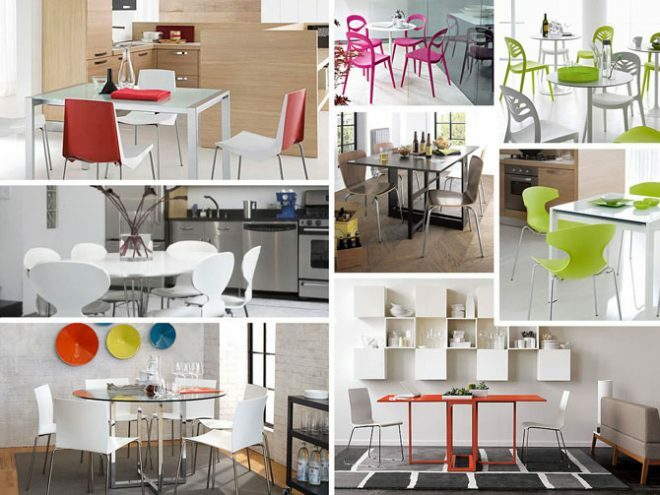
- In the form of the letter "P". This design can be used in spacious rooms. The excess space is occupied by functional modules. You can even place a dining table in the center.
- Peninsular. Part of the headset in such a layout can act as a bar counter or a work surface. It looks very stylish and impressive.
Features of mutual arrangement
When choosing a kitchen layout option, you should take into account some features. They are connected with the mutual arrangement of its various modules. Below is a list of key rules.
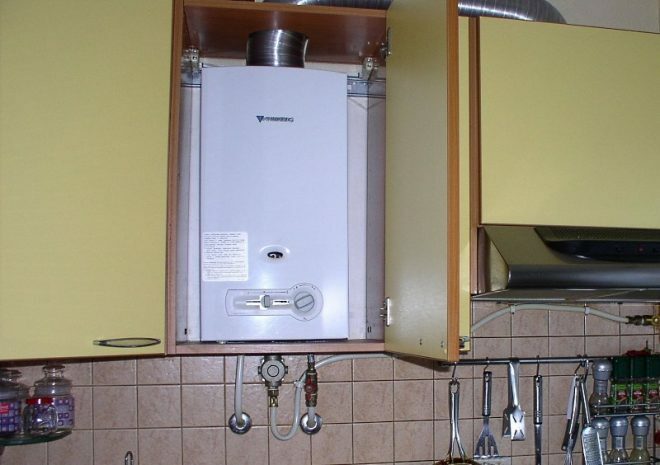
- Gas pipes and flexible hoses must not be placed above or below the piping system.
- The gas stove or hob should be located at a distance of 1.5-2 m from the main gas pipe.
- The sink and the gas pipe are separated from each other at a distance of 50-80 cm.
The latter is especially important in corner layouts. They should not contain a sink and a gas stove immediately on either side of the corner cabinet. There is always a chance that the hostess will flood the burning gas burner with water or put a towel on it.
General design sequence
 The development of circuits is a very important and difficult part when assembling a headset for the kitchen. It can be divided into several key stages:
- the material from which the frame part of the product will be made is selected;
- materials are selected for the manufacture of the most expensive elements of the headset - facades and countertops;
- specific models of fittings such as handles, hinges and door closing mechanisms are defined.
- the dimensions of the room in which the furniture will be placed are measured, taking into account the requirements of safety and convenience;
- a project diagram is created, on which the location of all modules is precisely indicated (cabinets, drawers, cabinets, sink, stove);
- the desired dimensions of the headset modules are reduced to physical dimensions (room dimensions, material thickness, location of air ducts, pipes and connections).
After completing these steps, you can start assembling.
Choice of materials
Carrier module materials
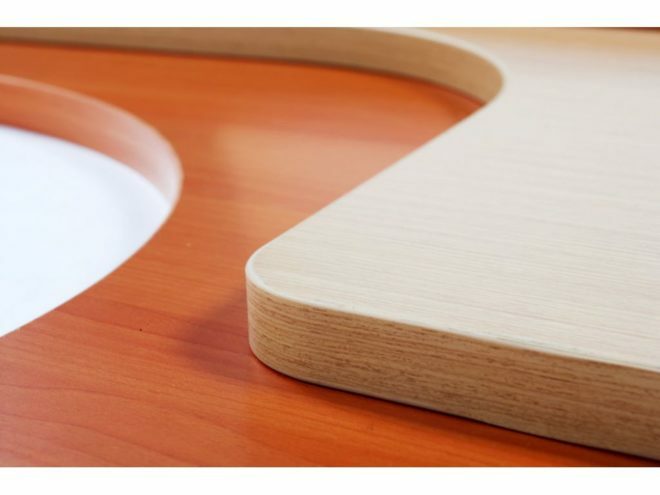
Most of the load-bearing elements will be hidden behind the facades and under the countertop. The cheapest and most widespread today is laminated chipboard (chipboard). It goes very well with any facade materials. At the same time, there is a huge selection of decorative coatings. The maximum length cannot exceed 3.5 m. This length is quite enough for the manufacture of any modules.
The thickness of the chipboard is chosen as follows:
- 16 mm - for side walls and shelves;
- 18 mm - for the base of the bottom row of pedestals;
- 10 mm - for decorative inserts.
Tabletops can be made of laminated chipboard with a thickness of 24–32 mm. If you have enough funds, you can use more expensive materials: artificial stone, acrylic, glass, natural stone. There are even options for laying decorative tiles on the surface of its functional areas.
Facades and fittings
The face of the kitchen set is the facades. Their main function is aesthetics. The most common facade material today is MDF. Made of environmentally friendly material, they are covered with various decorative films that shape color and texture. It is not worth saving on this material. It's okay if its share of the entire budget is more than half of the total.
If the facades have a decorative function, then the fittings are mainly functional. Handles are an exception - they should look pretty. Without functional elements, all furniture will be just a collection of empty boxes, in which it will be difficult to find the right thing.
Features of the design of individual elements
In the kitchen wall, everything is located in two rows:
- bottom - cabinets with doors or drawers;
- upper - cabinets with doors or open.
In this case, the construction has a number of features, depending on where they are located.
Standard
 The simplest structural modules are located along the straight sections of the kitchen: cabinets and cabinets. A drawing of a standard cabinet starts with two side boards. They are made from laminated chipboard 16 mm. They are located vertically. Then the horizontal boards are placed end-to-end between the vertical ones. As a result, a cabinet-box is formed. The thickness of the material is the same. For hinged ones, it is the side walls that are the load-bearing ones. The elements of the fastening system are attached to them.
The curbstone is done differently. First, the bottom board is taken - chipboard 18 mm. Two lateral ones, 16 mm thick, are placed on it. On top, between the side elements, guide strips are placed. They don't even need to be laminated from all sides. A tabletop will subsequently be attached to them, which will hide the strips. At the bottom pedestal, the entire load falls on the bottom. Since the finish cover (table top) is not immediately attached, only stiffeners are placed.
The back wall, made of fiberboard with a thickness of 4 mm, is placed in the same way for the cabinet and cabinet. This thickness cannot be neglected at the design stage. All neighboring modules are interconnected with special ties. They cannot be covered with shelves. Mounting the fastening brackets will require drilling holes with a diameter of 6-8 mm.
All pull-out components, such as drawers, are designed with oversized fittings. For example, if the roller guides are 22 mm thick and the side walls are 16 mm each, then the planned dimension is taken for the width of the box minus the sum: 16 + 22 + 22 + 16 mm. Consecutively go: wall, guide, drawer, guide and wall.
Non-standard
 In any kitchen, you will definitely find such interior elements as pipes, protrusions for an air duct, beveled walls, etc. In this case, cabinets and cabinets will play not so much the function of storing things as masking the imperfections of the interior.
Hiding a niche is easy enough. To do this, you just need to make the depth of the cabinet more by the amount of the protrusion. And the protrusions will already be cut out of the furniture elements, and "eat up" part of the usable space. Shelves can also be cut to size.
The pipes inside the cabinets will require a corresponding recess. If part of the pipe runs over the apron, you can make an additional box to match the color of the apron or countertop. There are times when sewer pipes protrude more than 30 cm from the wall. You can hide them with a beveled product. One side of which has a standard 30 cm deep wall, the other - by an amount sufficient to mask pipes, for example, 50.
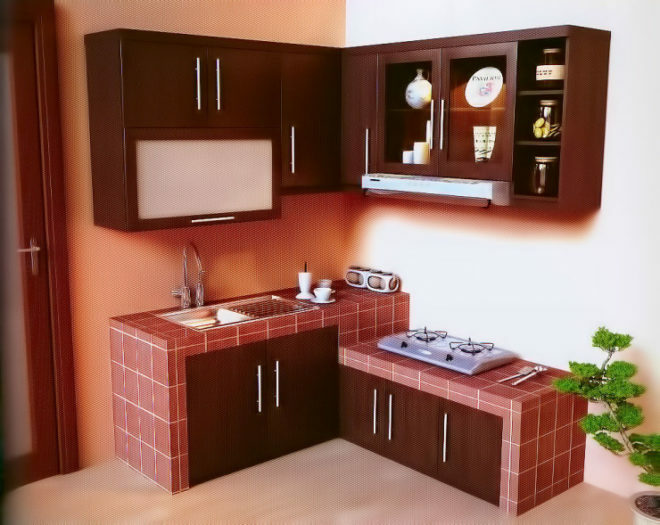
Features of the components of the corner kitchen
Corner cabinets and cabinets in the inner curve of the kitchen are the most difficult to design. In the drawing, it is not very noticeable that opening doors will block access to neighboring ones. In this case, a huge space is formed, to the far corners of which it is difficult to get close. Most often, a sink, an instantaneous water heater and a garbage bin are located in a corner cabinet. The countertop is made with a small margin in depth so that it protrudes 2-3 cm and hides the door.
 A corner cabinet can mask the water supply system, which is most often located in the corner. Such a piece of furniture must be made with a 45 ° cut. It should be done in such a way that the horizontal partitions are located inside the vertical ones. If the confusion of this sequence is forgivable, then the door of the facade simply will not snap into place.
Facade design
Despite its simplicity, it is necessary to carry out drawings for the elements of the facade, which indicate the dimensions. Door leaves can be both overhead and internal. The way they are placed depends entirely on the choice of hinges. Their width should be made with a margin of 4-5 mm on each side. For example, with a cabinet width of 0.6 m, the horizontal dimensions of the doors are 29.2 centimeters each.
Another difficult moment that is on all facade structures: a special drank for the hinge dies. It is usually done with special cutters. The drilling depth of the grooves for some hinges may differ from the standard ones. The hinges are adjustable in depth. In this case, the placement of the dies can have a spread of 2-6 mm from the edge of the door.
Entire headset design diagram
Taking measurements of the room
 When taking measurements, it is necessary to take into account a number of features. Despite the fact that you want to fill the entire space of the room along the wall as much as possible, some zones will remain blind. This primarily applies to the base. A gap of 10-15 cm under the ceiling does nothing. If there is a hood just below the ceiling, then the border should be drawn along its lower level. With a lower vent position, air ducts are routed into the upper cabinets, which results in a loss of interior space.
7-10 cm stumbles from the bottom of the floor. Most kitchen cabinets are placed on special legs that allow you to change their height. They can withstand a load of up to 200-300 kg per element. The number of legs must be taken based on the design weight of the cabinet with the things stored in it. When passing the pipes of the heating system, a margin of 5-10 cm should be provided. It is better to hang a curtain in this place. This will allow you to hide the pipes, while maintaining free access to them.
The countertop can be adjacent to the rest of the walls. The lower pedestals themselves will stand 100 mm from the wall, allowing communication elements to be held behind them: gas hoses, water supply, sewer pipes. It is better to lay the apron on the wall before installation. Made of tiled tiles, it will take an additional 10-15 mm. In its absence, this margin should be taken into account when designing.
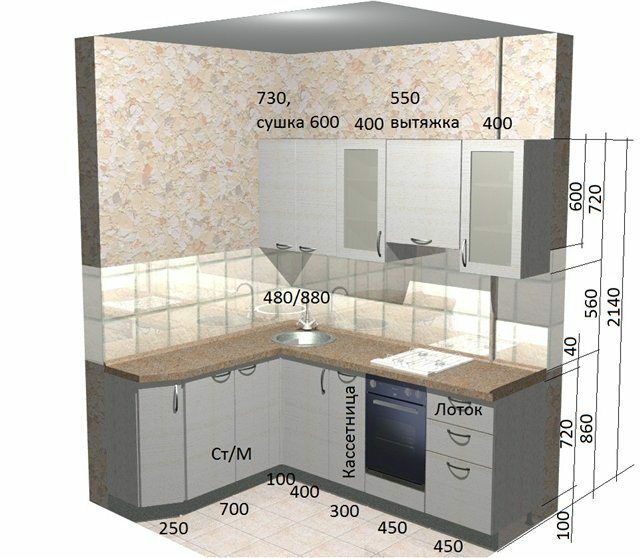
Layout of modular elements
 A schematic drawing of the kitchen furniture is drawn up at this stage. It is necessary to arrange all the cabinets of the upper row and the cabinets of the lower one in such a way that it is convenient to work with them later. You should be very scrupulous about the location of such important elements of the kitchen as the sink, hob and refrigerator. It is between them that the hostess will have to run the most. They are laid out using the functional triangle rule.
There is a slab in the center. It is advisable to place it directly under the air duct. This will allow the hood to be fixed in the same place and avoid placing long and cumbersome ducts. The stove is often used with two hands.
They also work at the sink with both hands. It should be located on one side of the slab, for example, to the right. The refrigerator should be positioned on the other side. In our case, it is on the left. It is better to make the distance between the sink and the stove no more than 1.5 m. It is better to place the refrigerator on a smaller distance, for example, 1.2 m. The cutting table will be conveniently organized in the area between the refrigerator and stove. This will save energy when removing food before slicing.
In addition to the horizontal layout, you should take into account the rules of ergonomics when removing the upper cabinets. They should be located in such a way that the lower edge is at the level of the hostess's chest. The top shelf should be accessible from the floor at arm's length. When choosing the height of the cabinets to the ceiling, you can only get to the top shelf from the stool.
Drawing of a homemade kitchen set with dimensions
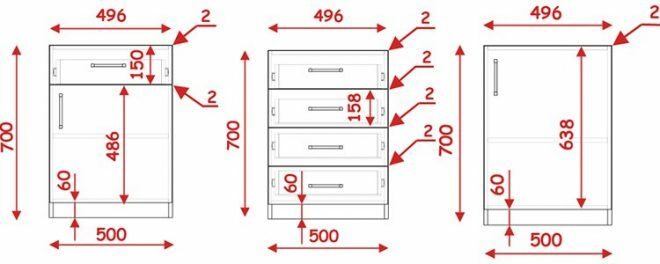
When designing the dimensions of cabinets and cabinets, several rules for choosing dimensions should be taken into account, which have already become the standard:
- 30 cm - the depth of the upper;
- 60 cm - the depth of the lower row pedestals;
- 85 cm - the height at which the tabletop is located;
- 72 cm or up to the ceiling minus the basement area - the height of the cabinets;
- 35-80 cm - the width of the cabinets, closed with one or two doors.
Regarding the last size, it should be borne in mind that with a standard swing door opening, with a width of this sash of 40 cm, the structure will sag strongly. If you make a cabinet with two doors more than 80 cm wide, then there will be excessive pressure on the hinges. Additional reinforcement with 3 or 4 loops will look ugly and take up a lot of space inside.
A homemade kitchen with a mezzanine board located under the plinth will look beautiful. In this case, you can leave a distance between it and a number of cabinets. Equipped with lighting fixtures, it will perform not only a decorative function, but also become a lighting fixture.
Since the pedestals are not mounted close to the wall, their depth is chosen only 45-50 cm. But at the same time, the facades will be located at a distance of 60 cm (plus the thickness of the facade) from the wall. This is exactly the width of standard countertops.
If the space of the room allows, then you can choose the same width of the cabinets in the upper row, for example, 30-60 cm. In this case, the entire facade will be made of doors of the same width. If you alternate glass and solid doors at equal intervals, the overall design of the kitchen will look impressive.
Keeping the vertical, the doors of the lower row of pedestals should be made the same width. The only exception will be functional elements such as a dishwasher. Having a non-standard width, they can leave tails 15-25 cm wide. You can add width to the vertical alignment in such ways as a pull-out vertical drawer for storing bottles and cutlery.
How to do the calculations yourself
 One cabinet consists of 8-10 elements: 4 walls, 2 front doors, rear panel, 1-3 shelves. Moreover, each part has three-digit dimensions. The simplest typeface can have a dozen blocks. How not to get confused in so many and do everything right? You can draw everything on a piece of paper schematically, but it will be very difficult to calculate and cut with your own hands.
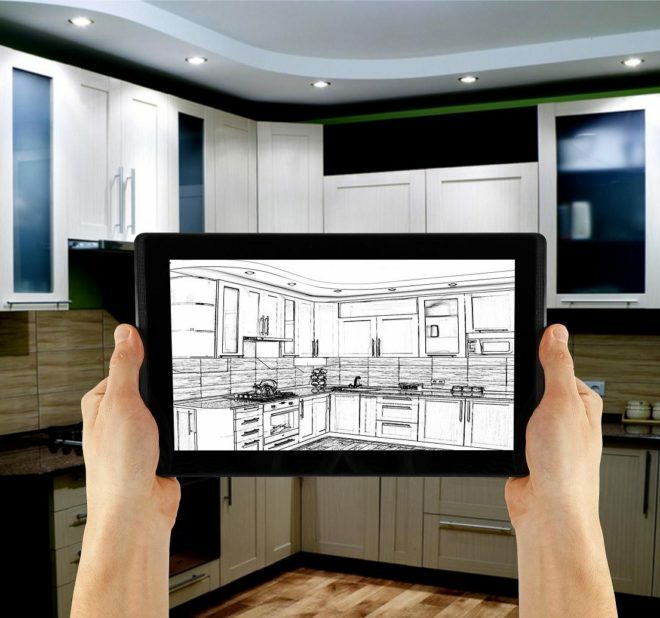
Computer programs come to the rescue. You don't always need to use products as bulky and expensive as AutoCAD. There is, for example, the Pro 100 program. It contains a huge database of standard elements. In it, you can calculate not only furniture for the kitchen, but also draw drawings of wardrobes. In addition, it allows you to take into account the location of all modules without overlap. If something sticks out, it will be visible at the design stage. A schematic design of a headset is built in it in a couple of hours.
The cutting of the boards itself also does not need to be done on graph paper with your hands.
In order to cut all the elements on chipboard sheets, you can use the Astra program. It takes into account not only the dimensions of standard laminated chipboard sheets, but also takes into account the thickness of the seam that forms the saw stroke. It also calculates the length of the edges and the total cost of the sawing job.
After completing all the design stages, you can start assembling the furniture.
How to make and design kitchen furniture with your own hands (photo of drawings)


average rating 0 / 5. Number of ratings: 0
No ratings yet. Be the first to rate.