Ceramic tiles are considered one of the main finishing materials used in the kitchen or bathroom. Such products have high strength and durability, have a huge assortment. Next, we will learn how to lay tiles on the floor, and what tools are needed for this.
Drafting and selection of tiles
Before laying the tiles on the floor, they create a project for the performance of work with their own hands. This document indicates the amount of material required and the type of its layout. At the preparatory stage of work, the length and width of the room in which the repair will be carried out is measured, and its area is calculated. The number of products for the flooring device is taken 10% more of the calculated value. The stock is needed for trimming the product and the possible break of tiles during transportation.
Attention! Earned on our website kitchen designer. You can familiarize yourself with it and design your dream kitchen for free! May also come in handy wardrobes designer.
When choosing ceramic tiles, pay attention to the symbols on the packaging:
- The boot icon tells the user about the material for the floor.
- The designation of a leg on an inclined plane indicates the coefficient of friction. A bathroom or kitchen floor can be slippery through high humidity or surface water spills. For these premises, it is recommended to choose a rough tile with a matte surface.
- The water resistance of the product is less than 3%, otherwise the material will not last long.
- When caring for the floor covering, it is necessary to use special chemical compounds. When choosing a tile, pay attention to the letter combinations in the image of the flask, the ideal option is AA.
- The frost resistance of the material is indicated by the image in the form of a snowflake, good wear resistance is the pattern of the circular saw blade.
- The thickness of the products for laying the flooring must be greater than that of the tiles intended for wall decoration. The minimum size is 8 millimeters. This parameter is indicated using a special designation on the package.
Important! Pay attention to the dimensions of the product. The larger the size of the side of the tile, the fewer seams there will be in the flooring. Large products have several disadvantages - complex technology for laying tiles on the floor, as well as the need for trimming the elements.
Purchase ceramic tiles in the required amount, with a lack of building material, you may not find the desired shade of the product. When buying a product, make sure that the batches of tiles match.
Layout types
In practice, several options for the layout of ceramic tiles are used. Let's get acquainted with them in more detail.
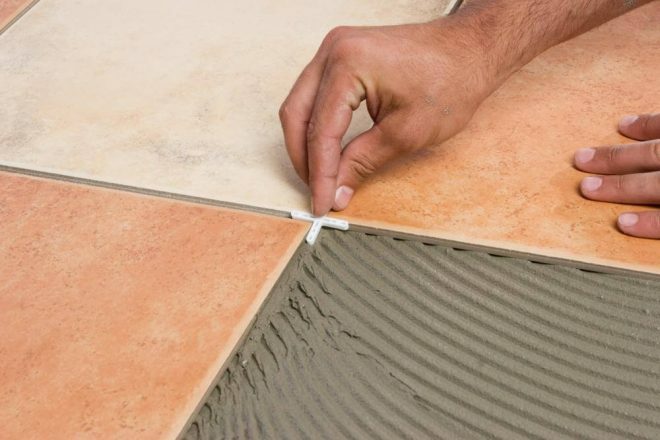
Seam to seam
"Seam to seam" in parallel rows is one of the most popular installation options for floor tiles. In this case, products of a rectangular or square shape are used, they are placed on the base in even rows. To obtain even seams between adjacent elements, plastic crosses are used.
Diagonally
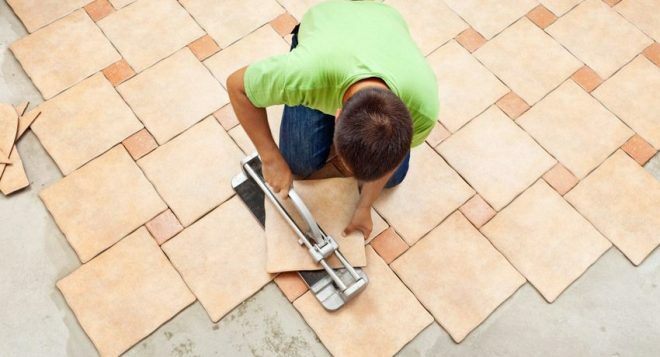
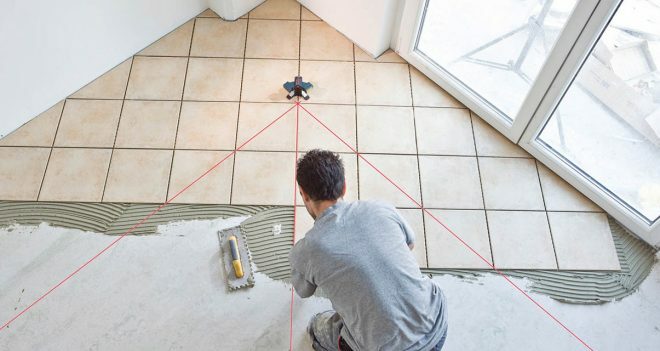
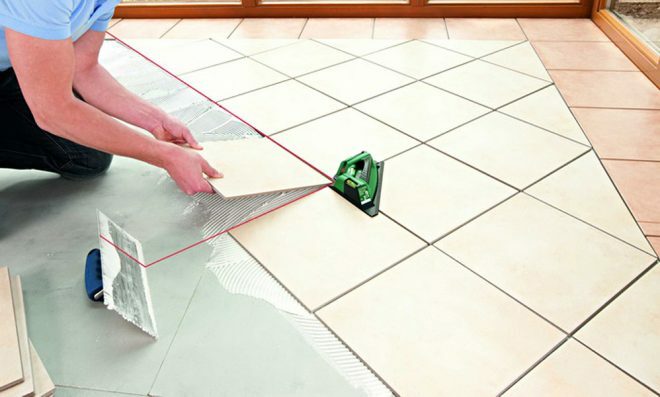
The "diagonal" layout is considered the most beautiful option for flooring, but it is distinguished by a complex technology of work. At the preparatory stage, the diagonal axes are marked, which will be used for laying the tiles. Elements are mounted at an angle of 45 degrees. The only drawback of this method is the need for frequent trimming of products.
At a run
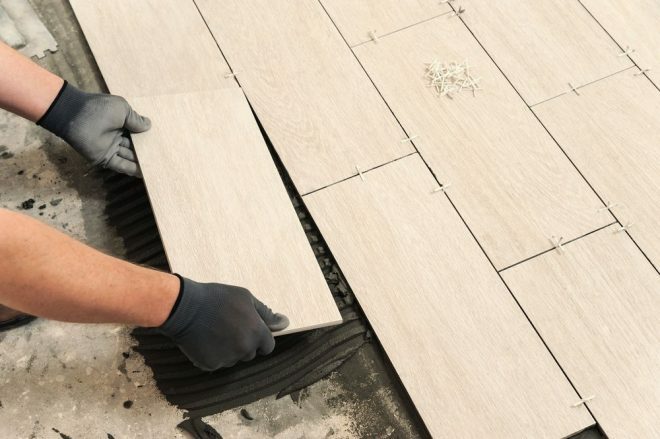
Staggered laying is similar in appearance to brickwork. This method of tile arrangement looks original in any room, therefore it is used quite often. It is recommended to use rectangular materials for staggered layout. The elements are arranged in parallel horizontal rows with overlapping half of the tile.
Herringbone
The herringbone layout resembles parquet flooring in appearance. Installation technology is quite complicated and requires professional skills. Elements are positioned at an angle of 45 degrees, which requires mandatory trimming.
Advice! Regardless of the chosen layout, the laying of tiles on the floor with your own hands should be carried out on a pre-leveled base. This will simplify the work and help save on the costs of cement-sand mortar or adhesive mixture.
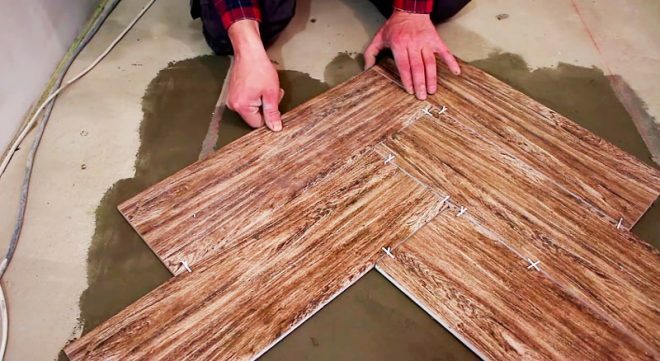
Required tools and materials
Before laying ceramic tiles on the floor with your own hands, you need to prepare the following tool:
- square;
- roulette;
- building level;
- long rule;
- marker;
- marking cord;
- tile cutter or grinder with a diamond disc for cutting tiles;
- container for solution or preparation of an adhesive mixture;
- trowel or notched trowel, the size of the teeth depends on the thickness of the product;
- pliers;
- soft cloth or sponge.
In addition to the tool, the following materials are used:
- ceramic tiles of the selected size;
- glue for a specific type of substrate (concrete, plywood or wood);
- surface priming solution;
- silicone sealant for processing joints;
- plastic crosses are used to keep the thickness of the joints between tiles.
Correct laying of tiles on the floor should take place at a temperature of + 5- + 30 degrees and humidity within 40-60%.
How to lay tiles on the floor with your own hands
We start installation with preparatory work. Furniture is taken out of the room and the old covering is dismantled. We clean the surface from construction debris and dust. After that, a visual inspection of the base is carried out.
To level the base, a mortar or a special mixture, self-leveling floor is used. At the initial stage of work, we remove all the bumps, remove the remnants of the tiles. We cover all cracks and chips with a solution. We prepare a mixture for the installation of a self-leveling floor in accordance with the attached instructions. We fill up the raw materials in the container, add the required amount of water. We mix the composition with a drill with a whisk.
Pour the finished solution onto the base, align with a needle roller. When using a cement-sand mortar, we make beacons from metal pipes. Pour the mixture between the guides and level it with the rule.
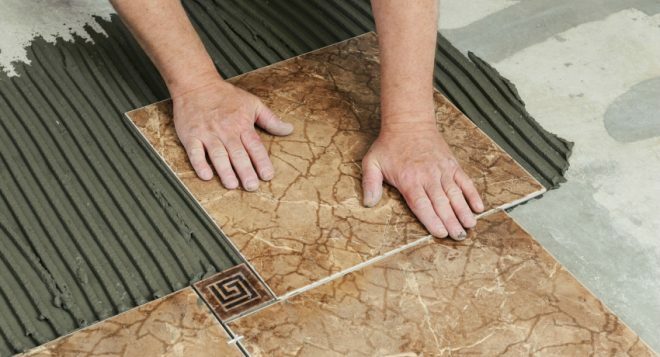
Surface treatment with primer
A deep penetration primer is used for the pre-treatment of the substrate. Pour part of the solution into a small container, dip in a paint roller or a wide brush and distribute the mixture evenly over the base. After soaking, the primer is applied again.
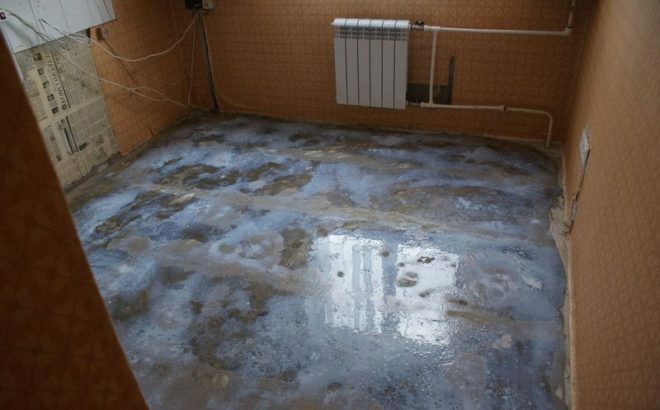
Floor marking before laying tiles
Layout work is carried out in accordance with the method of flooring. When laying floor tiles with your own hands, a seam in a seam or in an interval, the number of elements is calculated taking into account the gaps. Many users don't know where to start laying tiles on the floor. This must be done from the most visible places, in which case the trimming of products will be carried out in the least viewed areas.
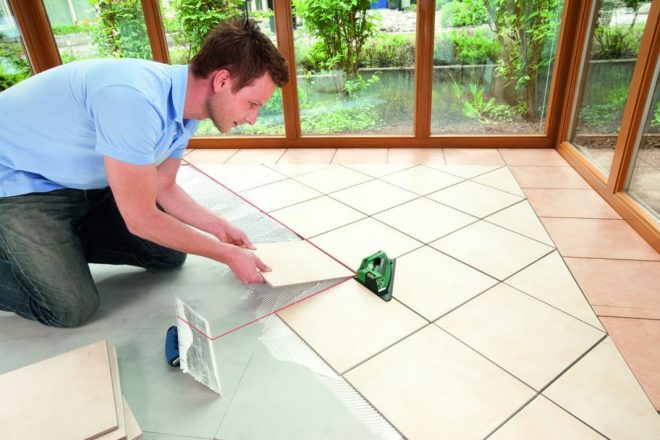
To get beautiful uniform tiles from all sides, you need to determine the center of the room along two diagonal lines. The center of the tile and all other elements are laid on this point. When performing basic work, it is necessary to use a cord that will set the direction of the row.
For marking for a diagonal, a rectangular room is required. If the corners in the room are not even, then the extreme elements that go near the perimeter of the walls will shift, the flooring looks ugly. We measure the sides of the room, lay the diagonals, they must be even. Laying of tiles begins from the opposite wall from the side of the door. Whole tiles and halves should alternate near the enclosing structures.
Preparing tile adhesive
Before putting the tiles on the floor, you need to prepare the glue mixture. For laying the tiles, special glue is used, which is supplied to the hardware store in the form of a dry mixture. To prepare such a composition, it is necessary to pour raw ingredients into the container and add water (in accordance with the instructions). All components are thoroughly mixed using an electric drill with a special attachment until a homogeneous consistency is formed. The solution is infused for 5 minutes, then stirred again. That's it, the glue is ready to use.
Advice! Do not add water to the solution when solidifying, this may deteriorate its technical characteristics. You need to mix the glue according to your needs.
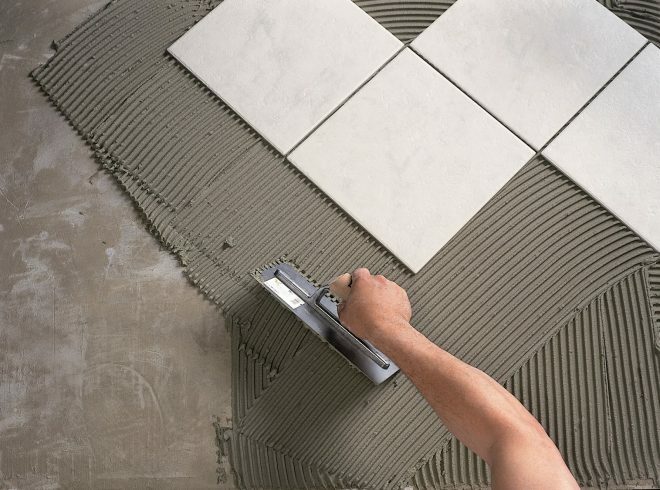
Applying adhesive to tiles or floors
Many users are wondering where is the best solution to be applied to the substrate or ceramic tiles. There is no exact answer to this question. When glue is applied to the tile, the marking lines on the base are preserved. Glue on the floor can be spread over a large area, after which the tiles are quickly laid. The elements are mounted one after the other.
If the sole of the product has a grooved structure, then the glue is applied both to the tile and to the base. The grooves should be in two mutually perpendicular directions.
Laying tiles
The technique of laying tiles on the floor is not particularly difficult. After fixing the products on the basis, their position is checked with a level, if necessary, the tiles are knocked out with a rubber hammer. When placing the next element, adjust the gap. For this, plastic crosses are used.
During installation work, it is necessary to remove glue residues from the gaps. It will be difficult to remove while grouting. Separately check the horizontalness of the tiles, all the elements of the flooring must be located in the same plane. If the tile sticks out after a few blows of a rubber hammer, the product must be removed and the excess solution removed. Correct the tile immediately after laying; it is impossible to change its position after the solution has set.
Tile trimming
Previously, it was described how to properly lay tiles on the floor, but when installing the coating, it does not do without waste. The material has to be cut around the perimeter of the walls, in areas with protrusions, as well as in the place where utilities are laid. To carry out these operations, the following tool is used:
- grinder with an abrasive disc;
- glass cutter and wire cutters;
- tile cutter.
The grinder is used for the device of cutouts of complex shapes, for example, for utilities. Wear protective goggles and gloves when working with this tool. Secure the product securely so that it does not fly out or break during cutting.
The tile cutter is used to cut tiles in a straight line. You can cut a piece of 2 centimeters or more from the product. First, they make notes, then they are passed with a roller, slightly pressing the handle. With a slight movement of the hands, the tiles are broken into two parts. Nippers should be used to remove small pieces of ceramic, sharp burrs at the edges are smoothed out with a file.
Grouting
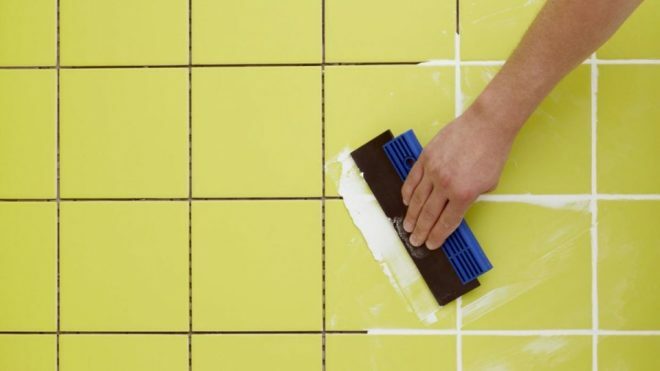
The tile flooring takes on a finished look after grouting. This decorative solution not only highlights each element, but also prevents water from entering the gaps (a humid environment is favorable for the development of mold and mildew).
At the initial stage of work, we embroider the seams, remove the remnants of the solution. After that, stir the grout with water according to the instructions. You can purchase a ready-to-use material, it is sold in small buckets. We put the grout on the tip of a rubber spatula and press in the seams, while the solution should completely fill the space. When the mixture hardens, its remnants are washed off with a damp sponge.
Cleaning the coating
In order for the tile flooring to get an aesthetic appearance, you need to clean the surface from the remnants of glue and grout. For this, a kitchen foam sponge is used, it is moistened in soapy water and the tiles are wiped. The glue should be slightly soaked, then remove it with a metal spatula. The stains formed on the surface are wiped with a damp soft cloth.
It is necessary to scrape off the solution very carefully so as not to scratch the surface of the ceramic tile. In addition to a spatula, a toothbrush is used for this purpose. The adhesive on the embossed surface must be removed before it fully sets.
How to properly lay tiles on different types of surfaces
Before installing the tile, it is necessary to create a flat, reliable and solid foundation. Let's figure out the nuances of installing tiles on different types of bases.
Concrete floor
When laying products on a concrete slab, it is necessary to install heat-insulating material, which will save on heating costs. Some users use an underfloor heating system to heat the room. In this case, the minimum thickness of the leveling screed is 4 centimeters.
With a relatively even base, all the recesses present are filled with mortar, the mounds are knocked down with a chisel and the surface is primed in two layers.
Wooden base
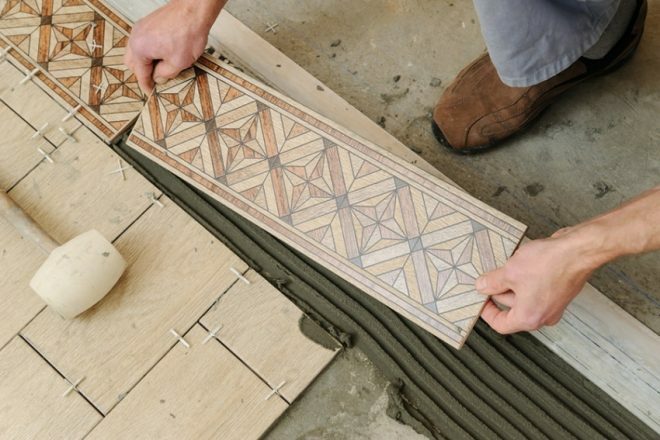
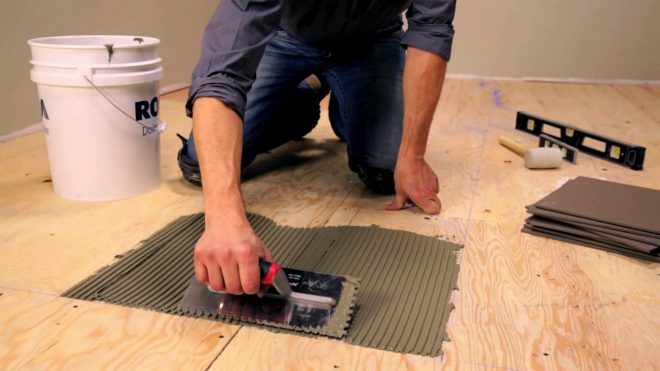
Wood surfaces must be firm and level. Rotten or cracked, as well as "playing" boards are replaced with new products. Smallpox sheets can be used for additional leveling of the base, but such material must be resistant to moisture.
Small gaps of up to 8 millimeters are left between such panels, which will compensate for the expansion of the material. The products are fixed on the base with self-tapping screws, then a layer of primer is applied to the surface. To prevent the development of mold and mildew on wooden surfaces, a ventilation layer must be created between the boards and the floor.
Tips from the masters
Before installing the floor covering, it is necessary to familiarize yourself with the recommendations of specialists in order to avoid mistakes during installation work:
- Take seriously the preparation of the base, the slightest irregularities on the surface increase the consumption of the adhesive mixture.
- At the initial stage of work, debris is removed from the base. This can be done with a vacuum cleaner.
- Tile adhesive is selected taking into account the material of the base surface, as well as the humidity in the room.
- Make floor markings regardless of how the tiles are laid.
- When making intricate patterns, lay out the products in advance on the surface to see how the floor will look.
- With the standard installation method, you need to start laying from the corner.
- Wait until the primer is completely dry.
- The grout is applied after the glue has hardened.
- To get a beautiful flooring, choose a grout tone to match the color and pattern of the tile.
After the installation work, you need to wait 2-3 days. When the glue is completely cured, you can bring in the furniture. Do not use abrasive substances when cleaning the floor covering, they can scratch the surface of the tiles.
