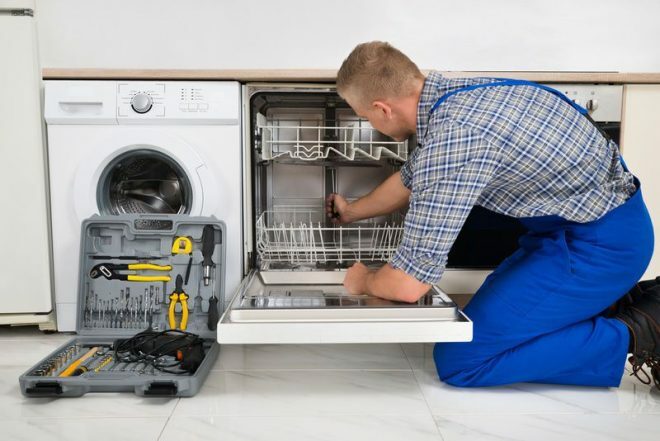
More and more people prefer to wash the dishes not by themselves, but with the help of a dishwasher. When installing these household appliances, you should understand that connecting a dishwasher is far from an easy task. Therefore, if you are not confident in your own abilities or are doing it for the first time, it is better to entrust the connection to an experienced specialist. You can help the master even during the call. Tell us which brand of equipment, which model and series number.
A portable machine of compact size is considered the easiest to install and connect. In addition, it can be removed immediately after use. It will be more difficult with a stationary appliance; certain knowledge and skills in the field of plumbing will be required.
If you are confident in your abilities, then you can take over the connection of the dishwasher. This instruction will help you do it competently and quickly.
Attention! Earned on our website kitchen designer. You can familiarize yourself with it and design your dream kitchen for free! May also come in handy wardrobes designer.

Step 1 - Prepare tools and materials
Before installing the device, you need to prepare all the necessary things. The tools will be screwdrivers (straight, curly) and pliers. Consumable raw materials - insulating cotton tape and vinyl.
Insulating tape will need to be wrapped around metal parts in the future. Here is a list of all the items that can be used for assembly work:
- tee with a thread diameter ¾ ", material: brass, bronze;
- a siphon with a fitting, if you plan to purchase a washing machine, you can buy a siphon with 2 fittings, if you have it installed, one will be enough or close it with a second sleeve;
- shut-off ball bronze valve with a diameter of ¾ ";
- long tube;
- filter for deep cleaning (extends the period of use, the same is in front of the water meter);
- PTFE sealing tape;
- Euro socket (socket with grounding);
- wire with the desired section and length;
- electric drill;
- adjustable wrenches (2 pieces);
- scissors suitable for reinforced plastic pipes;
- sharp knife;
You have assembled the entire set of tools and prepared consumables. The next step is to choose a suitable place for the dishwasher.
Step 2 - choosing a suitable location
Usually people figure out where the new rubble equipment will be located. If you haven't already, here are some guidelines for where to place your dishwasher:
- The built-in view (stationary) requires a place where it will not interfere and where it is convenient to operate. If the kitchen is just being set up and furniture has not yet been purchased, it is better to give preference to a design that involves placing a dishwasher - under the countertop or in the cabinet of the cabinet. The main thing is that the device does not interfere and does not attract attention.
- The distance from the dishwasher to the sewer cannot exceed one and a half meters. Otherwise, the pump of the device can fail in a short time. Sometimes difficulties arise when the installation of a dishwasher cannot be realized in the kitchen. For example, if it is far from the sink or the drain does not flow into the kitchen. In such cases, a reasonable solution would be to place the device in the bathroom.
- It is advisable to choose a place closer to the outlet. This will help in the future to immediately connect to the mains without installing a new outlet.
- There are models that are installed on the tabletop. You don't need to think too much about how to connect a dishwasher with your own hands of this type. Everything is quite simple here. Simply flip the hose into the sink. This type does not require thinking through the drainage system. Suitable for old houses and small spaces.
After choosing a place, a person should know how to connect the dishwasher to the water supply, sewage and mains.

Step 3 - Connect the water
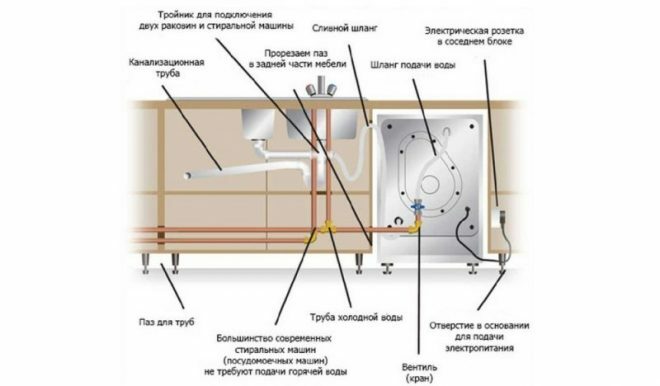
The first step is to install a tee between the water pipe and the tap. In the course of this manipulation, a branch is formed, to which our unit will be connected. In the case when the device does not have the function of connecting to water, a special valve must be installed. Here, a filter for water purification is installed. Procedure:
- Disconnect the flexible hose of the mixer from the metal-plastic pipe.
- Now you need to connect the tee, before that, having wound a fluoroplastic sealing tape on the thread.
- We wind the mixing hose on top of the tee.
- A filter for cleaning is installed on the outlet, then a shut-off valve (here it is also necessary to wind the FUM tape).
- We take the hose from the equipment and connect it to the tap.
Step 4 - Putting the drain
Here the eyeliner scheme is simpler than in the previous paragraph. It is necessary to install a siphon under the sink, this prevents the spread of unpleasant odors from the sewer throughout the apartment.
A drain circuit is connected to the siphon. The hose should be sloped so that the water can drain efficiently on its own, and the hose does not need to be tweaked by hand. I would like to focus on an important aspect - at the junction of the siphon and the drain, a V-like bend is needed, which will prevent water from the sink from pouring into the drain.
The final stage of the connection to the downpipe is to check the length of the hose, depending on the load of the pump.
Step 5 - supplying electricity
As mentioned above, the socket should be located directly next to the dishwasher. In addition, it can handle a current of 16A and is grounded.
The power of the unit is high, so the conductive system must withstand the incoming load. This will help the selection of the correct cross-section of conductive conductors. Their diameter is from 2 mm.
The distribution of electricity must come from a panel or a junction box. It is recommended to protect the transmission line with a circuit breaker under 16A. It is necessary to use only earthed euro sockets. This requirement is dictated by safety rules. Do not plug the washing machine into a socket with a connected dishwasher or something else! This can cause an overload current.
Step 6 - finishing work
Align the unit parallel to the floor, any misalignment will interfere with operation.
After connecting all systems, do not rush to close the boxes and grooves. First, test your dishwasher. This is done without dishes, but with the addition of detergent. We thoroughly check the functionality of the entire system: water filling speed, heating, draining, drying mode. Inspect all places so that the pipes do not leak anywhere, the joints are securely fastened. After you are convinced of the normal operation of the machine, you can clean everything up and enjoy the new assistant in the kitchen.
Useful Tips
- Look for videos on YouTube. If you are planning to connect a dishwasher with your own hands, the video will help you understand the sequence of actions.
- Do not connect ground contact to gas or water pipes. It needs to be connected to the grounding bus.
- The distance from the walls to the car is at least 5 cm.
- Be careful when installing the drain pipe into the sink. Waste water can spill out of the pipe, which threatens to flood neighbors. The process is insecure, although it makes it easier to join.
- Before you buy, study the models of the most popular brands, read reviews about them, choose the appropriate options at the price that allows you. The best manufacturers of dishwashers are the brands Bosch, Electrolux, Siemens; in Moscow, their production equipment is in great demand.
- Do not use extension cords. They are often the cause of accidents.
- Each large household appliance should have its own line from the junction box. The dishwasher is no exception.
Now you know how to connect the dishwasher. Its use helps housewives to take off some of the household chores, get more free time and save water consumption.
average rating 0 / 5. Number of ratings: 0
No ratings yet. Be the first to rate.


