Every person sometimes has a desire to update the interior of the kitchen. And if the materials are badly worn out, this is more a necessity than a whim. It's good if the repair work can be done on your own. Consider how to repair the ceiling in the kitchen, what to look for when choosing materials.
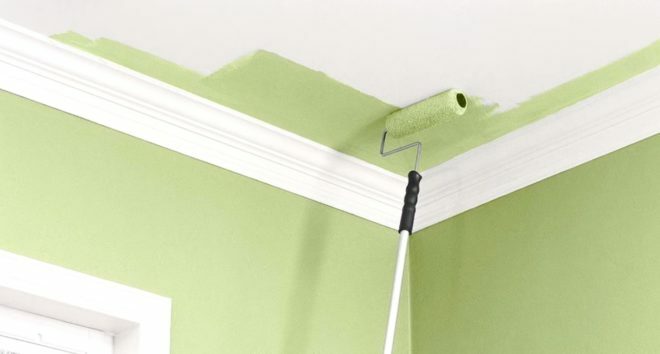
Image taken from https://www.youtube.com/watch? v = fa9pMuy46nQ
What are the requirements for a kitchen ceiling?
If the materials lose their original appearance in difficult kitchen conditions, the repair will have to be done again soon. To avoid this, already at the planning stage, you need to imagine the features of the microclimate in the kitchen, what properties the materials should have:
- The most important thing is moisture resistance. In the kitchen, humidity changes are recorded in the range from 40 to 90%. Paper, fabric wallpaper, natural wood, if not processed in a special way, will not work.
- Resistant to thermal factors. Hot air rises up during cooking. Cheap types of plastics should be avoided. At elevated temperatures, such material releases harmful substances into the air that can adversely affect human health. When ventilated in winter, cold air enters the room, which contributes to the formation of condensation.
- Fire safety. The most dangerous are wood and paper coatings. Plaster, paint, stretch fabric do not burn.
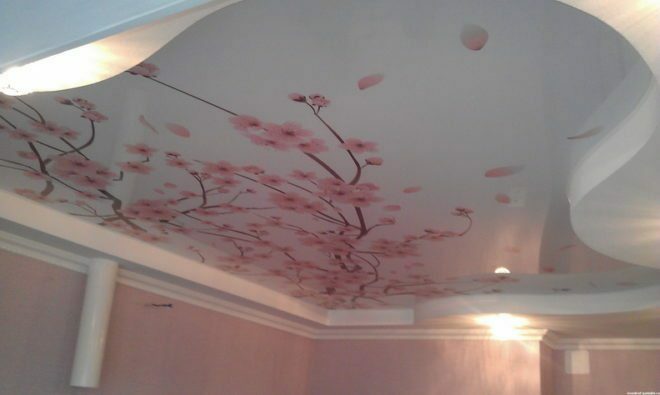
- Ease of maintenance. You need to understand that any surfaces will get dirty in the kitchen, even with the most careful attitude. This process can be slowed down by the use of a powerful hood, periodic cleaning of the ceiling. It is better to choose products with a smooth surface that can be washed. These are stretch ceilings, panels, acrylic paint. Wipe with a damp cloth, lightly water-based paint, washable wallpaper. Fabric, paper wallpapers will not work at all.
- Color fastness of the material to ultraviolet light. They can change the shade of PVC panels, wooden slats, wallpaper, plaster. Stretch ceilings and acrylic paints are considered more resistant.
- Air permeability. The better the air passes through the material of the ceiling covering, the less the likelihood of condensation and mold formation, the more favorable the microclimate in the kitchen. Whitewash, plaster, drywall are good air permeability, less - vinyl wallpaper, PVC tiles, aluminum slats, stretch fabric.
Based on these requirements and the budget, families choose the right material. It is not recommended to save on materials. If you have the skills of construction work, you can repair the ceilings on the kuna with your own hands, without the involvement of specialists.
Attention! Earned on our website kitchen designer. You can familiarize yourself with it and design your dream kitchen for free! May also come in handy wardrobes designer.
In terms of ease of repair, suspended structures such as a rack ceiling are in the first place. It is not difficult to make a plasterboard ceiling. Painting, plastering is within the power of most people, but only if the base ceiling is sufficiently flat. If the level difference is more than 3 cm, it is better to consult a specialist. It is difficult to make stretch ceilings without experience and special tools on your own. 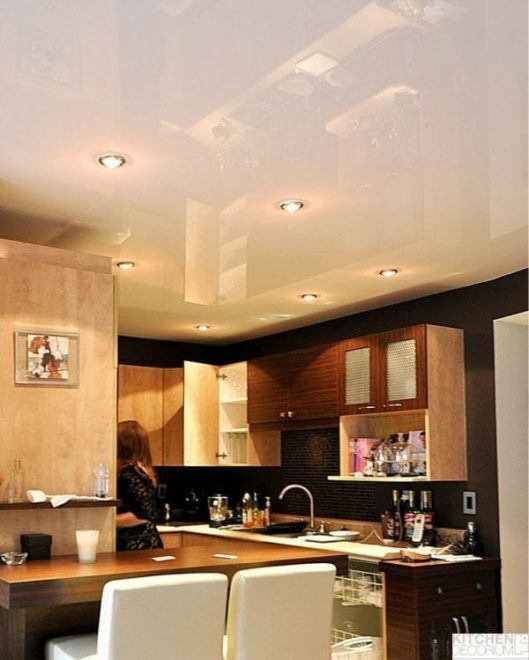
Training
Kitchen renovation begins with preparing the surface of the ceiling. It is necessary to remove the existing cover. This is a tedious and messy part of the job. Furniture, equipment should be well covered with foil, if possible, removed from the kitchen. For work, purchase personal protective equipment - a respirator, glasses, gloves. Prepare a secure ladder or table to reach the ceiling comfortably. We will consider the features of removing a specific coating from the ceiling below.
When the ceiling is completely cleaned, you need to level its surface. Use a gypsum mixture or a solution of cement and sand. This is a mandatory process if the finishing stage is painting, plastering, wallpapering.
Leveling can be avoided when using suspended structures. Then the rough ceiling is hidden, the nature of its surface does not matter. Another advantage of such structures is the convenience of laying wires in the space behind the ceiling. Fixtures for fixtures and lighting are easily hidden.
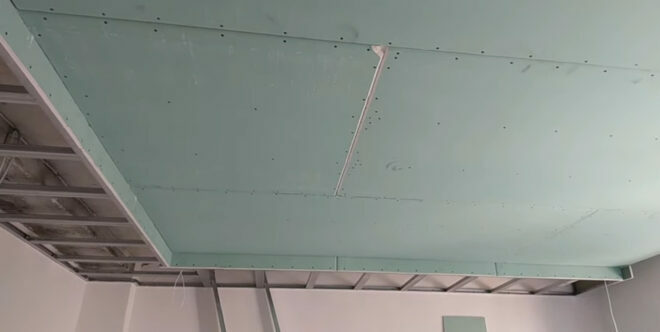
Image taken from https://www.youtube.com/watch? v = tuFfEgayB_w & feature = youtu.be
Which ceiling design option you prefer depends on the quality of the original ceiling, your skills, budget, general design concept, and the height of the room. When the kitchen is already low, any suspended structures as an option disappear immediately. If the ceiling is very uneven, and you have never worked with putty, it is unlikely that it will work to make the perfect ceiling surface without specialists.
Painting or whitewashing
The most budgetary options, but not the easiest ones. They require a perfect rough ceiling. This can be done using plaster and primer. Let's consider the main stages of alignment:
- A primer is used to increase the adhesion of different materials to each other. It is applied in 2 layers in mutually perpendicular directions, wait until it dries. It is good if the primer contains an antifungal agent.
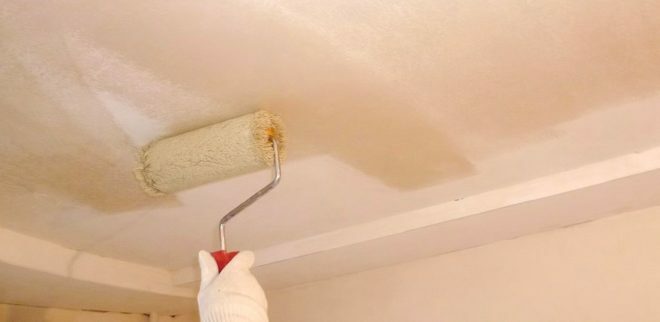
Image taken from https://www.youtube.com/watch? v = fa9pMuy46nQ
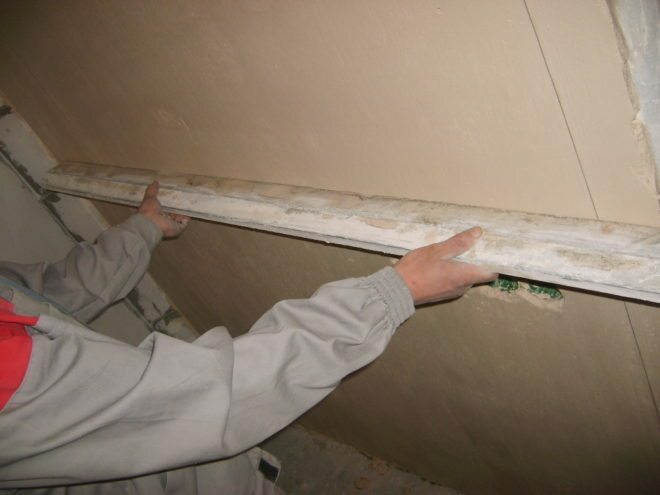
- Install beacons using a horizontal level. Lighthouses are long aluminum profiles. They are laid so that the rule (long and narrow metal rail) is greater than the distance between the two beacons. Fix the lighthouses with plaster.
- A plaster mortar is applied to the ceiling between the beacons with a spatula, leveled with a rule. The overall level should be up to 2 cm. If a thicker layer is needed to compensate for unevenness, the solution is applied in several stages: first the first layer dries up, a reinforcing mesh is attached to it, then the next layer is applied and again align.
- Lighthouses can be left or removed, the trail from them can be repaired with the same solution.
- The final leveling is carried out with a wide spatula (45 - 60 cm) and a sponge dipped in warm water, eliminating all remaining irregularities.
- The putty is applied in a thin layer of about 1 mm once or twice.
- The paint itself is applied with a roller or spray. Water-based emulsion allows air to pass through well, is inexpensive, however, and does not look so impressive. Now on the market you can choose a matte effect Euro paint, acrylic compositions. They retain color firmly and wash well.
Image taken from https://www.youtube.com/watch? v = fa9pMuy46nQ
The choice of plasters has also increased. In addition to the standard one-color white, decorative plaster is often used. It is easy to apply, but it looks very interesting, gives color to the entire kitchen. It has different colors, with the help of embossed rollers it is given the desired pattern - dots, stripes.
Pasting with wallpaper or PVC panels
In order to renovate the ceiling in the kitchen, vinyl wallpaper is suitable. It won't take long to glue them, but the process on the ceiling is quite inconvenient. For relief, use a device - a wallpaper holder or work in pairs.
Another unpleasant moment is that over time, the wallpaper can disperse, the seams are exposed, which looks unaesthetic. When wallpaper is glued, there should be no draft in the kitchen: windows, doors are closed, the room is not ventilated until it is completely dry, that is, another day after the completion of the work.
PVC panels are functional and look good in the kitchen. These can be slats, square or rectangular tiles. Sometimes this surface can be painted. Vinyl or PVC kitchen ceilings are washable. This will help preserve the aesthetics for a long time. 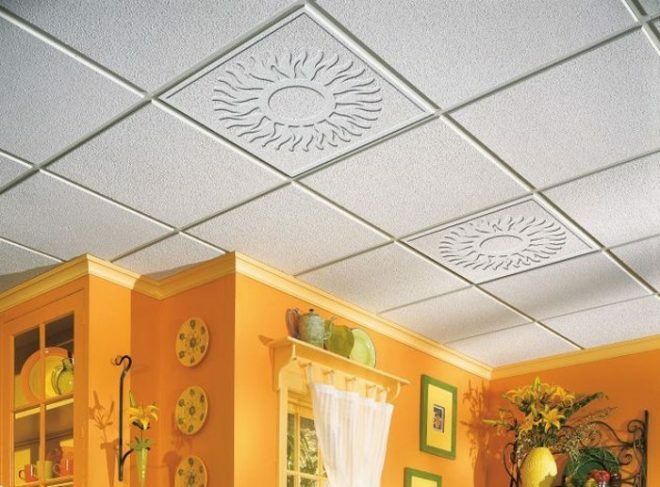
Installation of a suspended or stretch ceiling
Suspended structures can be made independently. There are several options: plasterboard ceiling, slatted ceiling or Armstrong type.
What unites them is that first you need to assemble a frame on which the finishing ceiling will be mounted. If slats or tiles are used, you can alternate transparent and opaque materials, use different colors, add metal, mirror inserts. This allows you to diversify the look of the ceiling.
Such a structure is easy to repair if one or two elements break. The entire system remains in place. Also, if access to the wires is necessary, it is easy to dismantle a part of the structure, and then return it to its place.
Plasterboard ceilings are a favorite technique of designers if you need to make a multi-level ceiling of an arbitrary shape. Drywall is inexpensive, easy to make curved structures. Light enough, hygienic - breathable. From above it can be covered with any topcoat - wallpaper, paint, plaster. You can make a plasterboard ceiling in one level if the kitchen is not high. You will lose only 5 - 10 cm, but the surface of the ceiling will be absolutely flat.

Do-it-yourself ceiling repair in the kitchen with the installation of plasterboard suspended structures involves the following stages:
- Mark the perimeter using a horizontal level. You can use a laser level, a water level, a chopping line, or a pencil with a ruler. Measure a line from the lowest point on the ceiling.
- A U-shaped profile is attached along the perimeter. If its length is insufficient, individual elements are connected with adapters.
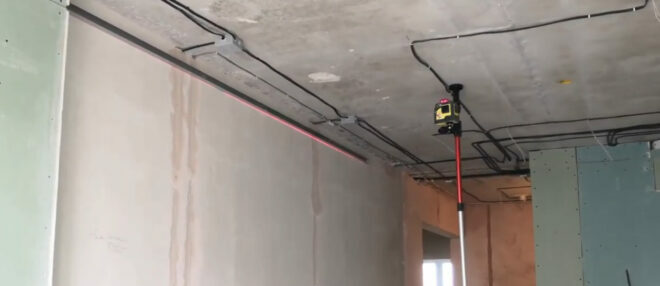
Image taken from https://www.youtube.com/watch? v = Epm5GFZSEJE
- Profiles are installed every 40 cm across the room.
- After 70 cm, suspensions are attached to the ceiling. It is imperative to check how firmly they are fixed. Add 1 - 2 more dowels if necessary.
- Align all profiles in turn with the help of suspensions to the same level. To do this, the thread is pulled, the profiles are raised to the very ceiling and in turn are lowered until they are located immediately above the thread. Self-tapping screws with a press washer fix the profile to the suspension.
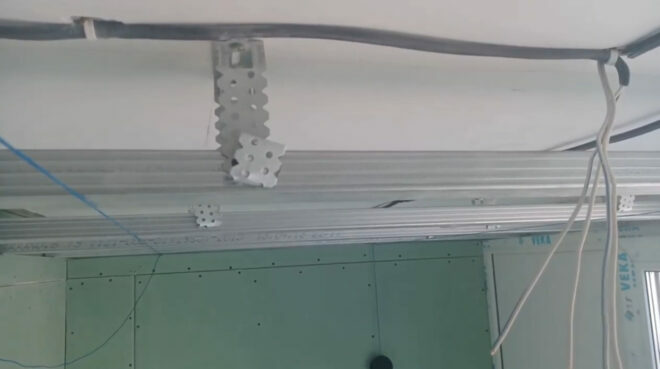
Image taken from https://www.youtube.com/watch? v = Epm5GFZSEJE
- At the junction of the plasterboard sheets, transverse jumpers are installed between the profiles. They must correspond to the general level of construction, be free of protruding parts. They are fastened together with self-tapping screws.
- Install plasterboard sheets. They are screwed to the profiles with self-tapping screws after about 20 cm, somewhat sinking the cap into drywall. Close up the seams.
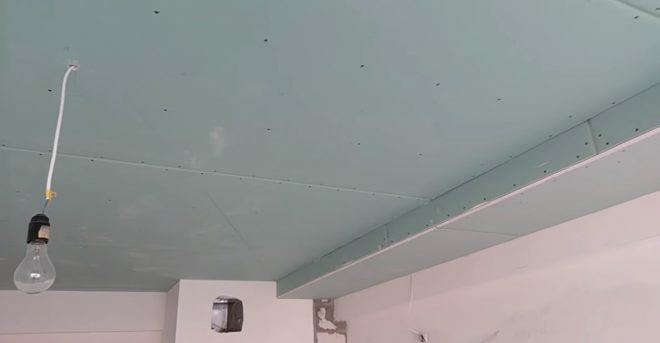
Image taken from https://www.youtube.com/watch? v = bcbSSDSi3rE
- Finish the drywall.
A very effective and practical option is a stretch fabric. It completely hides the base, perfectly flat, has a large selection of colors and patterns.
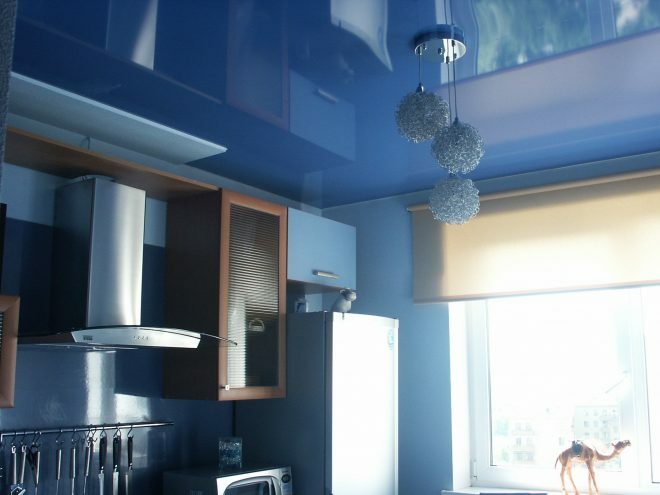
When installing a stretch ceiling, the steps are as follows:
- Mark the perimeter along the wall. Fasten the wall baguette, starting from the corner. The joints must be on a flat area. They are covered with masking tape.
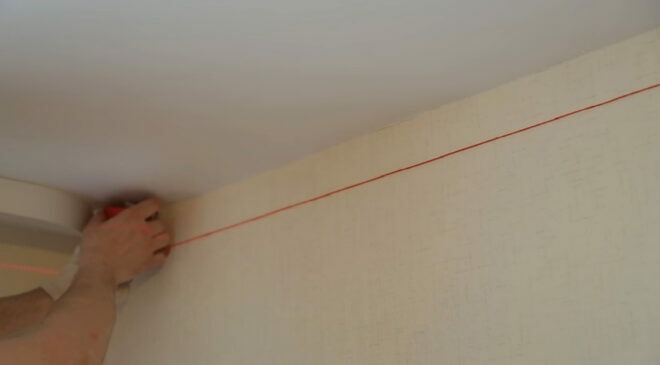
Image taken from https://www.youtube.com/watch? v = 5IkKVmzYJAw
- Mark the location of the lamps and fix the embedded parts for them to the ceiling.
- The canvas begins to be fixed on one side. To do this, insert pieces of a harpoon about 15 cm long into the baguette. The same actions are repeated on the opposite and the two remaining walls. The canvas is straightened and pulled from the center towards the corners.
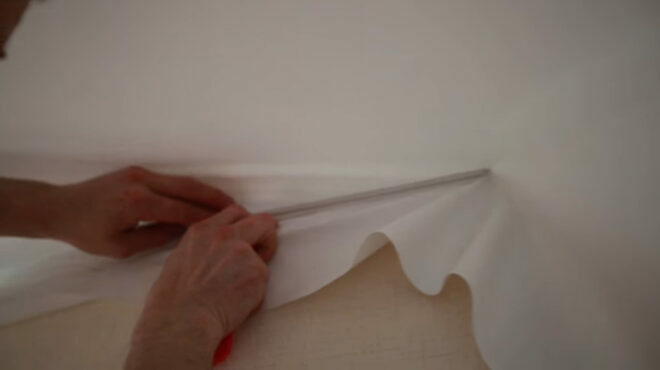
Image taken from https://www.youtube.com/watch? v = 5IkKVmzYJAw
- The fabric is heated with a building hair dryer and the tension is increased until all folds are completely evened out. When warmed up, the elasticity of the web increases.
- The excess canvas is cut off at the edges with a construction knife. A masking tape is introduced along the perimeter, starting from the corner. For a neat seam, the edge should be trimmed at a 45 degree angle.
- In places where under the canvas there are embedded fixtures for the lamps, thermo rings are installed on the Contact superglue. Fixtures are fixed.
Image taken from https://www.youtube.com/watch? v = 5IkKVmzYJAw
How to remove old whitewash, paint and plaster?
Let's take a closer look at how to remove the old trim from the ceiling and clean the ceiling surface well:
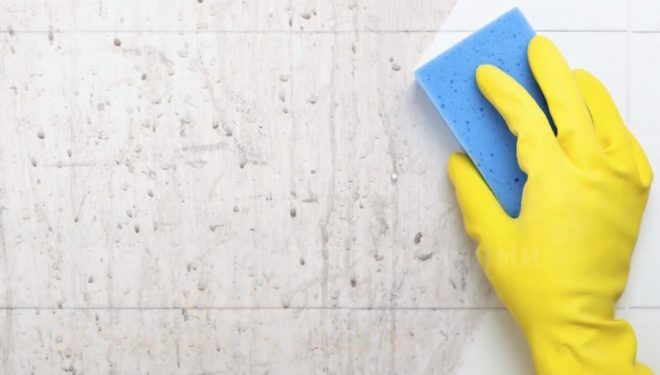
- The easiest way is to remove the chalk whitewash. The surface is moistened with water using a spray bottle and washed off with a foam roller or sponge.
- The lime wash must first be soaked in water. The roller is moistened in water, they pass along the ceiling. After 15 - 20 minutes, remove the coating with a metal spatula. Old wallpaper is removed in the same way. In those places where the coating adheres tightly and cannot be cleaned, use a grinder, metal brushes.
- The process of removing water-based paint is similar, only an iodine solution is added to the water so that the water turns light brown. When the material has saturated the water, it is mechanically cleaned with a spatula.
- Sometimes the paint is firmly fixed. Then you can apply a mixture of glue and water to the ceiling, cover the surface with a paper layer - newspapers, old wallpaper. After drying with a spatula, remove the wallpaper along with a layer of paint adhering to them.
- Ready-made compositions are often used - chemical paint solvents. You need to use them according to the instructions, buy the corresponding paint in the kitchen.
- The hardest part is to remove the putty. This requires sufficient physical strength, powerful tools - a drill, drills, hammer, chisel, grinder. Work on wet surfaces. The ceiling is moistened with hot water. The plaster is knocked down and cleaned from the surface.
If you make high-quality repairs to the ceiling in the kitchen with your own hands, choose a suitable coating, you will not have to change it for a long time. This is not difficult to do, in most cases it can be done without the involvement of builders. Ceiling repair options depend on your experience, the complexity of the ceiling structure, kitchen design, budget.
average rating 0 / 5. Number of ratings: 0
No ratings yet. Be the first to rate.
