One of the main and frequently used devices is the kitchen faucet. In connection with its need, it often falls into disrepair. Today we will tell you how to repair a kitchen faucet with your own hands. There are tons of videos on this topic on the Internet, but this article will describe everything in more detail. Recently, housewives are increasingly choosing a lever mechanism rather than a conventional one. Due to the lack of rubbing parts, these valves are usually more durable. Also, the popularity is influenced by the stylish appearance, smooth lines and a variety of colors. In this article, we will consider the repair of single-lever mixers.
Types of single lever kitchen faucets
The principle of operation and the device of a single-lever mixer with ceramic cartridges is shown in the photo.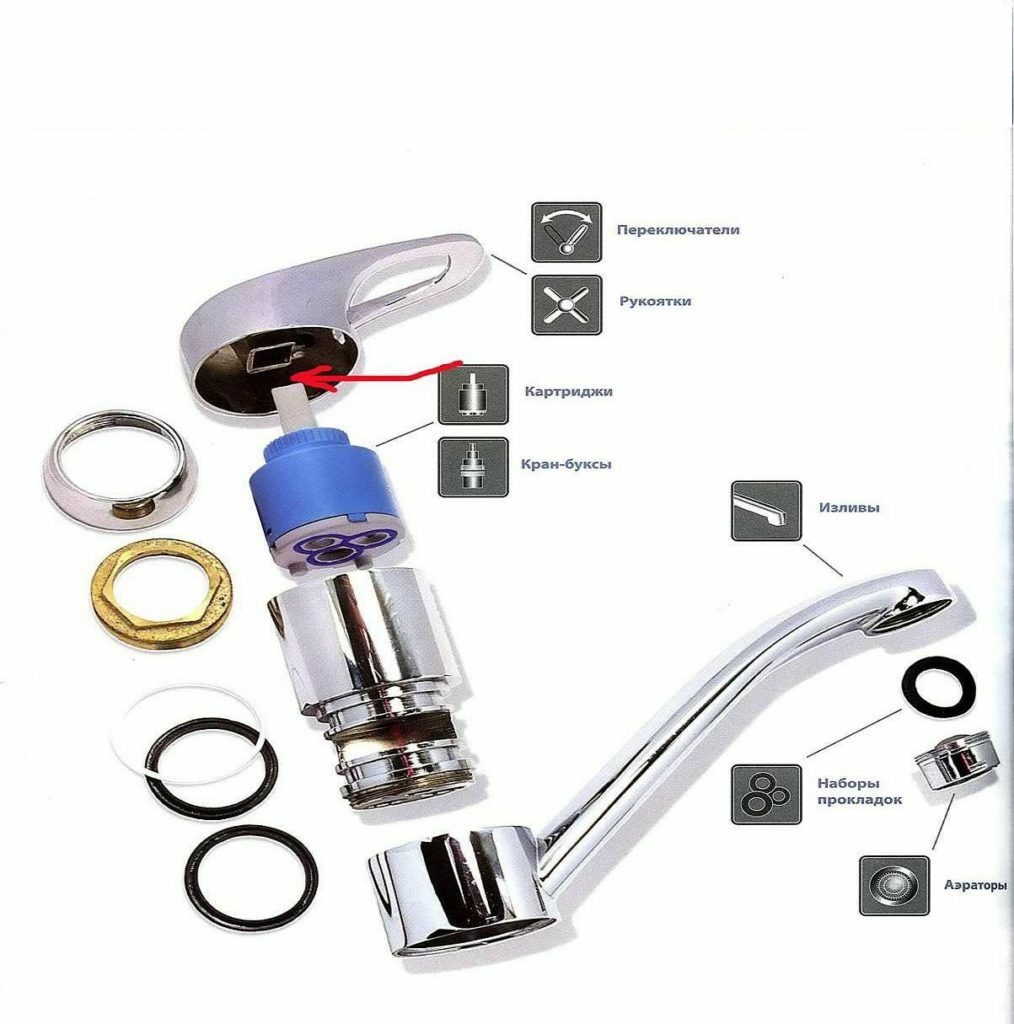 The central part, which is located between the lever and the tube, is called the mixer body, and the most important part is hidden in it - the cartridge. It is responsible for mixing water and is often the main source of problems. A mixer handle is installed on the body. A swivel spout is located at the point of attachment of the tap; various rings provide its water resistance and mobility. There is an aerator at the end of the tap, but we'll come back to that later.
There are also ball mixers. Their device looks something like this:
Attention! Earned on our website kitchen designer. You can familiarize yourself with it and design your dream kitchen for free! May also come in handy wardrobes designer.
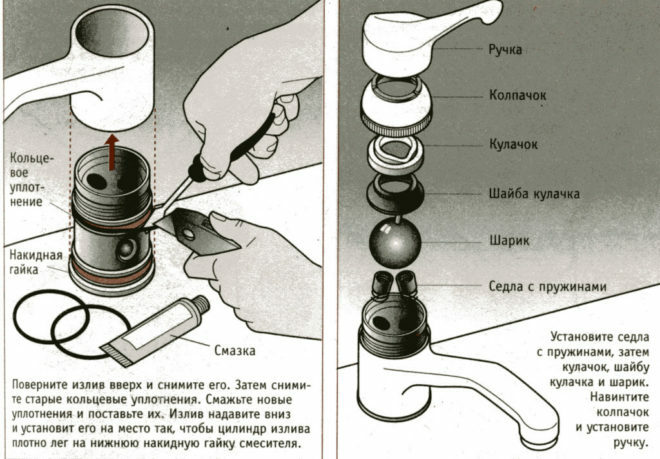
They also have a "torso", but a ball is installed inside, which is responsible for regulating water. Under the handle, which is fixed with a screw, there is a metal cap that holds the entire valve mechanism inside. There is also a figured washer inside, which serves as a regulator of the angle of rotation of the lever, and it fits snugly to the ball itself. The bottom is not much different from the previous mixer.
Mounting methods
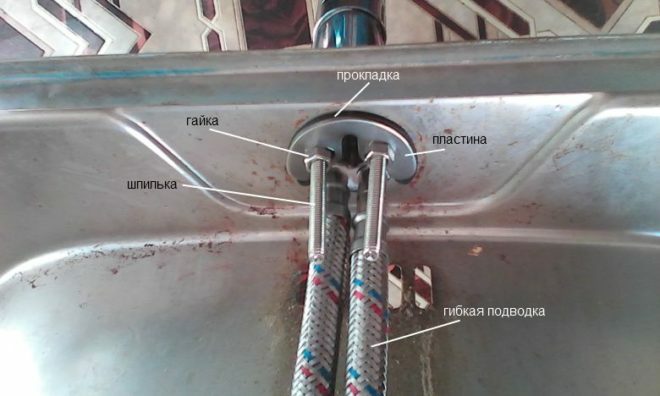
- Hairpins. Simply unscrew the nuts from the studs and lift the mixer up.
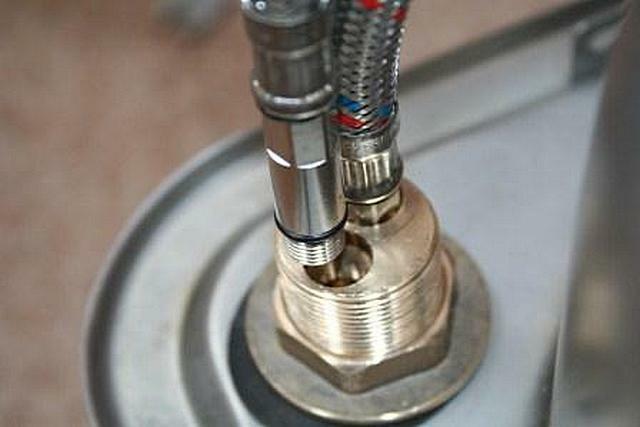
- Nut. You just need to unscrew this nut.
Many craftsmen advise removing the entire sink, which will make it easier to work with the mixer, at the same time it will be possible to update the sealant. If you nevertheless have conceived an overhaul of the mixer, then you should purchase a set of hoses in a flexible metal braid, just be sure to check the length. You can also try a rigid reinforced plastic pipe liner. You will need to buy special adapters, but this method of liner will last a very, very long time.
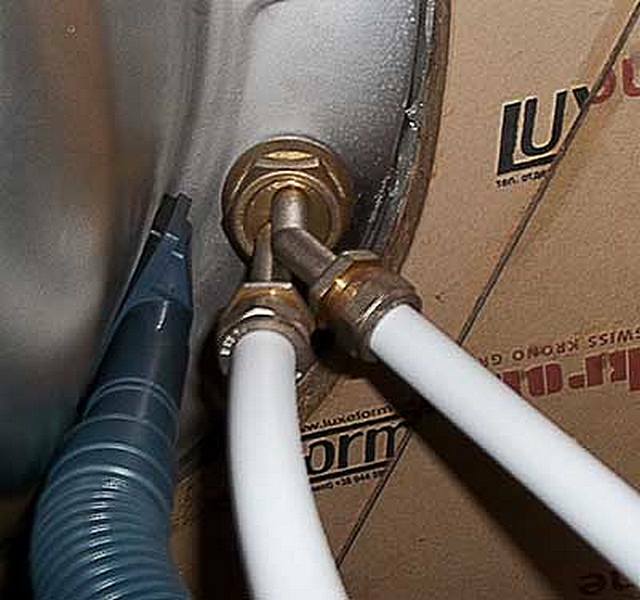
Before starting any work, do not forget to turn off the cold and hot water and turn on the tap to reduce the pressure, and of course, drain all liquids. If you will disconnect the pipes, then take a bucket to drain the remaining water. Repairing a single lever mixer is a very painstaking task.
What are the signs that you can understand that the problem is in the mixer
- Is there a constant puddle from under the sink?
Feel the siphon, if it is dry, then, most likely, the solution lies in the water line. Feel the hoses where they connect to the pipes and at the inlet to the device itself. Close the tap, wait until all the water is gone, wipe all the parts of the sink with a dry cloth and then you can see by eye where the water is flowing. If you see problems aligning the elastic hose with the old steel pipe, try tightening the nut. If this does not help, then turn off the water, take a bucket, unscrew the nut and study the pipe itself. Look for thread integrity. If it is damaged, then you need an extension adapter, the end of which flawlessly adheres to the hose routing. Wrap the adapter to the pipe, and only then put the hose on the adapter itself. 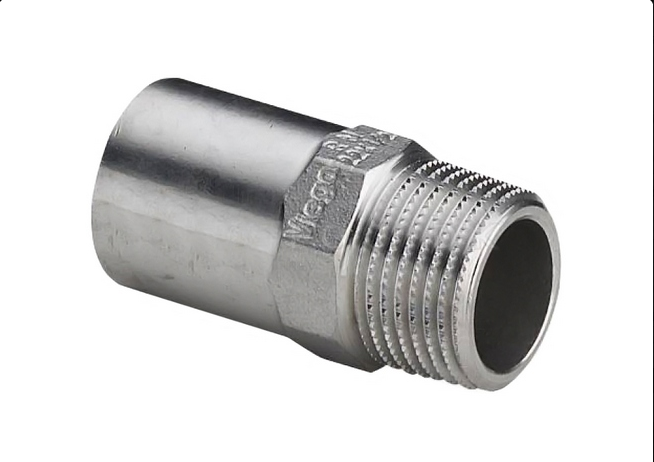
- Drops from the drain even when the tap is closed?
Problem in valve packing or ceramic parts.
- A puddle of water near the mixer body?
Causes: Cracks in the housing or wear on the O-rings in the swivel block. If the lever functions properly, but there is water near the faucet, try looking for cracks. If you do notice something, change the mixer right away, there is no way to help it.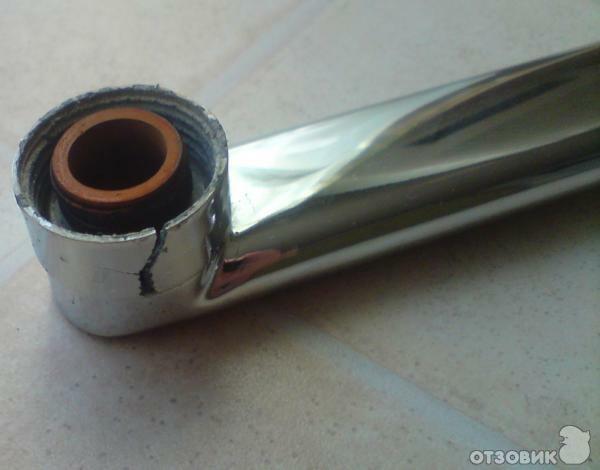
- Is water flowing from under the lever?
This is most likely an insufficient tightening of threaded nuts, wear of oil seals, failure of the cartridge. If you need to apply force to change the position of the lever, or, conversely, it is too easy, and the water temperature does not change much, the problem is in the ceramic cartridges. The best option is to replace them with new ones.
Step-by-step instructions for repair
- Remove the plug that covers the retaining screw.
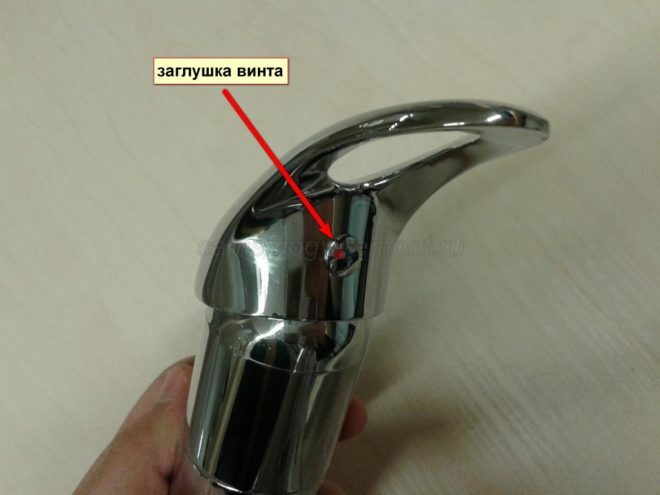
- There will be a screw in the hole that opens, which you need to gently loosen with a screwdriver.
- Then remove the handle.
- Unscrew the decorative cap; you can safely do this with your hands.
- You will see a locking clamp nut. It must be unscrewed with a wrench of a suitable size and removed.
- There you will see the coveted cartridge. You can also reach it with your hands. Replace it with a new one.
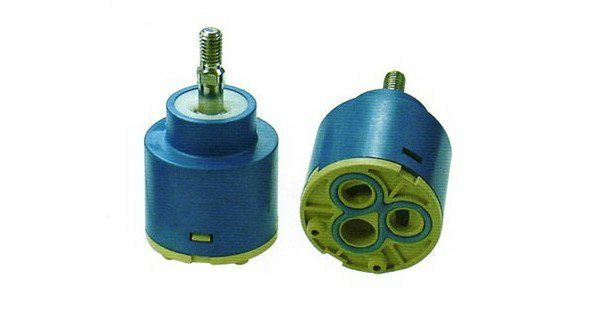
- That's all. Now everything needs to be done in the reverse order. If you had a leak near the very base of the device, then you need to disassemble the mixer even further, carefully remove everything that will meet (mainly various rings) and reach elastic bands-seals. They will have to be replaced. You can also replace all the rings, they are inexpensive.
Ball Mixer Repair
- Remove the mixer handle.
- After removing it, we take out the cam with the washer. It can be cleaned immediately.
- Then we take out the ball itself and carefully examine it. Let's start with the top washer. It just needs to be cleaned. If the ball itself looks worn out, then only a replacement will help. If the springs do not press the seats well against the valves, then it is worth replacing both. It's not very difficult. Pick them up with a screwdriver and get them out.
- OK it's all over Now. Also, the problem may be in limescale or wear of mechanical components.
- Low pressure? There may be pinched gaskets on the liner, poor permeability of pipes or hoses. It is also worth mentioning about the aerator - it is such a mesh at the end of the tap. If something is not very good with the flow of water, then it is worth removing this mesh and cleaning it. This is done very simply, it can be done with a needle, or it can be done with a strong pressure of water. You can simply change it, the price is small. However, if a similar situation occurs often, then this makes you think that it makes sense to put at least mechanical filters. This will greatly extend the life of the device.
As a result, repairing a mixer in the kitchen with your own hands is not such a difficult task. It will take you one day to go through the entire sink. The easy and understandable design of this mixer corresponds to the ease of its repair. But there is no need to rush. Everything should be done as carefully and carefully as possible.
Video: device, DIY kitchen faucet repair
average rating 0 / 5. Number of ratings: 0
No ratings yet. Be the first to rate.