Of all the possible reasons, the most unpleasant one can be considered the one due to which the microwave panel does not work. It's not that it can't be repaired, it's just that a board with buttons or a touchpad is always a black box. It is not easy to establish the cause of the malfunction only by inspection - you have to check and test the device.
The content of the article:
- The main causes of panel failure
-
How to fix the microwave sensor
- Step one - disassemble the oven
- Step two - diagnosis
- Step three - how to fix
-
What to do if the open button does not work
- How to open the oven if the button is broken
The main causes of panel failure
Any control unit, no matter if it is a microwave oven, a gas boiler or a water heater, will function stably only from the correct operation of the button. As a rule, the touch panel does not work on the microwave in the following cases:
- The sensor sticks, dirty contact on the button. The panel can function, but is unstable, pressing works every other time.
- Part of the buttons does not work due to a break in the conductive path.
- Damage to the cable that connects the keyboard to the control controller board.
- The board does not work due to damage to the controller.
The latter case is more often the result of a break on the board, a blown fuse, or a breakdown of the capacitor. Sometimes the reason why the panel stops working is a sudden power surge in the network. Then a backlight or a high-voltage fuse on the TVN can be added to the control panel.
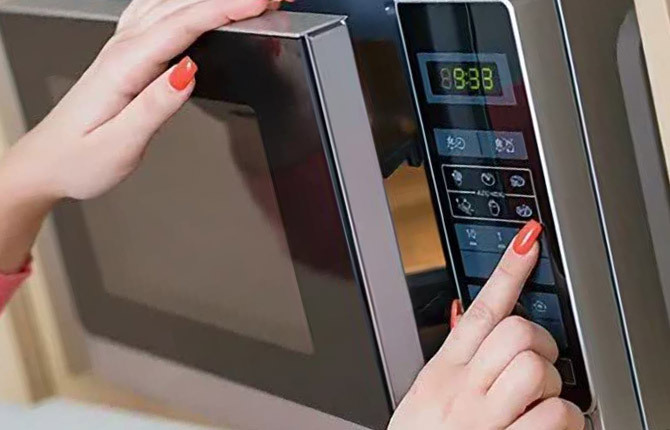
But most often the reason why the touch buttons do not respond is excessively strong pressing.
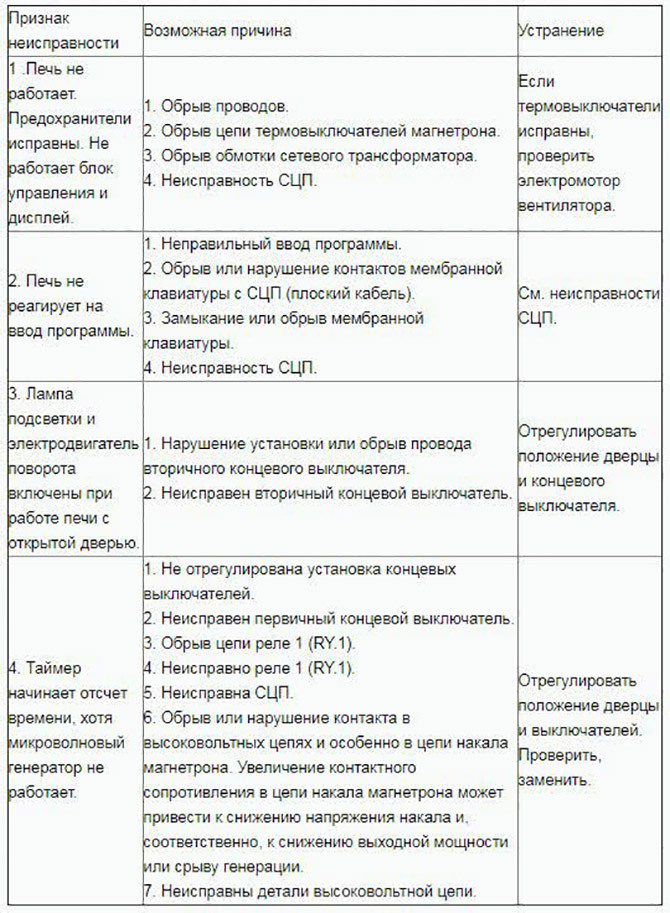
Touch panels of budget models of microwave ovens of the middle price category are not full-fledged sensors, as in smartphones. In fact, this is a membrane keyboard in the form of a board with current-carrying tracks and a soft plastic membrane with buttons. A metallized layer is applied on the reverse side (sometimes foil is glued). If you press the button with great force, then the microwave oven panel will not work in a couple of months.
In more expensive microwaves, a full touch screen can be installed. It also needs to be pressed with a little effort, approximately like on a smartphone. If such a panel does not work, the cause may be dirt on the glass or fingers that are too cold (or even dry). The sensor is programmed for a certain temperature of the skin of the hands.
How to fix the microwave sensor
The scope of work directly depends on the type of microwave oven panel. For many Daewoo or LG brands, the touch screen has to be replaced in one block with the entire panel. Therefore, the microwave is often sent to the workshop. But even if you manage to remove the block with the screen, it is impossible to work with it without a special tester, and if you do not carefully dismantle it, you can easily break off the cable.
Therefore, you can try to repair at home only in the case of a microwave with a membrane panel. Samsung microwave ovens are another matter. It is easier to work with them, since they mainly have sensors on membranes.
Step one - disassemble the oven
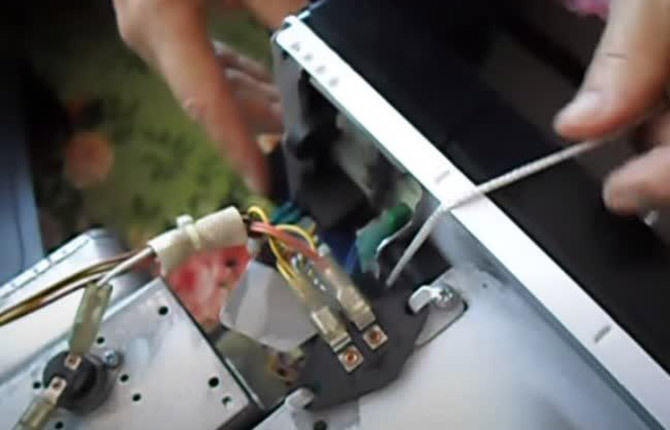
First of all, we de-energize the device and remove the outer lining. Almost all microwave ovens are disassembled in the same way or in a similar way. We unscrew the screws on the back side with a screwdriver and remove the lining from the body - the cover and side walls, all this is one element in the shape of the letter "P". Only the front with a door and the back wall remain.
Find a panel. The part itself is plastic, attached to the microwave frame with a pair of self-tapping screws. You will need to work with a screwdriver to unscrew the fasteners and remove the chips with wires. Carefully disconnect the cable from the display, with which the panel is connected to the unit. After that, you can remove the keyboard in one block along with a plastic box and a board.

The keyboard itself is a flexible plastic tape glued to the front of the box. The control part is made in the form of a board. It can also be damaged, preventing the microwave from working stably under load.

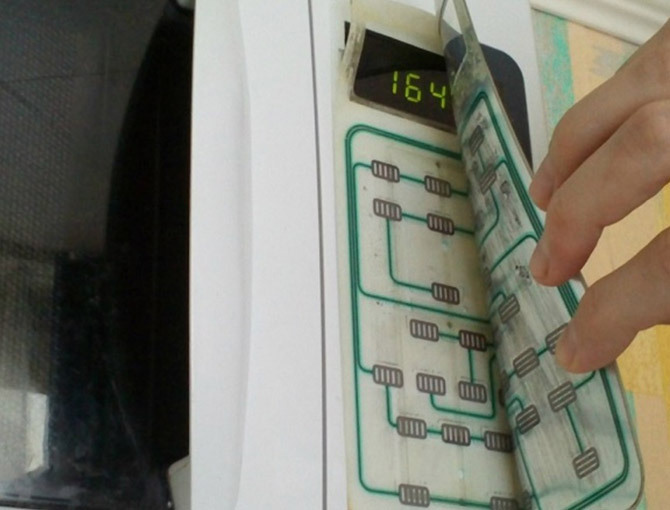
Step two - diagnosis
The most difficult thing is to determine the reason (there may be several) why the panel does not work. First of all, you need to do a visual inspection. Sometimes the reason why the panel does not work lies on the surface.
We immediately pay attention to the delamination of conductive tracks, broken contacts, oxidized surfaces. It is possible that some parts on the control board look burned out. If the unit is constantly overheating due to increased voltage, then the capacitors will be damaged (swollen) first.
Initially you need:
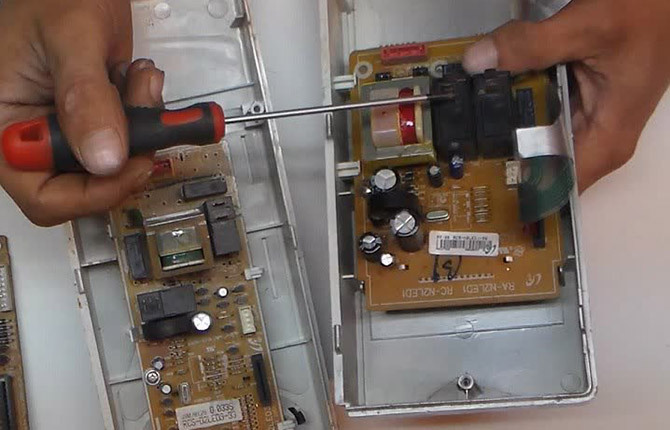
- Inspect the cable and the metallized underlayer, especially under the start or stop buttons. The microwave may not work if there are breaks in the tracks, conductors, or there is dirt or grease on the contact surface.
- We examine the board, check the gap on the fuse. Usually the microwave does not work due to a burnt fusible link.
- We examine the details on the board. If there are swollen capacitors, then this is exactly one of the reasons why the panel will not work.
- We check the fixation of the cable in the connector on the board. Often, water-fat vapors formed during the heating of the microwave get inside the connector, which may cause some panel buttons to not work.
A common damage is a break in the current-carrying track on the cable. The damaged place can be seen with the eyes, even without a dial-up with a multimeter. But you need to be careful, the cable can be damaged in the process of disassembling the microwave and removing the panel. Therefore, the stove may not work for another reason.
Step three - how to fix
Repair work must begin with the board. Before trying to fix it, you need to clean all the contacts on the cable with alcohol.
The next step is to check the loop itself. If there is a break, then it must be sealed with conductive glue, on top of which stick adhesive tape.
There is a pair of relays on the microwave control board. If visually it works, but no heating, then most likely the reason is the switching relay. If the stove works every day, then the resource of these parts is enough for a maximum of 5-6 years.
If possible, replace the relay, even if they are in working order. The microwave will be able to work for at least another 5 years.
The last operation is cleaning the tracks on the membrane keyboard itself. Initially, we wipe and clean the surface with a swab moistened with alcohol. If gray spots are visually visible on the contacts, we additionally erase the dirt with a rubber eraser for drawing.
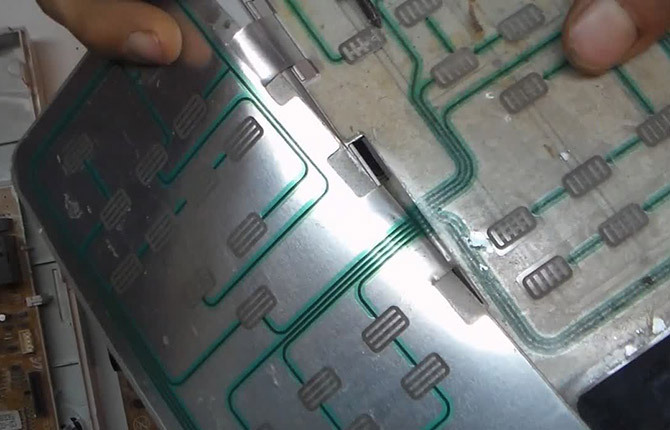
The membrane keyboard can be glued with a few drops of glue and immediately installed on the microwave, you need to check how the oven works after the panel is repaired.
What to do if the open button does not work
The problem is usually associated with severe wear on the pusher that lifts the door latch. You press the key - the lock does not respond. If the microwave oven works every day, then problems with the door can begin as early as the second year of operation.
It is difficult to get to the pusher even with the housing removed. On some models, you can remove the door blocking module or remove the hinges.
But in most cases, the door is unlocked using a steel locksmith ruler (thickness 0.2-0.3 mm). First, turn off the microwave so that the heating does not start working if the sensor works. Next, you need to insert the ruler into the gap between the door and the body and press firmly up. So it is possible to lift the latch and open the door.
How to open the oven if the button is broken
In the event of a breakdown of the mechanism, you will have to disassemble the microwave. Remove all parts until you have access to the locking mechanism. Repair is performed by replacing with a new unit. For the button to work stably, you will need to adjust its position using spacers.
In old microwave ovens, released 10-15 years ago, the lever lifting mechanism does not work due to poor quality plastic. In this case, the button is not pressed at all. You can open it if you remove the casing and try to pass a small weight attached to the cord under the latch flag. Then you have to work, like fishing. The cord is passed through the bottom of the block and pulled up. With the resulting loop, you can pry off the latch flag and lift it up. The door will open.
Often the microwave panel does not work due to rough handling of the sensor, pressing the buttons too hard, or the poor quality of the keyboard itself. It is possible to repair the block with your own hands, but you need to know exactly the procedure and remember that there may be several breakdowns.
Tell us about your experience in repairing microwaves - how difficult was the process of restoring the keyboard and buttons? Bookmark this article so that you don't lose useful recommendations from the masters.