The replacement of the water supply is carried out exclusively in agreement with the management company or the HOA, if we are talking about an ordinary apartment building. Work can be done independently if you have the appropriate skills and equipment. Step-by-step instructions and recommendations for choosing materials can be found in the article below.
The content of the article
- Coordination and assessment of the pipeline condition
- Which pipes to choose
-
Repair Instructions
- Dismantling works
- Wiring selection
- Installation work
Coordination and assessment of the pipeline condition
Repair of the water supply in the apartment involves the replacement of pipes and connecting elements. As a rule, this is due to natural wear and tear and the desire to install new plastic pipes instead of old cast iron or galvanized steel pipes. Replacement is planned for several reasons, the most common are:
- severe clogging of pipes, clogging of internal surfaces, when ordinary cleaning will no longer help;
- leaks, breaks in connections;
- unpresentable appearance, clearly talking about heavy wear.
Repair of water supply pipes in an apartment requires mandatory approval from the management company or the HOA. To do this, you need to draw up a written application and receive an act. Just in case, it is advisable to insure the apartment against leaks. It is equally important to warn the neighbors about the complete shutdown of water in a certain period. It's best to do this ahead of time.
In order to properly replace the water pipes, you should also determine the initial parameters:
- Do meters need to be replaced?
- which pipes to choose;
- is there a need to replace the shut-off valves;
- whether it is necessary to set filters;
- whether it is necessary to replace the inlet taps (if so, you will have to shut off the entire riser).
Which pipes to choose
When planning the repair of water pipes in an apartment, it is necessary to select the appropriate materials in advance. Today, several types of pipes are produced, the most common are:
- Polyethylene - reliable and easy to install, repairable even in case of an emergency. But they are not resistant to light and do not withstand too high temperatures. As a rule, they are used only for cold water supply and in the underfloor heating circuit.
- metal - steel, with or without a galvanized layer, cast iron. Very strong and durable, but heavy in weight, installation is quite difficult. In addition, plaque and rust regularly accumulate on the internal surfaces, so regular cleaning is required.
- The installation of plumbing in an apartment is most often carried out using metal-plastic pipes. They are easy to install, light in weight, do not accumulate dirt on the surface from the inside. Unlike polyethylene, they are more resistant to high temperatures, so the scope is universal - they are also suitable for hot water supply.
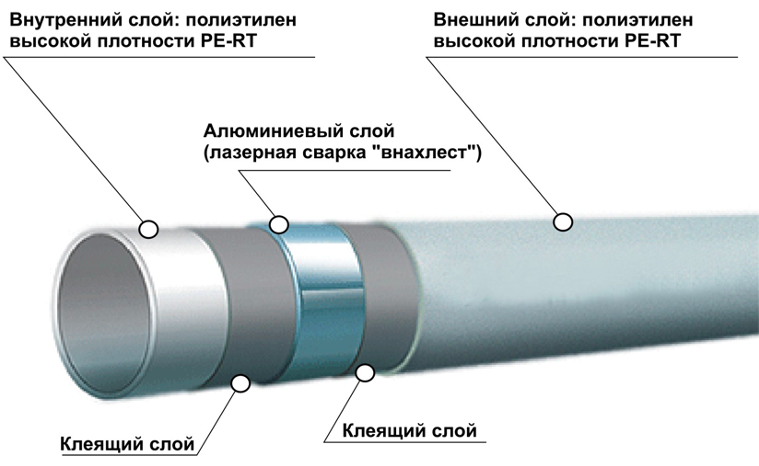
- PVC pipes have become very popular due to their high strength, affordability and lack of pollution, as well as a tendency to corrosion. But their disadvantage is similar to products made of polyethylene - they do not withstand high temperatures, they are applicable up to + 65 ° C.
- Sometimes the replacement of the plumbing in the apartment is carried out using polybutene pipes. They appeared on the market relatively recently, but have already gained popularity due to their resistance to high temperatures, pollution and corrosion.
Repair Instructions
The replacement of water supply networks is carried out in several stages - the dismantling of the old system, the choice of wiring and the actual installation.
Dismantling works
After coordination with the management company, the old pipes are dismantled:
- Coordinate time with neighbors.
- Covering the stand.
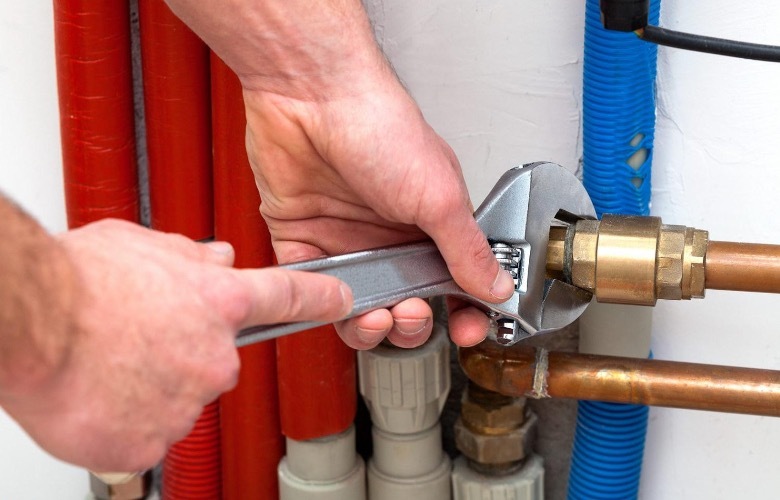
- Twist all fittings with a wrench.
- If there are a lot of them, you can make cuts in the appropriate places with a grinder.
- A container and a dense film are pre-prepared, which are laid on the floor after finishing work with the grinder.
- According to a pre-prepared plan, a scheme for wiring new pipes is outlined. It is transferred directly to the wall, but for this you first need to choose the wiring option.
Wiring selection
The type of wiring is also chosen in advance, there are 2 main options available here:
- Collector.
- Tee.
The first scheme is suitable for large apartments in which there is only one source of water supply, and the water intake points are far apart. Then each device is connected to its own separate branch, which, in turn, departs from a single collector. This is an effective scheme, but during installation you need to consider a box or other shelter, since a lot of pipes and communications will accumulate in one place.
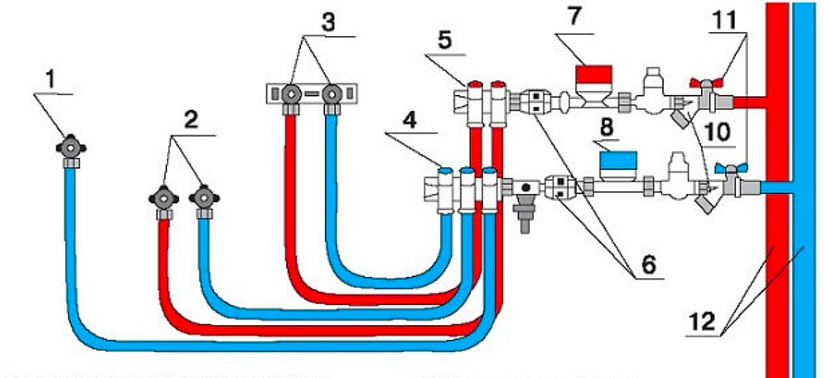
1. Washing machine outlet 2. Water inlet for basin faucet 3. Water socket on the bathroom faucet bar 4. Cold water collector 5. Hot water collector 6. Check valves 7. Hot water meter 8. Cold water meter 9. Pressure reducers 10. Coarse filters 11. Shut-off valves 12. Hot and cold water risers
Replacing the water distribution in an apartment with a tee type is suitable for small apartments. In this case, 2 pipes are mounted for hot and cold water supply. Branch tees are cut into each. Those. the device is connected in series along the entire length of the water supply, as is customary in residential premises of a typical layout.
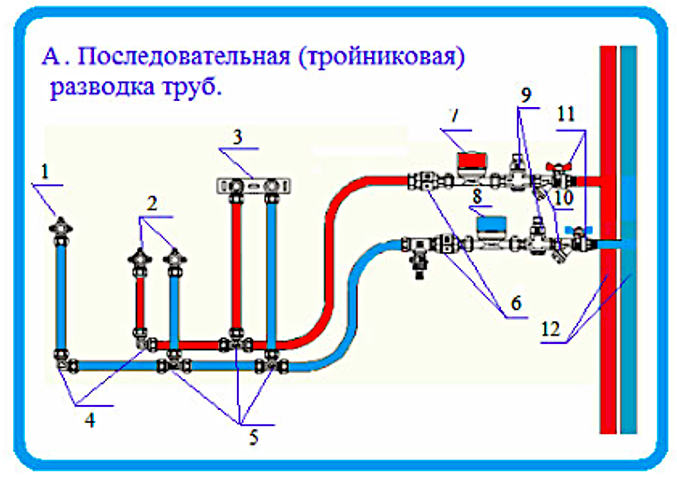
Typical scheme "A" 1. Water socket - connection of the washing machine. 2. Water socket - connection of the sink mixer 3. Water sockets - bath faucet bar. 4. Corner. 5. Tee. 6. Check Valve. 7. Hot water meter (DHW). 8. Water meter of cold water (HVS). 9. Water pressure reducer (you can not use it in an apartment, it is a must in a private house). 10. Coarse filter. 11. Shut-off valve. 12. Hot and cold water supply.
Installation work
Then proceed directly to the installation of a new system - the work is carried out in several stages:
- They take measurements, put marks on the pipes and cut off fragments of the established length with ratchet scissors (if the products are made of PVC).
- Clean the ends of dirt.
- With the help of a nozzle on a soldering iron, a fitting is put on, on the other hand, a pipe is adjusted.
- The connection is heated - the temperature and time are adjusted depending on the diameter and material of the pipe.
- Pull out the pipe with the fitting and connect with a confident movement. The other elements of the system are assembled in the same way.
After all the work is done, you need to wait a few minutes and turn on the tap to fill the entire system with water. It is required to carefully inspect each area, especially the connections, for leaks. If necessary, carry out a correction, change the fittings.
