The door of the washing machine consists of several elements, each of which can fail for various reasons. For example, the latch has broken or the glass has broken through, or the device that blocks the hatch does not work. Repairing the washing machine door in different situations is described step by step in this article.
The content of the article
- How to open a broken lock
- How to disassemble the door
- If the lock is broken
- Latch repair
How to open a broken lock
Replacing a washing machine door starts with unlocking the lock to get out the laundry and then proceed with the repair. Even if the handle breaks off, you can do it with improvised means, for example, using a spoon. You need to act like this:
- Choose a spoon of the desired length and width, since the blocker in different models is located closer or farther.
- See the middle part of the hatch.
- Take a spoon and insert the handle into the gap between the body panel and the door.
- Gently move to the sides and feel for the desired part.
- After that, you can press on the spoon, and the door will open.
Doing this the first time usually does not work. Therefore, it is recommended to move the spoon vertically, since the blocker may be slightly higher or lower.
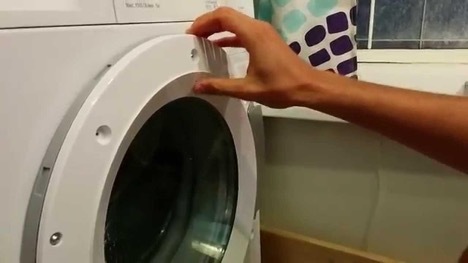
If the washing machine door is broken, you can also open it using the emergency lever, which can be found below. It is usually installed next to the drain filter. However, not all models have this device, so you have to act manually.
How to disassemble the door
After the hatch is open and the clothes are removed, repair of the washing machine door begins. To do this, they act like this:
- Disconnect the plug from the socket.
- Close the cold water tap.
- Unscrew the fixing bolts of the hinge, after which the fastening of the door of the washing machine is removed.
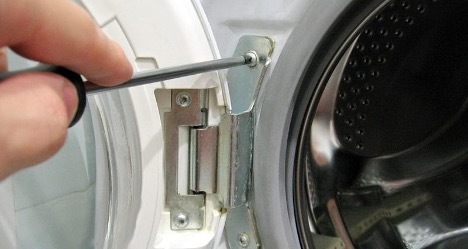
- Remove the door and place it on a flat surface.
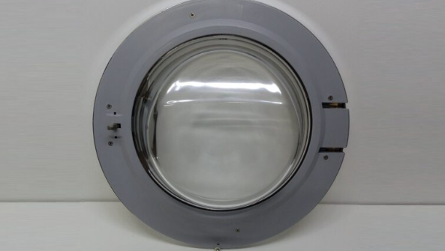
- Unscrew the screws that go along the inner contour. They are very small - you need to prepare a bag or a small container in advance.
- Now you need to remove the glass by opening the latches.
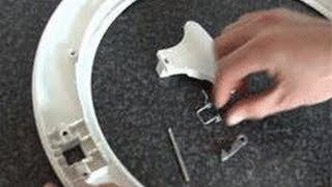
- Inside you can find a metal rod. It is removed and all parts of the lock are taken out - it is necessary to disassemble the plastic, remove the spring with the latch and the connecting element.
After that, you need to purchase new parts and put them in place of the old ones. It is important to understand how to disassemble the washing machine door and repair it correctly. Even if one element is broken, everything should be replaced, because the rest may not fit the new part. To install a new handle, mount new parts:
- First install the spring.
- Then install the latch, holding it with a screwdriver.
- They put a pin, but not yet completely.
- Put a new plastic handle on the latch.
- Now you can push the pin all the way.
It should be understood that each model has its own characteristics. For example, instructions on how to disassemble the door of an Electrolux washing machine may differ slightly from other devices. Although in general it is exactly the same - the basic steps are the same.
If the lock is broken
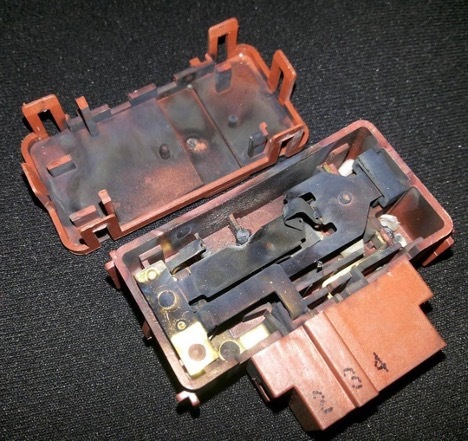
This is an important element, which is called the hatch blocking device (abbreviated as UBL). It may be damaged due to careless handling or worn out due to long-term use. If the door of the washing machine is broken, it is often necessary to repair the blocker.
You can also do this yourself, for this you only need a set of screwdrivers. The sequence of actions is as follows:
- The clamp is pry off with a slotted screwdriver and removed.
- They remove a fragment of the rubber cuff, which is located in the part where the lock is attached.
- Next, unscrew the 2 screws that secure the locking mechanism.
- Now you need to figure out how to remove the door from the washing machine. The device is removed manually and the chip is pulled together.
- Put a new blocker, fasten the screws.
- Put on the cuff and put back the clamp.
Latch repair
The question of how to remove the washing machine door may not be raised if the problem is only with the latch. You can determine this cause by the absence of a click at the moment when the hatch closes. Also, notches appear on the lever that enters the hole - it is they that interfere with normal closing.
During the repair, they act like this:
- Unscrew the fasteners, remove the door, as described above.
- Remove notches with a file.
- Graphite-based lubricant is applied so as not to spoil clothes.
- Then put the door back in place.
As you can see from this review, replacing the washing machine door is quite simple, it does not require special tools or skills. They prepare a set of screwdrivers, as well as a small container for self-tapping screws, and remove each element in stages, after which they install new spare parts and check how the blocker works.


