Puttying window slopes is a mandatory type of finishing work before further processing, such as painting. It is carried out in several stages - first the surface is prepared and the solution is kneaded, after which it is leveled with drywall, puttied and cleaned with sandpaper. A detailed description of each step can be found in this article.
The content of the article
- Selection of tools and materials
- Preparatory work
-
Step-by-step instruction
- alignment
- Puttying
- Sanding and painting
Selection of tools and materials
Puttying slopes begins with the preparation of the required tools and improvised means. It is also important to choose the right composition that must withstand cool temperatures and high humidity, because it is always much colder in the window sill area than in the room itself.
The easiest way is to use cement putty. One can also consider a general purpose polymer blend. It contains organic polymers, is not afraid of moisture and cold, but is more expensive even compared to the cement composition.
Considering how to putty slopes, you also need to prepare a set of spatulas and other tools:
- roller;
- wide brush;
- building level;
- drill with mixer;
- scissors cutting metal;
- grater;
- bucket;
- rule;
- aluminum corners;
- sandpaper;
- masking tape.

Puttying slopes is carried out using a cement or organic composition. Moreover, it is better to use both the starting and finishing composition - then the result will be of high quality. Along with the putty itself, you will need the following materials:
- water-based paint;
- primer with deep penetration properties;
- water.
Preparatory work
Instructions on how to putty slopes on windows begin with preparatory work and mixing the mortar. First, the surface is thoroughly cleaned of dirt, after which the glass and frames are pasted over so that they remain clean. In addition, it is important to remove the old finish, clean it from residues.
Next, you need to knead the putty - the sequence of actions is as follows:
- First, water is always added to the container, and not the full volume, but approximately 75%, i.e. three quarters.
- Then gradually add the mixture in the amounts indicated in the instructions.
- Then the remaining quarter of the water is added in a thin stream. This is the basic rule on how to putty the slopes on the windows with your own hands.
- After that, they put a mixer on the drill and knead for several minutes until the solution becomes like thick sour cream.
- He is allowed to stand for literally 5 minutes and mixed again, after which they begin to work.
It is important to understand that the puttying of slopes for painting is carried out immediately after the preparation of the mixture. It should not stand for a long time - it is better to use a fresh composition. That is why it is prepared in small volumes so that there is no surplus. In extreme cases, the bucket can be left in a warm, dry room, but not more than two days.
Step-by-step instruction
When the putty for the slopes of the windows is prepared, you can start finishing. First, the surface is leveled with drywall sheets, after which the composition is applied, sanded and proceed to the last stage - painting.
alignment
The alignment guide is as follows:
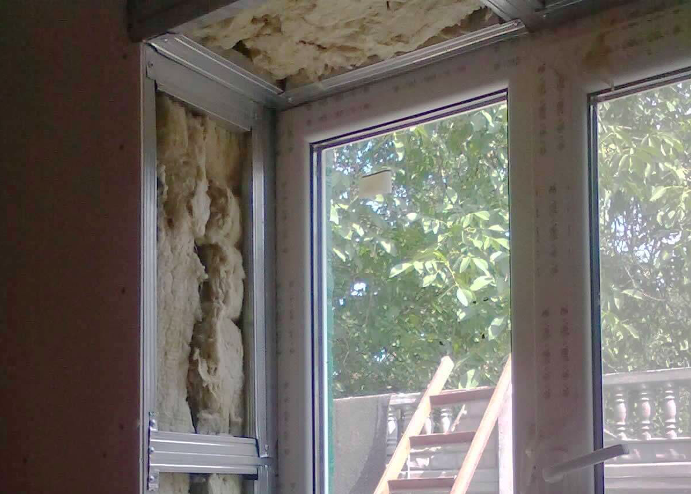
- A profile in the shape of the letter L is attached to the window frame with self-tapping screws.
- The surface of the drywall sheet is set according to the level.
- You can pre-plant a perforated corner on the glue and use it as a guide. On this corner make a fit plasterboard sheet.
- Insulation is laid in the space between the sheet and the window itself, usually mineral wool. On top of it is drywall, and then putty for window slopes.

Puttying
The next stage of work is the actual putty for the slopes of the windows inside. The main steps are:
- The slopes are sealed with starting putty, the composition is applied with a layer of up to 7 mm to hide flaws and defects.
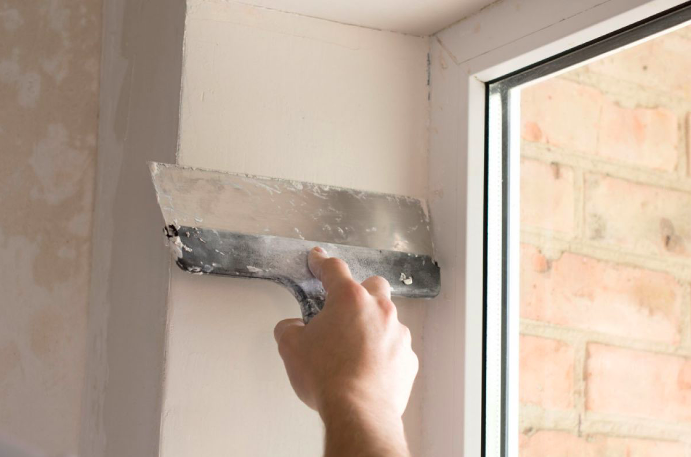
- The mixture is collected with any spatula and then placed on a tool with a wide working surface.
- As soon as the composition is applied, it is evenly distributed and necessarily leveled by pressing the spatula blade against the drywall.
- Each time the spatula is moved towards itself with translational movements.
- If the defects are too deep, do-it-yourself puttying of window slopes is carried out in two layers, and the next one is laid after the previous one has dried. In such cases, it is advisable to use a reinforcing mesh, which must be pressed well in order to drown in the thickness of the mixture.
- At the last stage, the finishing mixture is laid, and it can be distributed even on an incompletely dried layer. Finishing is carried out with a set of two spatulas - large and medium. Moreover, the blade should be slightly wider than the slope.

Sanding and painting
The final stage of the instruction on how to putty window slopes is grinding and actually painting. For rubbing, use sandpaper attached to the grater. Especially carefully you need to walk on a bumpy surface with waves, the remains of the solution and adhering dirt. Press with medium force so as not to leave marks on the freshly treated surface.
Then the slopes can be painted. To do this, use a water-based or water-dispersed composition. It is better to cover the walls in several layers, for example, in 3. Moreover, they first wait until the old layer dries, and then make a new one. This stage, like other types of work, can also be done independently.


