The housekeeper differs from the classic Russian stove in its smaller size. Its width does not exceed 1 m with a standard height of 2-2.5 m. Due to this, such a structure can be placed in almost any room. Step-by-step instructions for assembling an economy oven, drawings and masonry diagrams can be found in the material presented.
The content of the article
- Furnace device and drawings
- What you need to work
- brick oven
- metal oven
Furnace device and drawings
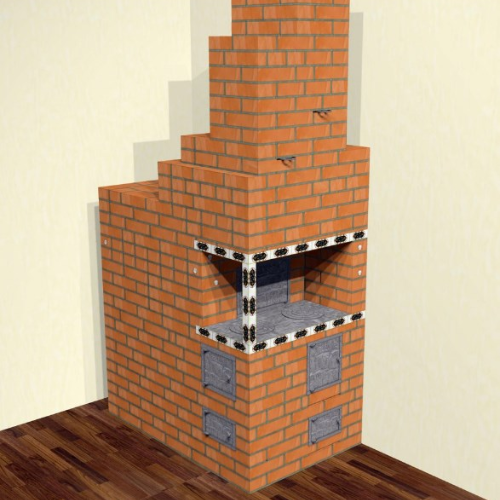
As a rule, a do-it-yourself brick oven is laid out. This is a small structure, having a height of 2-2.5 m, a width of no more than 1. It consists of several elements:
- Base with 2 combustion chambers. Each has its own container for falling ash, a blower and a grate.
- The first row is brickwork with 4 inspection grooves necessary for cleaning the chimney of the firebox.
- Base with hob - located above the fireboxes.
- Auxiliary combustion chamber - for heating in the warm season, as well as for cooking.
The ordering of the Russian oven-housekeeper is shown in the diagram.
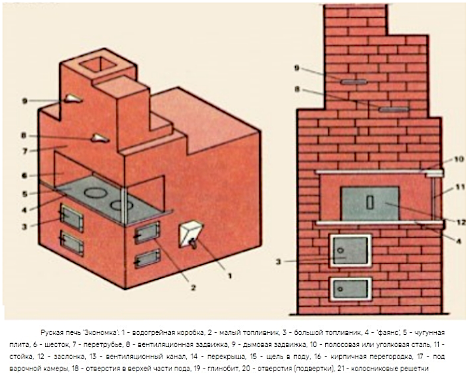
View from different sides.
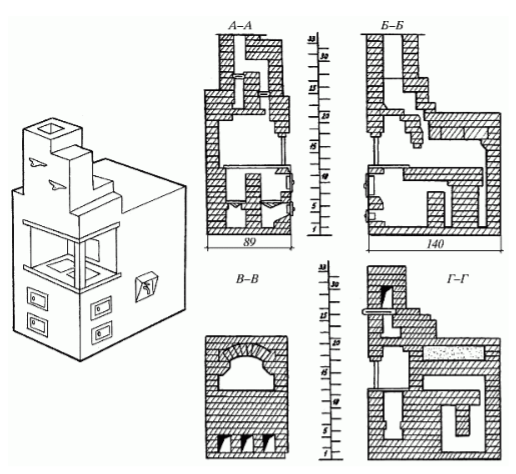
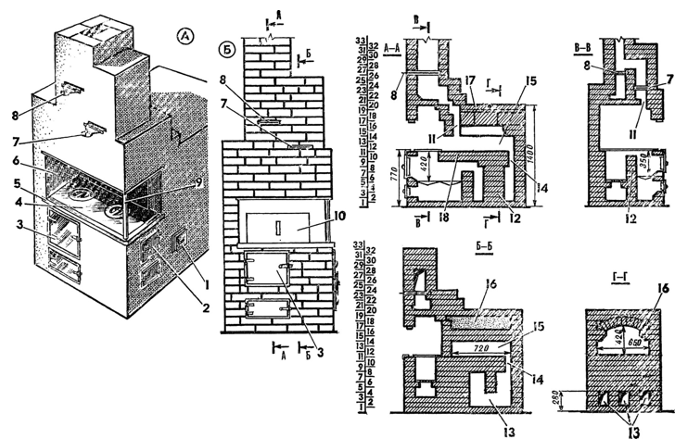
You can use this scheme (A - general view, B - front side).
What you need to work
Do-it-yourself housekeeper stove is made of brick and has the following dimensions:
- length 140 cm;
- width 89 cm;
- height 225 cm.
The following tools and materials are used for work:
- Master OK;
- construction roulette;
- ceramic bricks - 1300 pieces;
- container for kneading;
- clay 2.5 tons;
- sand 2 tons;
- file;
- building level;
- steel corner;
- grate;
- door;
- chimney damper;
- hammer;
- pick.
brick oven
Do-it-yourself wood-fired housekeeper is placed in stages, the main steps are shown in the diagram.
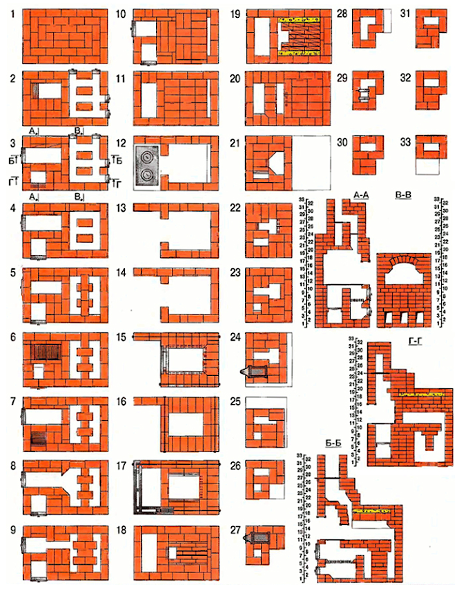
The procedure is as follows:
- Knead a solution of sand with clay, add a little water to get the consistency of thick sour cream. Lay out the first row according to the scheme.
- The second row is laid taking into account the arrangement of the channels of the ash pans, as well as the blower.
- An asbestos cord is placed on the door frame from the blower and a new row is placed on top of it.
- On the other hand, they put a door for a compartment with a blower.
- Now you need to put the grates. To do this, pre-cut the edges of each brick on the inner row.
- When installing the grate, a minimum gap of 4-6 mm is left and an asbestos cord is placed there.
- Next, bricks are laid according to the scheme up to 10 rows. Here you need to install the hob.
- During the laying of the 11th row, a gap is also left and an asbestos cord is laid.
- Cut off each brick, forming an acute angle. Form the vault of the cooking compartment. Ties are mounted on the sides to fasten the structure.
- Similarly, screeds are placed at the mouth of the stove.
- At the last stage, a transitional "corridor" is formed, which goes between 2 fireboxes.
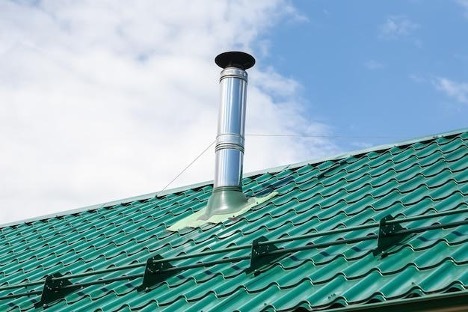
- It remains to make a chimney with an air damper. For installation, it is optimal to use a sandwich pipe.
Next, you need to dry the structure, leaving it for several days. You can speed up the process by putting no more than 2 kg of small firewood and burning it completely. It is recommended to repeat several such cycles once a day for 4-5 days. During the first fires, strong smoke will go out. This is normal as a lot of water is escaping from the bricks. Next, you need to carefully examine the masonry, if necessary, eliminate the defect, after which you can start kindling.
metal oven
You can also assemble a housekeeper made of metal with your own hands. This is much faster, although this design is less durable and more like a camping option. For work, you will need steel sheets with a thickness of 4 mm or more, as well as other materials and tools:
- steel corners;
- steel pipes (diameter 1.5-2 cm);
- instead of pipes, you can take fittings of about the same diameter (grate bars are made from it);
- arc welding with electrodes 3;
- grinder and cutting wheel;
- roulette construction;
- marker for marks;
- hammer.
The algorithm is this:
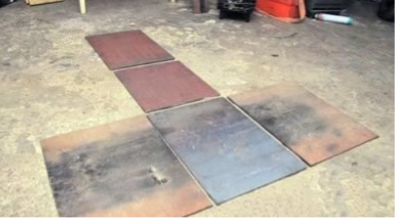
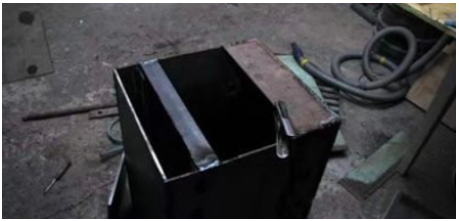
- Draw up a drawing, transfer dimensions to steel sheets, make marks with a marker or pencil. Cut the sheets with a grinder, get 5 rectangular fragments.
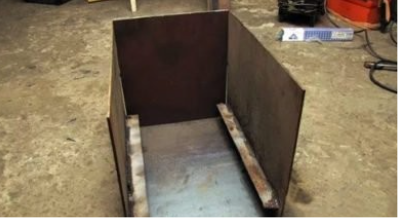
- Weld the bottom to 2 side panels. During work, you need to use a square so that the sides are connected strictly perpendicular. The second side is fixed in the same way.
- Weld the back panel by inserting it between the sidewalls. Make markings to determine the location of the ash pan, furnace and grate. The latter are installed at a height of 10-15 cm, for which the corners are welded in advance so that the shelf “looks” down.
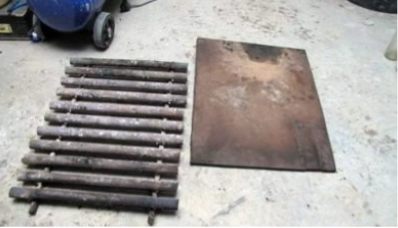
- Now you need to make grates from fittings or pipe scraps. They are welded together so that the interval between adjacent planks is 4-5 cm.
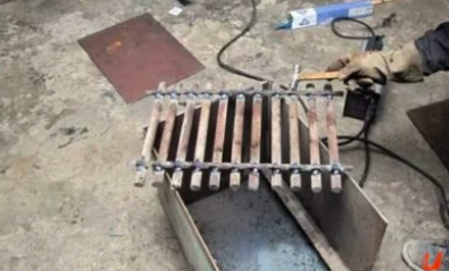
- The grille is not welded to the corners, since it should be easily removed at any time for cleaning.
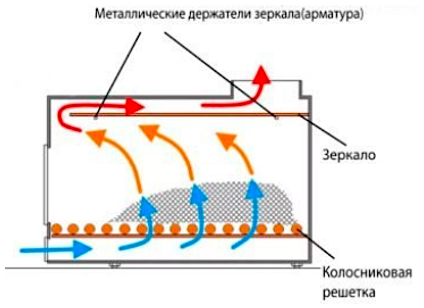
- Weld 2 pieces of reinforcement to put a reflector on top of the stove. This element is required to separate the space of the firebox and the chimney, it can also be removed. The length of the reflector should correspond to 10/11 of the length of the entire structure - the “extra” part is needed in order to leave a gap through which smoke will escape.
- Next, measure the diameter of the chimney and cut a corresponding hole in the surface of the cover. After that, it is welded to the stove. Form 2 jumpers - wide and narrow. The first is mounted in the upper part, the second is flush with the grate in order to separate the doors of the ash pan and the combustion chamber.
- They form the firebox door - in practice it should correspond to the width of the stove. The ash pan door can be made narrower.
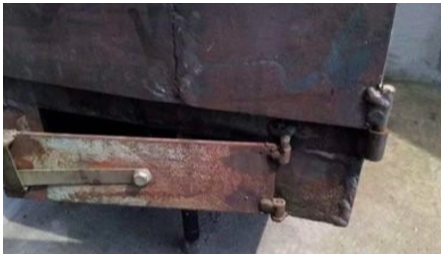
- Door handles are made, for example, from scraps or fittings. Install latches.
- Supports are also made from pieces of metal pipes. Nuts are welded to their ends and a bolt is screwed in.
- It remains to make a chimney from a pipe with a diameter of 15 to 20 cm. It is led through a pre-made hole in the thickness of the wall, forming 45° angles along the way.
Next, you need to carefully examine the design and perform a test firebox. The chamber must be completely sealed - you should make sure that the smoke goes only into the chimney. If necessary, patches can be welded from scraps of sheets of the same metal.