In conditions of lack of professional equipment, the presence of a surface planer can be an excellent solution for many tasks in carpentry or repair work. This material describes how to create a thickness planer from an electric planer with your own hands, while maintaining the quality and accuracy of processing.
The content of the article
- Preparation of materials and tools
- Making the base
- Installation and fastening of the electric planer
- Assembling a homemade jointing machine
- Calibration and Testing
- Errors when creating a thickness planer from an electric planer
- Conclusion
Preparation of materials and tools
Before you start creating a surface planer, you need to prepare all the necessary materials and tools.
List of materials:
- Electric planer.
- Wooden plate for the base.
- Pulleys and belts.
- Rails and carriages.
- Screws and nuts.
List of tools:
- drill;
- saw;
- screwdrivers;
- hammer;
- measuring instruments (ruler, level).
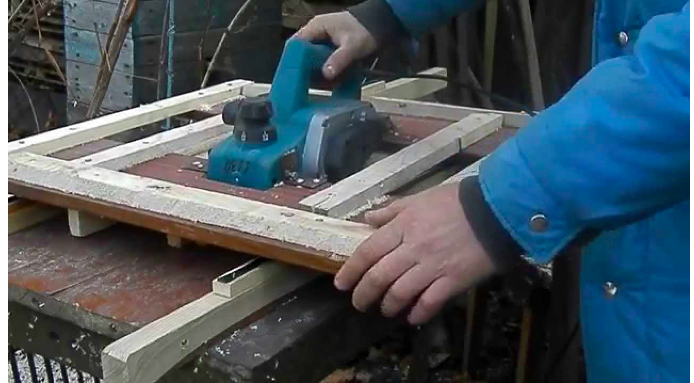
Making the base
Making the base is the first stage in creating a thickness planer from an electric planer. It is best to use a wooden slab as a material for the base. It must be stable and thick enough to support the load. Carefully drill holes for attaching the electric plane and other elements.
Installation and fastening of the electric planer
Once the base is ready, you can begin installing the electric planer. Here special attention should be paid to fastening. A poorly secured power planer can reduce the quality of work or even lead to an accident. Use strong screws and nuts for fastening.
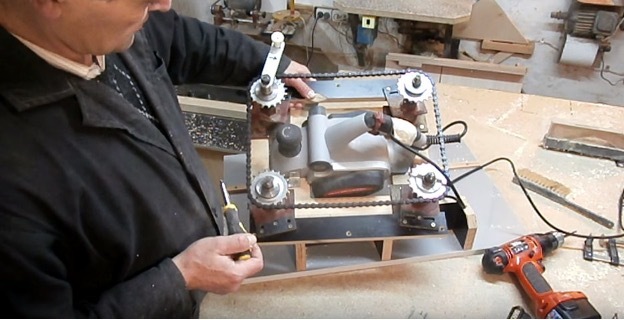
Assembling a homemade jointing machine
The next step is to assemble the thicknessing machine itself from an electric planer with your own hands. Install pulleys and belts to transmit motion, as well as rails and carriages to smoothly move the material being processed. It is important not to forget about the cooling and chip removal system.
Calibration and Testing
The next step is calibration and testing. Only after these steps can you say that your homemade jointing machine is ready for work. Perform several test runs to ensure the accuracy and efficiency of the machine.
Errors when creating a thickness planer from an electric planer
One of the most critical aspects in creating a thickness planer from an electric planer is underestimating the importance of quality components and materials. The use of materials that are not strong enough or do not meet technical requirements can lead to rapid wear of the device, overheating, and even failure.
The second common mistake is lack of preparation and planning. The lack of a clear plan and sequence of actions can significantly complicate the process of assembling a homemade jointing machine, and, as a result, lead to loss of time and resources. This also increases the risk that the final product will not meet its stated specifications and requirements.
The third mistake that should not be made is ignoring security measures. Working with power tools and moving parts always poses some risks. Inadequate fastening of components, lack of safety mechanisms or incorrect installation of electrical wiring can lead to injury and even catastrophic consequences. This is especially true when creating a thickness planer from an electric planer with your own hands, where strict compliance with all technical and safety standards is necessary.
Conclusion
Making a surface planer from a jointer or electric planer with your own hands is a task that requires careful preparation and care during assembly. But in the end, you will get a powerful tool that is not inferior in quality to factory models. Thus, this project is not only economically profitable, but also provides an excellent opportunity for the implementation of engineering skills.