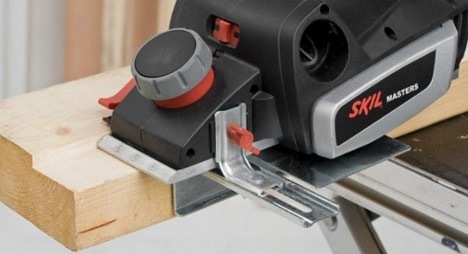
Quartering is the process of creating a depression or notch in a board to reduce its thickness in a specific area. This is necessary to form a connection between boards or for other structural purposes. Selecting a quarter with an electric planer involves using an electric tool to automate this process, which greatly simplifies and speeds up the work.

The content of the article
- Basic tools and materials
- How are boards planed and how does this relate to quarter sampling?
- How to make a sample: step-by-step instructions
- Setting up an electric planer
- Bevel the board to finish
Basic tools and materials
To carry out sampling, it is necessary to prepare the following tools and materials:
- electric plane;
- ruler or level;
- pencil for marks;
- clamps for fixing the board.
How are boards planed and how does this relate to quarter sampling?
The main tool for sampling is, of course, an electric planer. How boards are planed in most cases is determined by this device, since it allows you to quickly and accurately process wooden surfaces. If you use an electric planer correctly, you can achieve excellent results.
How to make a sample: step-by-step instructions
Before starting work, it is necessary to take measurements and put marks on the board to determine where the quarter will be sampled. It is important to use a ruler or level to accurately mark the boundaries.
Preparatory work:
- measure the board and determine the location for sampling;
- use a ruler or level to accurately mark the boundaries of the sample on the board;
- make marks with a pencil;
- secure the board with clamps.
Setting up an electric planer:
- Set the required cutting depth on the electric planer.
- Rotate the adjustment dial or use another adjustment mechanism on your electric planer to set the desired depth.
- Check the settings on a piece of board.
- Before you begin, check the depth of cut on a section of board that will not be used in the structure.
Sampling process:
- Turn on the electric planer and begin the process. Follow the marks you previously made on the board.
- Ensure even material removal by moving the power planer from one edge of the board to the other.
- After each pass, check the cutting depth with a ruler or caliper to ensure it is correct.
- Repeat the process as necessary to achieve the desired sampling depth.
Once the cut is complete, use a power planer or chisel to chamfer the board. This is done to avoid sharp edges and ensure a better, smoother connection.
Following all these steps will ensure that the sampling is carried out professionally and ensures the high quality of your work.

Setting up an electric planer
Before starting work, set the electric planer to the required cutting depth. This is done by adjusting the cutting blade. Check the depth on a piece of board that will not be used later.
Sampling process:
- Secure the board with clamps.
- Turn on the power planer and begin the process by following the marks.
- Work your way gradually from one edge to the other, ensuring even removal of material.
Bevel the board to finish
After finishing the cut, it is recommended to chamfer the board to avoid sharp edges and make the joint smoother. This can be done with the same electric planer or manually using a chisel.
Compliance with all these steps and recommendations will allow you to professionally sample the quarter and ensure the durability and quality of your structure.


