For a long time, the popularity of shower cabins has surpassed the demand for traditional bathtubs. This is not surprising. These structures significantly free up useful space in the room, and the water consumption in them is less, which affects financial well-being. But since this plumbing costs more than a traditional bath, many owners are trying to ease their financial burden and connect them to the water supply and sewerage system on their own.
This procedure is not particularly complicated, does not require special tools, but in order to prevent the risk of errors, you should know how to do it correctly. It is good that all the cabins are the same in their design. These are two main parts: a pallet and a frame with a door. Another option is a completely sealed device.
Types of shower cabins and features of their installation
The content of the article
- Types of shower cabins and features of their installation
- Preparing for installation and connection
-
DIY installation technology
- We collect the pallet
- Communications
- Walls, doors and roof
- We put the doors
- We connect to the plumbing system
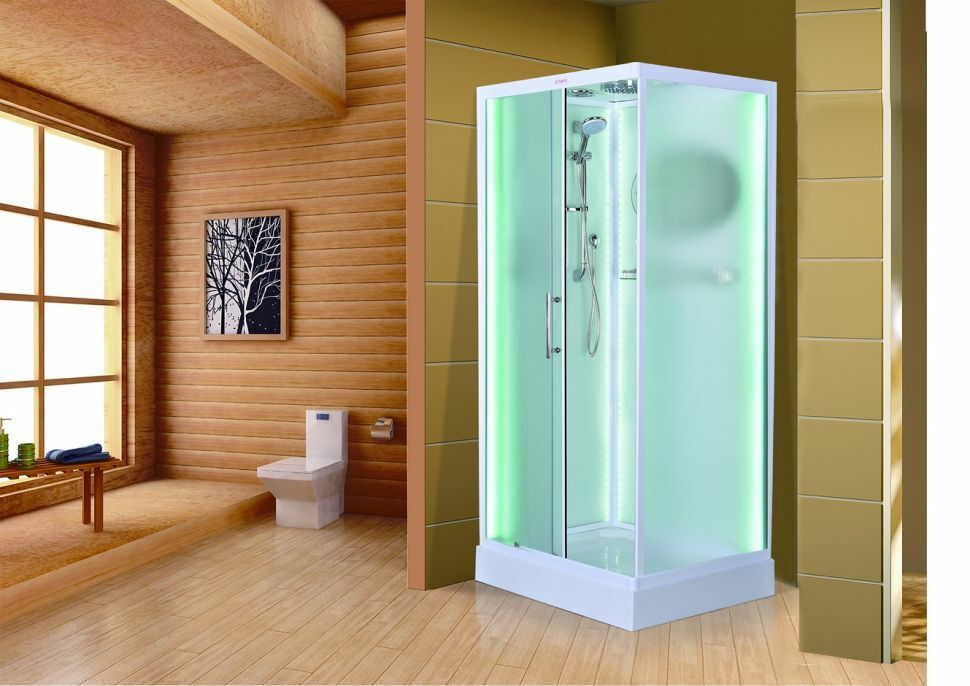
Small box - this is the appearance of the shower cabin. They are completed with a pallet, enclosing elements with doors and water supply devices (taps, watering can and nozzles).
There are varieties equipped with a radio, a steam generator and aromatherapy devices.
There are two types of booths:
- Open type - have no ceiling, only side rails.
- Closed - the space is completely closed.
Sizes may vary - compact models have an aspect ratio of 70 by 70 centimeters. Large structures reach dimensions of 2 by 2 meters; instead of a pallet, they have an acrylic bathtub.
Dimensions do not affect the ways of connecting to water supply and sewerage. All connection diagrams, technologies and tools are the same in all versions.
Questions may arise when connecting models without pallet. In this case, it is necessary to equip water drainage and drainage in the floor.
The easiest way is to install a standard model with a pallet and panel. The task will be - to mount the siphon and supply hot and cold water.
Attention! Piping must be routed prior to installation.
Some difficulties arise when installing devices that do not have a rear partition and shower panel. The walls of the room will serve as a partition and you will need to install a mixer with a shower head.
To connect such a model, you will need to supply all communications, install a mixer and decorate everything with tiles.
Preparing for installation and connection
Before connecting a shower cabin, no matter what type, it is necessary near the place where it will be installed this design, directly in the wall and floor to place taps for water supply and sewerage systems. If an open-type device is installed, then a water outlet for the mixer must be installed in the wall.
A sewer pipe with a cross section of 50 millimeters is placed at a certain distance from the floor level and connected to the central riser. The hydrobox is equipped with inlets for joining with a water conduit; water flows from water sockets through plumbing hoses. The installed cabin must match in height with the sewer drain - if the pallet has short legs, they are built up or put on a pedestal.
You need to prepare the following:
- siphon from the kit;
- water supply hoses;
- polymer hoses for water distribution inside the cab;
- screwdriver, pliers;
- spanners;
- sealant;
- level;
- puncher.
DIY installation technology
It is customary to start assembling the cab structure from the pallet. You can install it with or without a frame.
We collect the pallet
The material for the manufacture of the pallet frame is metal. The main thing in the frame is the high-quality fastening of the elements. The frame is a frame structure made of crosswise beams.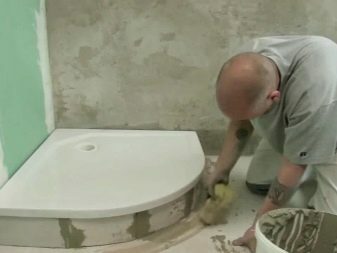
We act according to the following plan:
- We twist the studs inside the holes of the pallet.
- We screw the nuts onto the studs. We fasten one from below, and the second for support.
- We put on the frame support on the studs.
- We put the central leg and fix it.
- We fix the fixing beams.
- We put brackets as screen supports.
- We put the pallet in place.
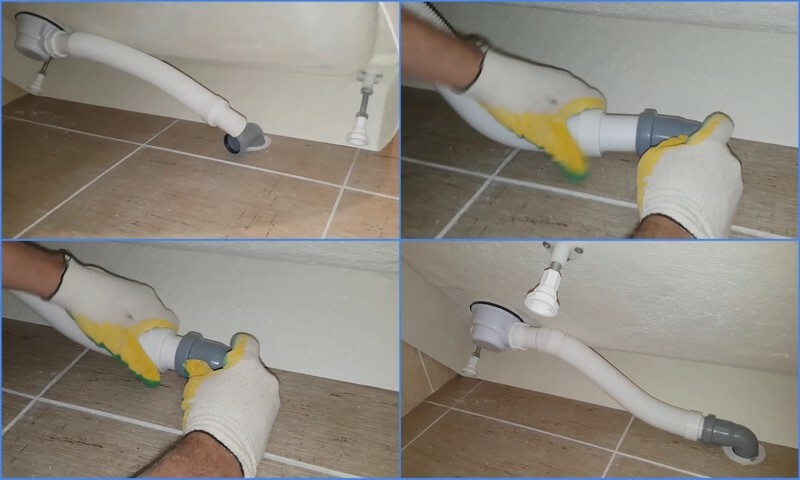
When installing the pallet, it is important to properly drain. We mount the siphon. An important detail is checking the joints for tightness. If there are leaks, they must be sealed with a sealant.
Small pallets do not require a frame. The main thing here is to put the siphon correctly. Disconnect the hose from the clamp. We connect a siphon to the pallet - before that, we treat the joints with a sealant. We are waiting for the sealant to harden. Then put the hose and clamp back.
After fixing, we check the tightness. Having filled in water, we look to see if the smudges are visible. This is very important, it is better to fix everything at this stage than to disassemble the entire structure if something goes wrong.
Communications
An important point in the installation is the connection to the sewerage system.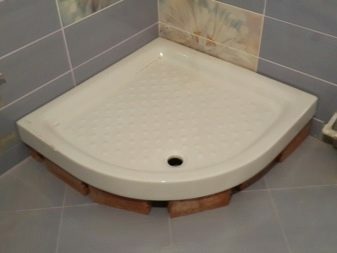
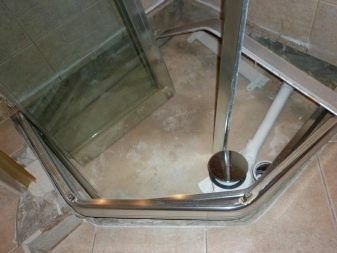
We act according to the following scenario:
- There is a film along the contour of the drain hole, it should be removed.
- We will replace the installed rubber gasket with silicone.
- Install the siphon.
- Lubricate the threaded joint and the lower part with sealant.
- We bring a siphon to the sewer system. We process the joints with silicone.
Walls, doors and roof
Despite the fact that this is the easiest stage of installation, it will be better to enlist the help of a partner. This will greatly simplify the entire procedure. When installing the structure, follow the manufacturer's advice, because the devices, although they are similar to each other, but each cabin has its own differences. The walls are fixed with bolts.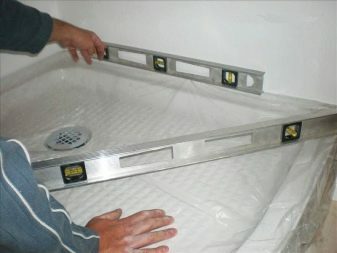
Sequence of work:
- Remove the film from the top of the pallet, leaving it only at the bottom.
- Moving the pallet away from the wall, we put the wall.
- We connect the holes of the pallet with the corner and fix. The main thing is not to overdo it. You need to screw in the self-tapping screws without overtightening.
- Mark the corners with holes with a marker.
- Remove the partition and apply the sealant.
- We put the partition back, remove the excess sealant.
- We put a pallet with a partition against the wall, try on the central part.
- Apply sealant to the joints of the sidewalls.
- We connect the walls and the central part.
- We fasten the rest of the walls, like the first.
- We treat the profile with a sealant and put partitions.
- We put the profile on top and bottom. We process the lower one with a sealant.
We collect the roof:
- We unscrew the ventilation grilles, remove the film.
- We process the watering can with silicone. This will make the connection tighter.
- We put the ceiling. We pull it from the bottom with self-tapping screws.
- We fasten the hoses to the rails with clips.
- Focusing on the color coding, we connect the wiring.
- We connect the device, check the water and electricity supply.
- We seal the central part and along the lower perimeter.
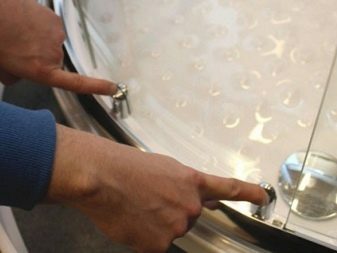
We put the doors
Completing the assembly, we install the doors. This usually does not raise questions.
We act in this way:
- using self-tapping screws, we fix the limiters;
- we put handles on the door;
- we attach moldings with magnets to the door, put the rollers with the wheels outward;
- we put the door on the upper rollers.
This completes the installation. Do not forget to check how smoothly the doors move and how tightly they close.
We connect to the plumbing system
If there is a high-quality wiring of water sockets in the wall, then bringing water to the shower is not a super difficult task. Both hot and cold water is supplied through the back panel, which does not completely cover the space. In an open place on the wall, water sockets are mounted.
How they will be located does not matter. They are not visible behind the wall of the booth. Owners of their own homes often seal up the piping from the heaters inside the wall so that the booth fits freely against the wall. The shower room is connected to the water supply network in a few steps:
- To make it easier to connect the hoses to the water sockets, angular adapters are inserted into them. To make the connection tight and tight, a fumka is screwed onto the thread.
- Liners are screwed onto the adapters, connections of the "American" type do not require sealing, there is a rubber gasket.
- Connect the hoses to the fittings. Inside, we dilute the water with flexible pipes that are supplied with the device, fix them with clamps. According to the wiring diagram, we supply electricity - the control unit is located on the rear side of the cab.
Important! The booth must certainly be grounded, it must work through an RCD machine, the wire cross-section must be at least 2.5 square millimeters.
Having studied all the technology of assembling a shower, the features of connecting it to the water supply system, you can independently carry out the installation and connection.
Subscribe to our Social Networks


