Any product sooner or later gets old and wears out. For example, smudges, rust deposits may appear on the bathtub, it ceases to be glossy, and roughness is felt at hand. The pleasure of taking a bath in such... is below average. Need to change? But - these are considerable costs. When replacing a bath, you will have to repair the room itself, and this is an additional investment of money. There is a way out - to restore your favorite bath on your own. There is a large selection of various products in stores that will help you successfully cope with this task.
Ways to restore old bathtubs at home
The content of the article
- Ways to restore old bathtubs at home
- Preparatory work
- Surface restoration with enamel
- How to update an old bathtub with your own hands using acrylic
- Correction of small defects in the bath
Time spares no one and nothing. Even the bathtub, which seemed to be still shining with whiteness, was already covered with smudges and raids of rust. But instead of changing it, which is very expensive, it is better to restore the old coating.
The most common restoration methods include the following:
- enamel coating;
- filling with acrylic.
Each of these methods has its own subtleties.
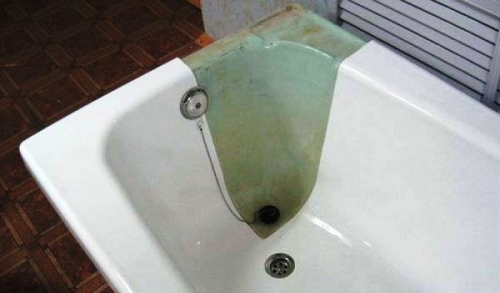
Coating a surface with enamel is one of the most inexpensive restoration methods. Enamel qualitatively fills in all irregularities and roughness, hides rust and yellow spots, removes shallow scratches. If the damage is significant, then the enamel is no longer suitable. It will not be able to repair chips, peeling coating, as well as deep cracks.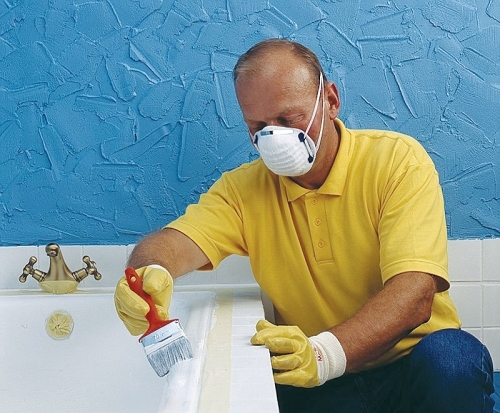
The positive properties of enamel:
- low price;
- it does not reduce the volume of the bath;
- during operation, there is no need to remove the siphon and the tile covering on the sides.
Negative properties of enamel:
- working with it requires accuracy, otherwise smudges and brush marks cannot be avoided;
- dries for a long time;
- does not cope with serious defects;
- the warranty period is no more than five years.
Liquid acrylic does not require a brush. It is simply poured onto the walls and drains freely.
Positive properties of acrylic:
- the coating does not turn yellow;
- not afraid of chemicals and corrosion;
- suitable for different baths;
- does not form smudges;
- does not require removing the bath;
- air bubbles do not appear on the surface;
- serves up to fifteen years;
- not afraid of chips and damage;
- keeps warm well.
Negative properties of acrylic:
- it is necessary to remove the drain before work;
- if the bowl is uneven, then acrylic will repeat all defects;
- afraid of high temperatures;
- dries for a long time.
Reference! If the acrylic is of poor quality and all technology is not followed during work, bubbles may appear, which will lead to deformation.
Preparatory work
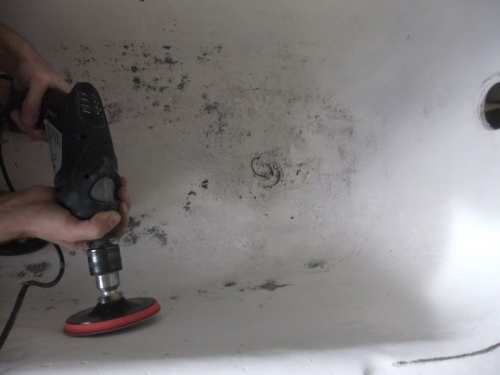
Before starting restoration work, you need to remove all the old coating:
- Cover the floor under the bathroom and around it with a film and fix it with tape. In this way, we save ourselves the extra work of cleaning the floor covering.
- We moisten the bath and fill in the powder containing the abrasive.
- Remove the coating using sandpaper or a grinder.
- We wash off all the dirt.
- We wipe the entire inner part of the bath with oxalic acid. To neutralize it, we treat it with soda.
- We fill the bath with hot water. We are waiting for ten minutes.
- After that we drain the water and wipe the surface. To dry it faster, you can dry it with a hairdryer.
- Places of chips and cracks are covered with putty. As soon as it hardens, level it with sandpaper.
- We remove dust with a vacuum cleaner, wipe the entire surface with a damp cloth and wipe it with a solvent.
- We disconnect the shower hose, close the taps with foil.
- We remove the siphon and drain.
- Install a container for enamel or acrylic drainage under the drain hole.
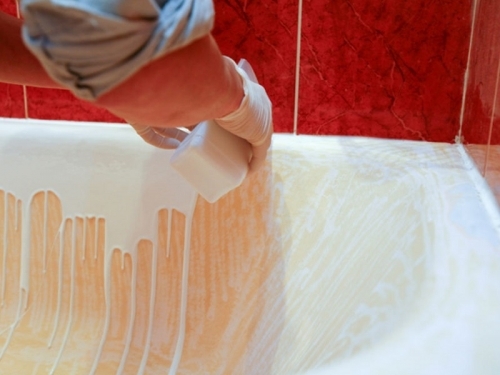
Surface restoration with enamel
After all traces of fat have been removed from the surface of the bath, you can proceed with the restoration. The whole procedure is divided into several stages:
- Following the manufacturer's recommendations, we make a mixture of hardener and base to obtain a homogeneous composition.
- Checking the brush. All bristles should be tight. Previously, it must be kept in water for a day.
- Dip the brush halfway into the enamel. Enamel should be applied from top to bottom.
- Apply the first layer. This will be the primer. We make it thin. We go first horizontally, then vertically. If smudges appear, smooth them out with a brush.
- We do not leave excess enamel. There should be no puddles.
- Without waiting for the first layer to dry, apply the second.
- We examine the surface. We paint over all the missing places. There is only thirty minutes for fine-tuning. After this time, the enamel will harden and it will no longer be possible to eliminate defects.
In order for the surface to be of high quality and smooth, you will need to process it four times. After five days, you can mount the harness and use the bath.
Attention! All restoration work must be carried out in the summer. There must be good ventilation in the room. Windows have to be opened everywhere. Make sure that neither children nor pets are in the room.
How to update an old bathtub with your own hands using acrylic
Restoring a bathtub with acrylic is very similar to working with enamel. Surface preparation is carried out in the same way as in the previously described case. After that, you need to prepare the material for the coating:
- Add hardener to acrylic and mix thoroughly.
- Wait ten minutes and mix again.
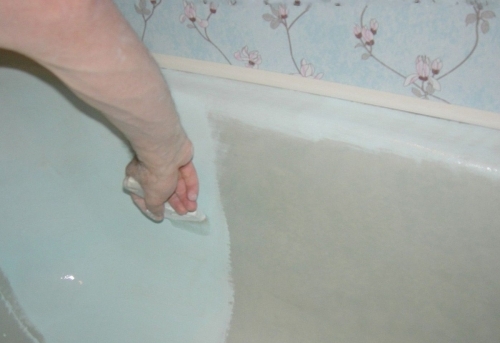
When the entire surface of the bath is prepared for work, you can begin recovery procedures:
- Pour acrylic into a convenient container.
- Start filling from the top edge. When you see that the mixture has reached the middle, slowly start moving on. Add an additional portion of the mixture to the container if required.
- When the entire perimeter of the bath has been processed, repeat all steps from the very beginning, but from the middle.
- If bubbles or streaks appear, remove them with a rubber spatula or brush.
The treated surface does not dry quickly. The time depends on the type of material as well as the temperature in the room.
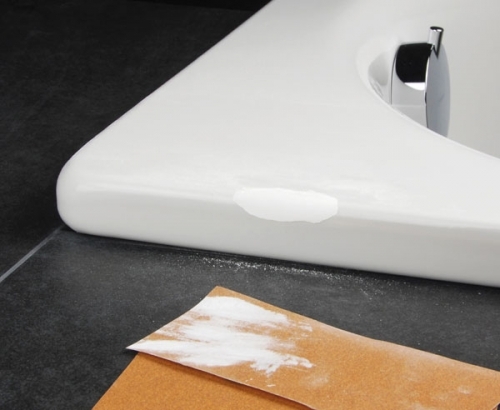
Correction of small defects in the bath
If the bath has minor damage, then there is no need to restore the entire surface. Defects can be removed locally. By following the recommendations, you will deal with this very quickly.
Epoxy is required to seal through holes. After filling the hole with it, apply a reinforcing mixture on top. In this case, you will need to purchase a special repair kit.
Chips, as well as cracks, are eliminated as follows:
- A rust remover is applied to the damaged area, after which it is cleaned with a powder.
- Treated with acetone to get rid of fat.
- Chips are sealed with putty, grinding is carried out.
- Enamel is applied to the damaged area.
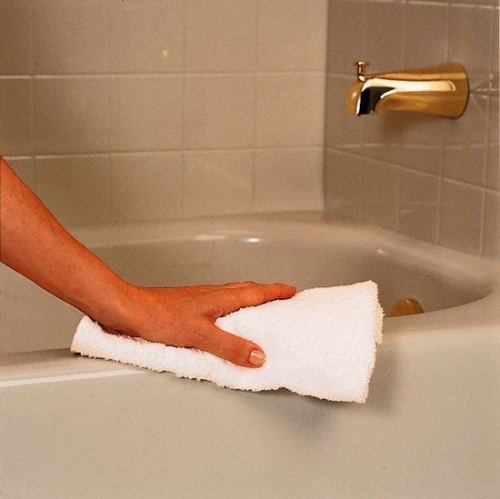
In order for the bath to serve for a long time, and repairs does not become an urgent need, it must be regularly cleaned and treated with care:
- Since enamel and acrylic are sensitive to abrasives, choose a detergent that will gently wash away dirt.
- After the bath has been cleaned, it must be rinsed well with water.
- Do not wash pets in it.
- Make sure that no water drips from the taps. Acrylic absorbs rust very well and will be very difficult to remove. To prevent plaque build-up, always wipe down the tub without leaving a drop of water in it.
Following these simple recommendations, you will prolong the life of the bath for a long time. She will look like new. And then you no longer have to think about how to restore the former whiteness and at the same time spend less money.
Subscribe to our Social Networks


