Have you noticed at what point people think about how to drill a tile? Right. At that moment, when it has already cracked due to inept actions or an illiterately selected tool. Agree that it is better to devote a few minutes to familiarizing yourself with the technology than to spend money, effort and time to purchase a new product. Which, by the way, is quite difficult to find: very often the shades of batches of one manufacturer differ markedly.
There are many instructions and step-by-step algorithms posted on the network. Masters shoot videos, write articles and comments. Someone focuses on the material, while others think the principles of working with the instrument are important. One way or another, a huge number of professionals and amateurs are involved in this process.
However, as practice shows, not all methods posted on the Internet are applicable, not all of them guarantee a positive result. Therefore, we conducted a special study, interviewed the experienced tilers with precision and made the most competent and detailed report. From it you can learn how to make holes in the tiles, and what you need to do this.
The content of the article:
- List of required equipment
- The main stages of work
-
Useful tips for different occasions
- Drilling large holes with a small drill
- About choosing a hole location
- Dowel drilling
- Common Beginner Mistakes
- Conclusions and useful video on the topic
List of required equipment
First of all, you need to prepare a tape measure and a pencil for marking. If there are two or more holes, then, most likely, a level will come in handy.
This is especially important when work is being done to place shelves, cabinets, hangers, heated towel rails, toilet bowls, mirrors.

When marking dark or bright glossy tiles, use a marker instead of a pencil. It's easier for them to draw, and they can see him much better.
As the main tool, a hammer drill with a disabled percussion mechanism, an electric drill or a screwdriver is suitable. The declared rotation speed should be between 300 and 1000 rpm.
The next item is drills. You can give preference to products with a diamond coating, as well as punch and core drills with a tungsten carbide coating. As practice shows, they do an excellent job with all types of tiles.
When drilling holes of large diameter (up to 9 cm), you need to stock up on a "ballerina". This is the name of a rotary drill with adjustable teeth: by fixing the teeth at the desired distance from the center, you can get a hole with the desired radius.

Very often, the glossy surface of the tile provokes the drill to slip. To avoid such incidents, experienced tilers are advised to paste over the drilling area with tape. And apply the markings on top of the scotch tape
A glass of cold water is also useful. It needs to be prepared to cool the drill during operation.
This will be especially true if diamond coated products have been chosen. It is they who demonstrate rapid heating and a significant decrease in cutting properties.
The main stages of work
Drilling can only be made from the face of the tile. Otherwise, there is a high probability of chipping.
Having made the necessary measurements and applying the markings, you can get to work:
- Position the drill exactly perpendicular to the tile surface.
- Slowly, at low speeds, beat off the enamel in the place of drilling.
- Remove the dust that has appeared, make sure that the actions are correct.
- Start drilling at high speeds by regularly cooling the drill in water.
Having drilled the hole completely, you need to change the drill to one that is suitable for the material behind the tiles (wood, brick, concrete).
The diameter of the second drill must completely coincide with the first, not be larger, as in this case the tile may be damaged.
If after the repair there are unnecessary tile samples left, you can first practice on them: adapt to the tool, feel the features of the material, choose the optimal mode and pressure
At the same time, neither when working with the first drill, nor after replacing it with the second, it is impossible to turn on the reverse mode on the tool. This provokes a sharp change in the drilling angle, fraught with the appearance of cracks and chips.
Useful tips for different occasions
Knowing the features of various materials, the rules for drilling holes of different sizes, you can give a lot of useful tips.
This is exactly what builders and tilers do with experience in cutting and drilling tiles. We have collected the most valuable in this section.
Drilling large holes with a small drill
When drilling holes for pipes, sockets, lamps, they usually use a "ballerina" or special crowns. However, both cost money. And making a purchase for one time is pretty expensive.

Crowns are considered consumables, as they quickly deteriorate. However, some power tool rentals do rent them out. To save money, you can use this offer
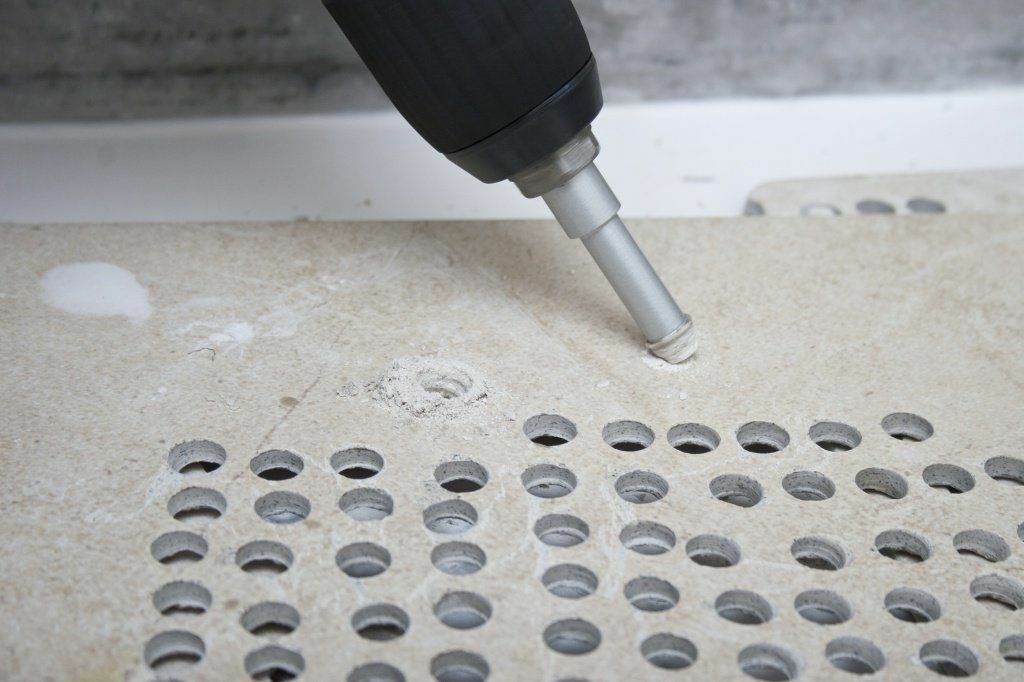
Therefore, many people use a simple drill, solving the problem in this way:
- draw a circle;
- select a simple or small diameter feather drill;
- make many holes around the entire perimeter of the circle.
Then it remains only to carefully release the resulting circle and align the edges of the circle in the tile.
About choosing a hole location
In case the marked hole is close to the seam between the tiles, it is worth shifting it to the seam itself or moving it closer to the center.
The fact is that drilling next to the seam is fraught with tile splitting. Especially if it is covered with a layer of enamel.

In situations where you have to drill close to a seam or in places with difficult terrain, it is recommended to use a hand drill at the initial stage. She carefully remove the top layer, outline the funnel of the future hole
It is also difficult to drill near the seam as the sloping edges of the tile will cause the drill to slip.
Experienced craftsmen advise keeping a distance of 2 cm between the seam and the future hole. This allows you to perform work with high quality, avoid damage to the product.
Dowel drilling
The preparation and sequence of the stages of the workflow in this case are no different from conventional drilling.
Difficulties arise only if the drill diameter is too small or the hole is too deep - the dowel sinks and turns out to be far from the surface.

When installing the dowel, it is important to clean the recess from dust. This can be done with a vacuum cleaner or soak the tiles in water for 30 minutes in advance - this way it will dust much less.
The first incident can be easily corrected by reaming, carefully expanding the edges of the circle to the required parameters.
It is better to foresee the second one in advance: having measured the length of the dowel, put a mark on the drill and go deep exactly to it.
The ability to drill tiles can also come in handy if you decide to build inspection hatch in the bathroom.
Common Beginner Mistakes
Surprisingly, many chips and cracks appear even at the marking stage. This happens when a hammer and a sharp nail are used for these purposes: when trying to leave a mark on the surface of the tile, inexperienced users do not calculate the impact force well. The result is a chipping, fracture, or deep crack.
Other common faults include:
- illiterate choice of the operating mode of the power tool - too high revolutions, use of the shock mode;
- incorrect selection of the drill;
- poor retention - drill slipping at the start of drilling.
Another common oversight is ignoring the search for voids. Professionals search for hollow spaces by tapping on tiles.

If the void is near the edge of the tile, you can try filling it with glue. To do this, make a liquid glue solution and use a pistol or syringe to drive it through the seam into the hollow space.
A dull sound that is heard indicates that the tile is tightly attached to the surface of the wall or floor, and a sonorous sound indicates the presence of voids.
Areas with voids should be avoided, since cracks often form on them when drilling.
Conclusions and useful video on the topic
We also suggest watching a video on the topic, filmed by an experienced craftsman. Pay attention to how carefully he approaches the removal of the top layer and at what stage he uses a punch, only after the tile has been drilled:
So, we got acquainted with the list of necessary tools, the main stages of work and the advice of the masters. We conclude that the correct selection of the drill, the correct choice of the operating mode of the tool, neat markings, surface preparation, the angle of inclination of the drill during operation are important.
If you have any questions or your experience allows you to give advice - please use the form below. There you can write comments, attach photos, drawings and diagrams.