Air conditioners significantly improve living conditions both in the city and outside it: they are the ones on hot summer days turn stuffy "boxes" into cool, cozy dwellings, and in winter they heat the air in the rooms to a comfortable temperature.
Mobile climate technology is a separate category. Unlike systems with wall and remote units, it is not tied to a specific place, but simply installed on the floor in a convenient area for a while.
In this article, we will analyze in detail how to install an outdoor air conditioner so that it works properly and 100% copes with the tasks set. And if you want to independently connect the mobile unit, then we will show you how best to bring the air duct outside the room.
The content of the article:
- What is the advantage of mobile technology?
-
Floor standing air conditioner installation instructions
- Stage # 1 - choosing a place of installation
- Stage # 2 - taking out the duct to the street
- Stage # 3 - connecting the power supply
- Stage # 4 - testing and operating rules
- Other options for connecting corrugations
- Conclusions and useful video on the topic
What is the advantage of mobile technology?
The question immediately arises: is this bulky floor-standing technique really necessary when there is an opportunity to buy a traditional, more customary split system?
Floor monoblocks are referred to as mobile equipment, that is, equipment that can be the desire to move from place to place - to move from the living room to the bedroom, and, if necessary, take to the dacha.

Monoblock air conditioner has gained popularity due to its easy connection. Its design differs in that both the condenser and the evaporator are placed inside the same housing, installed inside the room.
The units are attractive for those who like to change the environment, but at the same time live in the most comfortable conditions. Here are 4 main qualities that regular users appreciated in the floor models:
Image gallery
Photo from
Mobile technology is good because it is not fixed in one place. Moreover, the body is equipped with wheels for easy movement of the unit from one room to another. Bulky, but lifting air conditioner can also be used as a temporary, seasonal summer cottage option with easy installation
The air conditioner design consists of only one unit, which is located inside the living room. Outside, unlike the split system, nothing needs to be fixed. Accordingly, there is no need to worry about how the facade of a building will look like - especially one of historical value.
Here, too, there are solid pluses: if it is better to entrust the installation of a split system to professionals who will connect two blocks through wall, then the floor unit just needs to be placed on the floor near the window or door to the balcony, while the walls are not drilled necessarily
If you select a device that is recommended in terms of power and performance for a particular room, it will work no less efficiently than an expensive split system. And in terms of safety, the plastic block is comparable to a refrigerator - it seems volatile, but absolutely harmless
The installation location can always be changed
No special permission required for installation
Easy installation and connection
Efficiency and safety
As you can see, floor monoblocks are somewhat better than split systems, and to install a home mobile air conditioner, you do not need to hammer the walls and install brackets from the outside. Maintenance of the unit also takes a little time, and at a cost it is not more expensive than alternative models.

There are also mobile air conditioners without air ducts. But they have many disadvantages: loud noise, low efficiency, the need for regular maintenance. And the most unpleasant thing is the high humidity in the room.
If you opt for floor-standing equipment, read the next section carefully to get a better understanding of the installation nuances. Knowing how to properly install a mobile air conditioner, you can provide a comfortable indoor climate without the help of specialists.
Floor standing air conditioner installation instructions
The main difficulty in the installation is the outlet of the duct outside the room. If you want to quickly put the air conditioner into operation, then you need to take care of the installation of a sufficiently voluminous corrugated pipe in advance.
We will provide options for arranging a hole in a wall or in a window below, and your task is to choose the least costly and most convenient solution.
Stage # 1 - choosing a place of installation
But first you need to choose the most suitable place for installation. There are two important points to keep in mind:
- The air outlet hose is limited in length, so the unit must be placed as close to the outlet as possible - that is, to a window, balcony, etc.
- The power cord also typically has a standard length of 1.8 m, so a power outlet should be located nearby.
Anywhere - in a free corner, in the center of the room - you won't be able to put the candy bar. The fact is that it is impossible to lengthen the electrical cord or air duct both for safety requirements and for technical standards.
If you manage to somehow increase the length of the corrugated duct, then you will face another problem - a decrease in performance. And useless equipment in the house is not needed.
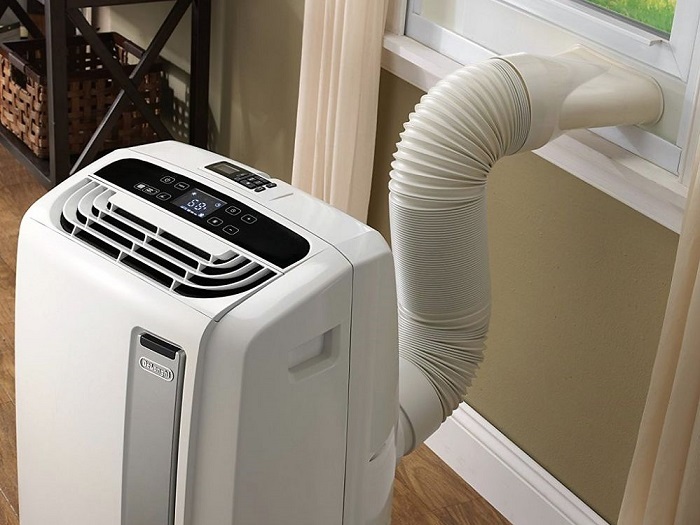
According to the installation requirements, the distance from the monoblock to the nearest walls or partitions must be at least 30-50 cm, otherwise there may be problems with operation and maintenance.
Another important point is an even and solid foundation. In old houses there is a sloping floor, it will have to be leveled. To do this, it is not necessary to sort out the boards or do cement pouring, you can put sheets of gypsum fiber board or thick plywood on top of the existing flooring.
Stage # 2 - taking out the duct to the street
One of the disadvantages of floor-standing air conditioners with an air duct is just this very air duct - a thick corrugated pipe, one end of which is integrated into the body of the unit, and the other must be pulled out independently outside.
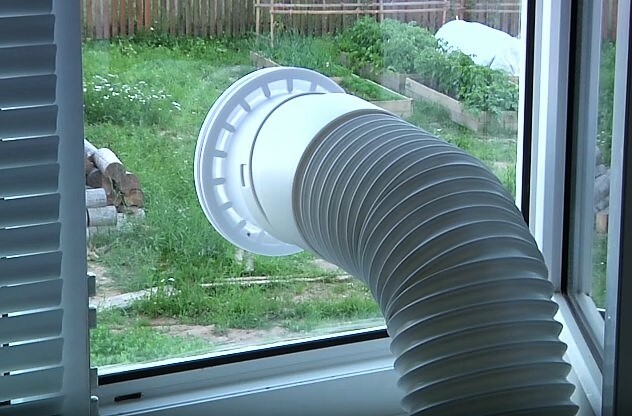
Warm air is discharged through the duct outside the dwelling. The task is to place the duct so that the heated medium does not return back to the house
We offer the most successful, in our opinion, option, thanks to which you can achieve two main goals:
- ensure the output of heated air to the outside;
- maintain an attractive window design.
As a result of the work done, you will be able to open the window sash during the operation of the air conditioner and connect the air duct to the frame with plexiglass inserted according to the principle of an anti-mosquito net. Plexiglas transmits light well and has the strength necessary to firmly fix the pipe.
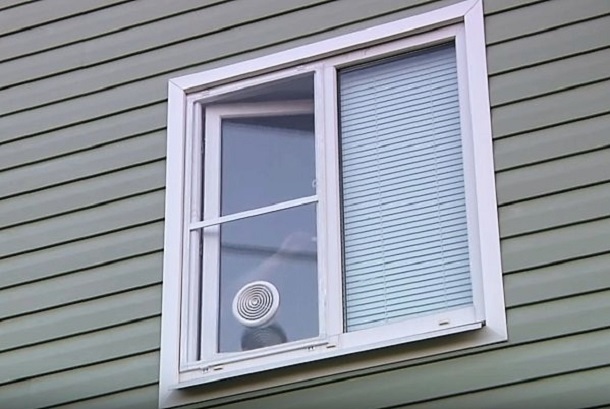
A diffuser inserted into plexiglass and acting as a fastening element will look good both indoors and outdoors
All work can be done independently. If you don’t find any tool, you can buy it, ask a friend, or rent it.
You will need:
Image gallery
Photo from
You can buy plexiglass in any building market - sheets 1, 2, 3 m long are always available. The thickness of the sheet can be from 1.5 to 3 mm, of any transparency. But keep in mind - the more transparent and durable the material, the higher its cost.
When installing plastic windows, they often immediately acquire frames with a metal mosquito net. If you do not have it, then ordering is easy - according to the size of the window sash, where you plan to insert this frame to bring the air duct out
The hole for attaching the corrugation must be designed so that it looks aesthetically pleasing and it is convenient to insert / remove the air duct. To do this, a round plastic ventilation diffuser with a protective grill is inserted into the hole cut in the plexiglass.
Cutting out a rectangular piece of plexiglass is easy - a sharp clerical knife will do. But to accurately remove the round fragment, you will need a more suitable tool - a soldering iron with an insert in the form of a knife or an electric jigsaw (electric tool)
A large piece of white or clear plexiglass
Standard frame with mosquito net
Supply and extract air diffuser with grille
Plexiglas processing tools
Elements for fastening the air duct - a strip, diffuser or adapter - must be made of more elastic and lightweight plastic, metal fittings are not suitable.
You will also need:
- construction tape;
- long metal ruler;
- pencil or marker;
- construction knife;
- sealant;
- cleaner;
- sandpaper.
Prepare sponges, rags, containers of water - everything you need to clean and degrease materials.
Sequencing:
Step # 1 - cut out a piece of plexiglass to fit the frame.
First, we measure the length and width of the frame with the mosquito net, then we transfer the dimensions to the plexiglass and cut out a piece.
In the future, corners will be fixed along the edges of the frame to fix it on the window, so the glass should be slightly smaller than the frame. To find out how much, we apply corners to the edges of the frame and make the same indents on the glass.
To cut off a piece of plexiglass, you can use an aluminum profile: we apply it to the drawn line and draw it several times with a construction knife. Then just bend along the cutting line.
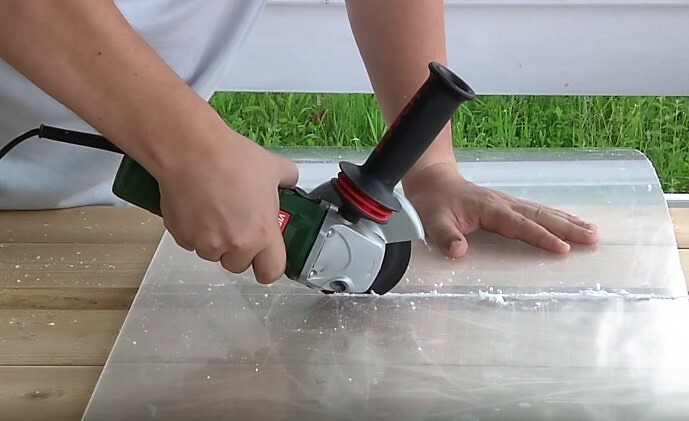
If you have an electric angle grinder at hand, you can use it too - just gently run the disc along the lines you have drawn.
Uneven or melted edges of the finished rectangle should be cut off with a knife or sanded with fine sandpaper.
Step # 2 - cut a round hole for the air duct.
We determine the place where the hole will be located - this is the lower part of the frame, that is, approximately 15 cm from the lower edge of the plexiglass sheet. We apply the narrow part of the diffuser, outline it with a marker or knife. For cutting, we use a jigsaw or a homemade product from a soldering iron.
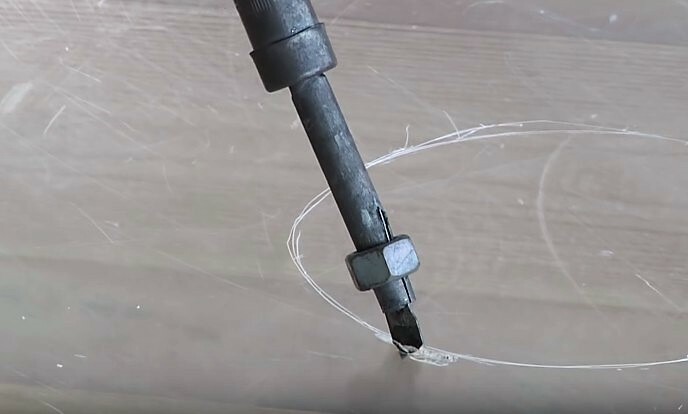
To make a knife for melting and processing plexiglass, you need to insert a blade from a regular knife into the working tube of a 60 W soldering iron. This tool can cut any plastic parts.
Having cut the circle to the end, extrude the circle and get a hole of the required diameter. We clean the edges with a knife or sandpaper.
Step # 3 - fix the plexiglass on the anti-mosquito net frame.
It is important to maintain consistency here: first fix the glass and then remove the mesh and fastening rubber cord, otherwise the frame will lose stability or simply fall apart into separate elements.
It is best to use a sealant for gluing, but first you need to degrease the frame.

Isopropyl alcohol is ideal for degreasing and forms the basis of all household and construction cleaners. You can buy it in the building market
We put alcohol on a cloth and wipe the frame around the perimeter. The glass can be sanded around the edges to increase adhesion.
Then we squeeze out a transparent universal sealant with the help of a construction "gun" and apply plexiglass. We first remove the protective film from the glass - until this moment it is better not to touch it.
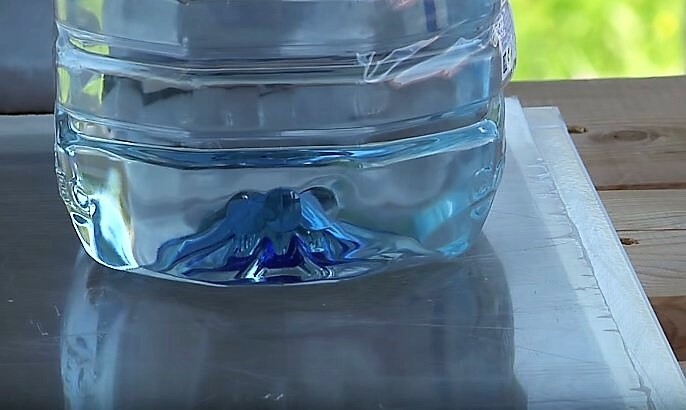
Additional weight is required for the glass to adhere well and adhere to the frame. You can use books, heavy tools, or containers of water - jars or buckets
Once the sealant has dried, you can remove the mosquito net. First, carefully take out the rubber cord, then pull out the mesh, and insert the cord back. This is necessary to secure the plastic "ears" holders located along the edges of the frame.
If you think that the cord is not needed, remove it together with the mesh, and glue the "ears" to the sealant.
Step # 4 - insert the diffuser into the hole and fix it.
Preliminarily we disassemble the diffuser into several parts, we obtain a pipe section, a grid, a mesh and a locking element in the form of a circle with "tongues". First we insert a plastic tube, then we apply a fine mosquito net to the wider end, twist the grill, and on the other side we put on the locking circle.
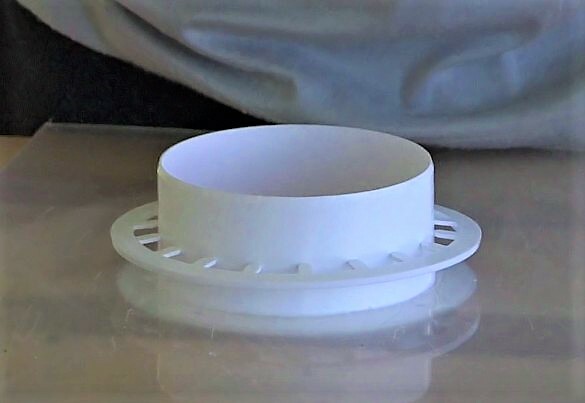
No sealant or screws are required to fix the diffuser to the glass - the kit includes a round polymer element that fits snugly on the pipe and holds it
That's it, the frame with the designed hole for attaching the air duct is ready. It remains to open the sash and insert it into the window to check the work. If you have coped with the removal of the corrugation of the mobile air conditioner, consider that the installation was successful.
Stage # 3 - connecting the power supply
An outlet is required for the air conditioner to operate. The main thing is not to overload the electrical wiring if it is not provided for the installation of powerful equipment. Manufacturers do not insist on providing grounding or installing a separate machine, but the presence of an RCD is usually specified in the instructions.
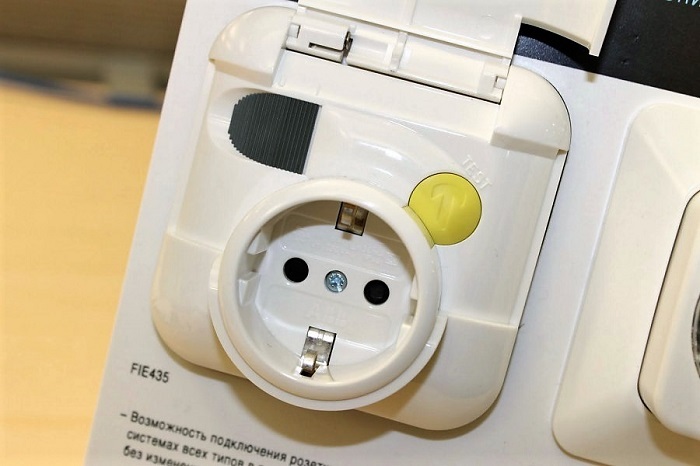
Experts recommend installing a chip socket with an integrated RCD. It is weaker than an electromechanical analogue, but withstands up to 4 kW - no more than 2.5-3 kW is needed for an air conditioner
The socket must be close to the unit, and therefore also from the window. The use of extension cords, filters and other similar electrical equipment is not recommended.
General requirements for electrical installation:
- Use only certified equipment and wires.
- Do not use the air conditioner with loose insulation on the power cable.
- Disconnect the unit from the power supply before any repair or maintenance work.
- Do not expose the cabinet to water, such as raindrops from a window.
Some air conditioners will heat up when operating at full power, so keep children and animals away from the switched on units. In case of any abnormal situations - smoke from the unit, a burning smell, leakage - immediately disconnect it from the mains.
Stage # 4 - testing and operating rules
The first start-up should be done only after the air duct is brought out. You also need to make sure that the power grid is working.
Procedure:
- We check the tightness of the corrugated pipe connection.
- We insert the plug into the outlet.
- Press the key or the "On" button.
- We select the operating mode, temperature, fan speed.
- Press the "Start" button.
Make sure doors and windows are closed. After a while, you should feel the temperature change in the room. If this does not happen, check if you have selected the correct operating mode. In case of difficulty, call the service center.

If vibration or loud noise appears, check if the air conditioner is installed correctly. There should be a flat surface under the monoblock, without debris, dents or bumps
To care for the case, use soft cloths and sponges, only neutral detergents that cannot scratch the plastic or rub off the gloss. Clean the wire rack with a soft brush.
Remove and rinse the filter from time to time. The recommended interval is after 3 months. Use only clean water and mild, alcohol-free, acid-free detergents.
Drain the condensate as the sump fills. To do this, you need to remove the plug from the hose and lower its end into the container. There is usually little condensation, as most of it evaporates naturally.
Other options for connecting corrugations
We examined in detail the best option for the air duct outlet - through the hole in the window.
But there are other solutions as well. All of them are less successful, and now we will explain why:
- Conclusion of corrugations into a window, transom or a slightly open window. This is often done by everyone who does not get his hands on equipping a more acceptable unit. Cons - the heated air immediately returns back to the room, the efficiency of the unit decreases.
- Air duct outlet through the balcony door. A bad option if the balcony is glazed, if not, the disadvantages are the same as in the solution with a window.
- Connecting the pipe to the hole punched out in the wall. An acceptable option if you provide maximum thermal insulation.
The latter solution is suitable if the mobile air conditioner is used constantly.
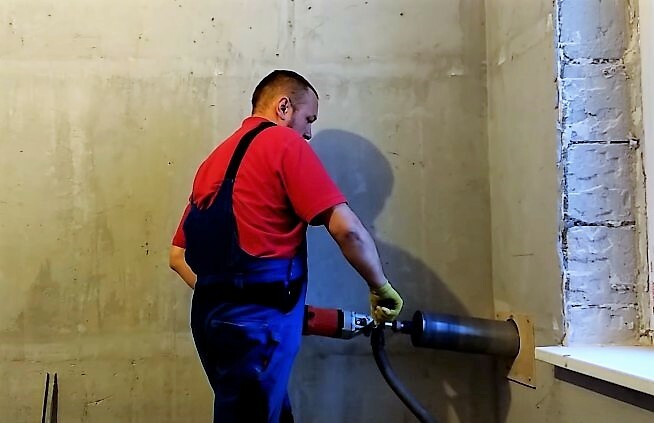
To drill a wall made of concrete or foam blocks, a perforator with a long crown and a vacuum cleaner are used to remove debris. To stabilize and fix the crown during work, a stencil frame made of plywood is fixed on the wall.
When the air conditioner is turned off, the hole is closed. You can use a "plug" made of insulation, or you can put a replacement - a ventilation valve.
In private houses, sometimes there are windows with lifting or sliding sashes. They are convenient for removing the air duct - the sash moves back, and a plastic or plexiglass panel is inserted in its place.
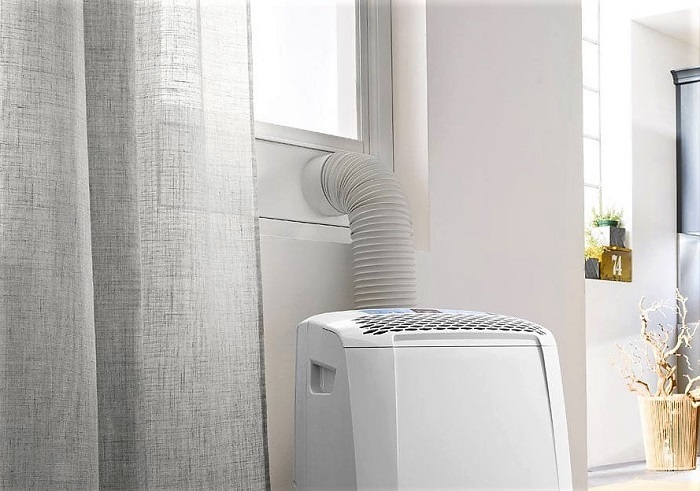
In the plastic panel, in the same way as described in our instructions, a hole is cut out, then an adapter or diffuser is inserted into it, and already an air duct pipe is inserted into it.
Any option is suitable if the heated air remains outside and does not return to the room through open windows or doors.
Before choosing and installing a mobile air conditioner at home, be sure to think over the nuances of installation.
Conclusions and useful video on the topic
Simple and inexpensive solution for a rented apartment:
Analysis of an installation error - what happens if you lengthen the air duct:
Professional Installation Tips:
According to user reviews and expert opinions, a floor-standing mobile air conditioner is effective, useful and especially convenient for owners of seasonal dwellings. It is easy to install and maintain. The only difficulty is in the output of the duct, but thanks to our article, you already know how to deal with it.
Tell us about how you installed a portable air conditioner in your home or office. Share the technology details you know. Please leave comments in the block below, post a photo and ask questions on the topic of the article.

