Thinking over the ventilation system in your house, you most likely wondered how much you need to install a ventilation fungus on the roof, and if there is such a need, which fungus should you choose?
In fact, the fungus, or as it is also called the deflector or ventilation hood, performs several very important functions. Its absence, as well as the wrong choice, can lead to the cessation of traction and damage to the ventilation equipment.
We will help you understand the useful functions that the device performs. We will tell you what kind of ventilation fungi are. We will advise you on how to make the right choice.
The content of the article:
- Purpose and types of ventilation fungi
- Making and installing an umbrella
- Selection and installation of an exhaust deflector
- Application of ready-made ventilation outlets
- Conclusions and useful video on the topic
Purpose and types of ventilation fungi
If the pipe brought out above the roof is not equipped with any fungus, then it can effectively remove air from the room only in complete calm.
Even the slightest rain will disrupt traction or start the air flow in the opposite direction. In addition, dust, snow, fallen leaves raised by the wind, branches and other objects that can damage the ventilation system will get into the open pipe.
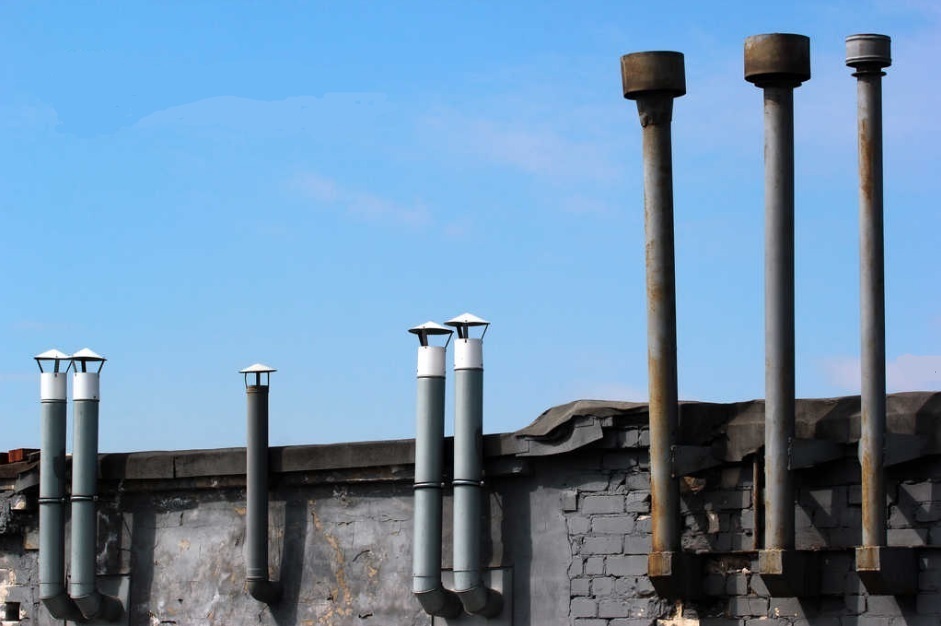
When choosing what type of ventilation fungus to make in your home, give preference not to a simple umbrella, but to a more advanced deflector. This will provide stable traction in the ventilation duct and protect against wind blowing.
To exclude such phenomena, a ventilation hood is installed on the ventilation pipe, which performs three functions:
- Protects ventilation pipe from falling precipitation and foreign objects;
- Does not allow the wind to stop or direct the air flow in the ventilation duct in the opposite direction;
- Increases traction in windy conditions.
There are several types of fungi that have their own advantages and disadvantages, but at least one of them must be installed. The simplest design installed on a ventilation pipe is an umbrella deflector.
It has sufficient functionality, is able to increase traction and protect the pipe only from precipitation entering it. It is mainly used in areas with medium and high wind loads. There is no need for additional tweaks to increase the draft in the chimney.
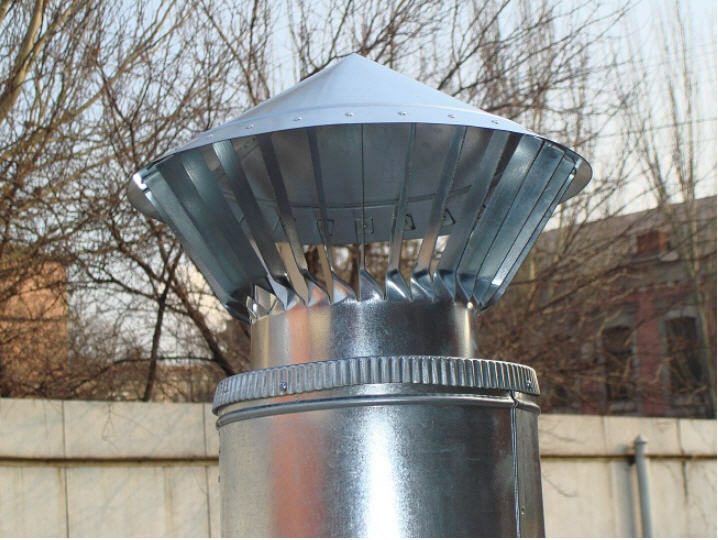
If it is required to protect ventilation from the ingress of precipitation and no additional requirements are imposed on the creation of traction, then an umbrella-deflector will be a practical and inexpensive solution.
The ventilation umbrella has become widespread due to its low price and the possibility of self-production from scrap materials. However, for use in ventilation systems, especially natural ventilation, it is undesirable since it practically does not prevent the occurrence of reverse draft.
More complex and efficient varieties ventilation fungus they differ from an umbrella by the presence of additional parts such as a diffuser, rings and blades. The most widespread are deflectors of TsAGI, Volperta, turbo deflectors, weather vane, as well as similar products..
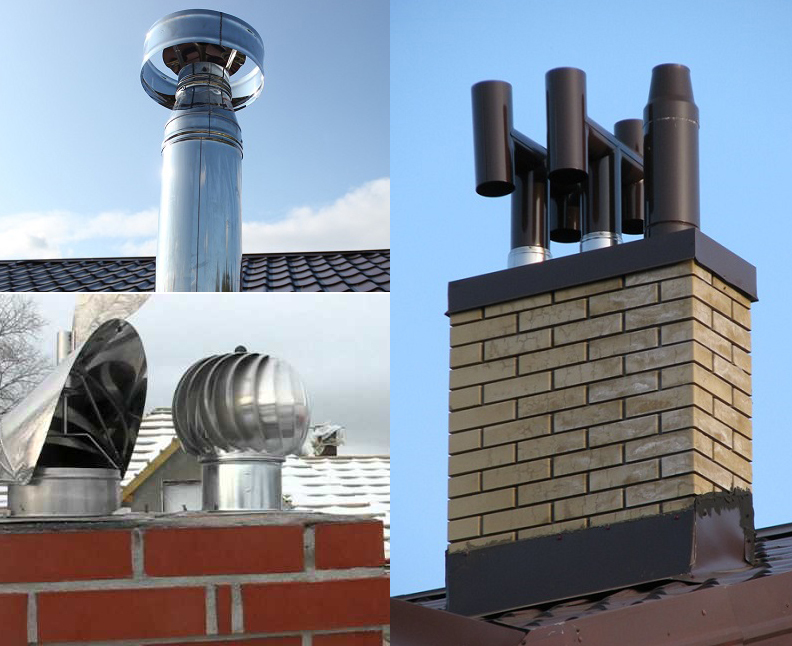
When choosing the type of deflector, study not only its advantages, but also its disadvantages. This will allow you to make the right decision for your area and minimize the risk of stoppage of the deflector.
Regardless of the design, all the deflectors have in common the ability to increase traction in ventilation during wind. This property is given to them by the specific shape of the parts, bending around which the wind creates areas with high pressure and rarefaction.
It is in the rarefaction area that air rushes from the ventilation duct, while the speed of its movement increases, and the draft also increases accordingly. Most of the deflectors are energetically passive and do not require a mains connection.
In addition to the advantages, deflectors have several disadvantages:
- In calm weather, they reduce draft, preventing the free exit of air;
- In cold weather, parts of the device may become covered with frost, narrowing the air outlet;
- Turbo deflector and a weather vane provide less protection from rain, and their rotating parts require periodic maintenance and cleaning.
Despite the listed disadvantages, it is necessary to install the ventilation hood on the chimney. The deflector model is selected based on the standard wind load in the area.
In places with low wind activity, in settlements surrounded by forest, it is better to equip the mouth of the hood with a turbine deflector.
Making and installing an umbrella
The simplest fungus for ventilation can be made by hand. To do this, you need a galvanized or stainless steel sheet with a thickness of 0.3-0.5 mm.
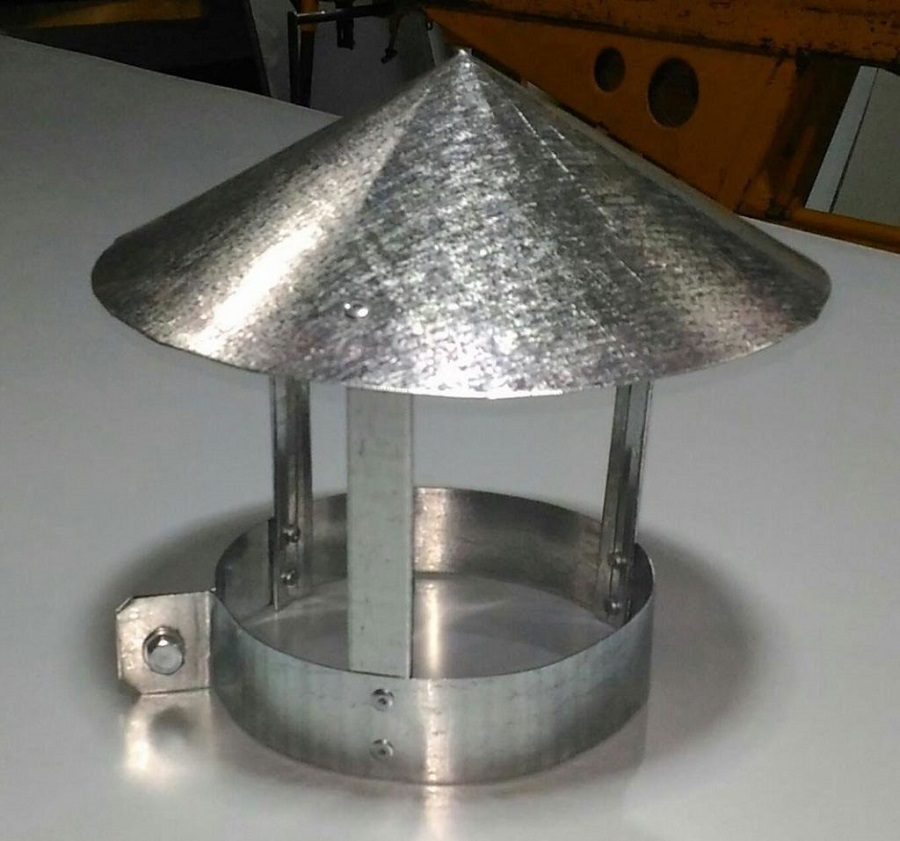
Do not use too thick metal in the manufacture of the umbrella, as this will complicate the work. When choosing the material from which the fungus will be made, it is better to give preference to stainless metals or those with a coating that protects against corrosion
From the tool you will need:
- Scissors for metal or grinder;
- Hammer;
- Riveter with rivets;
- Drill or screwdriver with a drill;
- HB gloves.
An M8 bolt with nut is required to secure the clamp to the pipe. Instead of rivets during assembly, you can use self-tapping screws for metal, while they will have to be screwed into the clamp from the inside so that in the future they do not interfere with installation on the ventilation pipe.
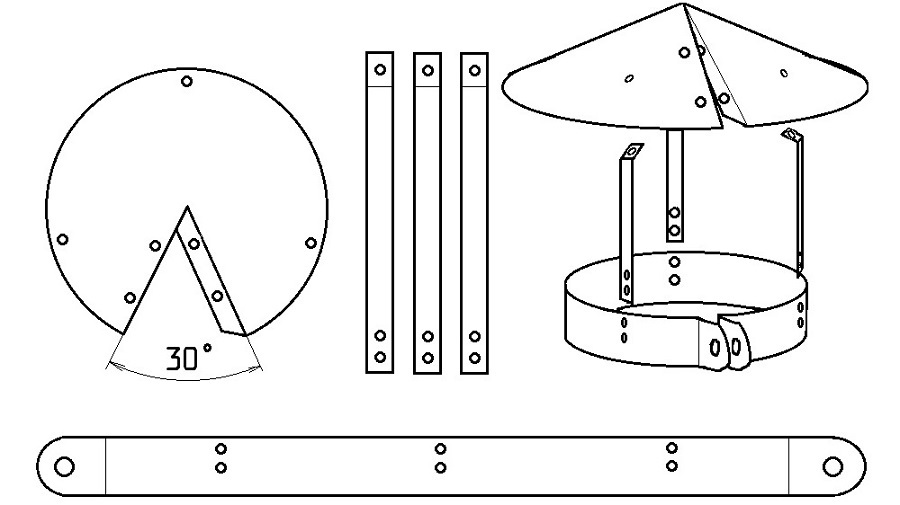
Sketches can be taken as a basis for making an umbrella. The specific dimensions of the parts will depend on the diameter of the ventilation pipe. The length of the clamp from bend to bend is equal to the circumference of the pipe reduced by 5 mm. The diameter of the cap is equal to two diameters of the pipe
The manufacturing process is not complicated and does not require special skills:
- First, on a sheet of metal with a permanent marker, we mark future parts: a clamp for fastening to a pipe, three legs for fastening and an umbrella-cap. We cut them out with scissors for metal;
- In the clamp along the edges we drill holes for the tie bolt. We give the clamp the shape of a circle, and bend the ears with holes at an angle of 90 degrees, insert the bolt, fix it with a nut;
- Drill three pairs of rivet-sized holes in the clamp for attaching the feet at 120-degree intervals. In each foot for attaching an umbrella, we drill three holes: two on one side for connection with a clamp and one on the other for connection with an umbrella. We fasten the legs on the clamp with rivets;
- We roll up the umbrella-cap in the shape of a cone. In the place of the overlap, we drill several holes and connect the edges of the umbrella with rivets. With an interval of 120 degrees, we drill three holes along the edge of the umbrella and connect with rivets with the legs from the clamp. The umbrella is ready.
You can make such an umbrella for ventilation pipes from any material and any size. To install the umbrella, it is necessary to put it on the pipe head with a clamp and tighten it with a tightening screw and nut.
To give the umbrella hood additional aesthetics and protection against corrosion, it can be painted in the color of the ventilation pipe or roof. Any paint for metal for outdoor use is suitable for this, since the ventilation umbrella is not exposed to high temperatures.
If you decide to install a factory-made umbrella, then you need to choose a product that is suitable for your ventilation pipe in terms of size and method of connection.
Selection and installation of an exhaust deflector
Unlike an umbrella, it is quite difficult to make a beautiful and flawlessly working turbine deflector on your own. Although, if you have the patience, enough for cutting and riveting metal with a set of tools and a proven blade pattern, this is quite possible.
If there is no desire to get involved with precision cutting, then the kits for assembling the turbine deflector are actively offered by Chinese trading sites. The customer of such a set will simply need to assemble everything according to the instructions and put rivets on each blade.
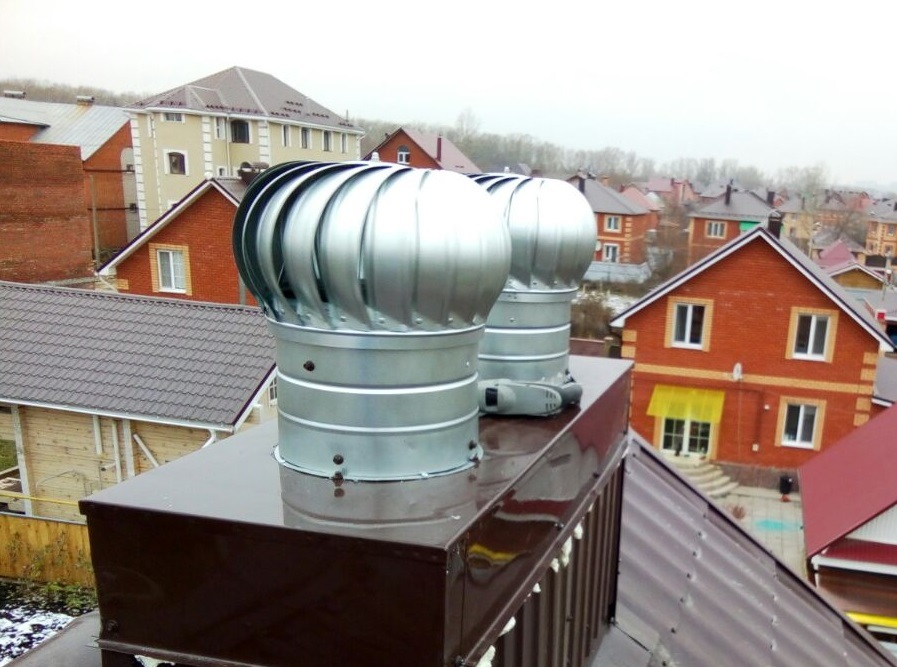
Manufactured turbine deflectors are equipped with bearings for easy rotation. Such umbrellas are well balanced, which eliminates friction of parts during operation and ensures a confident start even in the smallest wind.
To select the correct deflector, two main factors must be taken into account:
- Diameter and design compatibility with your ventilation pipe;
- Compliance of the deflector with the climatic conditions of the area in which it will work.
The first indicator guarantees you a tight and secure attachment of the ventilation hood to the exhaust outlet.
Due to the large blowing area, the deflector experiences strong wind loads, so it must be securely fastened during installation. Also, the connection between the ventilation pipe and the deflector must not have leaks, due to which the ventilation hood may move.

The original deflector weather vane, in addition to improving traction and protection from precipitation, is able to emphasize the uniqueness of your roof design
Climatic conditions are also very important. If winds often blow in your area of residence, then there is no need to install turbine deflectors and hoods in the form of weather vane on the hood. They are needed where traction is required in all possible ways.
However, they will not be able to work effectively in areas with frequent snowfalls and temperature fluctuations near zero degrees, since they will be covered with an ice crust, they will lose mobility and will not be able to adapt to the direction of the windy flow.
The TsAGI and Volpert deflectors, although less effective in creating thrust in the wind, do not include rotating parts that are afraid of icing. These deflectors are maintenance-free and less expensive.
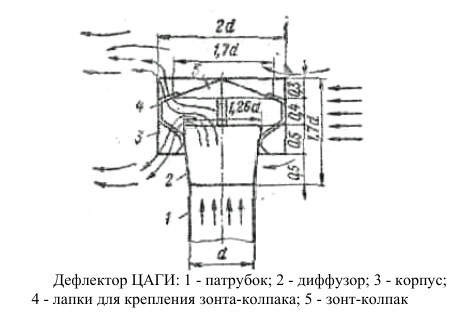
To ensure the correct movement of ventilation and wind air flows and to increase traction in the manufacture of the TsAGI deflector, it is necessary to observe the correct dimensions of its elements. These dimensions primarily depend on the diameter of the ventilation pipe, so they can be calculated independently
If you have chosen the right deflector for your ventilation pipe, then its installation will not cause difficulties. Deflectors are mounted on the ventilation pipe, as a rule, on clamps or self-tapping screws.
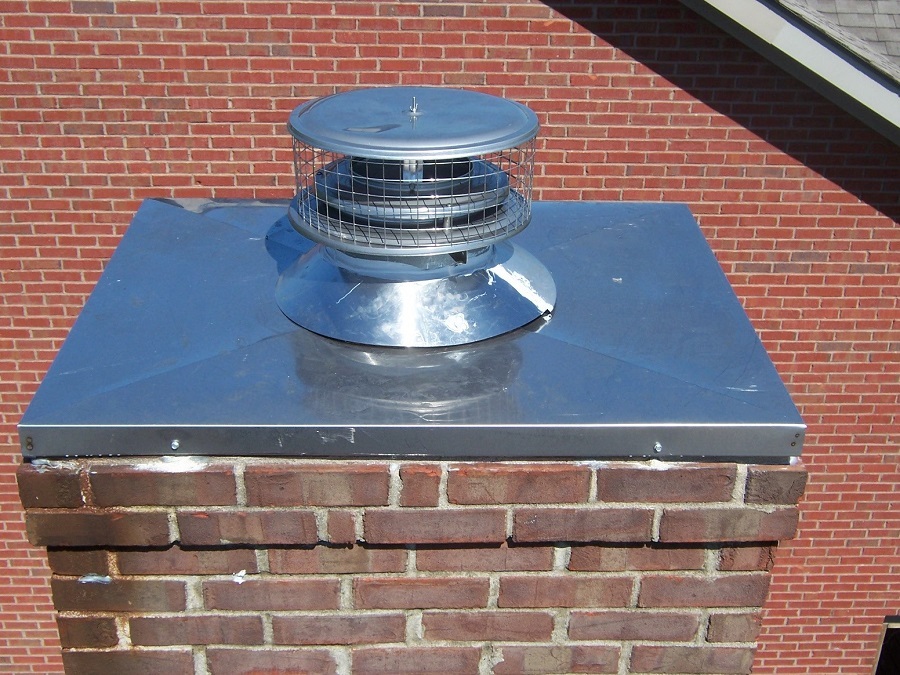
To install the deflector on a square or rectangular ventilation pipe, use an adapter plate, which you can purchase with a deflector or make yourself
When choosing a deflector with a complex design for the manufacture of a ventilation fungus, make sure that you have the opportunity to conveniently maintain it on the roof. Indeed, even the simplest fungus may require periodic cleaning of frost or lubrication of rotating parts.
Application of ready-made ventilation outlets
If you have no desire to understand the intricacies of the ventilation hoods and an attractive the appearance of a ventilation fungus on your roof, then you should consider installing a ready-made ventilation exit.
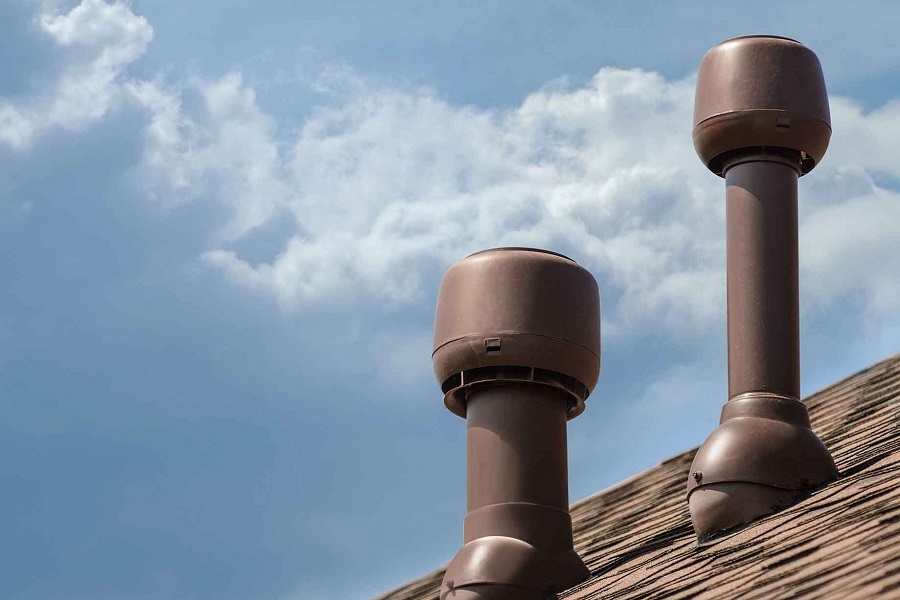
The design of the deflector for arranging the ventilation outlet is designed for the diameter of the exhaust pipe to which this device is connected. To select a suitable factory-made ventilation outlet, you only need to know the diameter of the ventilation pipe and the material from which the roof is made.
Such outlets are manufactured at the factory and represent complete sets of ventilation fungi, completely ready for installation.
This exit includes:
- Pass-through assembly that ensures tightness of the connection with any roof;
- Insulated ventilation outlet, towering over the roof;
- Deflector for protection and traction;
- Template for easy installation.
Installation of a ventilation outlet does not cause difficulties even for beginners.
In the right place in the roof, a hole is cut into which a pass-through unit is installed on top of the sealant and self-tapping screws. Further, an insulated outlet with a deflector is attached to the passage unit. Finally, the outlet under the roof is connected to the chimney of the internal ventilation system.
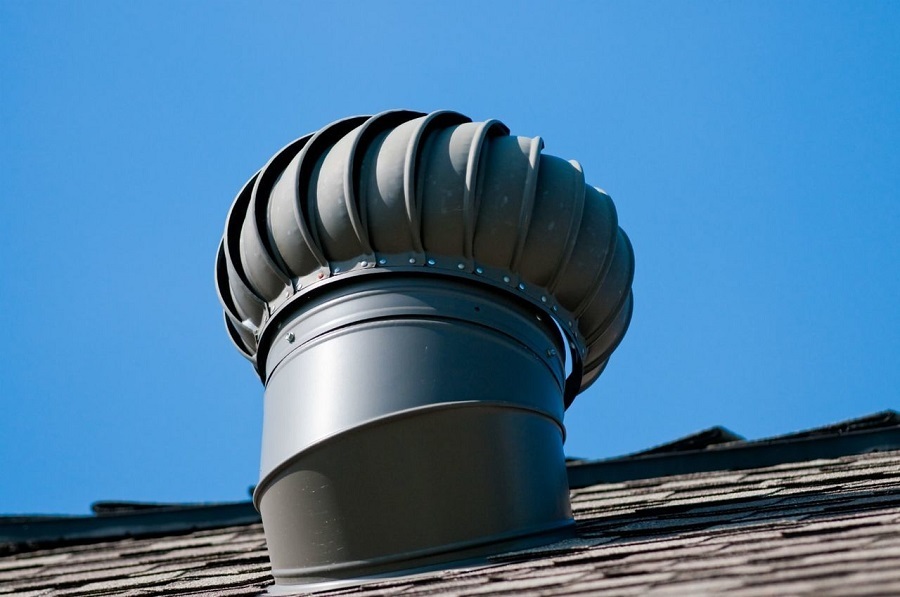
For improved draft, opt for a vent with a turbine deflector. In order to install such a ventilation fungus on the roof vertically, rotate the upper part of its body relative to the base. Having chosen the desired angle, fix the position with self-tapping screws
The use of a ready-made ventilation outlet will simplify your choice and allow you to correctly make a ventilation fungus on the hood, even with your own hands.
He will acquaint you with the nuances and instructions for making a deflector for the chimney next article, the information of which can also be taken as a basis for those who decided to make a fungus for the hood with their own hands.
Conclusions and useful video on the topic
The video shows the difference in draft in ventilation pipes with and without a weather vane deflector:
The following video will acquaint you with the principles of operation and the device of various deflectors:
This video shows the manufacturing process of the deflector:
The correct choice, along with the correct installation of the ventilation fungus deflector, is essential for creating a stable draft in the air exchange system. In addition, any of the ventilation hoods prevents precipitation, dust and foreign objects from entering the system ducts.
The simplest Grigorovich fungus deflector can be made independently in the shape of an umbrella. If you want to provide stable traction both in calm and windy weather, then install a deflector on the ventilation pipe, or buy a ready-made factory-made ventilation fungus.
Tell us about how you assembled and / or installed the hood on the exhaust pipe of the ventilation with your own hands. Share the technological subtleties and models of ventilation hoods known only to you. Please leave comments in the block form below, post photos on the topic of the article, ask questions.
