If you want to protect your site from prying eyes, then a professional sheet fence is an effective and inexpensive way to do this. Such a fence looks modern and attractive, and with proper installation it can last for decades without replacement and repair. Build a fence from professional sheet anyone can do it with their own hands, you should only listen to the recommendations of specialists and accurately perform the sequence of operations.
In our article, we will tell you how to start building a fence, give advice on the selection and calculation of materials, and provide step-by-step instructions for building a fence.
The content of the article:
- Create a sketch and drawing of a fence
- Tips for choosing a professional sheet
- What else do you need?
- Calculation of the required amount of material
-
Installation of a fence from a profiled sheet
- Stage # 1 - marking the fence line
- Stage # 2 - installation of support pillars
- Stage # 3 - installation of the lag
- Stage # 4 - fastening the profiled sheet to the frame
- Conclusions and useful video on the topic
Create a sketch and drawing of a fence
First, a sketch is performed, that is, a freehand drawing of the future fence, without exact dimensions and details. At this stage, it is necessary to choose one of the possible options for the fence: solid or sectional. Depending on the model chosen, you will get a different consumption of materials and the method of installing the structure as a whole.
On a preliminary sketch, the main characteristics of the structure are noted. Choosing a place entrance gates and wickets, the location of the fence in relation to buildings and landscape features of the site.
Points of elevation difference are marked on uneven terrain in order to take into account the required height of the sheets. Costs are calculated by the number of straight sections professional sheets, main and intermediate pillars and lag. When constructing a sectional fence, indicate the dimensions of the sections.
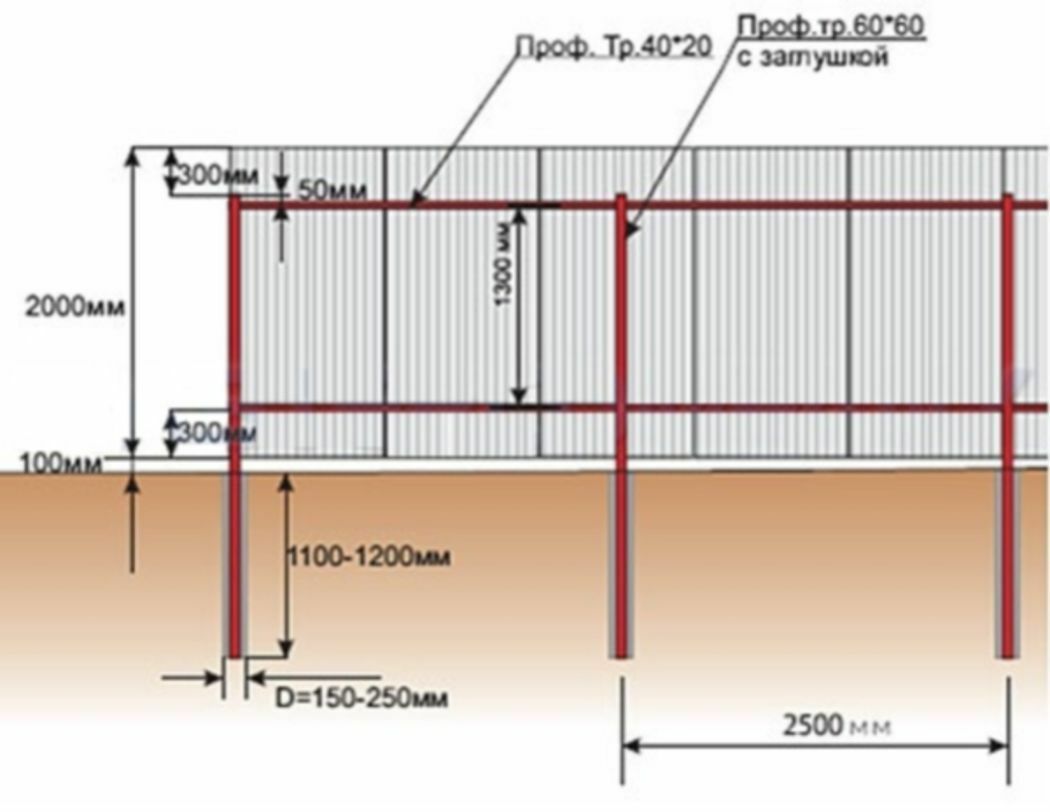
Then an exact drawing is created, which is a construction project. The exact dimensions and distances are applied to the drawing, all significant data, indicating the necessary decryptions, explanations and references
According to the adopted technology, the distance from the ground is taken within the range of 0-150 mm. If there is a slight slope of the relief - 3-5%, then the sheets are mounted with a difference in height of 150 mm. In other cases, the difference is calculated individually.
Tips for choosing a professional sheet
First of all, you should choose the best option for consumables, since the industry produces a large number of items professional sheet. Sheets are marked with special symbols indicating possible use and bearing qualities (stiffness).
The optimal price-quality ratio for the fence will be a sheet marked "C". For example, C8, C10, C20, C21, C44, where the numbers indicate the wave height.
If you wish, you can choose a more durable sheet with the HC35 marking, which is somewhat more expensive, but has less windage. This is important in difficult weather conditions, strong winds. The thickness of the material is also different, it is recommended to stay at the options of 0.45-0.6 mm.
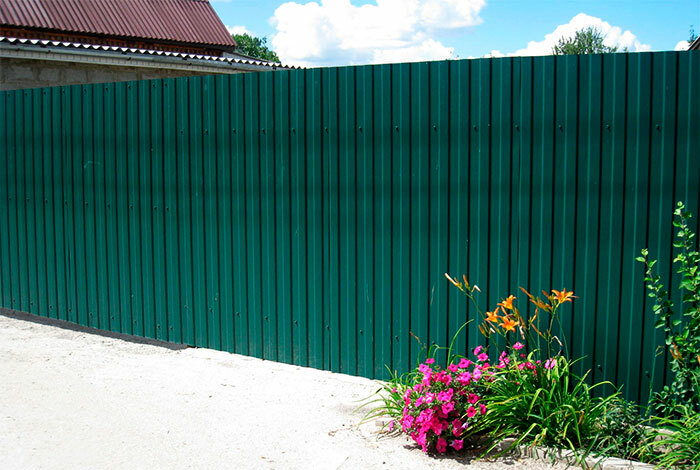
A solid fence made of profiled sheet has undeniable advantages: it is inexpensive, reliable and hides the area from prying eyes
You can choose galvanized sheet - 20-30 years warranty or coated polyester paint - a guarantee of 40-50 years, depending on the thickness of the coating. In the second case, manufacturers offer a wide range of colors - the fence will not only be durable, but also an attractive structure.
What else do you need?
except corrugated board, you will need to choose accessories for the fence:
- poles or support posts, can be wooden, brick, reinforced concrete or metal. The last option is the most common. These can be shaped or round pipes of various diameters. Ready-made fence posts are available that come with a top cap, mounting heel, and welded brackets;
- logs (transverse connections), it is enough to take pipes 40x40x2 mm / 40x20x2 mm;
- brackets for mounting logs to poles for work without welding;
- fittings: bolts or screws M6 (20/30 mm), self-tapping screws or rivets.
Components and corrugated board must be selected taking into account the total weight of the fence. Heavier and more voluminous sheets require the installation of a frame made of shaped pipes of significant parameters.
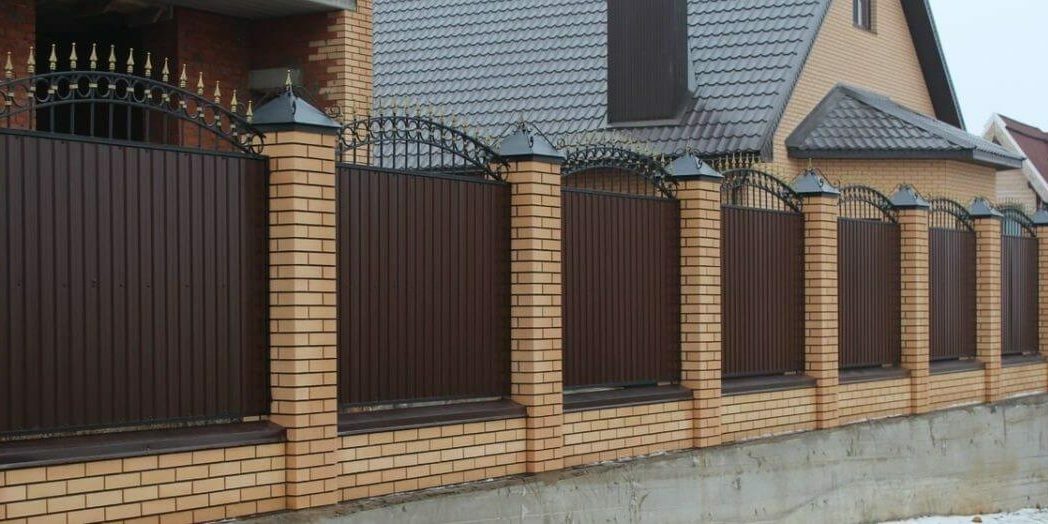
A sectional fence on a foundation decorates the site and is a capital structure. The construction of such a fence can be carried out according to individual requests, the professional sheet fits perfectly into the most modern design projects
In addition, you can purchase consumables: paint, pipe plugs and top fence strips. Accurate calculation of materials and components will allow you to quickly complete the construction and not spend extra money.
Calculation of the required amount of material
For a continuous fence, it is necessary to divide the perimeter of the structure by the width of one sheet, taking into account the overlap. For sectional - divide the perimeter by the number of sections, if one sheet is put, and by the useful width, taking into account the overlap when attaching 1.5-2 sheets. If the gate and wicket will be sewn up professional sheet, then you will need to add the amount of material, taking into account their width.
To calculate the number of posts for a solid fence, divide the total length by the number of spans. As a rule, the distance between the supports does not exceed 2-3 m. For a sectional one: the distance between the posts is equal to the width of the sheet or the useful width if the span is filled with 1.5-2 sheets.
The height of the supports is calculated according to the height of the sheet and 30% for the depth. It is necessary to take into account that you will need the main supports at the corners of the perimeter for the installation of gates and wickets.
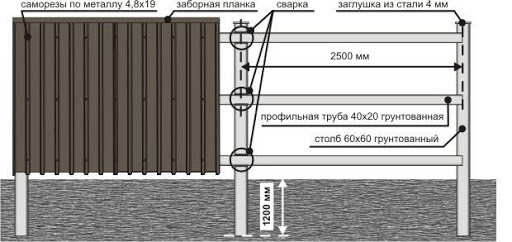
Before starting construction, it is necessary to draw up an accurate estimate of the necessary parts and take into account the compliance of the technical parameters of all components
Cross connections between posts are purchased on the basis of: the perimeter is multiplied by 2 or 3, depending on the height of the fence. For example, if a fence with a length of 50 m is being mounted, then 100 logs (structure height up to 1.5 m) and 150 pieces (for a higher version) will be required.
Fittings and components:
- holder plate or brackets, if it is decided to work without welding: calculated by the number of posts and lag;
- caps on top of each pillar. Plain or decorative caps can be purchased;
- hardware: fastenings are performed along two extreme waves and through two waves into a lag. Requires 6/9 pieces for 2/3 cross connections. The total amount will be obtained if the consumption per sheet is multiplied by all sheets used in construction. To acquire hardware more profitable in boxes of 250 pieces, rounding up the consumption;
- end plate for decorating the top of the fence: the perimeter of the structure is divided by the length of one strip (2 m), taking into account the connecting overlap during installation;
- paint: you will need a spray can to paint over possible mechanical damage and chips. Paint markings must be identical with professional sheet.
For work, you will need to purchase cement and sand for preparing a solution, take care of the necessary tools and construction containers.
Installation of a fence from professional sheet
The installation of the fence from the profiled sheet begins with the preparation of the site and the marking of the perimeter, taking into account the drawing data. Then the foundation is poured and the support pillars are installed. At the next stage, the logs are attached to the support pillars and the profile sheets are mounted on the resulting frame.
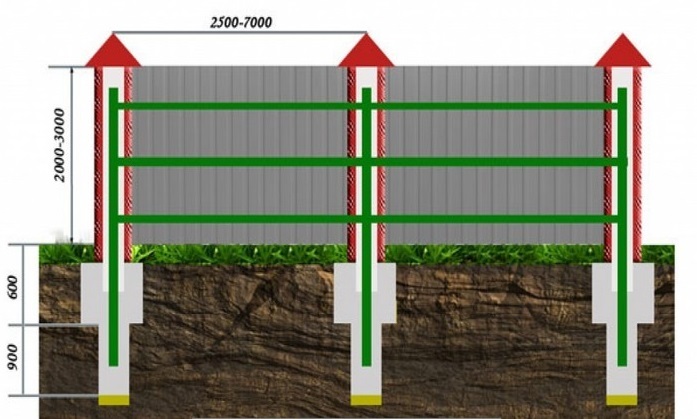
When digging in pillars without a foundation, the grillage (ground connection) device will become relevant. This option will significantly increase the rigidity of the structure.
After all the installation work is completed, you need to look at the structure well for chips. If any are found, then they are painted over to match the fence.
Each stage has its own characteristics and requires strict adherence to the technology.
Stage # 1 - marking the fence line
At the preparatory stage, the line of passage of the fence is freed from plants and foreign objects. It is recommended to cut or backfill areas with particularly uneven terrain to prevent possible installation problems.
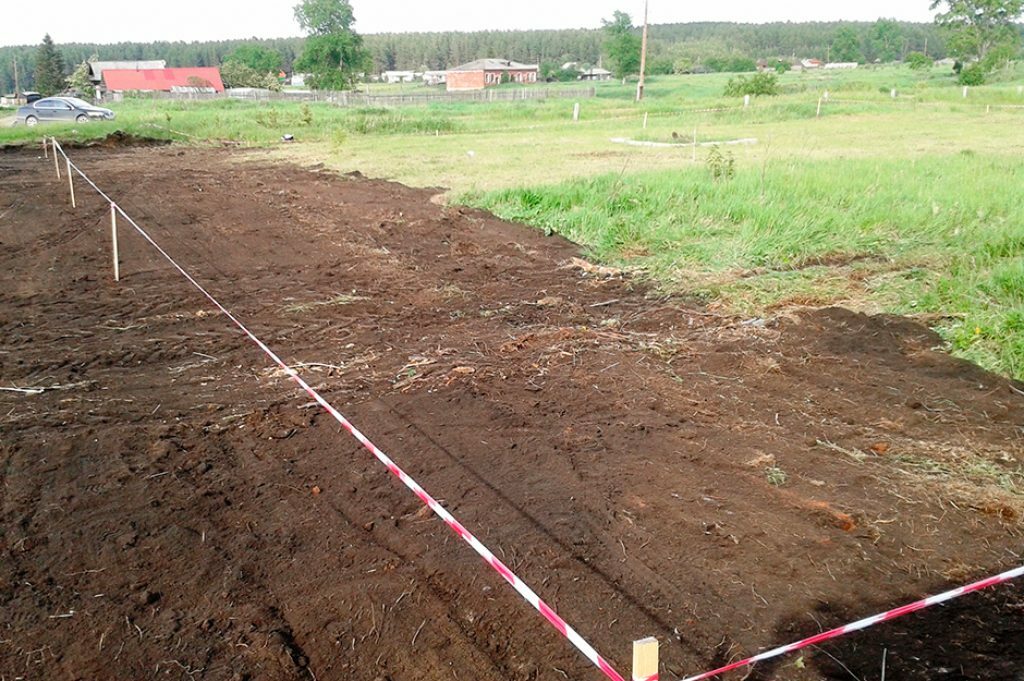
This stage requires careful measurement of the distances and contours of the future fencing, so that in the future you do not have to cut or build up sheets and logs
When marking the site, extreme points are marked - the corners of the fence. Where the installation of pillars is necessary, pegs are driven in there. The extreme points are connected with a cord, which will show the direct location of the fence.
Then, beacons mark the location of intermediate supports (2-3 m) according to the drawing, in the selected places the exact place of digging in the pillars is determined by a plumb line or level.
Stage # 2 - installation of support pillars
The method of installation of the fence is chosen: using a strip foundation or on poles. Fencing using professional sheet refers to lightweight structures and does not require a buried foundation. If a decision is made to arrange a capital foundation, then it is quite suitable shallow foundation for 300-400 mm.
To prevent heaving of the soil and ensure the reliability of the foundation, the following points should be considered:
- foundation for supporting pillars (at the corners of straight segments): the depth of the pit should be 30% of the height of the pillar;
- under the intermediate pillars, a deepening of 25% of the height of the pillar is enough;
- in both cases, it will be necessary to additionally take into account the place for the construction of a gravel-sand cushion;
- the width of the foundation may be insignificant, it should be selected taking into account the parameters of the racks.
When installing a strip foundation, a pit is pulled out and formwork (removable or capital) is performed.
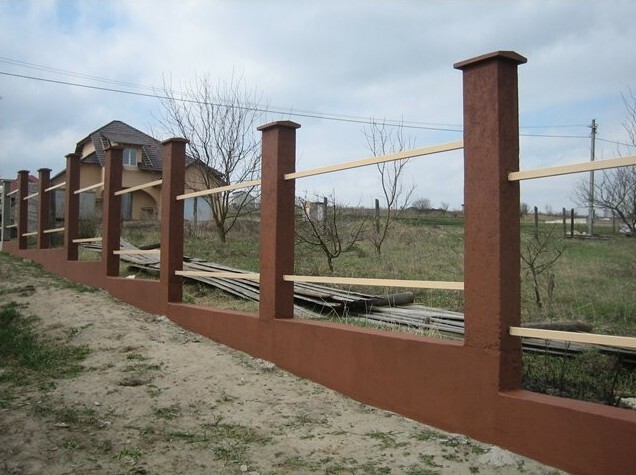
When constructing a foundation in areas with significant differences in height, it is necessary to take into account the difference in levels of individual sections of the fence
At the designated points, pillars are installed: the soil is removed with a drill, a pillow is made and the supports aligned along a plumb line are concreted. Finally, the entire area is reinforced and filled.
In case of stable soils and uncomplicated terrain, it is enough to simply concrete the pillars without pouring the foundation. After gaining the working strength of the concrete, you can start fixing the lag.
Stage # 3 - installation of the lag
The connection of the support pillars can be performed by welding and fastening. In the first case, welding is performed over the entire contact area of the log with the pipe, having previously cleaned the surface. When using brackets, the assistance of a welder is not required, and besides, it is an equally durable way of creating a frame.
There are several ways to fix the crossbars: in front, butt to each other (optimal for solid structures), behind through the bracket (for sectional models) and on the side of the support (for attaching not only to the lag, but and to the post).
The choice of the connection method depends on the type and length of the fence, as well as the requirements for the reliability and stability of the structure.
Stage # 4 - fastening professional sheet on the frame
To preserve the geometry of the sheet when mounted on a frame, it is necessary to attach the first sheet at the top point, set the second edge using a level and fix it. Then put the rest self-tapping screws. Subsequent sheets are mounted with an overlap on the last wave of the previous sheet. Fastening is carried out only through the lower wave, in the place of maximum fit to the lag.
It should be noted that self-tapping screws should not be tightened to the limit, this will help preserve the cushion rubber. It is necessary to provide for the distance from the leaf to the ground, to avoid direct contact with the soil. Fastening is carried out from gate and wickets, otherwise there may be a scrap of sheet near them.
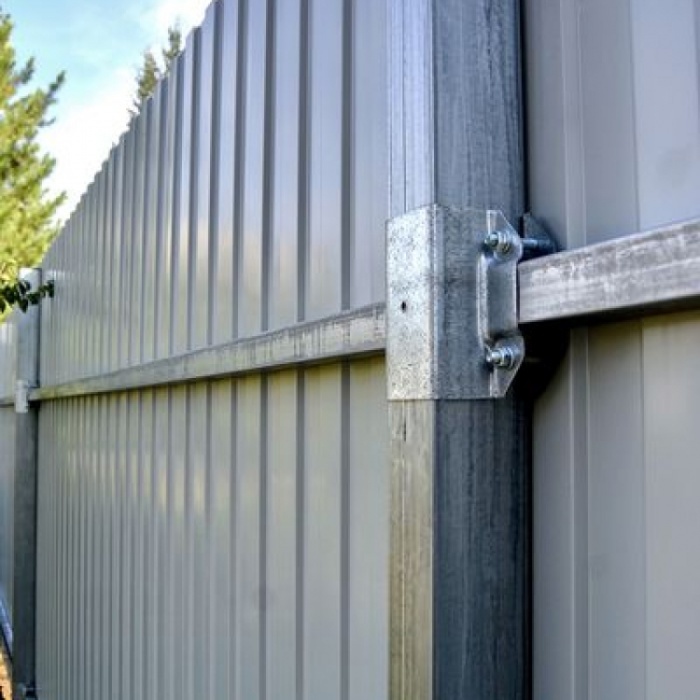
In the absence of a welding machine and skills to work with it, brackets or plates welded to the pillars will cope with the task no worse
The final step will be to close the end of the pipes with decorative caps or simple plugs. When deciding to install the upper planks, it is necessary to take into account the width of the wave for the possibility of a tight connection. The strips are fastened at the ends, taking into account rolling or without it.
Conclusions and useful video on the topic
Detailed instructions for installing a fence using corrugated board. What kind professional sheets and which coating option is best suited. When you need a foundation and why. How to install fence posts and what characteristics must be taken into account in this case:
It is the installation flaws that cause problems with the subsequent operation of the fence. A well-installed fence made of corrugated board serves for a long time, decorates the site and protects from uninvited guests. Having decided to independently carry out the construction of the fence, you should take into account the advice of the masters and everything will work out for you.
Have you ever encountered the installation of a fence made of corrugated board? What difficulties did you face during the installation process and how did you manage to cope with them? Tell our readers about it. The contact form is located under the article.


