In everyday life, we often face problems that do not require calling a specialist to solve them. Why pay for work that you can do yourself with a minimum of effort, right?
If the antenna cable for some reason has fallen off the plug connecting it to the jack of the TV receiver, you can return the part to its place on your own in just a few minutes. But for this you need to know the rules for cutting the cable and the procedure.
Let's consider in more detail how to connect the antenna cable to the plug using the only available tool - a clerical or construction knife. And at the same time we will find out what an amplifier is and whether it is possible to independently make a wiring for two TVs.
The content of the article:
-
How to connect the plug to the antenna cable?
- Stage # 1 - cable and plug selection
- Stage # 2 - stripping the antenna cable
- Stage # 3 - plug installation
- Stage # 4 - testing and debugging
- Do you need an antenna amplifier?
- Connecting to the antenna of 2 TVs
- Conclusions and useful video on the topic
How to connect the plug to the antenna cable?
The procedure is much easier when you do not need to look for materials: the cable is laid all the way to the TV receiver and there is a spare, working plug.
But what if one of the "participants" of the technical operation is not available? Let's take a closer look at what we need to quickly establish a television signal.
Stage # 1 - cable and plug selection
Any wire will not work, so to connect the antenna with a TV receiver or an attachment for digital signal transmission, a special type of cable is required - coaxial. The optimal resistance parameter is 75 ohms.

A coaxial cable consists of two main elements - a central conductor and a shield (therefore, the type of cable is called shielded). There is an insulating polymer coating on top, another insulating layer separates the shield from the conductor
For the manufacture of veins, either copper or copper-plated steel is used. The first option is characterized by low resistance and is typical for equipping satellite television.
The second option can be safely used for switching terrestrial TV systems - even with small losses, the signal will be stable. A steel copper-plated analogue is about 2 times cheaper than a copper one.
Rules for choosing an antenna cable:
- There are no special requirements for the manufacturer, but for a satellite dish it is better to purchase a more expensive product of an eminent brand, and for terrestrial TV, a domestic one will also work.
- Be sure to consider the length of the track. If the distance from the antenna to the TV receiver is more than 5 m, the signal will lose its strength.
- Core thickness standards - 0.5-1.1 mm. The best option is millimeter.
- Pay attention to the quality of the shielding. If a powerful electrical wiring is located next to the antenna route, the screen must be solid, with maximum protection parameters.
- If in room conditions the type of insulation does not matter, then for outdoor installation we recommend using only a stronger cable with a PVC sheath painted in black.
Can't go wrong when choosing a labeled cable RG 6 Is the most popular standard with 1mm conductor, aluminum shield and PVC insulation.
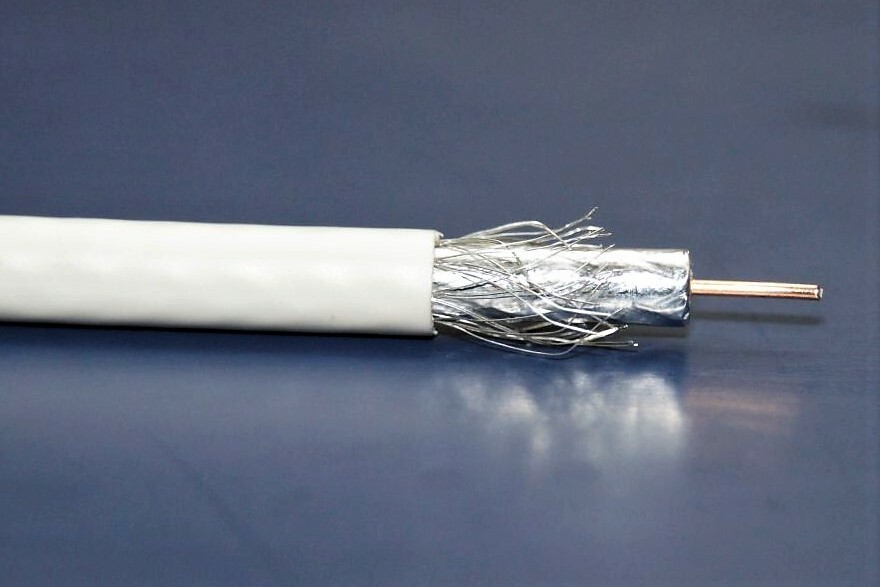
RG 6 coaxial cable is well suited for self-installation, not only in terms of its technical parameters. Thick core and soft shield for fast and accurate cuts
In addition to it, you can use a domestic alternative RC 75 or Italian - SAT 50. An option such as RG 59 is not suitable, especially if the signal transmission distance is more than 200 m. It has too high a conductor resistance.
It remains to pick up the plug. Previously, when connecting old-style products, soldering was used. Now this procedure has become superfluous, since there is a steel plug of the standard F. For amateurs with minimal knowledge of electrics, it is good because it is mounted by ordinary screwing.
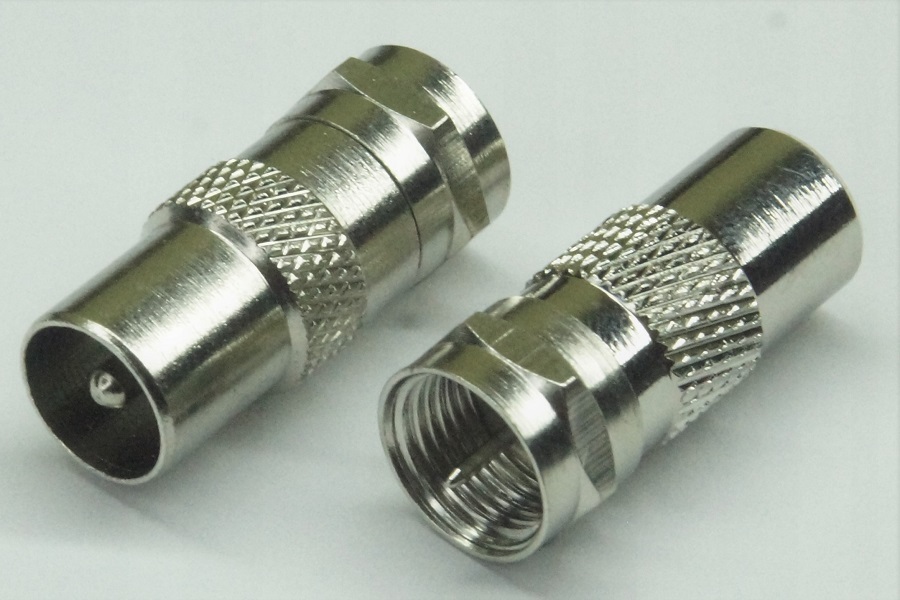
The antenna plug is made of steel and consists of 2 parts. When connecting a TV with a set-top box, the second part is not required, but both halves are needed to connect the antenna
F-plug - an inexpensive product, and if the old one breaks down, there will be no difficulties with the purchase of a replacement. In LED, LCD, plasma TVs, there is a special connector for it on the rear panel.
When both the cable and the plug are at hand, you can start cutting. This is a simple operation that is accessible even to a schoolchild.
Stage # 2 - stripping the antenna cable
And now we will find out the nuances of the procedure itself and will analyze step by step how to correctly and accurately connect a shielded antenna cable to the plug.
For stripping you will need a sharp knife - construction, clerical, assembly or any that will be nearby. In the process, wire cutters and pliers can come in handy.
Step # 1 - removing top insulation
At a distance of about 1 cm from the end of the cable with a knife, gently, slightly pressing, make a circular incision. In order not to damage the screen located under the plastic, we do not cut through the insulation. Then, shaking, with a little effort, remove the outer insulation.
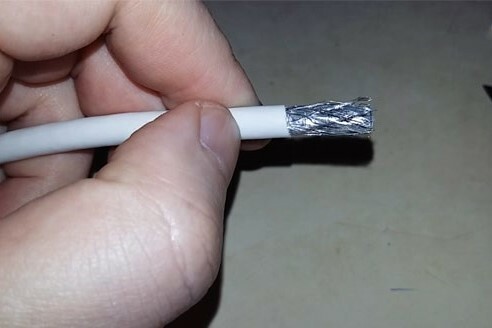
Under the protective polymer coating there is a screen consisting of thin metallized threads and a foil layer. It is designed to protect the cable from power fields and other interference that can disrupt the signal
Step # 2 - folding the screen
The aluminum braid and foil layer just below the insulation do not need to be cut off.
Carefully, in turn, bend them towards the remaining polymer coating and press firmly against it.
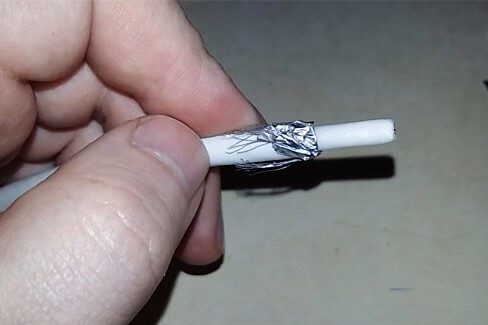
The braid threads can be assembled into one flagellum and placed on either side, or you can simply bend around the entire circumference. Together with the foil, they form a thin layer that will not be visible at the end of the procedure.
Step # 3 - removing internal insulation
There is a second polymer layer under the shield that separates the central core from the aluminum braid. We also cut it off and remove it carefully, trying not to damage the conductor.
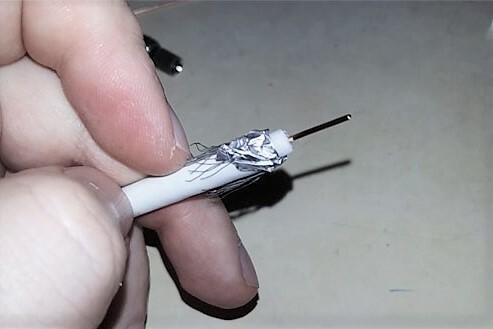
The central copper core must be exposed before screwing the fastening nut of the plug, and the screen must be bent over a polymer sheath. The main condition is that they do not touch even after the plug is installed.
Stage # 3 - plug installation
The simplest, but no less important procedure remains - screwing the plug onto the antenna cable. It is not necessary to cut off the bent screen elements, they must remain under the nut.
We take the plug, untwist it along the thread to divide it into two halves. The one that has a thickening in the form of a nut at the end is screwed on the other side directly onto the bent insulation. To make the fit as tight as possible, we help ourselves with pliers.
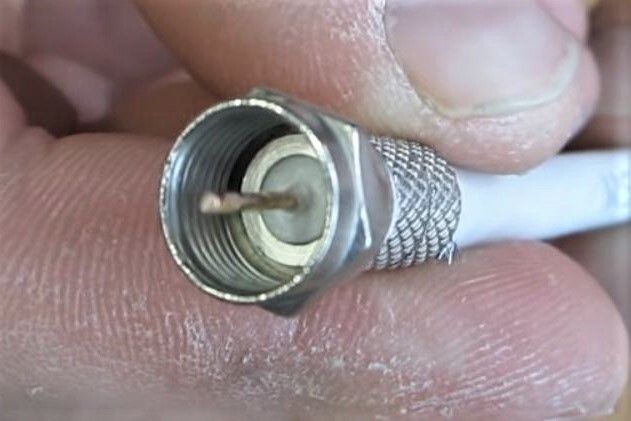
If the ends of the braid or foil stick out, it's okay, you can cut them off at the end. The main thing is that the vein falls into the center of the hole in the plug.
Then we cut off the tip of the core with pliers so that it protrudes from the half of the plug by 2-3 mm, no more. It remains to put on and twist the second half.
Stage # 4 - testing and debugging
Whether the installation was done correctly, you can find out in a simple way - turn on the TV. If the signal is stable, there is no interference, the picture is clear, and the sound is clear - everything is done correctly.

To connect the antenna cable to the TV on the back of the receiver, we find a connector labeled "ANT", "ANT IN" or the like. It is difficult to confuse it with others - it is round in shape and ideally fits in diameter
If there are problems with signal transmission, you need to find the cause.
Here are some of the more common ones:
- The cable length is more than 5m and the signal just weakensbefore reaching the TV set. Choose a more powerful cable or find a way to shorten the length.
- Broken antenna. We'll have to inspect it if it is installed on a balcony or rooftop. You can call a representative of the service organization if it is responsible for the health of the equipment.
- Installation errors when connecting the plug. Unscrew the plug, remove it from the cable and reinstall it. Perhaps the aluminum braid has somehow come into contact with the central core - this should not be allowed.
Poor performance can be caused by cable breakage. For example, he was severely pinched by a door or gnawed by a puppy. To make sure that it is in good working order, you need to check the track along its entire length.

If everything works fine, but the cable interferes with installing the TV near the wall, the straight F-plug must be replaced with an angled one. The principle of installation on a cable is the same
Another reason for a weak signal lies not at all in installation errors, but due to the large distance to the transmitter. Therefore, we will additionally analyze what an amplifier is and what it is intended for.
Do you need an antenna amplifier?
Purchase question antenna amplifier rises when signal loss becomes systemic.
Due to insufficient transmission, the receiver or digital tuner cannot handle the organization's processing. On the TV screen, you can see the inscription "no signal" or "weak signal".
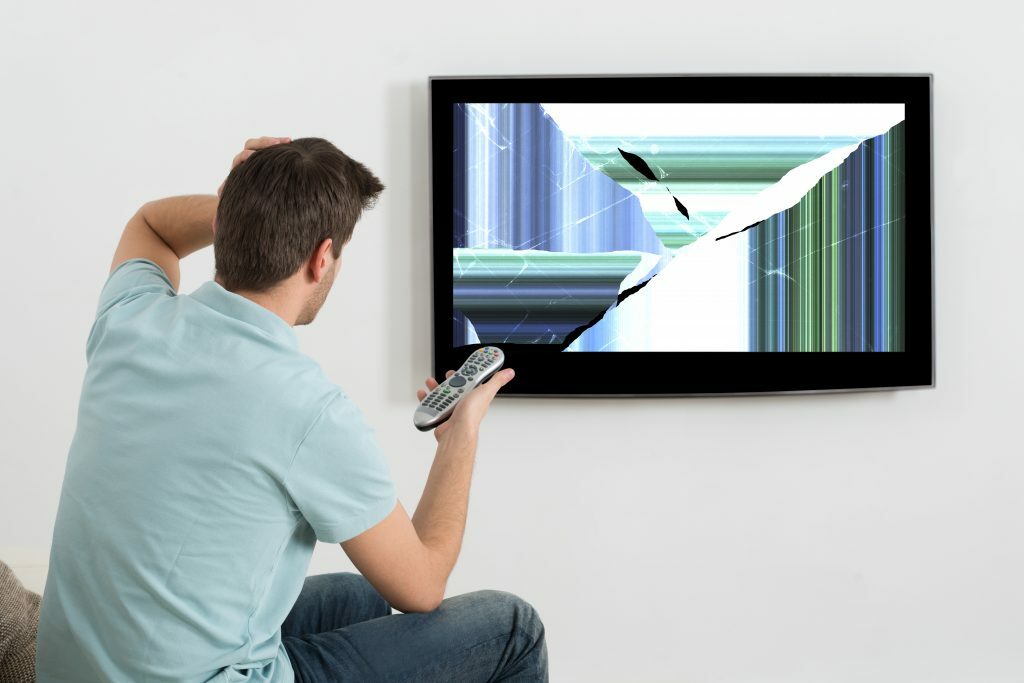
If communication is carried out without an electronic intermediary, then signal loss can be expressed by the absence of sound, a "frozen" image, a fuzzy or "pixelated" picture.
If the signal is too weak, an antenna amplifier is installed, the main purpose of which is to make the signal more powerful. It is integrated into the TV system along the section of the route between the TV receiver and the antenna.
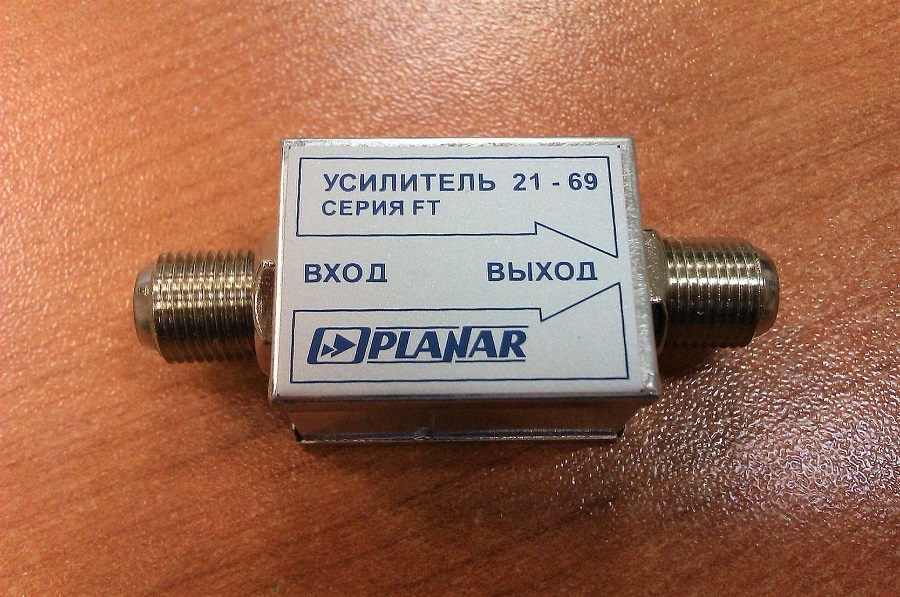
Most often, external devices are used that cut into the antenna cable using two connectors. More "serious" amplifiers look like a set-top box, and some have an additional power supply
Active type antennas already have built-in amplifiers, installing a second one will not help. Also, it will not cope with its function if the antenna is broken or, according to its parameters, is simply not able to receive a signal at a long distance.
In the area of stable reception, the amplifier can even harm, since too strong a signal is also one of the reasons for the failure of the digital tuner.
Connecting to the antenna of 2 TVs
Often, several television sets are installed in an apartment, one in each room. To split the signal into several devices, use a special splitter - splitter.
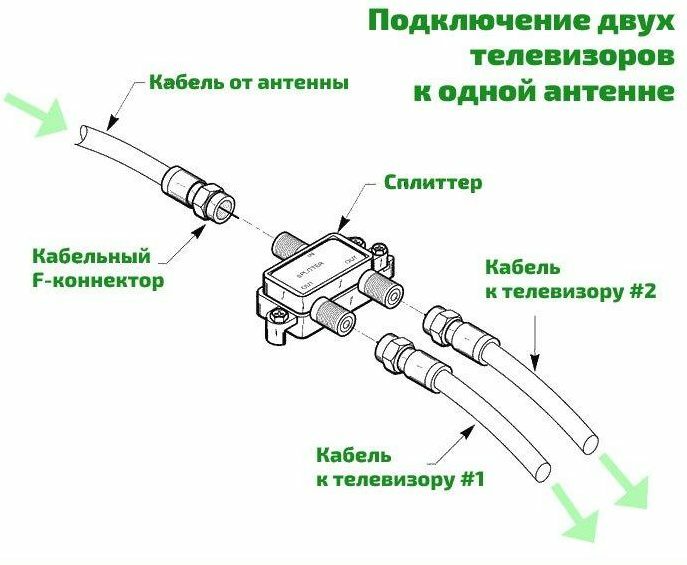
Diagram of splitter connection to antenna and TVs. The F plug of the standard is connected on one side to the coaxial cable, on the other to the input connector of the splitter
The choice of a splitter depends on the number of receivers: how many TVs, so many outputs on the device. But we must not forget that the signal arriving at the antenna will be divided into as many parts as there are connected transmitting receivers.
And if the signal quality is not the best, then when you connect even a second TV, the image or sound can be severely affected. It is possible to fix the problem with the help of an amplifier installed near the antenna (if it is passive).
O how the amplifier works we talked about in our next article.
Conclusions and useful video on the topic
The whole process of joining is in 3 minutes:
Clear video instructions for installing the splitter:
Even the installation of such a simple element as an antenna plug has many nuances. Moreover, after its installation, other, more serious questions may arise.
Have you ever had to change or install the antenna plug yourself? Maybe you were dealing with an old-style device - is the installation procedure different? Share your experience in the comments, tell us about the features of connecting antennas. Send photos - they are often more informative than detailed descriptions.


