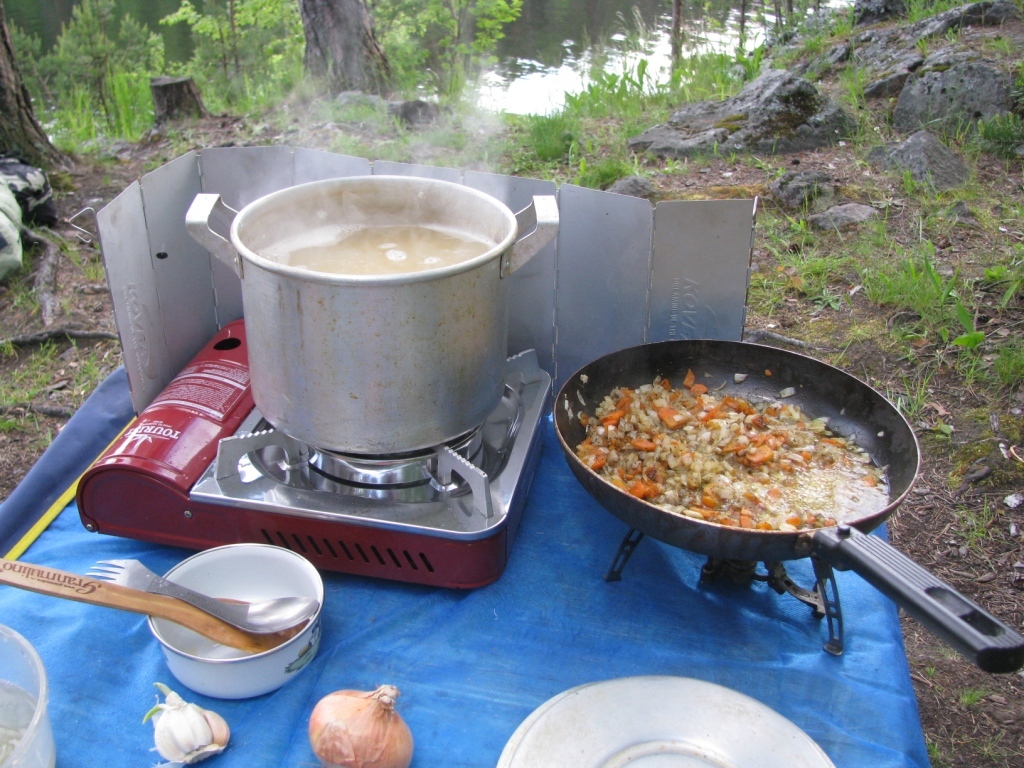
A gas stove can be found in almost every kitchen. It is hard to imagine cooking without this device. In addition, there are even camping gas stoves that you can take with you on any trip and not worry about the fact that cooking will be problematic.
And, if a gas stove is made with your own hands, then its cost will be much lower than that of factory devices. At the same time, such devices work just as well.
Next, we will tell you how to make a miniature gas stove with your own hands. Let's figure out what materials and tools are required for work.
The content of the article:
-
What is a miniature tile for?
- Option number 1 - a stove for a summer residence
- Option number 2 - a tile from a tin can
- Option number 3 - camping gas stove
- Option number 4 - a camping tile from a pipe
- Option number 5 - gas infrared stove
- Safe operation rules
- Conclusions and useful video on the topic
What is a miniature tile for?
Many of us love to travel, and every trip to nature involves more than setting up a tent or friendly gatherings. Nature hikes are rarely done without making a fire to make kulesh or fish soup.
But, it is not always possible to make a fire. Sometimes rain or other factors can interfere with this. For such situations, you can build a camping gas stove from scrap materials. Making a simple homemade product is not difficult.
But do not forget thatgas is a highly flammable substance, so you need to be very careful when using it.
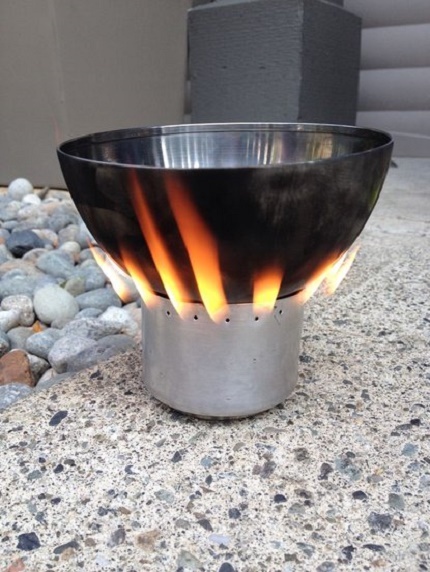
A miniature gas stove will become indispensable in field conditions when you need to quickly boil water for tea or coffee
It should also be borne in mind that a self-made marching gas stove should be small in weight and dimensions. Next, we'll take a look at a few of the most popular homemade gas stoves.
Option number 1 - a stove for a summer residence
Few can boast of having a centralized gas supply in a country house, and this at times complicates the ability to cook food or boil water for tea.
But, if you have the skills to work with gas welding equipment, then making a homemade gas stove for a country house will not be difficult.
For the construction of homemade products, you will need to prepare:
- corners made of thick metal;
- flexible gas line;
- shut-off valve;
- gas burner from the column;
- welding machine.
The first step is to build the body of the future slab. To do this, you will need to cut the metal corner into 8 parts, their dimensions will depend on the desired height of the stove. We also recommend that you familiarize yourself with welding rules.
Further, with the help of gas welding, the body of the future plate is constructed and a gas burner from the old column is welded to it.
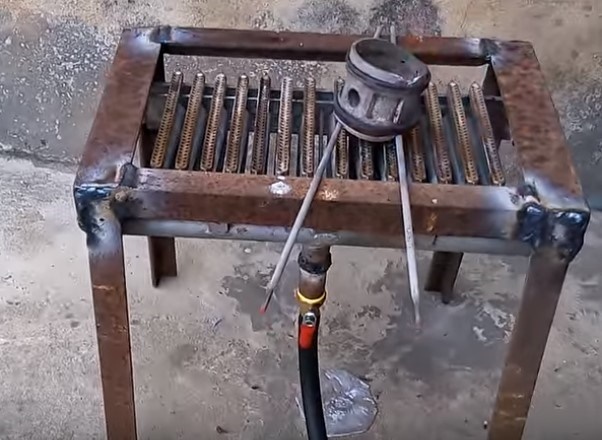
Such a stove will be an excellent alternative to the factory version. It can be placed in any convenient place, both in the house and on the street.
Further it is necessary install hose and a shut-off valve. To do this, using an adapter, we connect the gas burner to the shut-off valve, and then, using a flexible gas supply, we connect stove with gas cylinder. At this stage, it is very important to take care of the tightness of all connections.
Now the plate is assembled, and you can start testing it, having previously checked the tightness of the joints. The easiest way is to lubricate all the joints with soapy foam, if bubbles appear, then the connection is not tight and the equipment cannot be used. If everything is in order, then you can start using the stove.
If no corners were found on the farm, then round metal pipes of small diameter can be used to construct the base of the tiles. For stability to them from below, you can weld on an old car rim.
It is imperative to remember that at the end of the use of the equipment, it is imperative to shut off the gas, both on the device itself and in the cylinder.
Option number 2 - a tile from a tin can
Many travel enthusiasts have probably heard and used such a device as a camping gas stove.
They are a lightweight portable burner with legs, and work from a gas cartridge. You can buy them at any store that sells travel supplies.
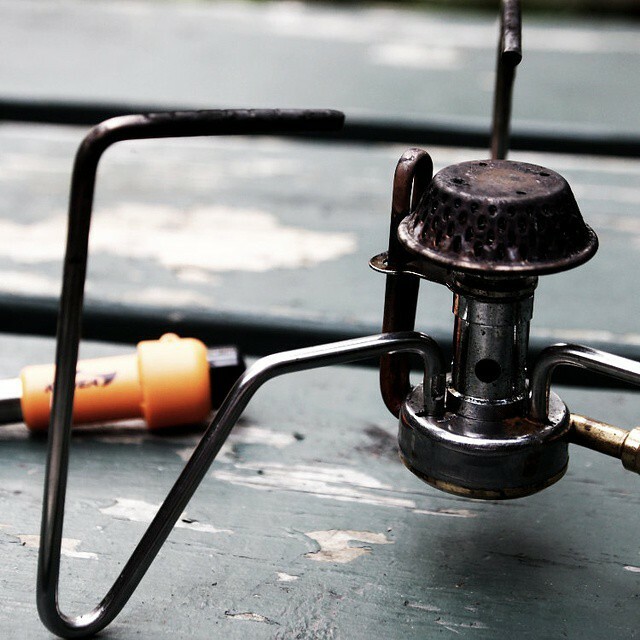
A camping gas stove will be a real salvation in the rain, when it is not possible to make a fire from firewood. A small gas cylinder may well be enough for a family weekend in nature.
The only downside to camping tiles is their cost. Therefore, we propose to assemble a camping gas stove from improvised materials with our own hands, especially since any home craftsman can make it.
Image gallery
Photo from
To do this, we need to take a jar of condensed milk and make 4 holes in it with an awl on one side, evenly distributing them along the edges, and on the other side - one in the middle. We turn the jar over the container and wait until the condensed milk flows out
In the next step, we enlarge the hole in the bottom of the can with a # 10 drill and rinse it out. A copper tube will be inserted into this hole.
In order to bend a piece of a copper tube without deforming it, we clamp it on one side with pliers, and on the other, cover it with sand, tamping it tightly and clamping the second hole with pliers. After that, you can safely bend the tube without fear of deforming it. After bending, cut off the folded edges and pour out the sand
To do this, you need to take the needle from the medical syringe and cut it off, leaving 4-5 mm to the base. The edge after cutting can be filed
Using a drill, we make three holes in the copper tube and push our nozzle into the tube, after putting on a silicone tube on it, which will serve as a seal
To prevent the tube from wobbling, it must be strengthened. To do this, you need to cut off a piece of aluminum strip of the required length, drill a hole in it for the tube and rivets. Pass a tube through the resulting hole and fasten with rivets to the jar
For the legs, you will need to cut off three more pieces of an aluminum strip of 37 cm each, give them the necessary shape and attach them to the jar with rivets. To make the legs as uniform as possible, it is better to bend them not one by one, but all together. In the upper part of the structure, in a circle, we pierce 16 holes with an awl, trying to keep the distance between them as much as possible
We connect the gas canister to our homemade device and turn it on. If everything suits you, then you can leave it as it is. If you need a more powerful flame, you can increase the number of holes in our makeshift burner
Step 1 - preparing the base of the future stove
Step 2 - drill a hole in the jar
Step 3 - bending the copper tube
Step 4 - making the nozzle
Step 5 - building a stove burner
Step 6 - fastening the gas supply tube
Step 7 - making tile legs
Step 8 - testing the gas camping stove
As you can see, there is nothing difficult in making a camping gas stove. The main thing is to observe safety precautions when working with gas equipment.
Option number 3 - camping gas stove
If you are used to traveling by car, we suggest that you familiarize yourself with the following option for a homemade gas stove.
This is a more bulky design than the previous version, but with the help of such a tile, you can cook food or boil water much faster in field conditions.
Image gallery
Photo from
As a basis, you can take an old infrared heater, from which we first remove the protective grid
The next step is to take a piece of metal pipe, cut it into pieces of the required length and weld it to the base of the device. These will be the legs of our homemade gas stove.
In order not to bother with the dimensions and construction of the gas stove grate, we recommend ordering it in the workshop where forged products are made to order. This will save both time and nerves spent on making this part.
By connecting the gas mixture cylinder to the stove, you can start using the homemade device
Gas stove body assembly
Installation of tile legs
Installing the grate on the stove
We connect the cylinder to the gas stove
Before you start using a homemade device, be sure to check the joints for gas leaks. How to do this was written a little higher.
Option number 4 - a camping tile from a pipe
It is not difficult to build the next version of a camping gas stove with your own hands.
This requires very little: a piece of metal pipe and skills work with a grinder and a welding machine.
Image gallery
Photo from
First you need to take a piece of metal pipe with a diameter of about 12 cm, a length of 30-35 cm and mark on one side in the form of teeth
Armed with a grinder, we cut the teeth on one side of the pipe according to the marking. We try to make them as similar as possible - the stability of the structure will depend on this.
This step can be skipped if you took a piece of a new pipe. If the pipe is old, there are traces of rust or paint on it, these must be removed with a grinding wheel. This must be done, because when heated, the paint will melt and emit unpleasant odors.
From the edge of the pipe opposite to the teeth, at the same distance from each other, mark six holes, and then drill them with a drill with a diameter of 10 mm
Next, you need to drill a hole for the gas burner nozzle. We do it using a drill with a diameter of 20 mm, slightly below the holes drilled earlier.
Taking a metal rod, we make a holder for a gas cartridge out of it and weld it to the body of the future tile
Before using the stove, you need to check it for stability. To do this, put it on a flat surface, and put a saucepan on top. If the structure seems unstable, it is worth trimming the jagged edge a little.
After completing all the previous steps, insert the gas burner into the holder and proceed to testing our camping stove
Marking a tile blank
Cutting teeth on the base of the tiles
Grinding the body of the future stove
Marking and drilling holes
Drill a hole for the nozzle
Welding the torch holder
Structural stability check
Homemade gas stove test
When working with a welding machine and a grinder, it is imperative to adhere to safety rules. If you do not have the skills to work with such equipment, then you can order the production of a blank in the workshop.
Option number 5 - gas infrared stove
Fans of traveling in the cold season will definitely appreciate the option of a gas stove, with which you can heat your tent.
For work, you will need to take the following tools and materials:
- gas cylinder (200 g or 5 l);
- oxygen hose at least 2 m long;
- infrared gas burner;
- clamp;
- screwdriver;
- gas nozzle;
- retaining ring.
Choosing a ceramic burner in a store, you should give preference to small models. They consume gas much more economically than overall devices.
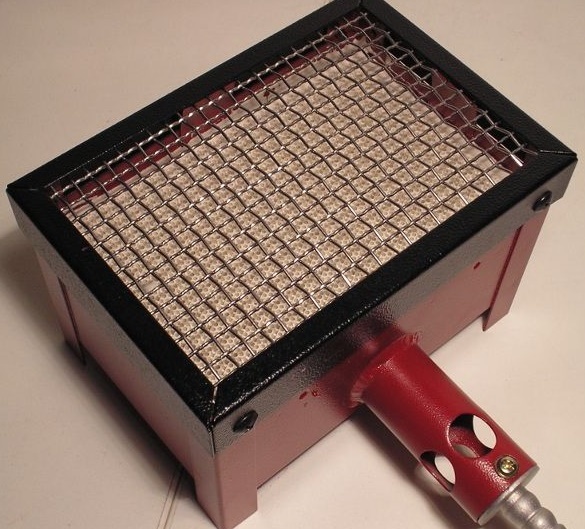
Since it is very difficult to make a ceramic gas burner with your own hands, it would be better if you purchase this device in a store.
Having prepared all the necessary tools and materials, you can start assembling the device. First, we connect the nozzle to the inlet of the gas burner and secure it with a retaining ring. Next, we connect the oxygen hose to the nozzle and tighten the clamp tightly with a screwdriver.
Then we connect the second end of the oxygen hose to the gas cylinder and also secure the connection with a clamp.
The homemade gas stove is ready. In order to ignite it, you need to open the gas and bring a match to the gas burner.
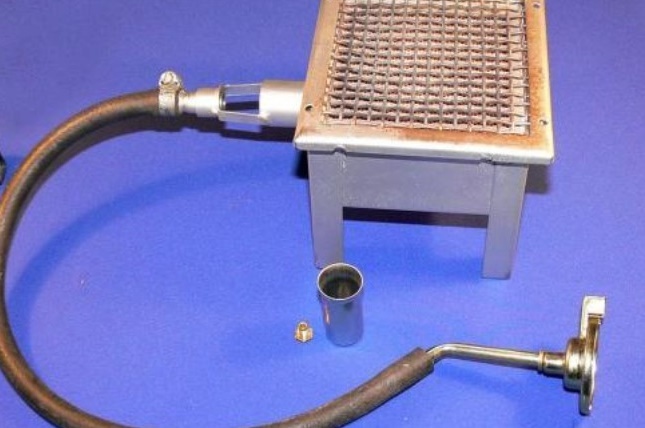
Such a stove can not only heat the tent, but also cook food on it. To do this, you need to put two stones on the sides of the burner, and put skewers on them, making an impromptu burner
When using such a device, it is imperative to follow the rules of safe operation. It is forbidden to leave the working device unattended. You also need to remove flammable items away from the homemade gas stove and remember to periodically ventilate the tent.
Safe operation rules
When working with gas equipment, do not forget about the rules of safe operation. Wrong balloon operation may cause explosion or fire.
In addition, homemade gas stoves are devices that pose a latent threat, so you need to be as careful as possible when working with them. Even at the stage of designing a homemade product, you need to take care to do everything clearly according to the instructions.
You should also not neglect checking the connections, since even the slightest leak can lead to dire consequences.
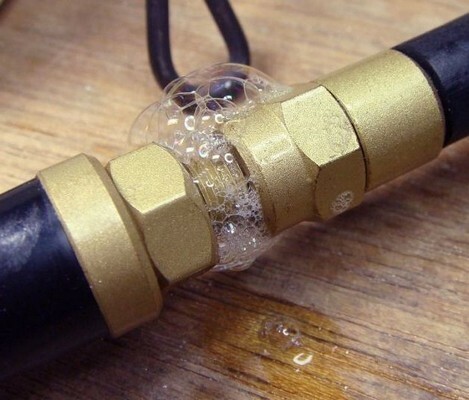
The most common way to test gas equipment for leaks is to lubricate the connections with soap suds. If it does not bubble, then the equipment is in good order and you can start operating it.
If you are not sure that you can make a really high-quality device, then it is better to purchase a gas stove in the store. Factory devices are subject to mandatory certification and control, so it is much safer to operate.
Conclusions and useful video on the topic
How to make a powerful gas stove from pipes and a burner from a gas column will be discussed in the following video:
Another way to build a gas stove yourself:
As you can see, it will not be difficult even for a novice home craftsman to build a gas stove and such a device will cost much less than the purchased option. This will require a minimum set of tools and materials, as well as some free time.
But, do not forget that homemade gas equipment is fraught with a latent threat, therefore it is important to handle it very carefully and do not forget to shut off the gas supply at the end of use device.
If you had to assemble a gas stove yourself, please tell our readers about it. You can attach photos of the assembled device to the article and share the assembly secrets.
