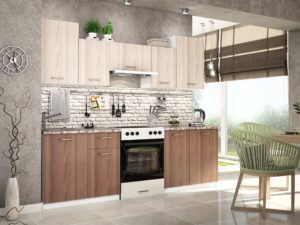
 The kitchen is a place of frequent visits to all household members. The comfortable arrangement of furniture and the ease of use of base and hanging cabinets affect the mood when preparing and eating food. The correct placement of the modules will allow you to ergonomically place the sink, stove, refrigerator, and will also increase the life of the furniture.
Preparing to install the kitchen unit
The content of the article
- Preparing to install the kitchen unit
-
The process of assembling and installing a kitchen set
- Installing lower modules
- Fastening the hanging modules
- Table top fixing
- Backlight
- Problems when installing a kitchen unit
When arranging a kitchen, first they plan the placement of all cabinets, depending on the location of the communications that will have to be used:
- the oven or hob is positioned as close as possible to the hood;
- the sink is placed near pipelines with water and sewage;
- refrigerator - close to the power supply point, as far as possible from heating radiators.
After allocating the installation locations of the listed attributes, determine the space for placing the headset modules. The main criterion for planning is the ease of use of communications and lockers.

ATTENTION! The stove must not be placed next to a refrigerator or sink! An increase in temperature in the working area of the hob will adversely affect the operation of the refrigeration equipment. And spray from the tap can get on the stove during cooking.
Creating a sketch or drawing that will reflect the kitchen equipment and furniture modules will help you organize your workspace correctly.
When installing the headset, you will need the following tool:
- drill and hammer drill;
- screwdriver;
- jigsaw;
- measuring and marking devices;
- carpentry set.
The process of assembling and installing a kitchen set
Delivery of furniture cabinets is made in assembled or disassembled form. Regardless of this, they have internal end surfaces not covered with PVC tape, which entails the spread of a specific odor, which is due to the presence of formaldehyde. These are harmful substances for the human body, without which the production of furniture from chipboard is impossible. To get rid of unpleasant components, all ends are covered twice with PVA glue, which, after drying, prevents the spread of harmful substances.

Delivery of a disassembled headset requires preliminary assembly of modules. For this, special corner fixtures and clamps are used, which allow you to assemble the boxes with maximum accuracy. Confirmants or self-tapping screws are used as fasteners. The back walls made of fiberboard are nailed down.
Installing lower modules
When the headset is delivered assembled, before starting the installation, the facades are removed from all the cabinets. Before installation, the legs are screwed to the bottom surface from the outside. If you have to assemble the modules yourself, then before installing the boxes, at the locations of the pull-out shelves, the slide is attached to the inside of the side surfaces. After that, the necessary slots and holes are made in the rear walls of the cabinets for connection to communications.

ATTENTION! When marking for cavities through which pipes and electric cable will be connected, the module, pre-set in its original position, then outline the cutout with a pencil - in place location. When measuring linearly and transferring the size to the product, it is difficult to take into account all the deviations of the box setting, so the cut is inaccurate.
Installation of the lower cabinets begins from the corner, gradually moving to the extreme elements or household appliances. Each of the modules is adjusted in height so that it is the same with the adjacent cabinet and corresponds to the horizon. After installing the lower boxes of the kitchen unit, using a long level, check the correct installation of the entire row. If necessary, correct and connect with each other using self-tapping screws.
IMPORTANT! All end cuts for communications are treated with silicone sealant to prevent moisture ingress.
Fastening the hanging modules
The installation of the upper row is done so that the distance from the lower cabinets to the suspended shelves is 45–70 cm. The consumer chooses the exact value himself, depending on the height and ease of use. Mounting technique may vary.
Most often, brackets are used that are attached to the back wall, and then a hole is drilled in the marked place on the wall. Using dowels 8 or 10 mm, screw in long screws on which the module is suspended. This method does not always provide the ability to accurately install the cabinet. Displacement of the self-tapping screw by 2-3 mm in height distorts the general line of the location of the upper shelves.

To avoid this disadvantage, the hinged boxes are fixed in place. For this, the box is equipped with a chipboard back wall and fixed in the required position. Then a hole is drilled in the wall through the chipboard. After that, using reinforced screws, fix the cabinet. This method will allow you to accurately install the modules, but it will be much more difficult to remove them.
After fixing the upper boxes, shelves and additional equipment (hood) are installed inside. Then the facades are screwed on.
Table top fixing
If the working surface of the table is connected to a stove, refrigerator or has an angular design, then before installation, an aluminum bar is attached to these ends to protect the surfaces of the joints from moisture. Then, holes are drilled in the upper horizontal strips of the floor boxes, and if they are absent, metal corners are screwed onto which the tabletop will be installed.

Before moving the countertop to the desired location, cut out the holes for the sink and hob. The end planes, after the cut, are treated with silicone sealant to protect against moisture ingress.
ATTENTION! In order not to scratch the polymer coating of the desktop, when cutting a hole, place polyethylene under the support of the power tool!
After fixing the sink with the presser feet, the working surface is attached to the horizontal strips or corners using self-tapping screws, the length of which is chosen 7–10 mm less than the elements to be connected. The next step will be the installation of the mixer with connection to the required communications. The final ones include the installation of the inner shelves of the lower modules and the hanging of the facades.
Backlight
Hanging cabinets, without which the convenience of using the kitchen is inconceivable, limit the access of light to the cooking area. To improve the illumination of the space, additional electrical appliances are installed between the lower and upper rows.

It can be one or two fluorescent cylindrical lamps. The installation of backlighting with the use of LEDs located on a flexible tape or separately fastened elements with a dot effect looks aesthetically pleasing. Such electrical appliances are attached to the bottom of the upper row of modules and equipped with an autonomous switch. The device of such lighting gives the kitchen a unique design and makes the visible space voluminous.
Problems when installing a kitchen unit
When installing furniture, sometimes difficult questions arise that require special attention:
- gas pipes located along the wall cannot be dismantled or moved, therefore, slots are made along the entire length of the rear wall of the lower row;
- the unevenness of the floor, noticeable when installing a flat plinth, will require cutting it, taking into account the distortion of the dimensions;
- walls made of plasterboard or gas blocks will not withstand the required load, therefore they use a metal bus, having previously reinforced the fasteners;
- if the window sill interferes with the installation of the countertop, then it is cut, and then, using aluminum transitions, it is connected to the desktop.
ATTENTION! To make the profile attachment point strong, it is necessary to disassemble part of the wall and reinforce it with a bar or metal! Finishing in such places does not really matter, since this part will be hidden by the modules.
Everyone who has the skills to work with a locksmith tool can assemble and install a kitchen set on their own. This will save money and enjoy the use of self-assembled furniture.

