 Water hardness, heavy use and wear of the gaskets periodically lead to failure of kitchen faucets and their leaks. In order to understand how to fix a faucet in the kitchen if it starts to leak, you need to know its type and device features. Let's deal with the problem of disassembling it in the kitchen and replacing broken parts.
Varieties of faucet designs in the kitchen
Lever cranes have become popular for their ease of operation, high reliability and durability. With the help of a lever, it is quite convenient to control the temperature of the water and its pressure. But everything fails sometime. So, you found that the faucet is leaking in the kitchen. How do I fix it? Let's start repairing. But first, it is advisable to prepare all the tools and materials necessary for this:
Attention! Earned on our website kitchen designer. You can familiarize yourself with it and design your dream kitchen for free! May also come in handy wardrobes designer.
- adjustable wrench;
- Phillips screwdriver and flat-blade screwdriver
- spanners;
- pieces of leather and rubber for making gaskets;
- rags.
It is better to protect the surface of the sink with something soft (sponge or cloth) to avoid possible damage to the coating. The main part of the lever valve is the cartridge. There are two types of cartridges: ball; disk.
Ball cartridge: how to fix a leak
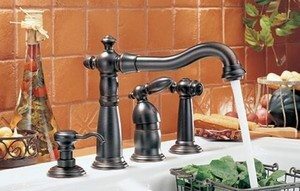
 The mixer device with a ball cartridge is a hollow ball with three holes, two of which are designed for the flow of cold and hot water into the ball, and the third hole serves to release the mixed to the required temperature water.
The ball is located inside the body and adjoins its two holes with seals - saddles. With the help of a lever that displaces the holes of the ball relative to the seats, the amount of water entering the ball is regulated.
The most common problem is that the ball does not fit tightly against the seat, causing it to drip and leak. This is due to scale and any debris contained in the water getting into the tap. As a result, we notice that the mixer is leaking in the kitchen.
Such a malfunction can be eliminated by disassembling the mixer and removing the cause of the blockage. If the reason is not clogging, but wear, then repair will be required.
 Sequence for disassembling a kitchen lever valve with a ball cartridge:
- shut off the water supply;
- unscrew the screw that secures the mixer lever located under the plug, which must first be removed;
- remove the lever by loosening it a little;
- remove the decorative strip and unscrew the nut;
- remove the cartridge;
- make a visual diagnosis of the seals and, if necessary, replace;
- reassemble in reverse order.
The disc cartridge started to drip: how to fix it?
This type of cartridge consists of two sintered metal plates with polished surfaces, tightly fitting one to the other, keeping the flow of water between them. Under the influence of the lever, the upper disc is displaced relative to the lower one and the holes on them open partially or completely. This regulates the supply of cold and hot water for mixing to the desired temperature.
If there is a drip, it means that the rubber seals in the body seats have become unusable and need to be replaced. Repairing a disc cartridge kitchen faucet is similar to repairing a ball type. Disc cartridge with ball are not interchangeable! Despite some external similarities, they have a fundamental difference in their design.
Two-valve mixer leaking
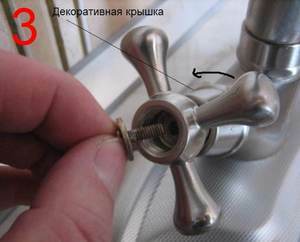
 The two-valve mixers we are familiar with are very simple. The flywheel, which we rotate during operation, is bolted to the so-called crane-axle box - a locking mechanism that shuts off the water supply. If, to fully open the valve, it is necessary to make several turns of the flywheel, then we are dealing with a worm-gear crane-axle box.
It is arranged as follows: as a result of rotational-translational movements, a rubber gasket presses against the so-called saddle or moves away from it to open a path for water into the body, and then into pouring it out. In case of wear or damage to the gasket, the mixer starts to leak.
If for a full supply of water it is enough to make only half a turn of the flywheel, then this is a ceramic-type valve-box. When you open it, the holes in the plates are aligned, opening the flow of water into the spout (spout).
Valve types are less durable than lever types, but their repair is easier and cheaper. When a kitchen faucet with a valve system leaks, some replacement parts can even be made by hand. If necessary, the gasket can be cut out of the rubber.
Often, two-valve taps are equipped with a swivel spout, which is quite convenient when working in the kitchen. If water began to run out from under the swivel spout, then it will not be difficult to eliminate the leak.
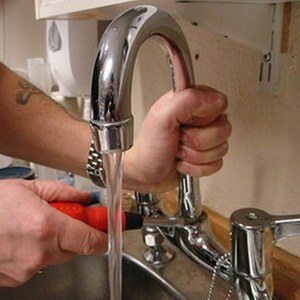
What should be done in this case? It is necessary to unscrew the fixing nut and, rotating and shaking, remove the spout from the body. Check the condition of the rubber gasket and the retaining ring and, if necessary, replace them.
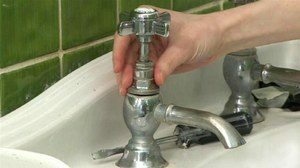
 To repair a two-valve mixer with a rubber seal, you must perform the following actions:
- Disconnect the water supply.
- Carefully, trying not to damage, pry off the screw cap with a thin screwdriver or knife and remove it.
- Unscrew the fixing screw and, swinging, remove the flywheel. If the screw is stuck and you can't unscrew it, you need to drip a little WD-40 or vinegar essence and wait.
- Unscrew the crane-axle box and remove it from the body.
- Remove the stem from the valve-axle box.
- Inspect the valve seat inside the faucet body for possible pits, deposits and other imperfections. Clean the saddle thoroughly.
- Replace rubber gasket.
- Install everything in reverse order.
- Open the water.
- Tighten the seals if necessary.
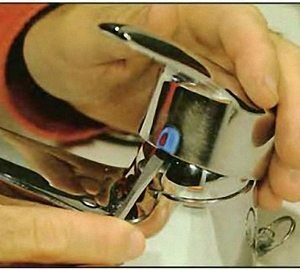 When repairing a ceramic-type axle valve, replace the internal parts and the rubber seal located in the repair kit, which can be purchased at any specialized store.
Ceramic-type valve axles are interchangeable with rubber-sealed valves. It is only necessary to select a part of the same diameter.
Do not use excessive force when tightening and tightening parts to avoid damaging the threads.
Conclusion
We have considered all the issues related to the elimination of breakdowns of the kitchen faucet. Now we will find out how to maintain it in working order and extend its service life.
When choosing a mixer when buying, do not pursue cheapness. Inexpensive products are often made from alloys that quickly oxidize, rust, and deteriorate. If they fail, they will most likely be impossible to repair.
It is advisable to install water purification filters in the water supply system in the apartment. This will prevent the ingress of mechanical particles not only into the mixer, but also into the system. When installing an additional filter for cleaning hard salts, your mixer, as well as washing and dishwasher, will be reliably protected from the effects of lime deposits, which will significantly increase their service life.
Video: what to do if the kitchen faucet starts leaking?
average rating 0 / 5. Number of ratings: 0
No ratings yet. Be the first to rate.


