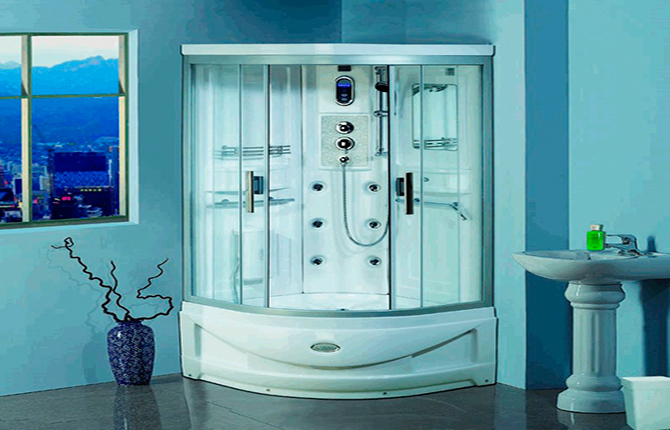
Brand manufacturers of shower cabins are trying to fully equip the equipment. In this case, plumbing for showers is part of the latter. Although when buying, you can always choose one option from several offered: by design, by mode of operation and other characteristics. But not all shower cabins are equipped with plumbing.
The content of the article:
-
How to choose plumbing for a shower cabin
- Which mixer to choose
- Which drain to choose for the shower
-
How is the installation of plumbing in the shower
- Installation of sewer plumbing in the shower
- Installation of plumbing fixtures in the shower
- Replacement plumbing shower
- Features of plumbing installation
How to choose plumbing for a shower cabin
What is included in the plumbing for a shower cabin:
- mixer;
- watering can with hose or stand;
- siphon sewerage system.
Which mixer to choose
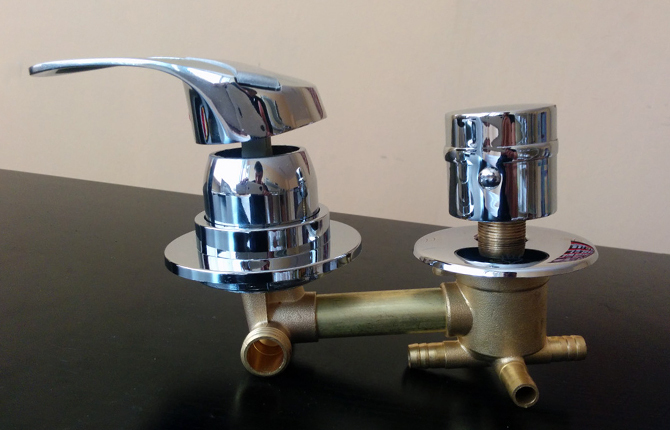
This is not to say that this is the most important plumbing fixture in the shower. But it is he who creates the modes of operation of the equipment, therefore, it occupies a central place in terms of functionality. Manufacturers offer a large number of models that differ from each other in shape, size, materials, method of attachment and control.
If the shower cabin is equipped with plumbing by the manufacturer, then you need to find out in the store how many modes it has. Usually one to five. The more, the more expensive.
Mode options:
- The mixer has one or two modes. They are usually installed in all budget cabins. And these are the cheapest models, although this does not mean that they are of poor quality. There are only two modes: hand shower and overhead shower. The latter is built into the ceiling of the shower cabin.
- Three modes. Such faucets are used in most modifications of shower cabins. To the first two, the so-called rain shower is added with a large amount of water poured from the ceiling. Some manufacturers do not offer rain showers. But there is a hydromassage of the lumbar back.
- Four modes. The set is the same as in the previous version. Only the foot massage mode is added.
- Five modes. Here is full functionality: a watering can, overhead and rain shower, hydromassage of the body and feet. The most expensive option, but also the most functional.
The following criterion for choosing plumbing is according to the method of control:
- with two valves
- single lever model;
- sensory;
- thermostatic.
The most popular option is single lever. Convenient, unpretentious in work, easily operated, inexpensive. Plus, there are many design options.
Don't skimp on the mixer. If you need to change it, then it is not necessary to look for models of the same brand. You can always find cheap products with high quality on the market. The main thing is that the characteristics of the new mixer coincide with the old ones. Particular attention is paid to the distance between the two pipes of hot and cold water supply. In the booth, this is a standard parameter: 100, 125, 145 and 150 mm.
The third selection criterion is the material from which the mixer is made. In this regard, the best option is chrome-plated brass.
Which drain to choose for the shower
Drainage equipment is responsible for removing contaminated water. At the same time, the pipe structure of which it consists must be 100% tight. Otherwise, flooding the bathroom cannot be avoided.
To reduce costs during the construction of the sewer system, it is necessary to initially determine the location of the drain.
There are two options here:
- The sewer pipe is already built into the floor. Then the shower stall, or rather its pallet, is chosen taking into account the location of the sewer pipe. The hole in the pan must match the place where the sewer pipe is brought out.
- Sewerage has not yet been installed. Then a shower stall is selected, and a sewer pipe is fitted under its drain hole in the pan.
An important parameter is the installation height of the pallet. Plumbers recommend installing the pallet higher. It will be easier to repair or change the siphon.
Today, shower cabins are not only equipment, which includes a pallet. There are also bottomless models.
Drains for bottomless showers
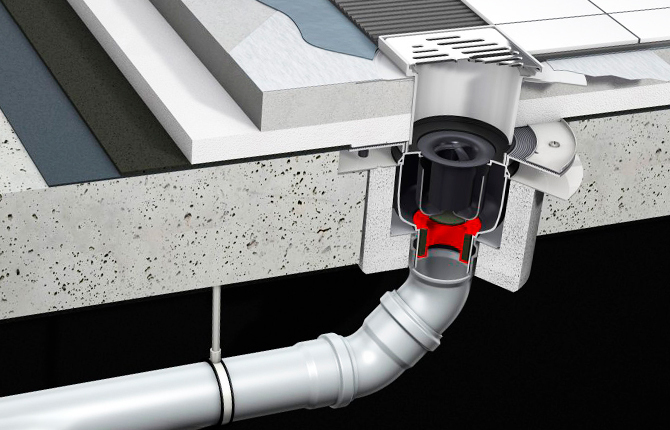
The drain device, also known as a siphon, is mounted in the floor base and closed with a finishing material. Only the drain hole is visible.
Plumbing of this type on the market is represented by two models:
- shower ladder;
- channel system.
The first structurally is a prefabricated product, consisting of several parts:
- frame;
- below the water seal, it is also a drain glass, which is always filled with water and does not allow an unpleasant smell from the sewer into the shower cabin;
- garbage collector on top of the body;
- above the decorative grille;
- between all parts there are gaskets that create tightness of the structure.
Material - plastic or stainless steel. Previously, cast iron was used, but it had to be abandoned. A plastic ladder is an inexpensive product, but one cannot say that it is of poor quality. Usually all parts of the plumbing construction are made with a thick wall, which ensures the long-term operation of the shower drain. This is especially true for the decorative grille, because it is often subjected to strong shock loads: falling from the hands of soap, bottles and other bathroom accessories. A stainless steel ladder is not a cheap pleasure, but it will last forever in a shower cabin.
This type of plumbing on the market is represented by two variations: horizontal and vertical. For showers use the first option. It takes up less space. The latter are used to organize drainage in pools - they have a large throughput.
The main thing when choosing a drain for a shower cabin is to choose the right one according to the size of the drain hole. The amount of water poured from the shower must pass freely through the opening of the drain. Therefore, its minimum diameter should be 50 mm.
It is not easy to replace the shower drain in the shower cabins, so you should not buy cheap low-quality models.
The second type is channel. There is only one difference from the shower drain - instead of a round-type drain device, a rectangular tray resembling a channel is used here. The design is convenient in that it has a large cross-country ability, which ensures 100% removal of contaminated water from the cabin floor.
On the market, these devices are represented by three modifications that differ from each other in material:
- plastic;
- ceramics;
- steel.
Shower siphons with tray
Manufacturers of sanitary ware for showers offer many options for sewer siphons.
But all of them can be divided according to two criteria:
- design;
- principle of operation.
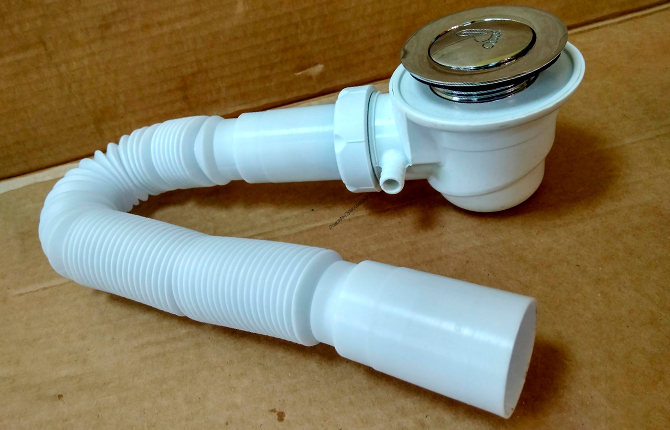
Structurally, the proposed models are divided into three groups. The first is the simplest siphon. It is a corrugation with a drain device. The design is convenient in that it can be placed at any angle, providing an outflow of water. This is especially important under pallets, where there is little space, and in a situation where the location of the sewer drain pipe is non-standard.
The second type is bottle. It is often used under kitchen sinks. Elongated design, where small debris settles on the bottom. For him, under the pallet you need free space. Therefore, plumbers rarely install this option.
The third type is pipe. It is often used under baths. These are “S” or “U” shaped structures, where the bend of the pipe acts as a water seal.
Advantages:
- small overall dimensions;
- the minimum number of joints.
There is only one drawback - it is difficult to clean such a siphon due to the minimum distance from the floor to the back of the pallet.
The second category is the principle of operation. There are also three groups here:
- A standard siphon in which the drain hole is closed with a rubber stopper.
- With manual control. The drain regulator is located on the wall of the shower cabin at a comfortable level for the hands. This is a handle connected to a valve that opens or closes the drain hole in the sump.
- click-clack system. The composition includes a spring-loaded plug, which, when pressed, opens the drain. Closes when pressed again.
How is the installation of plumbing in the shower
Installation of plumbing is divided into several stages:
- Installation of the siphon and its connection to the sewer.
- Faucet installation and connecting it to the water supply.
- Checking the functionality of the shower.
Installation of sewer plumbing in the shower
If palletless equipment is installed, then all work is carried out at the stage of floor formation. The drain is installed in the floor base and covered on all sides with a finishing material (usually ceramic tiles).
If a pallet is mounted, then first a drain structure is mounted on it exactly according to the instructions that the manufacturer attaches to the product. After that, it is installed in place, while the siphon is immediately connected to the sewer pipe.
An important point - the pallet itself must be installed horizontally. This is checked by the building level. The position is achieved by adjusting the legs.
Installation of plumbing fixtures in the shower
Connecting plumbing is also carried out in stages:
- preparation;
- connection;
- examination.
Preparatory stage
Experienced plumbers install ball valves on all water pipes, which are used in case of repair of the shower cabin plumbing system. With their help, the water supply is simply cut off.
It is also recommended to install filters after the taps. They will ensure long-term trouble-free operation of the equipment.
If the shower cabin is equipped with a hydromassage function, then a small pump is needed in the design. Its inlet pipe must exactly match the outlet pipe of the water supply - they must be located on the same horizontal line.
During the installation process you will need:
- flexible inserts;
- connection fittings;
- FUM tape.
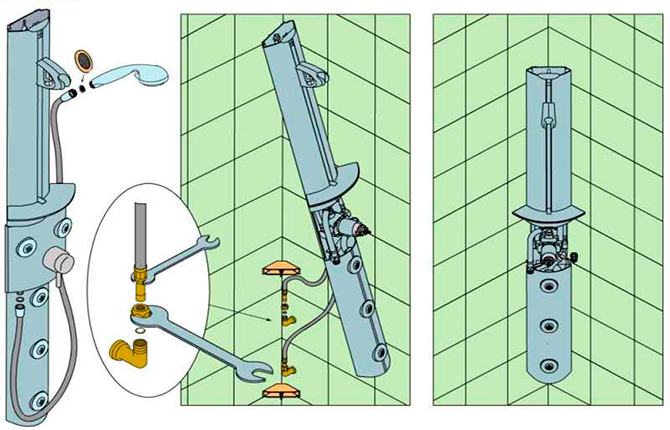
Cabin connection
All work must be carried out strictly according to the instructions attached to the equipment. Mixers with water pipes are connected with flexible connectors. It is important here to prevent leakage, so it is recommended to use inserts with union nuts. Inside the latter there are gaskets that ensure the tightness of the joint.
The complexity of the connection scheme depends on the number of functions of the shower cabin. If this is a simple model, then everything closes on the mixer. If the scheme is complex, for example, with the connection of a hydromassage, then you will have to use more hoses. At the same time, it will be necessary to install tees or crosses on the water pipes, which will distribute the flow of water to consumers: mixer, shower, hydromassage.
Checking the correct connection of plumbing
Open the water in the shower at full power and check the joints. If there are no smudges, the installation was carried out qualitatively. If even one drop of water appears, then it is better to disconnect the joint and reconnect. This applies to both water and sewer networks.
Replacement plumbing shower
The mixer fails the fastest. It is difficult to replace it with a new one. To do this, you need to remove the wall on which it is installed. But if there is space between the wall of the bathroom and the wall of the cubicle, then you can try not to remove the latter. Some booths are easily moved away, which means that the replacement can be carried out calmly.
For this you need:
- from inside the cabin, remove the mixer lining;
- fasteners are removed: bolts or screws;
- hoses are removed from the back;
- the mixer is removed;
- installation of a new one takes place in the reverse order.
Sometimes it's easier to repair the faucet. Usually a cartridge or a ball starts to leak, depending on which model of plumbing was installed. Or the handle is difficult to move, making it difficult to adjust the water temperature. In any case, it is necessary to respond quickly to a breakdown so that it does not turn into a catastrophe - pouring out a large amount of water.
Do you have a bathtub or shower?
Shower cabin.
0%
Bath.
100%
We're renovating, we haven't decided yet.
0%
Voted: 1
Features of plumbing installation
Whatever type of plumbing is, there are no special differences in the process of its installation. Regardless of the place of its installation, a connection to the plumbing system is carried out. And here the connection occurs either using flexible hoses, or directly on the pipe thread. This is how installation is done in showers, on the sink, in the bath.
In the cabin, the mixer is more complex, especially if the equipment has several functions. Then you have to connect each consumer with hoses.
It's the same with sewers. But it’s easier here, because the scheme is simple - from the drain hole to the sewer pipe. And the shorter the distance, the more efficient the work.
Installing a shower faucet: video.
I would like to hear from our readers who had the experience of choosing a shower cabin without plumbing and its subsequent installation. If someone has any questions, ask in the comments. Bookmark this article so you don't lose any useful information. Share it on social networks.


