The equipment of the furniture wall of the kitchen is a whole art. Doors on cabinets, drawers are designed so that you can easily open and close the sash without popping and falling. Therefore, the installation of kitchen closers is just as important as the choice of the configuration of kitchen furniture.
The content of the article:
-
Types of closers for the kitchen
- Types by mechanism of action
- Types by type of fastening
- Types by type of lift
- How to choose a closer
-
Step-by-step instructions for installing a door closer
- Installation of mortise devices
- Gas lift installation
- Installation of a body closer
- How to fix the closer
-
Major installation errors
- It's all in the manual
- Markup errors
- Closer adjustment
- Results
Types of closers for the kitchen
Quite a lot of various devices for smooth braking of doors or drawers have been invented. Not all of them are user-friendly. For example, classic spring closers in the kitchen did not take root, although they are still used in wardrobes.
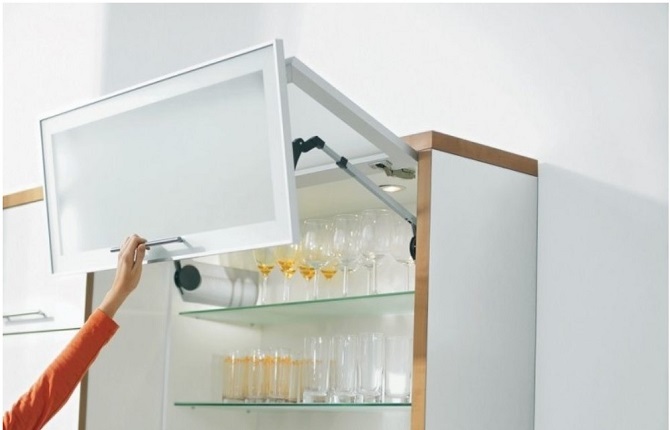
The main reason for installing a closer is the desire to make the process of closing the vertical cabinet sash smoother. The doors of the cabinets of the upper row of the furniture wall in the kitchen were usually located at a decent height - 200-230 cm above the floor. Therefore, the door is always made with the top position of the canopy.
Installing a door closer helps to avoid impact, the sash closes softly, silently.Likewise, the installation of a finishing mechanism on the drawer makes it easier to open and ensures a shock-free closing. Since the doors, shutters and drawers in the kitchen are opened much more often than on any other furniture in the house, then the installation of closers makes the process more comfortable, protects furniture from sharp blows and prolongs the life services.
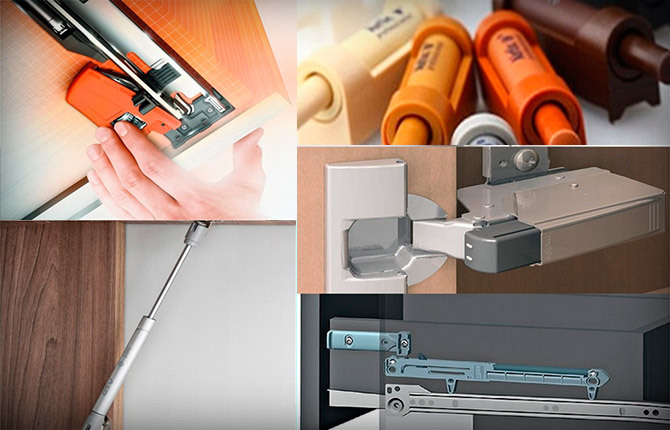
Types by mechanism of action
main function door closer - to compensate (dissipate) the excess energy of the moving door of the cabinet or drawer. The dispersion mechanism in the closer is selected depending on the weight of the door (box):
- Mechanical closer. It is used only on light vertical doors of wall cabinets. When the door is closed, the hinge eccentric rotates and for a moment rests against the metal spring-loaded “heel”, thereby slowing down the movement of the sash just before it closes.
- Oil compensators. Installation is recommended for the kitchen on all solid door leaves, as well as on kitchen drawers. A rod mounted on the door pushes the piston, as a result, oil flows inside the door closer through a small calibrated hole and absorbs excess energy.
- Gas mechanisms. The principle is the same as that of oil, but gas is used instead of hydraulic fluid. Installation is recommended on all hinged doors of cabinets weighing up to 3 kg. Service life - up to 5 years for Chinese devices, 10-12 years - for mechanisms made in the European Union.
Gas closers are best suited for the kitchen, they are easy to install, do not require additional maintenance and adjustment. In addition, a breakdown of the appliance does not threaten oil stains all over the furniture facade of the kitchen. Almost all models are disposable, poorly repaired or not repairable at all. You need to think carefully before installing furniture closers with a gas chamber.
Mechanical closers during installation require a certain qualification for setting up work. Branded devices can serve for 10-15 years.
Most often, the mechanism does not break, but wears out or, in conditions of poor ventilation of the kitchen, becomes overgrown with a greasy coating. Repair is not provided, it is easier to replace with a new one.
Oil closers in the kitchen work for 10-12 years. Installation is simple, only some models are subject to repair. The main advantage of the hydraulic mechanism is that the device does not fail at one moment, like gas or mechanical ones. It just starts to slow down over time.
But there may be other reasons for poor performance. For example, a broken fastener. Most often this applies to retractable closers or any other furniture in the kitchen with a hidden installation of the appliance.
Types by type of fastening
Installation of most models of closers is carried out overhead. Moreover, in a kitchen, it is recommended to use protected models or mount them inside a cabinet (drawer) so that the mechanism is less exposed to fat deposits.
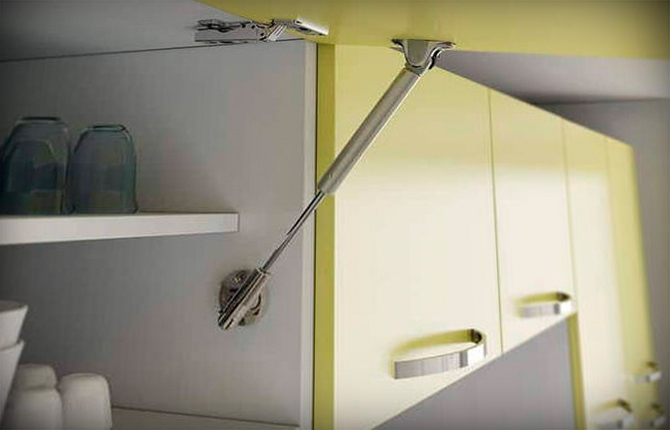
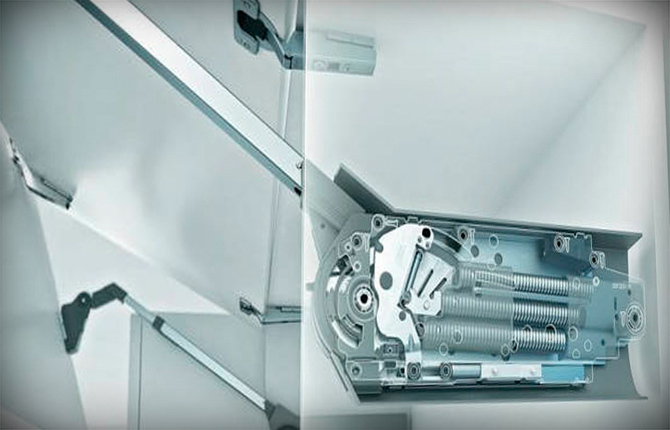
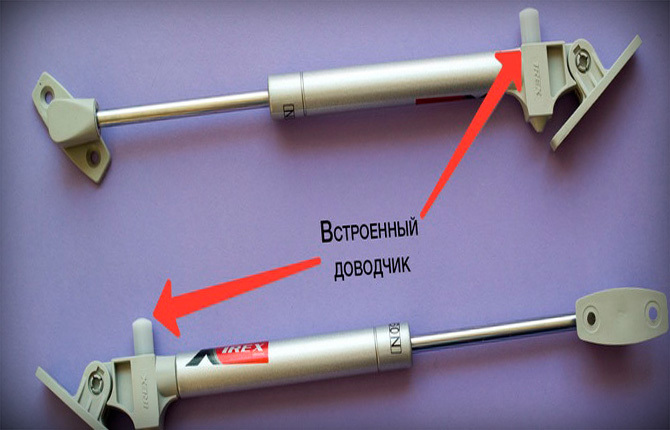
For example, a gas lift is installed inside the cabinet, a bracket with a movable stem is attached with self-tapping screws to the inner surface of the door, and a gas compensator is mounted inside to the side wall of the cabinet.
Oil closers, as a rule, are also mounted in a hidden way on the inner wall. Most manufacturing companies require that the mechanism be placed inside the furniture, not necessarily cut into the wall of the cabinet or sash. In some cases, a special pencil case is installed for the closer to work. For example, a device for a drawer is mounted above the guide rails in a special holder.
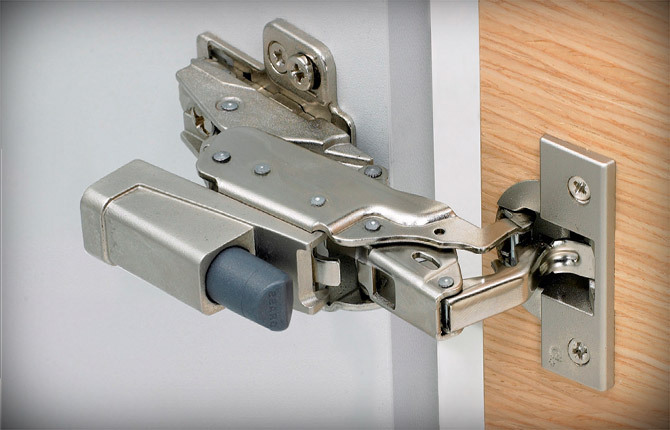
The only exceptions are hinges with a built-in closer. The mechanism with a compensator is mounted inside the cabinet on the side wall, and the counterpart cuts into the sash like a regular canopy.
Important! Some mechanisms work only on the swoop. These are also closers, but their use in the kitchen is rather limited. According to the installation scheme, the case completely cuts into the wall of the cabinet and blocks the impact load if the sash is slammed too hard.
Such designs are difficult to maintain, and the working rod in the kitchen is quickly contaminated with fatty deposits. If not maintained, the appliance may jam after a year of service in the kitchen.
Types by type of lift
Most of the simplest closers, mounted on hinges or cut into the cabinet wall, serve only to softly close the door. Often this is required by the operating conditions. For example, if you choose a cabinet with glass doors for the kitchen.
All body models of closers are used as a service mechanism. That is, the device not only gently accompanies the sash, but often its design allows fix the door in the open position, and some models allow you to fix it even in intermediate position. Opening the door can be very useful if there is a general cleaning in the kitchen, and you want to dry the cabinet, leaving it open at night.
Scheme of lifting the door closer:
- Traditional swing option. Usually it is a gas lift or an eccentric mechanism. Most of the wall cabinets in the kitchen are equipped with hinged sashes with a sash closer-lock in the upper position. It is clear that some of the furniture in the kitchen is made with a lower hinge arrangement. In this case, the closer rod serves as a limiter.
- Installation of door closers instead of traditional hinges. In this case, the sash moves away from the plane of the wall cabinet and rises, simultaneously making a turn. A convenient scheme in cases where a ventilation duct passes over the wall cabinets in the kitchen or a niche with lamps is installed.
- Installation on a double door closer. Complex body models are used. It is used in cases where the wall cabinets in the kitchen are made in the format of closed shelves. Instead of the traditional hinged scheme, the doors open vertically, like blinds. At the same time, the mechanisms of the argument perform the functions of additional loops and guides at the same time.
Such a scheme is becoming more and more purchased, since open doors do not occupy the free space of the kitchen. In addition, according to the installation conditions, the lower shelves remain free from any mechanisms, which is often a serious problem when arranging a dish dryer or simply storing overall utensils.
How to choose a closer
The most common model remains a standard gas mechanism, or in other words a gas lift. It is used on 90% of all finished furniture facades for the kitchen. Very easy installation, you can always replace with your own hands. If double horizontal doors are not used in the furniture facade of the kitchen, then all cabinets with lifting or folding doors can be equipped with gas closers.
Complex body models with a built-in locking system at different opening levels, an oil compensator, are quite expensive, require correct adjustment. It is quite possible to repair a cabinet closer with your own hands, but buying components and spare parts often costs more than installing a simple gas appliance.
Therefore, such schemes are used only for custom-made furniture for the kitchen. But even in this case, it is better to agree on the choice of hinges and closers with the designer or technologist before starting to manufacture the furniture facade for the kitchen.
If the wall cabinets in the kitchen are made according to the classical scheme with doors swinging open to the sides, then there is no particular need to install gas or oil mechanisms. Moreover, the more complex the device, the more free space it takes up inside the cabinet.
When opening the valves, the owners automatically hold them with their hand. For soft closing, it is enough to install overhead spring closers. In this case, it is better to buy ready-made hinges with a built-in compensator, they are more durable. But if the furniture has already been bought ready-made, then you can install additional compensators with your own hands.
Step-by-step instructions for installing a door closer
Simple mechanisms used on typical kitchen furniture facades do not require special training. For installation, you just need to correctly mark the place of attachment on the flap of the cabinet. In this case, it is better not to rush with the final tightening of the screws. The reason is that the installation of a closer almost always affects the operation of the hinges. It will be necessary to additionally adjust the rise or look for a new type of door closer for the kitchen.
Installation of mortise devices
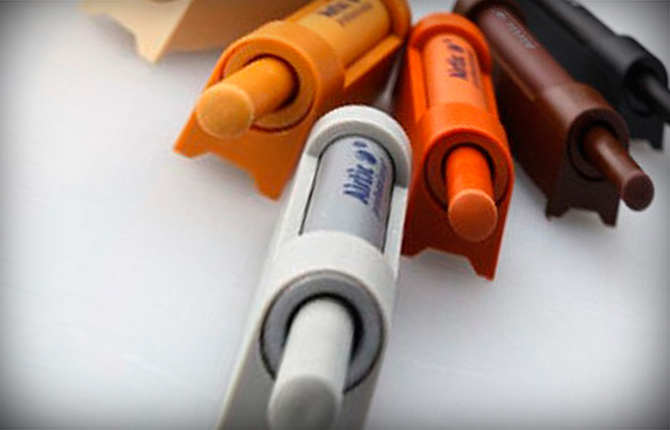
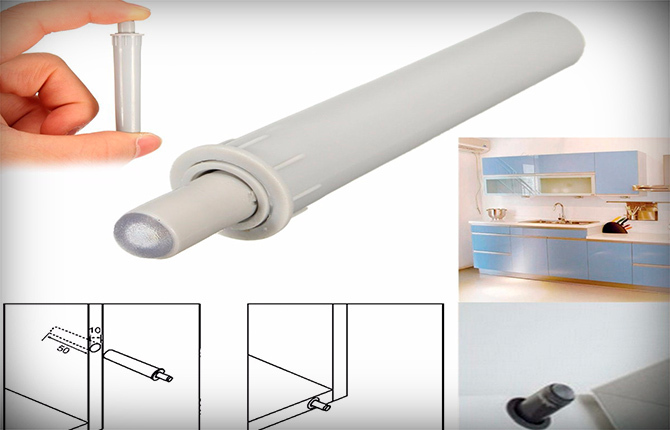
The easiest option is to install a mortise (push-button) damper-closer. In fact, this is a regular capsule with a spring and an oil chamber. The size of the closer allows you to cut into the end of any wooden furniture in the kitchen.
All that is needed is to choose the right door closer model. It is best to use the products of well-known manufacturers of fittings for kitchen furniture:
- HAFELE is a German brand, one of the best fittings manufacturers;
- HETTICH is a manufacturer of all types of closers for any furniture, including kitchens;
- Italian SIRO is one of the best manufacturers of mortise door closers.
For installation, you need to cut a hole to the depth of the body and insert the closer after the depth of the hole is adjusted, the closer can be sealed with transparent silicone.
Gas lift installation
First of all, you need to choose the right door closer model. There are a number of models of gas lifts designed for a specific weight and load. You can’t buy a dozen gas closers and install them on all the doors of the furniture facade of the kitchen. For example, marking 100N means that the gas lift is designed for heavy doors. Installation on a light door will lead to premature failure of the hinges.
Most manufacturing companies complete the door closers with everything that may be required to install the device. First of all, you will need a screwdriver, a pencil and a template.
The sheet with the contours of the fasteners is laid out on the inner wall so that the cut of the template coincides with the front edge of the board. In this way, any drawers with hinged doors in the kitchen are marked. With a bat inserted into a screwdriver, holes are pricked for future self-tapping screws. It remains only to drill and fix the bracket connected to the closer body.

Next, you need to determine the height of the sash. It is chosen based on the height of the kitchen ceilings, the location of the drawer or personal preferences. The position of the sash in the open state depends on the distance for the bracket selected during installation.
The smaller the distance, the higher the sash lift. After installing the gas lift, it is imperative to check and adjust the operation of the hinges. If this is not done, then the gas closer will not live long in the kitchen. On average, the service life of an elevator is half that of a furniture hinge.
Installation of a body closer
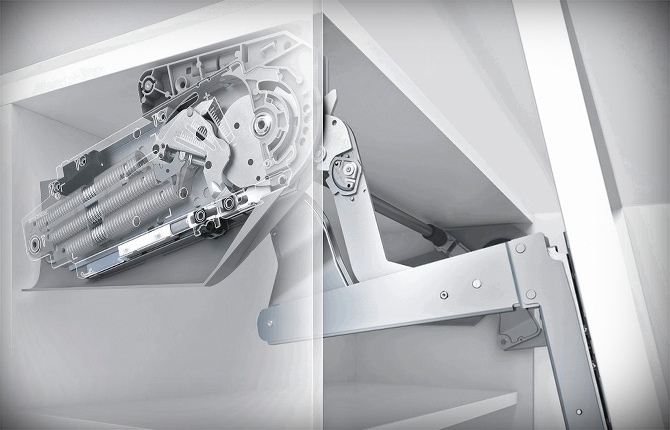
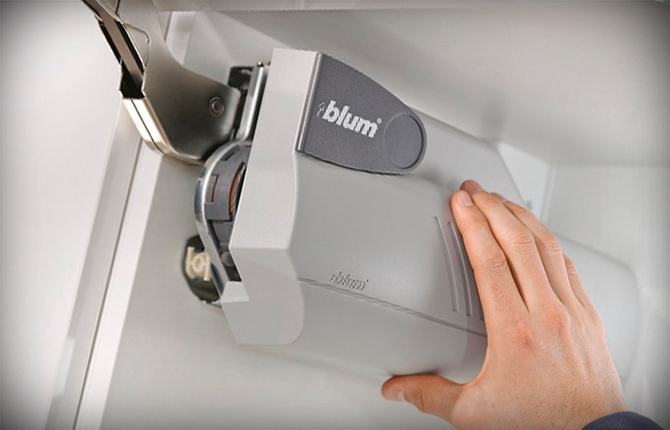
If possible, it is better to use BLUM AVENTOS universal hinged door closers, variant HK-S, for furniture in the kitchen. This model is much more convenient and reliable in work, especially in the kitchen. Installing the closer on the kitchen cabinet is not difficult, but you will need to carefully follow all the requirements of the instructions.
For one cabinet in the kitchen, two lifting mechanisms will be required. Installation is carried out strictly in size, from the inside of the sidewalls. When buying, you need to pay attention to the drive force. On the case or in the instructions there will be a letter marking in Latin. It is necessary to install the option that is suitable for the weight of the sash.
The easiest way is to install on a disassembled cabinet before installing furniture in the kitchen. The mechanisms are always accompanied by an instruction that describes the layout scheme.
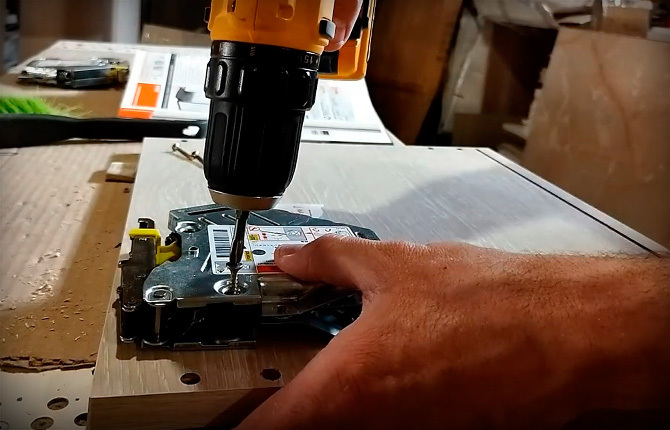
The first step is to mark the drilling points under the centering pins and drill holes to a depth of 5 mm. Next, you need to insert the pins and “put” on them the body of the closer itself.
Pressing the case firmly with your hand, you need to wrap three self-tapping screws with a screwdriver. Moreover, this is done in the body of the sidewall without any preliminary drilling. Only in this case, the installation will turn out to be durable and accurate, the closer will “live” in the kitchen for at least 15 years.
In a similar way, the second device is installed on the left (or right) sidewall.
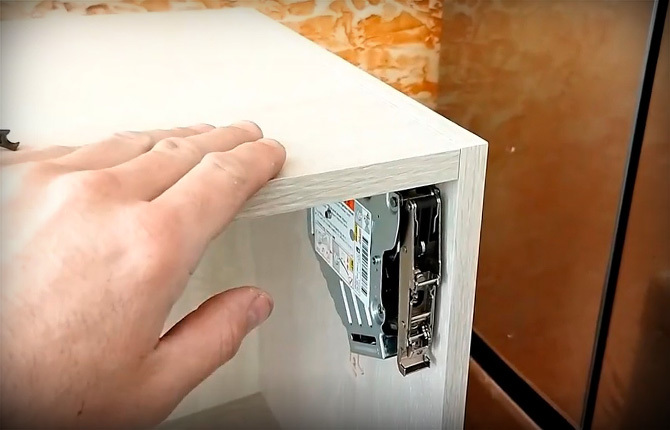
Further, according to the diagram in the instructions, it is necessary to fix two support brackets on the cabinet door. Plastic stops are inserted into each of the devices, and you can fasten (snap) the sash onto the kitchen cabinet.
But first, the mechanism needs to be adjusted.
It is required to set the back pressure value of the door closer. It depends on its value with what effort it will be necessary to close the sash. We find a screw with a scale placed on the side surface of the case, and unscrew it with a screwdriver to “-” or “+”.
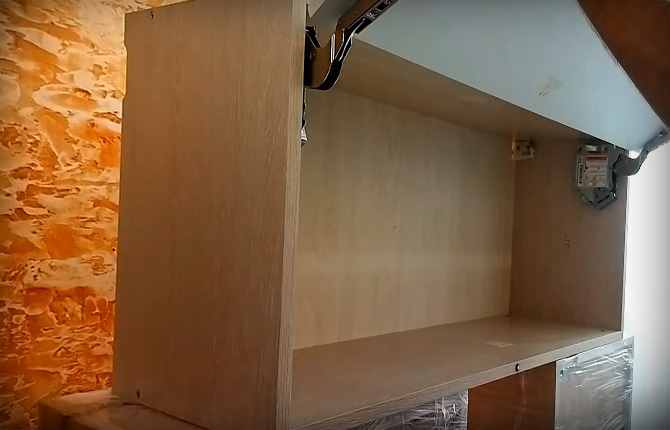
It is impossible to make the lowering force very large during installation; you can tear the cabinet off the kitchen wall. With a small sash will lower by itself. You will have to experiment with different cabinets in the kitchen to determine the best counterpressure option.
Also, after installation, you will need to align the position of the sash along the top edge line. But this will need to be done only after all the wall cabinets are mounted on the furniture facade of the kitchen. It makes no sense to do this before, the line will still turn out to be uneven, even if you stretch a thread or a masking cord between the walls of the kitchen.
How to fix the closer
Brand devices work for a long time. If everything is in order in the kitchen with ventilation and exhaust, then the mechanism does not even need to be washed from accumulated dust and grease. The only part that wears out over time is the compensator oil capsule inside the closer.
It is possible to establish the fact of a malfunction by the weak back pressure of the device when the sash is closed. You can even compare how the mechanisms work on other kitchen cabinets. There may also be oil stains from the bottom of the case. There is no hydraulic fluid leakage, but there is a leak, so you can see a greasy spot covered with dust on the bottom of the cabinet wall.
The first step is to remove the decorative cover from the door closer.
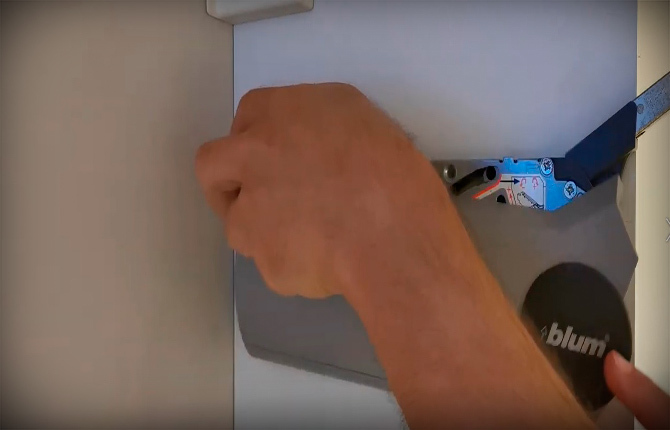
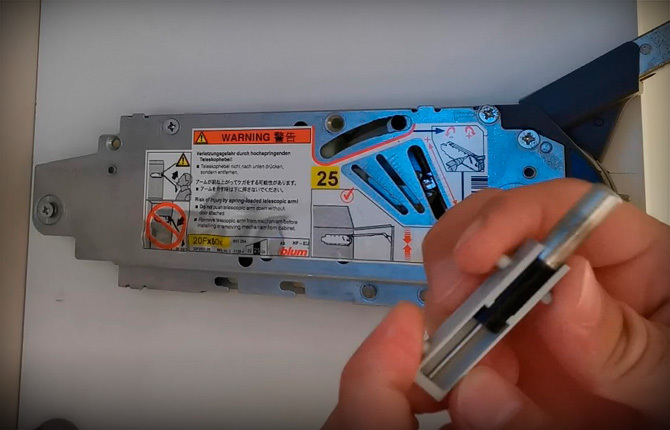
The compensator is located at the bottom of the door closer. Using a slotted screwdriver, you need to press and move the capsule forward so that the compensator disengages from the closer body.

You need to work with gloves, as well as remove all the contents of the cabinet and cover the floor. If the capsule is leaking, then when pressed, hydraulic fluid may appear, drops of which will scatter to the sides, some of it may fall on the kitchen floor. The oil is non-toxic, but sticks firmly to any surface. If it gets on the floor or kitchen furniture, it will leave dark spots.
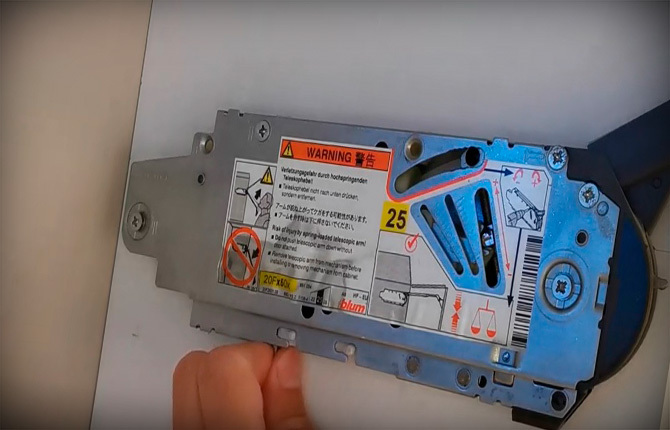
We send the damaged oil capsule to the scrap. Before installing a new shock absorber, you will need to remove dirt and stains. But the main thing is to try to establish why the shock absorber dripped. If due to natural wear and tear, then it will be necessary to install new capsules on closers throughout the kitchen.
First, let's check the operation of the lever without a compensator. If the mechanism creaks and sticks, then cleaning and lubrication will be required. Even worse, if the device wedges under load. This means that it's time to install a new closer.
After checking, you need to install a new shock absorber. To do this, we squeeze the rod with our fingers and, in a compressed state, insert it into the lower part of the housing. After replacing, you will need to check the operation of the closer and make sure that the problem was precisely in the faulty shock absorber.
It's the only option do-it-yourself repair. In all other cases, the mechanism is simply replaced. For an average kitchen, the service life of the appliance is 15 years.
Major installation errors
Most apartment owners choose a closer model for a long time and meticulously. But when it comes to installing the mechanism on the cabinet, the rush begins. As a result, the closer is installed, but somehow it does not work too well.
It's all in the manual
The biggest problem when installing BLUM AVENTOS door closers is the incorrect marking on the sidewalls of the shelf. First, you need to carefully read the instructions. Secondly, the installation scheme is thought out to the smallest detail by German engineers. Any attempt to make your own changes only worsens the quality of installation, makes it difficult to adjust the door closer, and often leads to damage to the appearance of furniture in the kitchen.
What you need to pay attention to:
- There is no marking in the instructions for drilling holes for self-tapping screws. The given scheme and dimensions in the instructions are required for installing the pins. You can not screw screws without pins. This is a mistake, the body will be installed skewed, and an obliquely hanging sash will spoil the interior of the kitchen.
- Holes for the pins must be made with a drill with a depth limiter of 5 mm. Otherwise, you can easily pierce the cabinet wall, you will have to rearrange the furniture in the corner of the kitchen to hide the hole.
- A similar mistake is often made due to the wrong choice of self-tapping screw. 35 mm fasteners are considered the standard. Shorter ones will not hold the case, and longer ones can pierce a 20 mm thick wall.
In addition, it is important to consider the material from which the furniture facade of the kitchen is made. If it is a chipboard, then before installing the self-tapping screws, it is necessary to perform preliminary drilling. Otherwise, a wrapped screw may peel off the “bump” on the outside of the sash. It will be possible to restore the facade of the kitchen only by replacing the cover.
Markup errors
The problem may arise if you read the installation diagram incorrectly. You need to pay attention to how the dimensions are indicated on the drawing. Typically, the vertical dimension (indent) for drilling under the pin is deposited from the outer plane of the upper shelf, laid on top of the sidewalls.
This means that after closing the sash (if installed correctly), its upper edge will be flush with the horizontal shelf. For kitchen wall cabinets, this is the most common option.
Often the upper plane of the cabinet is cut between the sidewalls. For example, if the furniture in the kitchen is capital or the facade of the kitchen was made to order. In this case, after installing the closer, the sash will protrude above the cabinet and completely ruin the look of the updated kitchen facade.
Closer adjustment
After completing the installation, you need to check the operation of the mechanism. An experienced craftsman evaluates the tension of the springs and the level of counterpressure of the closer with his hand, according to his feelings.
Many owners prefer to install appliances in their kitchen on their own. The installation manual recommends slightly increasing the tension of the springs so that the sash fits snugly against the cabinet body.
It would be a mistake to immediately tighten the springs. You need to let the closer mechanism run in for a couple of weeks. During this time, the cabinet in the kitchen will be opened and closed a maximum of a hundred times. This is enough for the parts to get used, and it was possible to increase the tension.
Important! The screw may need to be loosened if the kitchen door slams too hard.
Results
Any neat person can install the closer on the closet on their own. But first you need to decide: limit yourself to a gas lift or install expensive hull models. The choice of complex devices must be justified and must be set exactly according to the instructions. Otherwise, most of the money will be wasted.
Tell us about your experience with installing mechanisms, which ones do you think are best suited for a modern kitchen? Also share the article on social networks and bookmark it.


