Laminate is the leader in the ranking of finishing materials for floors. But you must admit that improper installation of such a coating will not only not decorate, but also spoil the look of the room.
Therefore, in order not to get into an unpleasant story, in this material we will tell you about the laminate, how to properly install and what the nuances should be taken into account - starting from surface preparation and ending with the features of choosing this floor coatings.
The content of the article:
-
Subtleties of the choice of flooring
- Material surface type
- Coating wear class
- Moisture resistant laminate
- Choice of locks to cover
- Types of substrate for laminate
- How to lay laminate?
- Conclusions and useful video on the topic
Subtleties of the choice of flooring
In the flooring store, the eyes literally run up from the abundance of types of laminate. It is not enough to choose the one that fits the interior or just like it externally.
After all, even the most beautiful material may not be suitable due to the characteristics of your house or apartment.
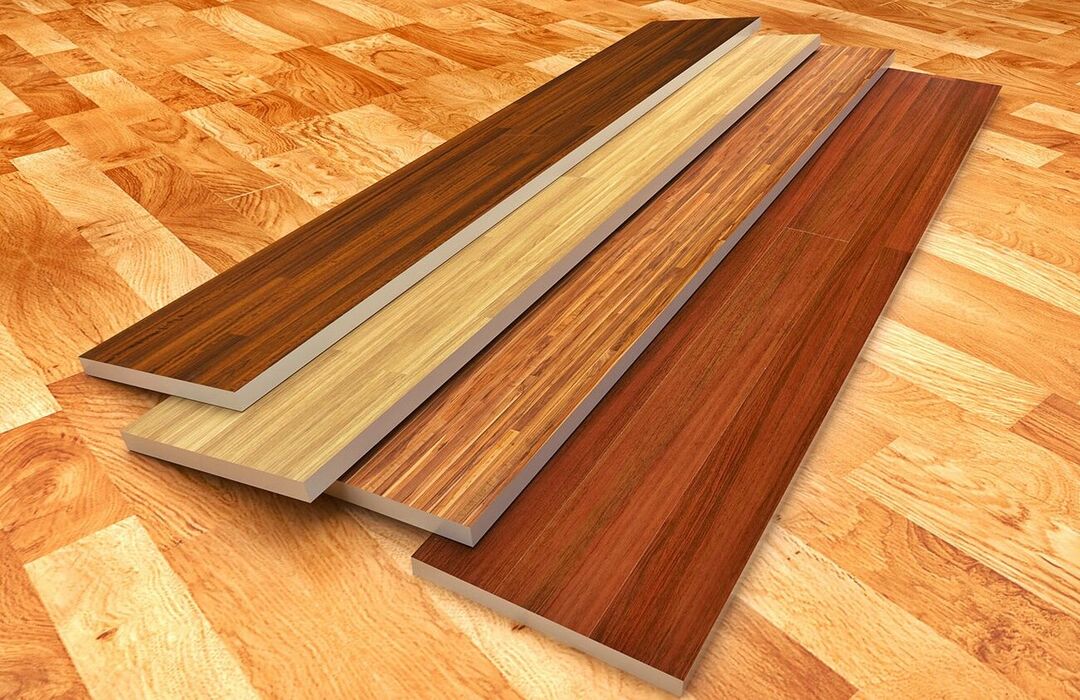
When choosing a laminate, you should focus on its data. Do not purchase material of dubious quality, even if you are offered a good discount for it. Panels must be clean, even, without strong odors or damaged locks.
There are a lot of varieties not only in appearance, but also in various technical indicators. Let's try to briefly and simply deal with the main ones.
So the material is different:
- surface type - standard, glossy, matte, waxed, cork, vinyl, quartz-vinyl, with a corrugated and textured surface, 3D, with parquet imitation;
- wear resistance - household, commercial;
- moisture resistance - not moisture resistant, moisture resistant, water resistant;
- production material - fiberboard, HDF, HPL, vinyl;
- lock type - lock, click, ProLOCK, UniClic, aluminum, 5g, MegaLoc, T-Lock, without locks.
Let's consider these varieties in more detail.
Material surface type
As a rule, a standard laminate is an imitation of boards. It is made from fiberboard or chipboard, then layers with a pattern, a protective coating, and so on are applied.
Budget variety, most often used in ordinary houses and apartments. The thickness of the fiberboard/chipboard base can vary from 6 to 14 mm.
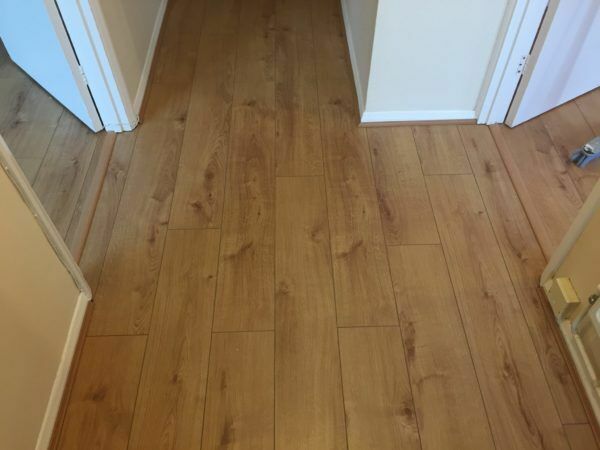
Standard laminate usually costs less than other varieties. And at the same time, products of 32-33 classes can be purchased at an attractive price with good quality. These are poorly disassembled models that are out of fashion or non-standard shades. If you are buying inexpensive material, look for similar sales in different stores. Perhaps a shade rejected by others will suit you and you can save a lot of money.
Glossy laminate can be simply shiny or with a reflective effect (mirror). Of the benefits: visually increases the space, looks impressive.
According to the reviews, it perfectly resists moisture, but, in fact, it already depends more and more on the lock connection and the “filling”.
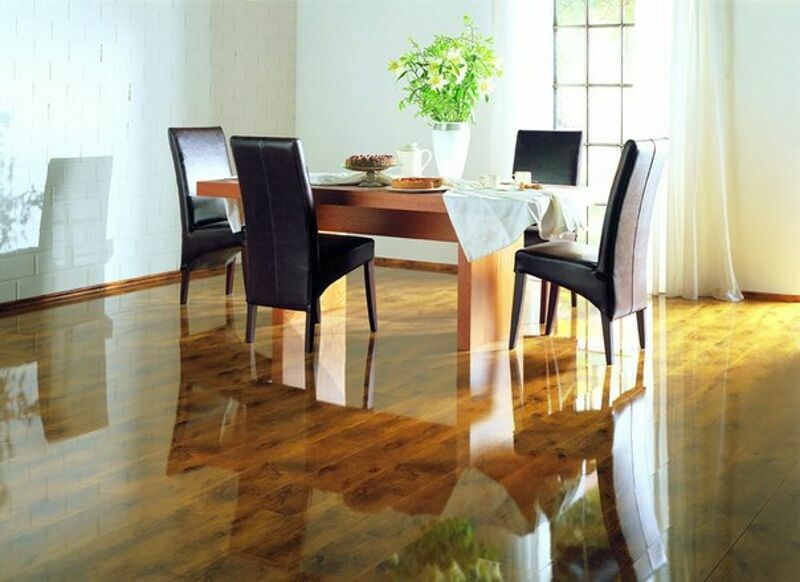
On sale you can find wood ornaments, "under the stone" or tiles. The main disadvantage is that damage and scratches are very clearly visible on its surface, it requires careful operation and maintenance. Well, you can still call it slippery
Matte laminate looks modest and noble. Perfectly imitates wood species. Wear-resistant, and, in addition, unlike the previous version, not slippery.
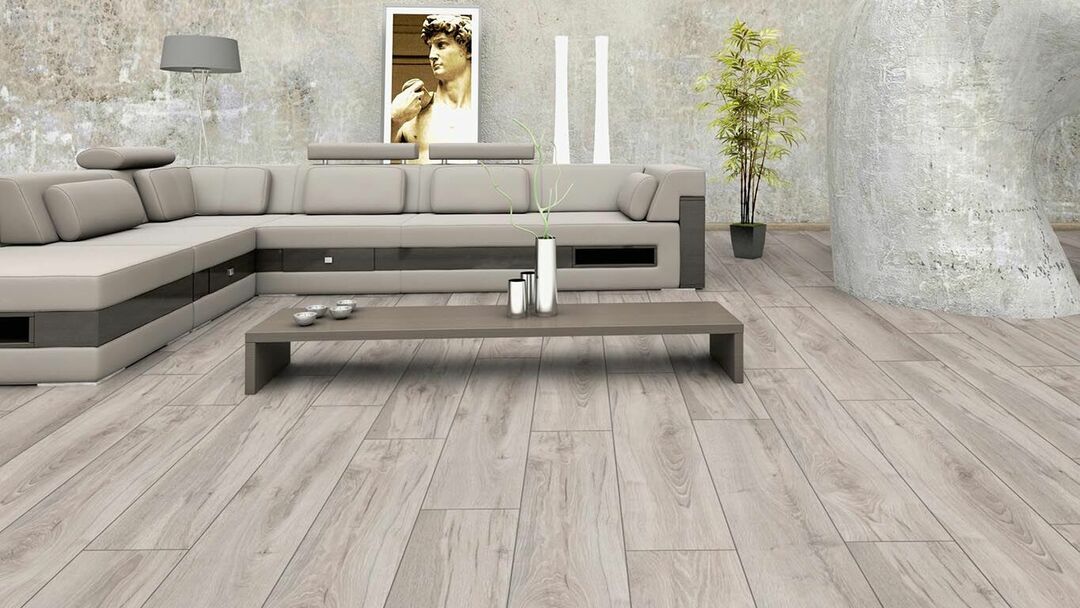
Matte laminate is suitable for almost any interior style. Restrained noble shades and naturalness will look equally appropriate both in the living room or bedroom, and in the office, shop, government agency
With a grooved or textured surface, the laminate has anti-slip properties and perfectly mimics the pattern that is depicted on it.
Of the minuses - more difficult cleaning, since the surface is not smooth. But this task will help to cope vacuum cleaner for laminate.
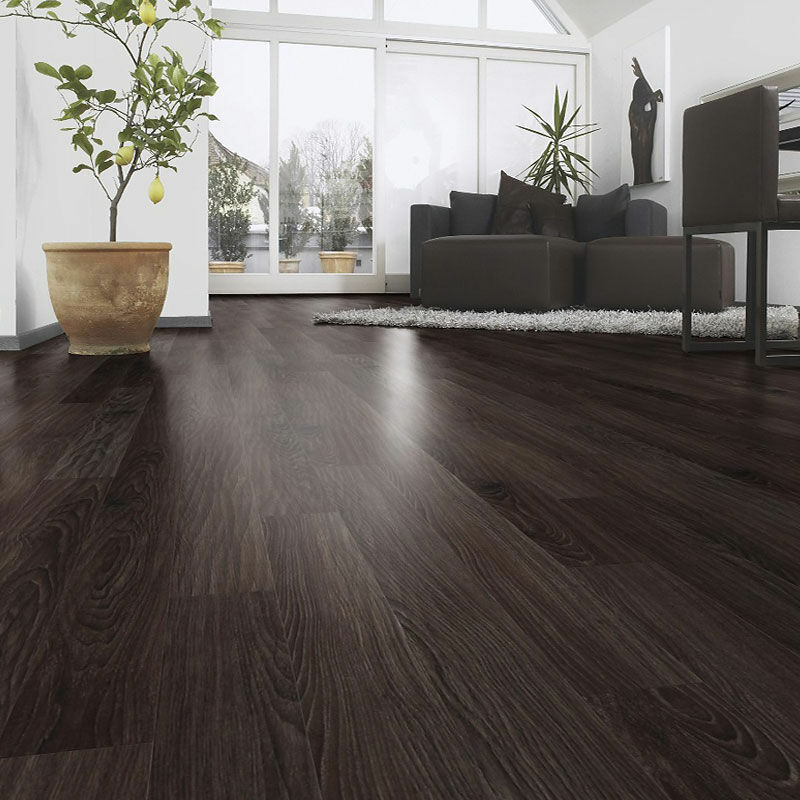
A laminate with a corrugated surface imitates raw wooden boards. Its main advantage is that it is absolutely not slippery and at the same time looks natural. It is mainly used in houses, apartments, private clinics
Waxed laminate looks very cozy. The effect is achieved due to the wax impregnation of the panels. Of course, it successfully resists moisture (again, we look at the locks), but it is afraid of damage.
However, there is a way out here too - in order to restore the surface and get rid of scratches, you can purchase a special wax pencil that will hide the flaws that have appeared.

Interesting fact. Not only laminate is waxed, but also its locks. They are treated with paraffin, which allows you to solve several problems at once, including creaking and low moisture resistance.
Cork laminate feels warm and soft to the touch. It has excellent thermal conductivity, environmental friendliness and sound insulation.
But he does not like moisture and is unstable to damage, and also requires substrates for furniture. And yes, it has the highest price.
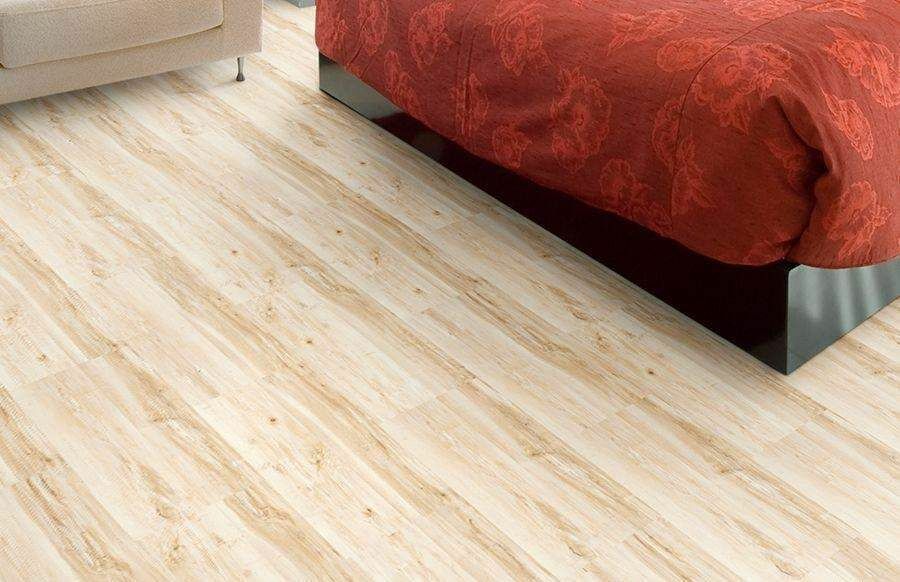
The 2 main disadvantages of cork laminate are the inexpediency of laying a warm floor on the system and difficult maintenance. Due to the porous surface, dirt penetrates deep into the material
Vinyl laminate is made from polyurethane. it happens with locks, without them (adhesive) and even rolled, like linoleum. Its thickness is from 2 mm to 6.5 mm.
It is flexible, durable, water resistant, but it is expensive, and its surface is not as visually close to natural as a conventional laminate.
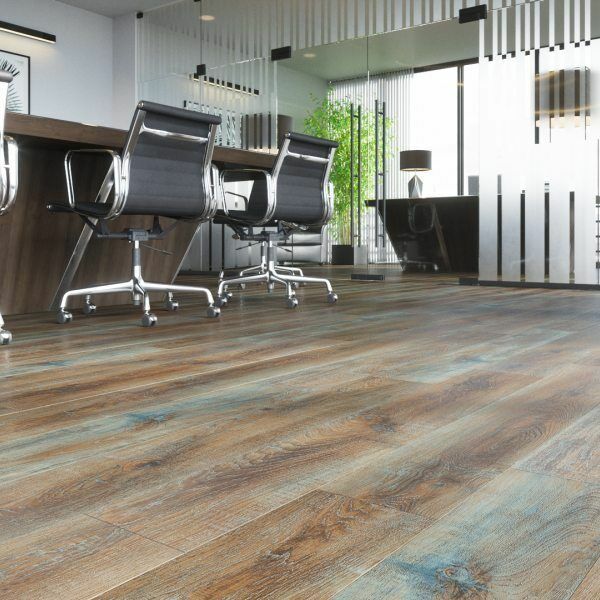
There is also another modification - quartz-vinyl laminate. When it is created, polyvinyl chloride and quartz sand are used. This type is distinguished by its special strength, resistance to moisture, and excellent decorative characteristics. But unfortunately it has a high price.
Parquet laminate is outwardly very difficult to distinguish from real parquet, so cleverly it imitates it. It is produced in different classes of strength and wear resistance.
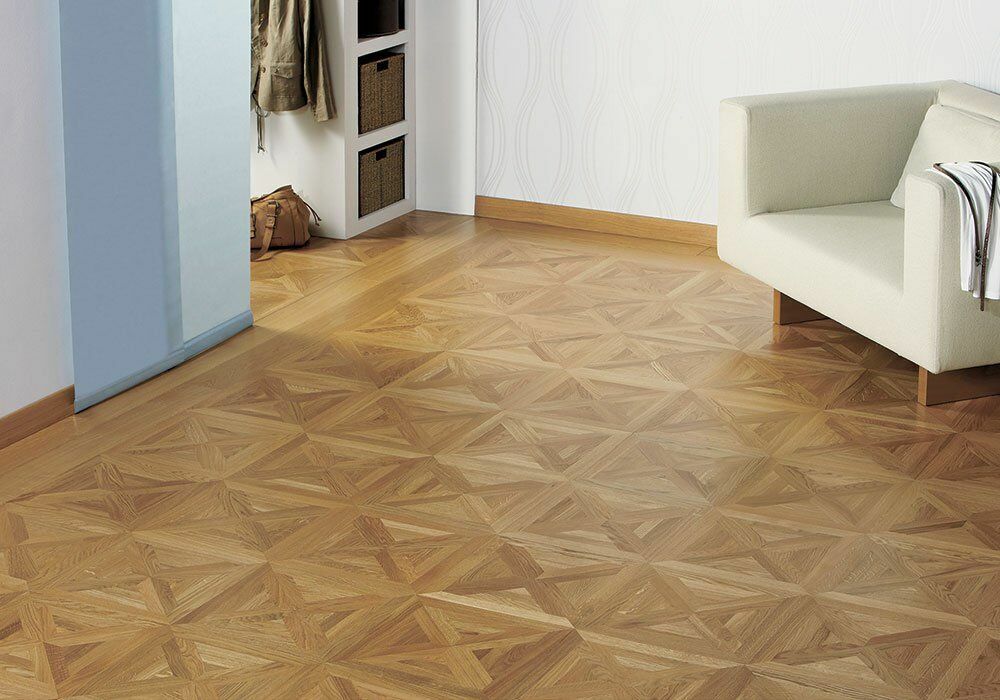
If you would like to purchase parquet, but financial possibilities do not allow, pay attention to parquet laminate. This material is visually very similar to the original, but it is much cheaper.
3D laminate is produced with an ornament that imitates three-dimensional images.
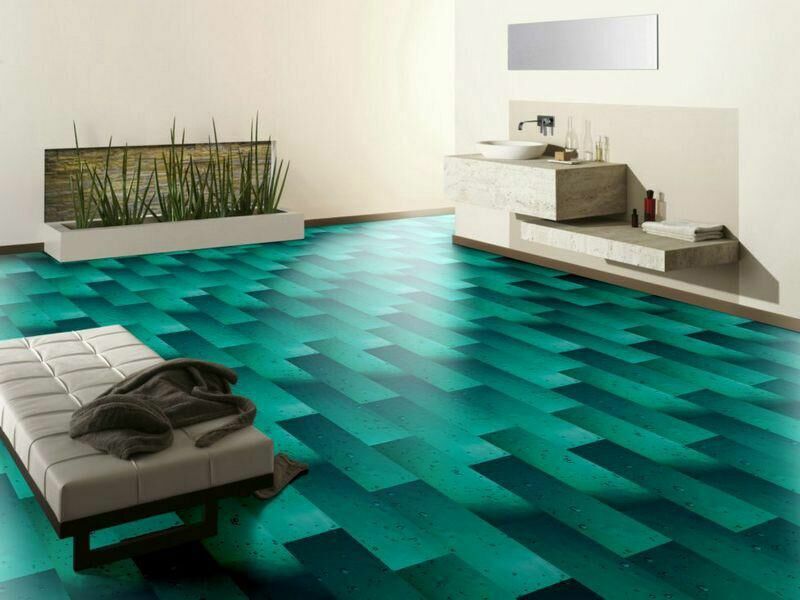
If you want to bring a very spectacular flooring to the finish, pay attention to 3D laminate. These are bright colors, three-dimensional images, for thematic and creative interiors.
Before buying, be sure to calculate the required amount of material, based on the size of the room in which it will be bedded, and take one or two more packs.
If you take the panels flush and during the installation process accidentally spoil the part or you need to will replace a damaged/worn piece, not the fact that you will find material of this color in store.
We bring to your attention the article - What is the difference between parquet and laminate.
Coating wear class
This is a very important parameter that determines the strength of the laminate, moisture resistance and resistance to mechanical stress.
Thanks to him, you can determine the purpose of the laminate - household or commercial-technical.
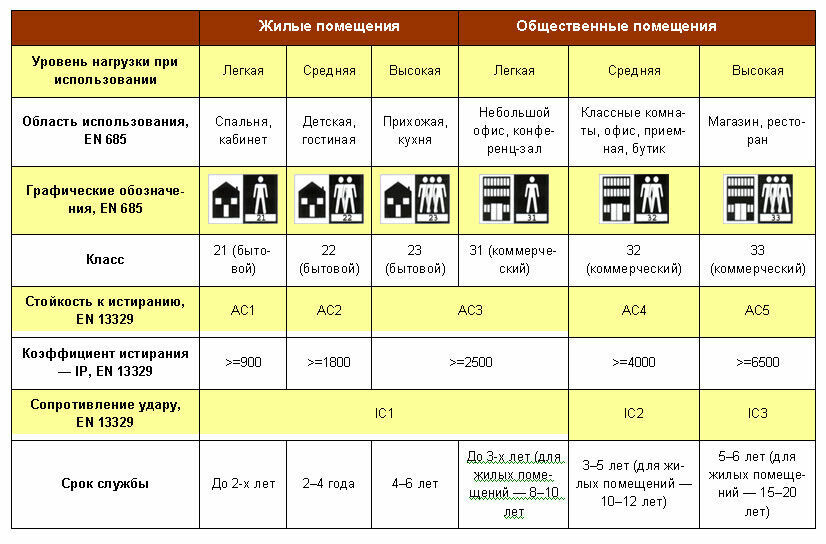
Pay attention to these options. They must be on every package with a laminate. Now, products of class 31-33 are most often chosen for ordinary residential premises, apartments or houses, which significantly extends the service life of the coating. Also, many little-known companies can issue a laminate with class 23 capabilities for 31 or 32. Therefore, purchase products from reputable companies if you do not visually understand the quality of the laminate
Sometimes there is a double classification on packages. It's all about the features of testing the laminate. It is carried out using a Taber abrasimeter.
From the number of circles for which the protective coating is erased, its classification depended. And at the same time, the abrasive wheel changed every 500 revolutions, and now, every 200. Some manufacturers specify both options.
Moisture resistant laminate
Everything is very simple here. 21-22 wear resistance class, usually characterize a non-moisture resistant laminate. Unfortunately, it passes moisture well in the castle area, the surface also swells, as it wears out quickly.
It is possible to impregnate it with special means and improve the quality of moisture resistance, but at a cost this is not the most rational way.
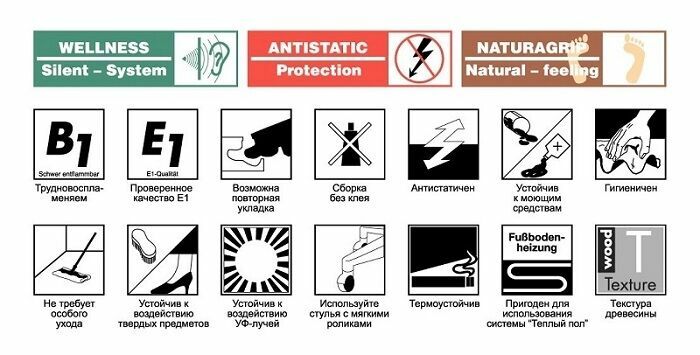
In addition to the classification and indication of the degree of moisture resistance, other important markings may also be present on the laminate. Pay special attention to the suitability icon for the underfloor heating system, if you have such a design.
32-33 class - moisture resistant laminate. As a basis, fiberboard or MDF is usually used. It is impregnated with a special composition at the production stage, including seams and locks. However, prolonged exposure to moisture is still fatal for him. Moisture resistance is indicated by marking in the form of a drop of water or an umbrella on the package.
32, 33 and 34 grades can be water resistant. As a rule, it is a vinyl or plastic material. The marking is the same as for moisture resistant, in addition to a drop of water or an umbrella, an icon in the form of a water tap is also possible.
Choice of locks to cover
The choice of locks directly affects the ease of installation and the strong adhesion of the planks. Experts say that there are only 2 connection types - lock and click, and the rest are just modifications.
Lock is a direct tongue and groove connection. The assembly is made with a rubber mallet for a snug fit of the slats. The disadvantages of "lock" in the strength of the connection, such a lock is difficult to disassemble if you have to replace one or another panel in the future or during assembly.
Click - if you have chosen this type of connection, it will not be difficult for you to assemble it. This is also a tongue-and-groove, but the assembly is not carried out directly, but starts at an angle of 45 degrees. After that, the bar is lowered flat to a characteristic click.
It does not require the use of a hammer, everything can be assembled manually, without improvised means. To disassemble the connection, the laminate panel rises again at an angle of 45 degrees and is removed from the groove.
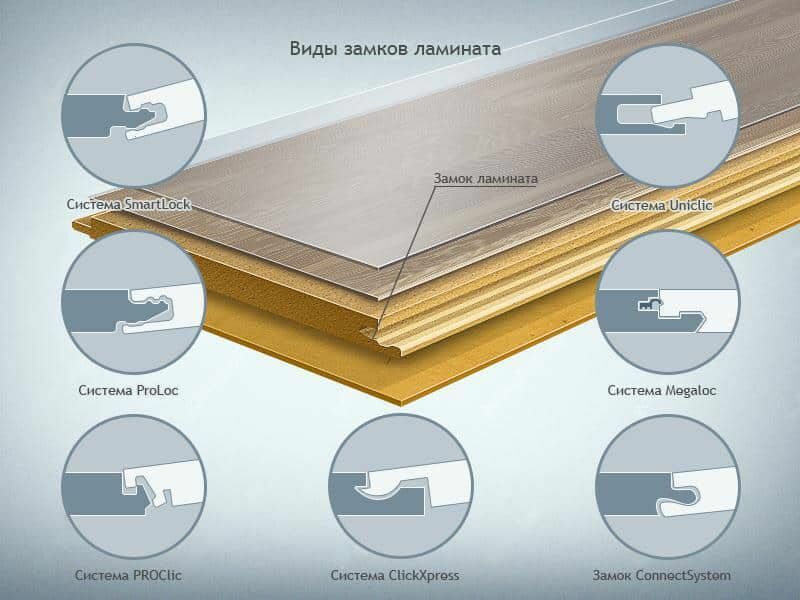
The diagram shows the rest of the types of lock connections. In principle, even from the figure it is already clear how which one to mount. There is nothing complicated, even a non-professional will cope with the installation. However, if you are not confident in your abilities, it is better to invite a finishing specialist
In addition to the adhesive method of fixing the material, the locks are in principle similar in assembly technology. All work should be carried out carefully. Inspect the planks for the integrity of the tenon-comb and its evenness, then there should be no problems.
Types of substrate for laminate
Laminate underlay is the material that will be laid on the base surface before laying. Some types of panels already have a special layer, but they are higher in price.
Substrate is needed for:
- Soundproofing.
- Leveling the quality of the base.
- deterioration in thermal conductivity. In case of underfloor heating, you should purchase a specialized substrate that will not interfere with the functioning of the TP, but at the same time possess all the necessary qualities.
- Waterproofing.
When choosing a material, you should focus on the prepared base.
If it is even, it is enough to purchase a substrate 2 mm thick. On the base with minor flaws - 3 mm.
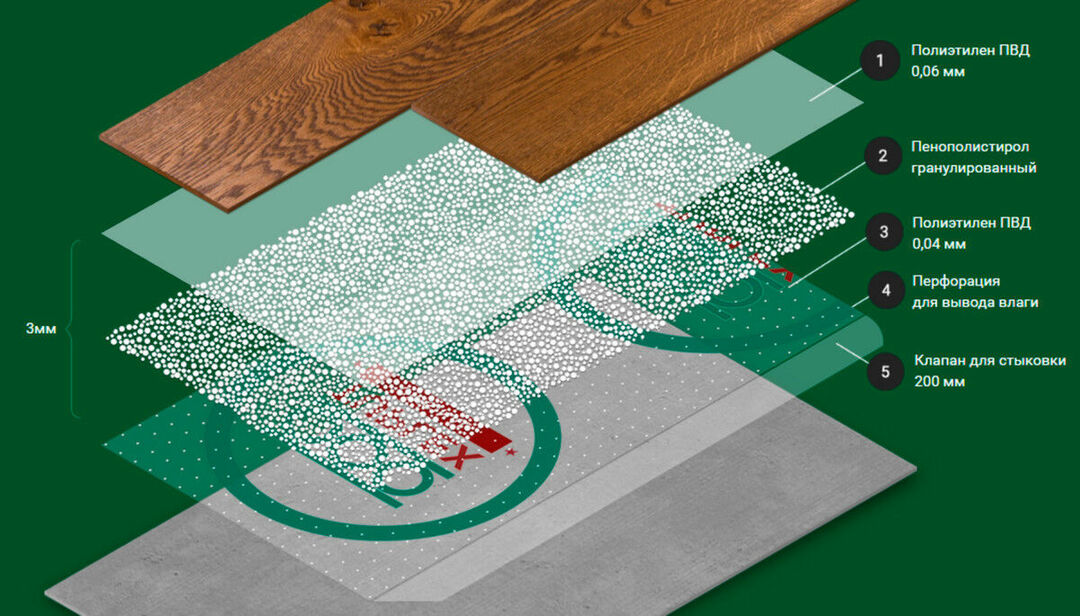
Universal, specialized substrates are also produced. They have a calculated multi-layer structure that combines thermal insulation, vapor barrier and so on. If you are not sure about choosing the material yourself, it is better to consult with the seller in the store, giving him the main features of the place where the substrate will be used.
The choice of substrate material is also important. Let us briefly define the advantages and disadvantages of the most popular types:
- Izolon. Pros - moisture resistant, not afraid of rodents, fungus, good sound insulation performance, easy to install. Cons - loses shape and elasticity over time, accumulates static electricity.
- Cork substrate - excellent recovery parameters after loads, low thermal conductivity, due to elasticity protects the laminate from deflection, environmentally friendly, not afraid mold and fungus. Cons - allows moisture to pass through, capricious to uneven floors, is not a budget option.
- Styrofoam. Pros - sound insulation (up to 27 dB), thermal insulation, quite elastic. Cons - fragility, capricious to surface differences.
- Foil material (also called "reflector"). Pros - thermal insulation up to 30%, provides waterproofing, is not afraid of mold and mildew. Minus - not very good indicators of elasticity.
When choosing a substrate, it is not necessary to focus on the manufacturer of the purchased laminate. They may be different.
Also, you should not take too thick material, in places where heavy furniture is installed, it will be pressed through, and therefore, laminate floors will begin to “walk”.
How to lay laminate?
So, the material is selected, we figure out how to properly lay it on the floor surface.
The work is divided into several stages:
- Surface organization.
- Preparation of material and tools.
- Substrate flooring.
- Laminate installation.
First of all, we prepare the floor surface. It should be cleaned of any existing contaminants, remove bumps, excess protrusions and roughness.
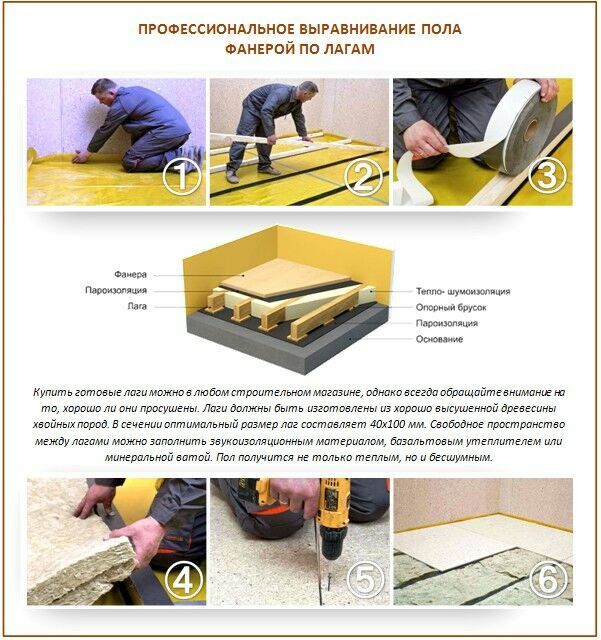
Ideally, the owners of future laminate floors have a screed level filled in and it has already dried completely. If there is no screed, and boards are laid, it is recommended to lay plywood, it will help improve the thermal insulation of the joints
There is a second option - boards with significant level differences. Obviously a failed idea, to try to leave everything as it is, logs with substrates are laid on such a floor, and plywood is already attached on top.
It should dwell in more detail on the preparation of the base from the boards.
If you do not want to fix plywood, and even before laying it, it is recommended to carry out the following preparatory work:
- Remove old skirting boards (if any).
- Replace rotten or questionable boards.
- Get rid of the squeak - firmly fix the boards with self-tapping screws with a slightly recessed head, blow out the joints with foam.
- Fill cracks and chips with wood putty.
- Get rid of fungus and mold, surface treat boards with fungicide.
- If the wall is uneven in relation to the floor, install spacer wedges. Do the same if the screed is flooded.
As for the differences, for a wooden floor the allowable limit is no more than 2 mm, and for a concrete screed - no more than 3 mm.
Follow these rules and thus you can not only lay the laminate evenly, but also extend its service life.
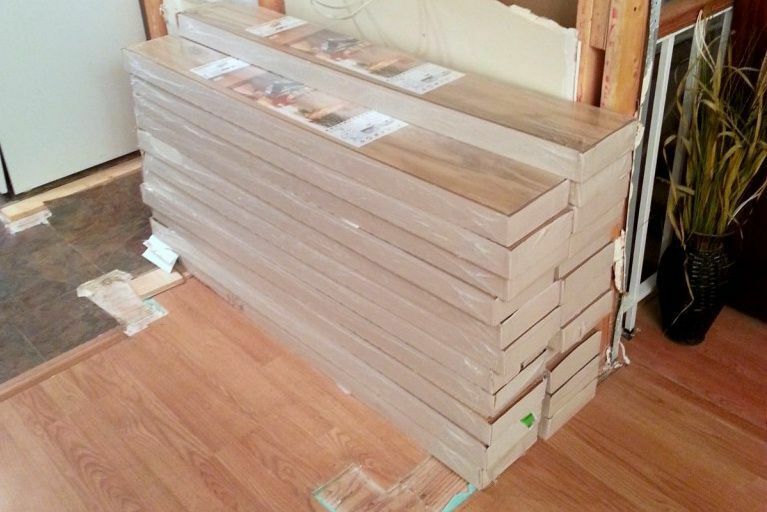
Unpacking the laminate before installation is necessary not only for its acclimatization, but also for quality control. Inspect the panels for evenness and focus on the locks, they should be free of breaks, drops of glue or varnish
Material preparation is a very important process. Ideally, unpack the underlayment from the package and air it out before laying. The laminate should also lie down in a dry room for 2-3 days.
This is done not only when buying cheap material or PVC with toxic odors trapped in the packaging, but also to get the material used to your air humidity.
While the laminate is being covered, prepare the tools:
- jigsaw for cutting laminate, where necessary;
- roulette;
- you can take an ordinary pencil, but building ones are also inexpensive, they are better seen on the surface;
- square;
- a hammer with a rubber knob (if the lock is “lock”);
- tamping bar;
- wedges-limiters;
- C-bracket, it is required to fit the slats near the walls. You can also cut suitable strips from improvised materials yourself.
The tools are ready, the floor is dry, the material is covered. It's time to lay the underlay.
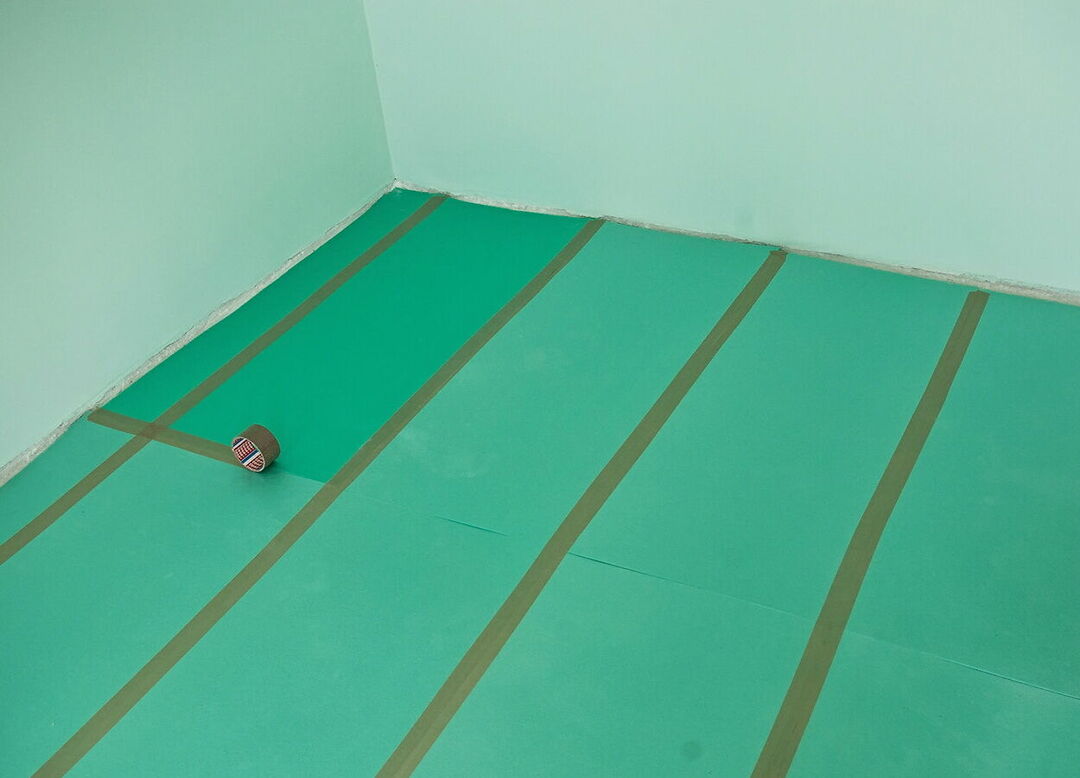
As is known, the substrate can be sold in rolls or sheets. Start the flooring from the corner of the room and be sure to tape the joints. This is necessary so that the substrate does not move under the laminate.
Provide a gap between the laminate and the walls with the help of limiters, approximately 8 mm.
Installation of panels is usually carried out along the line of window light.
Laying the first plank. We bring the second one to it and thread it into the groove strictly horizontally with the Lock type. With a light tapping of the hammer, we adjust until it snaps into place.
With Click-lock, the subsequent panel is inserted at a 45-degree angle and gently lowered flat.
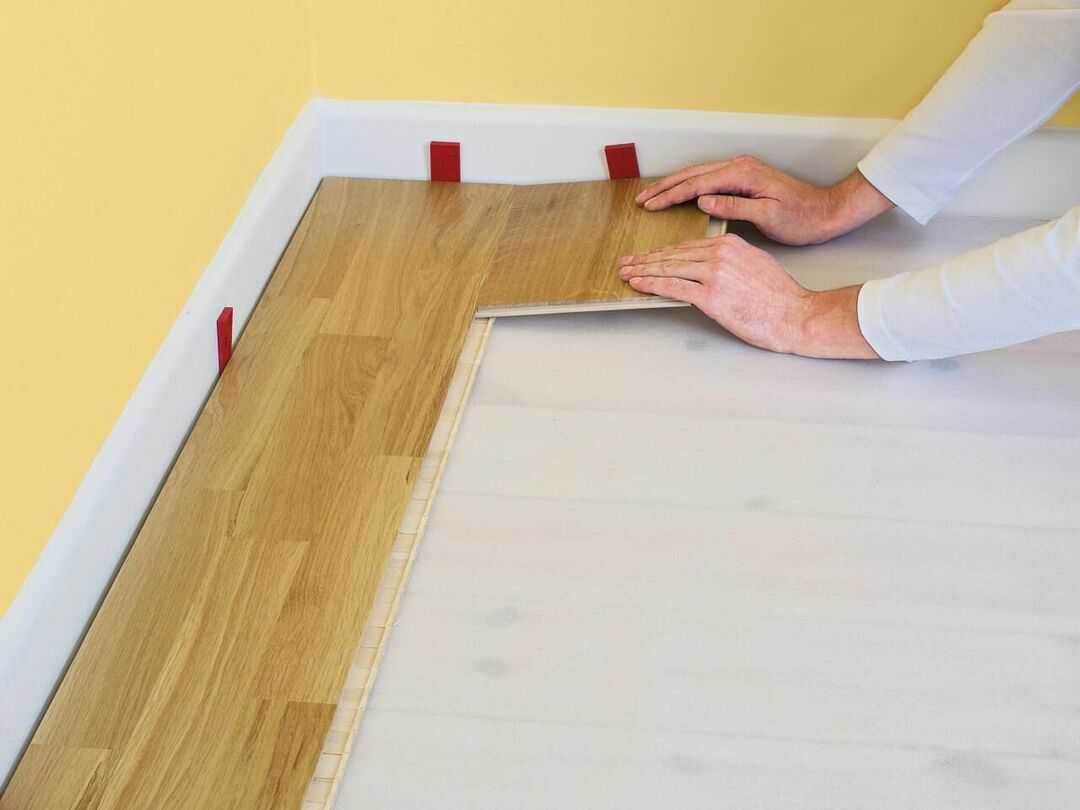
After you lay the first plank, lightly press on it with your hand, once again making sure that your floor surface is fairly flat and the panel does not walk along it.
Thus, we finish the row, if necessary, cutting the last board with a jigsaw.
We start the second row not with a whole bar, but with a half. The offset of panel joints should be approximately 30-40 cm.
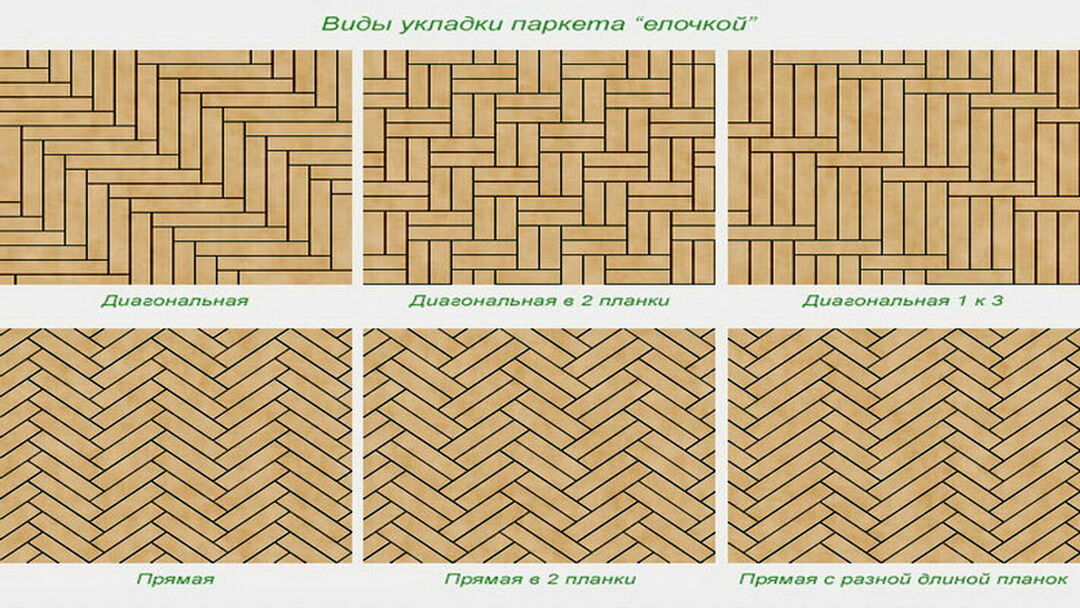
Laminate can also be installed diagonally or herringbone, but this is more of a challenge for those with experience in installing this material.
Note that in no case are laminate panels fastened with nails or self-tapping screws to the walls or to the base surface. The plinth is attached to the wall.
It should also be, with a floor surface area of 6 × 8 m, to leave deformation gaps of about 1 cm, they can then be masked with special strips.
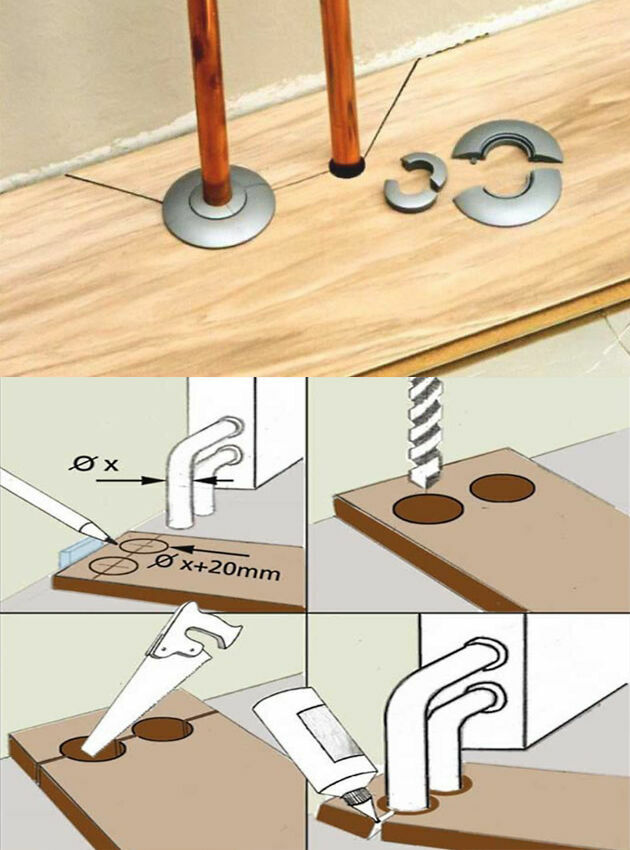
To go around heating, water and other pipes, holes are drilled in the panels with a drill-crown 2 cm larger in diameter than the communication that needs to be rounded. The cut is treated with glue, the field of which, if desired, is sealed with a decorative overlay
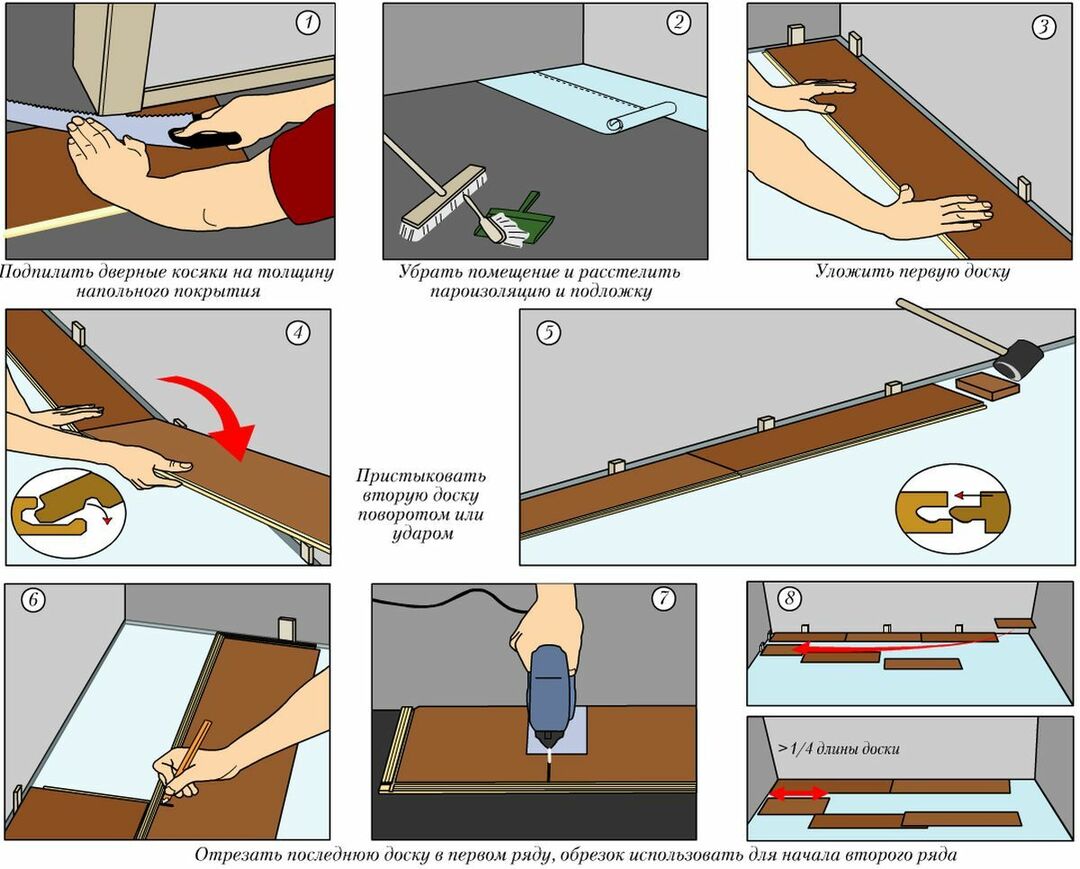
The main rule when installing a laminate is accuracy. Be careful, observe the level, carefully cut the planks and check the fit at the joints and interlocks
After the installation of the laminate is finished, you can screw the skirting boards to the walls. If the laminate smells unpleasant, it is recommended to keep the room ventilated for several days.
Conclusions and useful video on the topic
How to lay laminate correctly:
That's all, we disassembled the installation of the laminate with our own hands step by step. Of course, there are many different ways of laying, but using these instructions, you will definitely cope with the most common ones yourself.
Write your comments and ask your questions, and our experts will try to give comprehensive answers to them.


