The first thing to do after work on the roof is to assemble the ladder for the roof. You can, of course, get by with those temporary huts that were used during roofing, but this is not entirely correct. The roof on the house has to be periodically cleaned, repaired, patched. In general, not the last tool in the economy.
The content of the article:
-
Types of stairs for the roof
- Roof ladders
- Metal stairs options
-
Step-by-step instructions for creating a portable ladder
- What you need, materials and tools
- Manufacturing instructions
-
Step-by-step instructions for creating a stationary staircase
- What you need - materials and tools
- The hardest part is the supports.
- Manufacturing instructions
Types of stairs for the roof
Everything must be done on time. It will be too late to assemble a ladder to work on the roof during rain or after the rafters cracked from a meter layer of snow. A ladder or a drawbridge should be constantly on the roof slope, or you can leave a wooden temporary hut for the autumn-winter period. You can also buy a ready-made folding model, but such a design is expensive. And besides, a ladder for a roof roof with your own hands can simply be done in 1-2 days of unhurried work.
But first you need to choose the most suitable lifting option. Usually the design is selected according to the type of roof and roof.
The most common schemes:
- Classical "lying" from a bar with crossbeams.
- Construction ladder, knocked down from several unedged boards with steps made of bars.
- A lifting ladder with bowstrings can be made of rolled metal, profiled pipe or lumber trimmings.
- Lifting ladders made of metal, usually stationary, are installed on the roof even during the laying of the coating on the roof lathing.
- Facade stairs.
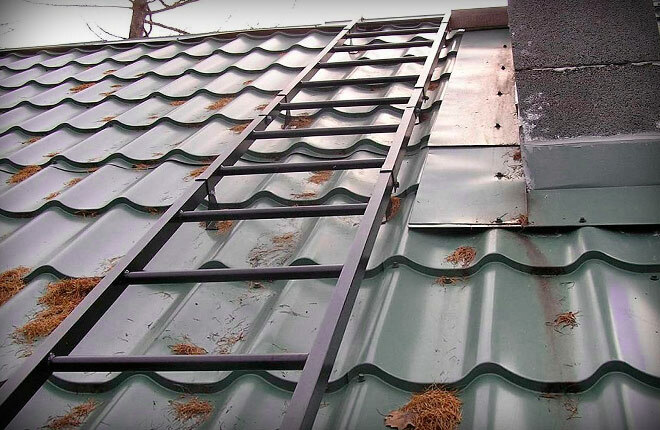
The last option is a stationary design. It usually consists of a wall ladder and a ladder ramp attached to it, with which you can move along the roof surface. The design is difficult to manufacture with your own hands, as you will need to make brackets on the walls. As can be seen from the drawing, it consists of 2 parts - the rise and the roof span itself.
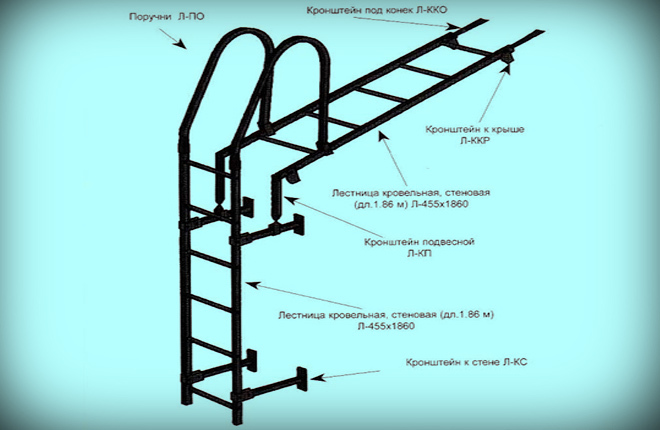
It is used mainly on two-three-story buildings, the front part of the stairs is often used as a fire. The second part is made folding. The ladder can be laid out on the roof and used for roof maintenance, gutters, pipe cleaning.
Read the article: How to make a ladder to the attic in a private house: varieties, step-by-step manufacturing instructions.
Roof ladders
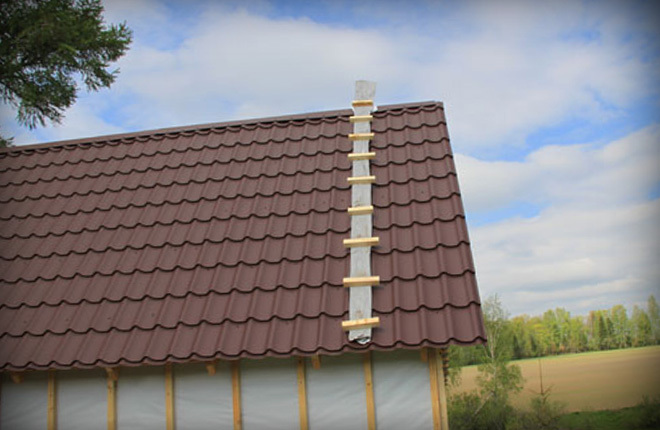
The classic for roofing is made of timber. Width - up to 600 mm, beam section 70x70 mm. The height between the crossbars can be small, up to 300 mm. With a small step, the ladder for working on the roof is more convenient. Such schemes are used on roofs made of bituminous and natural tiles.
Light structures with a small step are used as makeshift stairs. They are made from scraps of boards and battens, their strength and durability are low. They are needed only for the period of laying the roof, for example, metal tiles.
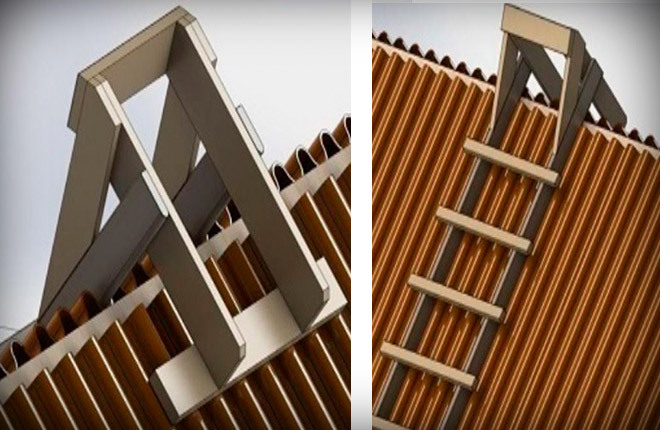
At each such ladder, a hook or hook is assembled at the upper end. It is needed in order to fix the structure on the roof. A pair of struts are stuffed in the upper part of the hook, they stiffen the hook and prevent the ladder from sliding down the roof. The braces are also used as a grip for the hands, otherwise it would not be easy to get down from the ridge down the roof.
The shape, weight and dimensions are selected according to the type of roofing. For example, for slate or ondulin, the distance between two longitudinal bars has to be adjusted so that they fit exactly into the depressions. Otherwise, you can break or damage the roof.
Ladders are also makeshift, but strong and durable. They are often left on the roof after rooftop installation is complete. The ladder differs from the usual wooden roof ladder in its higher bearing capacity. According to GOST 12.4.059-89, only a ladder should be used to lift materials and tools onto the roof. Therefore, ladder lifts are used to repair pipes or any other heavy work on the roof. But as a permanent option, it is inconvenient.
Metal stairs options
Climbing a metal ladder is considered safer. Metal spans and ladders are recommended to be placed on metal roofs even in cases where the length of the slope is large. The metal is more rigid, holds its shape well, so you can not be afraid of damaging the roof surface.
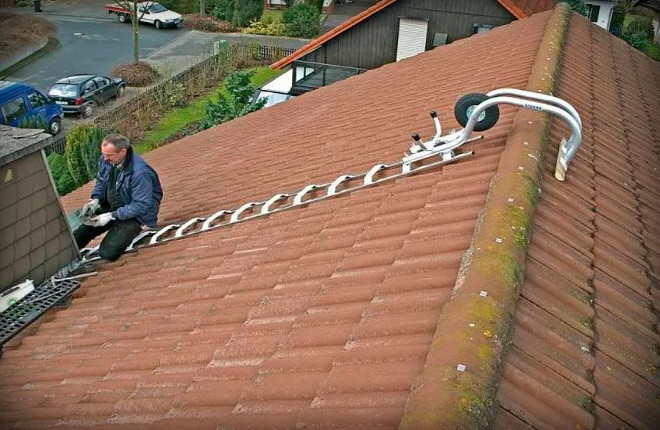
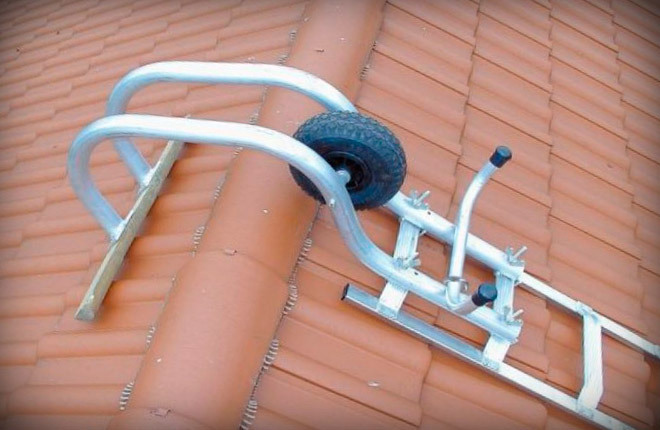
Transformer ladders are used as temporary ones, they are lifted in a folding form. This is usually a swing-out grip design with an extra wheel. The metal ladder is heavy, it is not easy to lift it along the surface of the roof slope and not damage the roof. Therefore, a wheel support is necessarily used in the design.
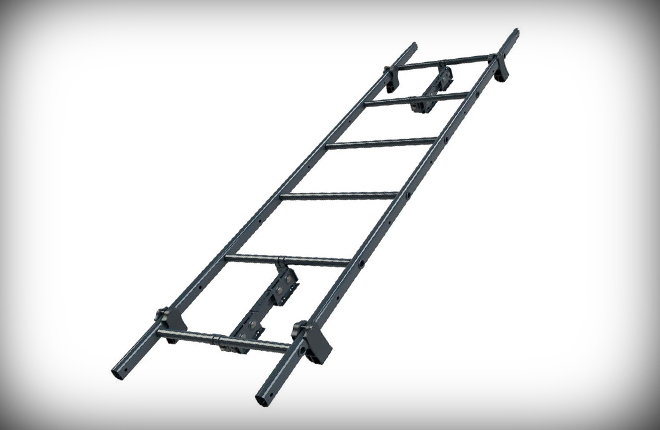
If you make a staircase to the roof for a private house with long slopes, an elevation angle, then only from a square steel pipe with a cross section of at least 30x50 mm. The structure itself is assembled from several spans and raised on stationary supports above the roof surface.
Step-by-step instructions for creating a portable ladder
The stair lift can be made of metal or wood, the specific option will need to be chosen based on the material of the roof and the angle of inclination of the slope. If this is the first experience in building a stair lift, then it is best to make a portable structure out of wood. This option will be practically no different from a regular ladder, with the exception of a small addition at the top, to which you will need to add a hook or hook.
What you need, materials and tools
To make a portable model, you will need a pair of 70x70 mm beams or a board with a thickness of at least 50 mm (two inches), 250 mm wide. Of these, the side racks of the stairs will be made. For the hook and steps, you need to prepare a bar-rail with a section of 50x50 mm. In addition, you will need carpentry self-tapping screws 120 mm long, in the amount of 25 pieces, as well as fasteners 50 mm long, in the amount of 15 pieces.
For the manufacture of lifting it is best to use oak or larch. This tree is not afraid of moisture, has high strength, and after being treated with mordant, the ladder can stand on the roof for 10 years. If there is neither oak nor larch, then any wood (except poplar and birch) can be used. But in this case, the finished assembled staircase will need to be additionally treated with varnish or drying oil in several layers.
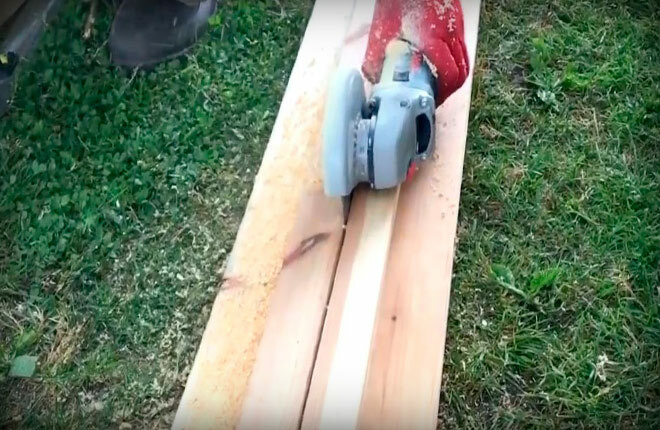
For cutting blanks, you can use a hand saw or an electric circular machine, but, as practice shows, in the field, an ordinary grinder is most often at hand. It can be used for sawing lumber no worse than a hand-held electric saw. It is only necessary to replace the cutting wheel for stone or metal with a round titanium cutter for wood.
To assemble the stairs, you will also need an electric drill or a cordless screwdriver with a chuck for installing a drill.
Manufacturing instructions
If you choose between a 70x70 mm timber and a board, then it is better to choose the latter for the roof. From the beam, the ladder will turn out to be too heavy, it will not be easy to lift it to the roof and remove it even for a physically strong person.
Therefore, it is better to make a ladder from a two-inch wide board. Initially, you need to mark the material, draw a center line and cut it into 2 blanks 120 mm wide and 50 mm thick. Such a stand is more rigid.
Moreover, with proper installation on the roof, the distance from the surface of the roof slope to the step is 40 mm larger. That is, it is more convenient to climb such a rise than if it were made on the basis of a 70x70 mm beam.
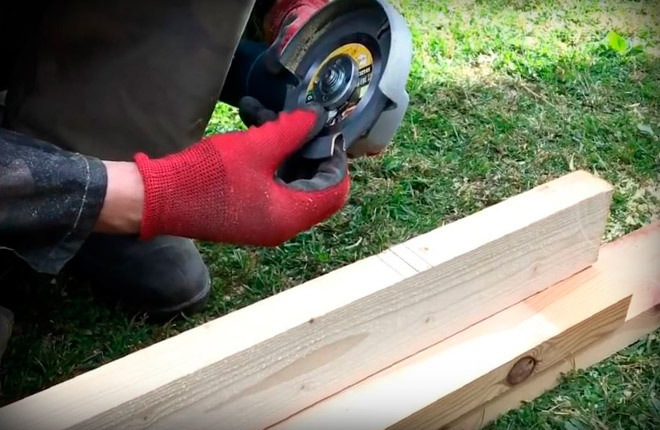
The next step is to mark the cut lines for the grooves into which the crossbars of the steps will be hammered. The distance between the steps should be no more than 40 cm.
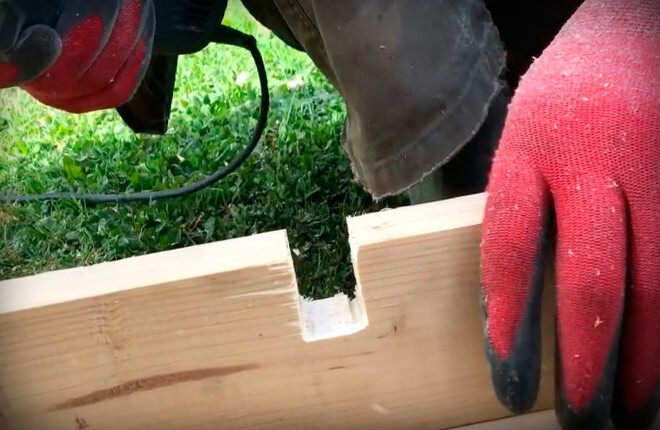
Using a grinder, we cut grooves on one rack. The depth of each must be at least 30 mm. Then we put both blanks in a bag and make cuts on the second rack of the stairs.
Next, you need to cut the steps. For a comfortable climb along the roof slope, at least a dozen crossbars will be required. They can also be cut with a grinder or even a simple hand saw.
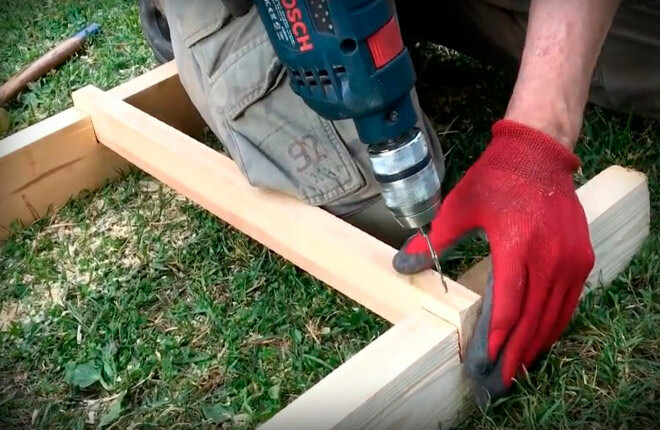
We lay out the blanks of the racks on a flat surface and fasten the crossbars into the grooves using joiner's screws. It is clear that before wrapping the fasteners, it will be necessary to drill a hole of 3-3.5 mm so that the self-tapping screw enters the tree gently, without cracks.
For the manufacture of the hook, we use trimmings from boards and timber 50x50 mm. First of all, you need to cut 2 blanks 80 cm long. We fix them on the head of the stairs with self-tapping screws at a right angle. The attachment point on the workpiece is chosen so that at least 50 cm of length remains in the direction of the ridge, and at least 30 cm in the opposite direction. It remains only to fill the transverse strips on the hook and fasten the struts.
To prevent the racks from scratching the roof during the rise to the roof, a soft material, such as rubber or plastic, can be stuffed on the lower supporting surface, as well as on the toe supports.
After assembly, the wood must be treated with drying oil or oil varnish. After 3 days, the impregnation will dry, and it can be raised to the roof.
Step-by-step instructions for creating a stationary staircase
First of all, you need to choose a scheme and material for a specific roof option. It is clear that the easiest way to make a ladder out of wood. But such a structure cannot be permanently stored on the roof. Solar ultraviolet, rain, wind, frost - all this leads to the destruction of wood. At least the part that is on the sunny side of the roof.
The second option is to build a ladder on the roof from a steel profiled pipe. This is the easiest and most affordable way, but it has limitations.
First, the design will be heavy. If you use a light pipe 20x25 mm, then the structure will sag too much under the weight of a person, up to touching the roof. You will have to install additional supports or use a larger section of a corrugated pipe.
The weight of a structure made of a 25x25 square 6-7 m long reaches 35-40 kg. If we add the weight of a person, then the load on the roof slope, more precisely, on the roof lathing, will be at least 120 kg. The situation with a reinforced pipe, for example, 50 by 25 mm, is even worse.
Secondly, the weight of this design easily reaches 60 kg. Accordingly, the load increases, and it will be quite difficult to lift such a weight on the roof.
The stair riser for the roof can be made from an aluminum profile, or used as donor section from an old folding ladder-transformer made of aluminum with steel tubular steps. The mass of an aluminum ladder will be no more than 15 kilograms with a length of 6 m. It is possible to lift such a structure onto the roof even for one person.
What you need - materials and tools
If you build a rise to the roof from a profiled pipe, then you will need blanks with a section of 25x30 mm, 6 m long, in the amount of 3 pieces. For the manufacture of steps, you can use a cheaper material - plumbing steel pipes with a diameter of 3/4 inches. Its wall thickness is greater than that of a professional pipe, so it will be easier to weld.
In the event that it is planned to build a stair lift for an aluminum alloy roof, one section will be required a folding ladder with a length of at least 5 m. The remaining parts, for example, a hook, can be made from scraps of boards and lumber.
From the tools you will need a welding machine, a drill with a set of drills, reinforcement bars. In addition, you will need a grinder with a cutting disc for metal and a manual electric saw.
The hardest part is the supports.
The most difficult part of building a staircase on the roof is the manufacture of supports on which the staircase itself will be installed. The difficulty lies in the fact that the supports must be fixed to the crate of the roofing. It is impossible to fasten directly to the roof, even if the roof is covered with metal tiles, slate or corrugated board. Each such support will have a weight of 20-30 kg, the roof simply cannot withstand such a load.
The easiest way is to fix the supports for the stairs to a solid crate. For example, under a roof made of bituminous tiles or glass roofing material, the crate is made of OSB boards or waterproof plywood. Therefore, the process of attaching supports will be quite simple. You just need to lift the tile tiles, fix the rack on the plywood sheet and seal the roof with a bituminous patch.
In other cases, the location for the installation of supports must be selected individually. For metal tiles or corrugated board, fasten the supports directly through the hole cut in the roof. After installing the support, the cutout must be sealed with an additional patch.
Manufacturing instructions
The supports are easiest to make from sections of a profile pipe with a section of 25x50 mm. The length of the workpiece is chosen depending on the thickness of the insulation and waterproofing laid under the roof. Usually the height of the stand-support does not exceed 150 mm. An excess of 50-70 mm above the roof surface is considered normal. Even if the ladder sags under the weight of a person, it still will not touch the roof surface.
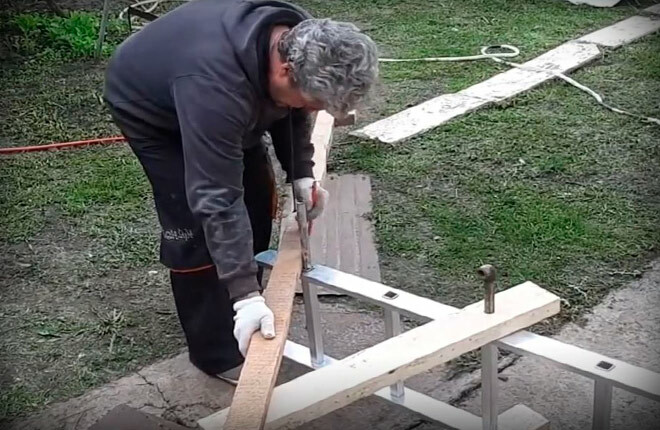
A ladder from a professional pipe can be welded in a locksmith's workshop. It is necessary to select from the available material two blanks 25x30 mm, 6 m long, for the manufacture of side racks. For steps, you can use trimmings, you can even have different sizes and sections. If the crossbars are made of a water pipe, then the blanks for the steps must first be cut at the ends, heated and bent at a right angle in opposite directions.
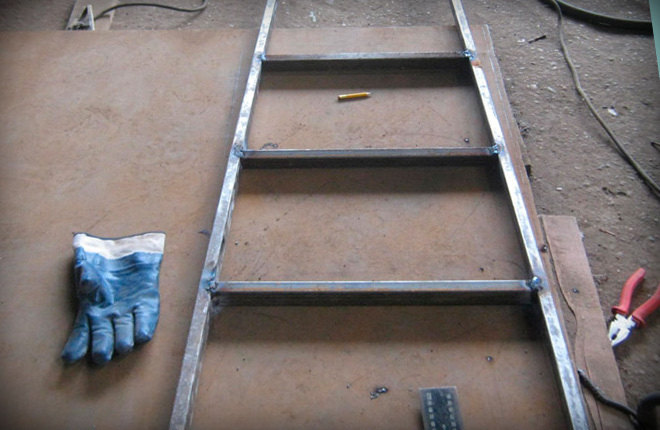
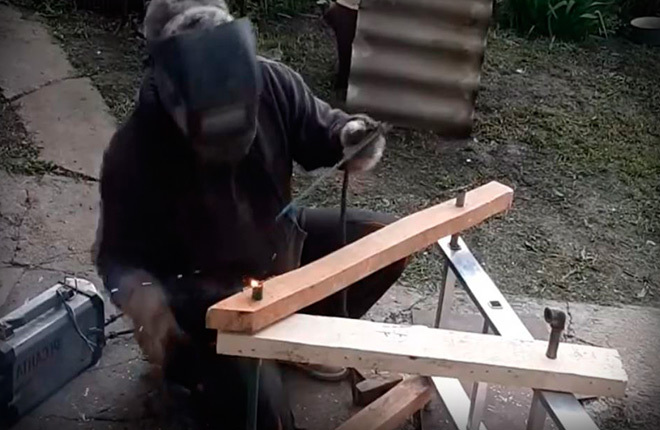
Ladder racks are fixed on a welding workbench or laid out on a flat concrete platform. Next, you need to lay out the crossbars and grab them to the racks using a welding inverter. If, after pre-assembly, the staircase turned out to be flat, without local deformations (without a “propeller”), then we fix the parts with a clamp and connect them by electric welding.
The hardest part of making a ladder is getting it up to the roof without damaging the roof. Often, a metal structure has to be wrapped with cloth, tarpaulin, tape, so as not to scratch or break through the roofing. After the ladder has been raised onto the roof slope, it must be installed on supports, leveled, fixed and welded by electric welding.
It is easier to build a staircase from an old transformer ladder. The 4-5 m long aluminum section has a large supporting surface, so it can be laid directly on the roof surface, without studs.
All that needs to be done is to make and fix a hook on the top of the span. It is easiest to make it from scraps of timber or boards 50x70 mm thick.
First you need to markup, determine the places where the parts of the hook will be attached.

The steps of the section are made of thin-walled pipes, so reinforcing bars 60-70 cm long can be used for fastening. We cut out the details of the future hook and drill holes at the attachment points with a pen drill, equal in diameter to the size of steel reinforcing bars.
We assemble the entire structure and check how rigid and reliable the ladder hook turned out to be. To prevent the fastening from falling apart under load on the roof surface, the ends of the reinforcement will need to be welded. A slight thickening at the ends will not allow the bar to leave the tubular step.
The wooden parts of the structure will need to be opened with varnish or drying oil in several layers, dried thoroughly. The ladder for the roof turned out to be light, the weight does not exceed 15 kg, so it will not be a problem to lift it onto the roof. It must be attached to the ridge beam. Usually the toe is tied to the skate with two loops of jute rope.
If you use self-tapping screws or clamps, you can break off the roof over the ridge.
Making a ladder for a roof does not require expensive materials or the skills of a carpenter-locksmith. It is enough to be able to mark out at least a little and cut the workpieces correctly, and to own a welding inverter. In general, a home-made stair lift design is heavier than a factory one, but stronger and more durable.
Tell us about your experience in making roof stairs - which option, in your opinion, turned out to be more successful?