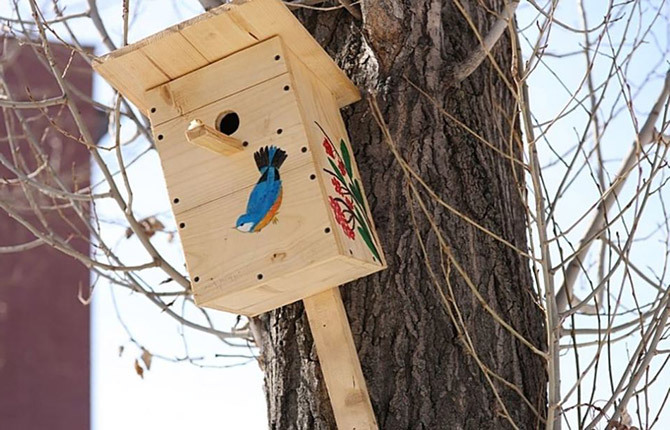
The question often arises: why make a birdhouse with your own hands, if you can buy a ready-made one. Probably because bird housing, built according to the classical scheme, is much more convenient than low-quality products, but at an affordable price. It's also a good way to do homework for school. These are not just crafts, often these are real projects with calculations and new ideas.
The content of the article:
- What material is best for a birdhouse
-
Schemes and drawings of birdhouses
- Classic variant
- Pioneer version with removable roof
- Birdhouse-house with a gable roof
-
Step-by-step instruction
- How to fix
- Material cutting
- Birdhouse assembly
- Features of building a birdhouse with a double roof
-
Where is the best place to hang it?
- Outdoor installation
- Tree mounting
- House wall
- Results
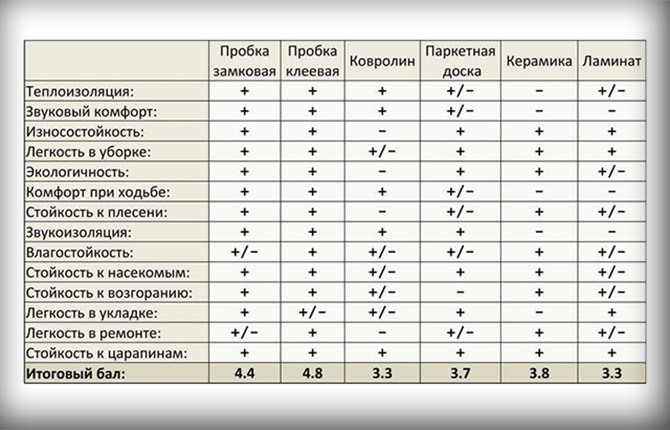
What material is best for a birdhouse
Housing for a bird cannot be made from the first material that comes to hand. Bird watchers can attest that all birds, whether starling or sparrow or titmouse, shy away from cold materials with strong odors.
Wood is best, in any form, but preferably not just plywood or OSB bought at the nearest hardware store. They can also be used for a roof, but before construction, the sheets will need to be washed with water, dried and allowed to lie down in the sun so that the smell of phenol disappears.
The best materials for building a birdhouse:
- The boards are untreated, dried in a natural way. Can be old, with numerous holes from nails and self-tapping screws. It is clear that the fasteners must be removed before construction. Do not use varnished, painted and etched boards from any container or pallet.
- OSB is ordinary, non-waterproof, without impregnation.
- Thick cardboard or fiberboard.
- Plywood glued without waterproof impregnations.
- Terrace board. Will go to the roof or bottom of the birdhouse.
- 5 liter PET bottles from packaged drinking water.
It is clear that only water should have been in the container. It is pointless to make a birdhouse from a bottle in which oil, beer, milk, gasoline, any chemicals were stored. The bottle is used as a repair insert inside an old birdhouse.
Birds are good at distinguishing smells, so the material for building a birdhouse must be clean. Chipboard and “fresh” plywood are considered the most dangerous. They have a very high phenolic index. This must be remembered before making a birdhouse. The box will turn out to be very beautiful, but birds will bypass such housing. For the roof, you can use old, but not yet exfoliated plywood.
It is not yet recommended to use without preparation any boards or plywood that have been stored in the apartment for some time, for a year or six months. Especially if there are pets in the house. Such material must first be washed and allowed to air out in the sun for at least a week.
You can often find step-by-step instructions for making dugouts from a tree hollow, as in the video:
The dugout is almost invisible in the branches of trees, but only for humans. Cats, squirrels, ferrets, birds of prey easily find a nesting place by smell. Therefore, a dugout is not the best birdhouse scheme for building with your own hands.
Cardboard (only brown packaging corrugation) is used mainly as a heater inside the box. Old birdhouses can not be disassembled into parts, but simply put cardboard packaging inside.
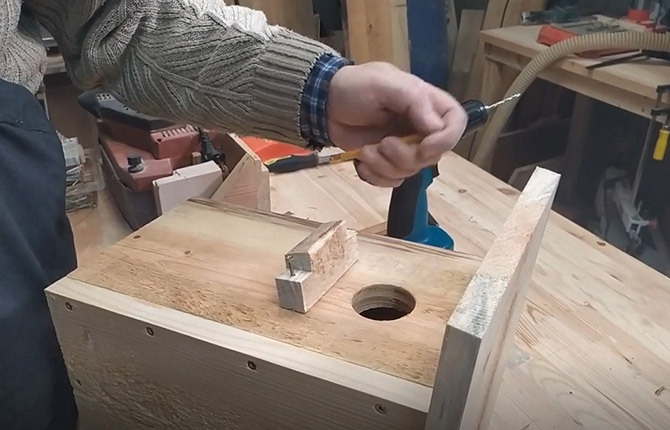
Advice! For cutting blanks for a birdhouse, it is advisable to use a hand tool: a hacksaw, a drill, a brace. With power tools, grease often gets on the cutting edge, so there is an unpleasant smell for birds.
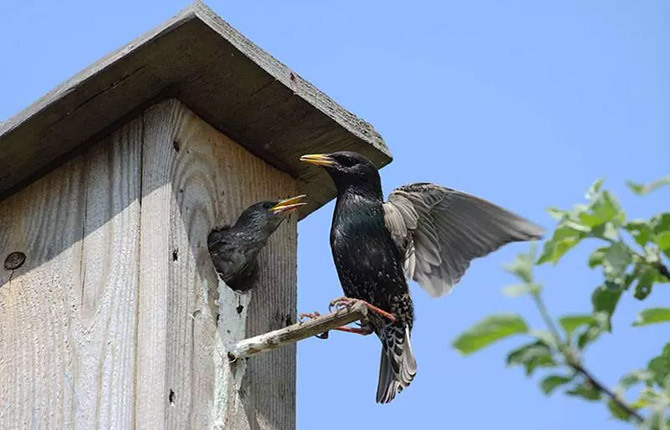
If birdhouses are planned to be installed in the garden on fruit trees, then the treatment of crowns, branches, foliage with chemicals will have to be abandoned until the chicks take off. If the birds have already settled in the birdhouse, it is strictly forbidden to remove the box, cover it with foil and try to fix something in the structure.
For building a birdhouse with your own hands, an ordinary edged board 20-25 mm thick, polished or untreated, is best suited. Coniferous wood is best not to use because of the resin. The best option is to build from birch or aspen.
The worst birdhouse is obtained from improvised materials. It is better not to experiment with MDF, chipboard, OSB, fiberboard, but to buy a normal birch board. Moreover, not so much lumber is needed to build housing for starlings.
Schemes and drawings of birdhouses
There are a lot of options for bird houses. Many designs appear arbitrarily, in the process of children's or teenage creativity. But, despite the abundance of schemes, in practice, only a few have taken root. If an unusual design option is not required, then it is best to build a birdhouse in the form of a rectangular box with a simple roof.
Classic variant
A rectangular birdhouse (parallelepiped) with a flat sloping roof made of the same material as the body.
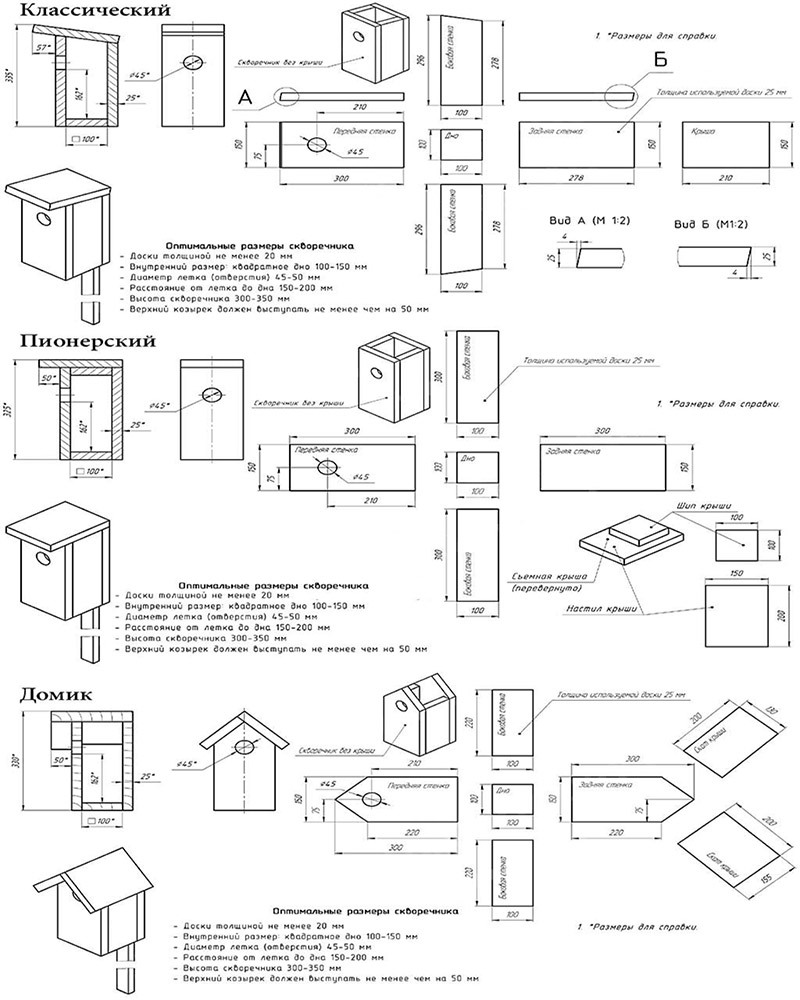
The entrance hole - notch (diameter 45 mm) - is cut out on the front wall at a height of 90 mm from the roof. It is believed that, given the front overhang of 70 mm, this is enough to protect the inhabitants of the birdhouse from attack by a cat or squirrel.
The birdhouse has no perch. This is also one of the ways to protect the inhabitants of the birdhouse from natural enemies. Birds easily get used to the size of the entrance and can easily do without a perch, while cats and ferrets will not be able to climb from the roof into the birdhouse.
The depth of the house is 160 mm. This is the minimum distance that guarantees the protection of starlings from rain and wind. The slope of the roof can be made larger, and the overhang can be increased to 100 mm. But you should not make it too big, the roof will interfere when installed on a tree.
Pioneer version with removable roof
The simplest scheme with a flat roof. Previously, according to this drawing, birdhouses were built at the lessons of labor education. Nevertheless, the design remains popular for installation within urban areas.

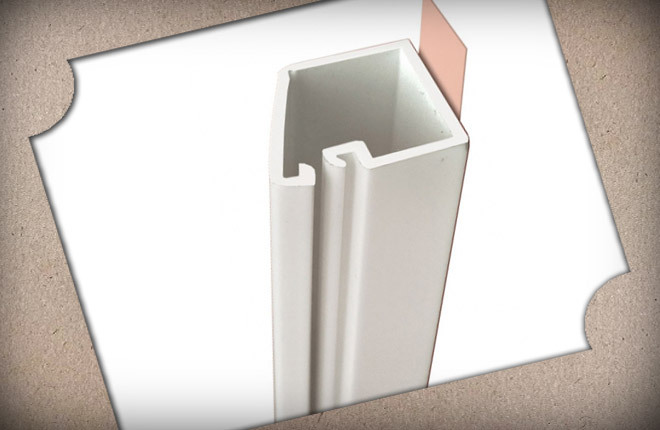
A distinctive feature of the birdhouse is a flat horizontal roof 150x200 mm. It is attached to the body with a bar-thorn. That is, the roof, if necessary, can be removed for sanitization of the interior space.
Such a birdhouse can be installed on the loggia of the first or second floor, on a free-standing bar or on the wall of the house. It is not recommended to install on trees or a fence, the level of protection of the "pioneer" birdhouse is much lower than that of the classical scheme.
Birdhouse-house with a gable roof
The most difficult construction to build, but at the same time the safest. The birdhouse has a roof with two slopes, tilted at a large slope. Protruding overhangs and a large angle of inclination of the roof protect well from cats, ferrets, but are practically useless against woodpeckers.
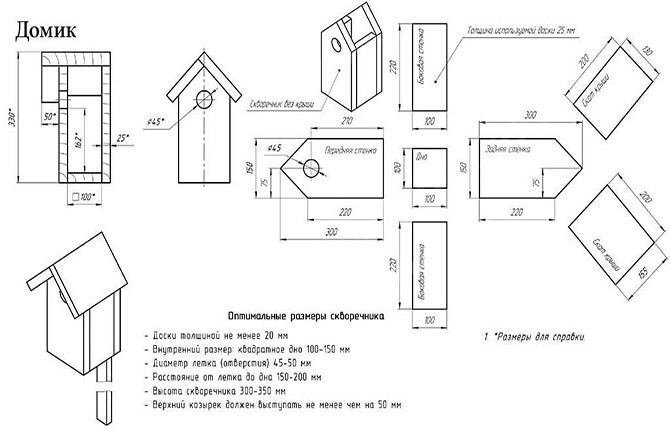
Salvation from birds of prey is a great depth - 160 mm, but it can not be done more, since the chicks will not be able to get out of the box. In some models, the bottom and roof are made removable so that at the end of the summer season it can be sanitized with a Whiteness solution. The product kills ticks and parasites well, is practically harmless to birds, and the smell disappears within two weeks after sanitation.
In addition, the model has a more attractive design, it is often installed next to the mailbox under the roof of the porch or on the fence of the house.
Regardless of the design of the body, one general rule applies to all types of birdhouses. In winter, they need to be removed, processed, dried and hidden in a heated room until February-March of the next year.
The reason is quite simple - unpainted wood does not tolerate moisture, frost, strong wind, so the walls and roof are often covered with cracks. If the birdhouse is made of plywood, then the material quickly delaminates. In addition, crows or squirrels can "rent" the house.
Step-by-step instruction
To build a birdhouse with a flat roof, you will need:
- board 20x130 cm;
- hand saw, screwdriver;
- ring and center drill;
- fixture.
If the board is too dry, then you will need to stock up on a 2.5-3 mm drill. It will be required for pre-drilling a hole for a self-tapping screw.
How to fix
Usually, in the manufacture of small wood crafts, without hesitation, black carpentry screws 15-25 mm long are used. But in the case of a birdhouse, black fasteners will not work, it is better to use yellow self-tapping screws.
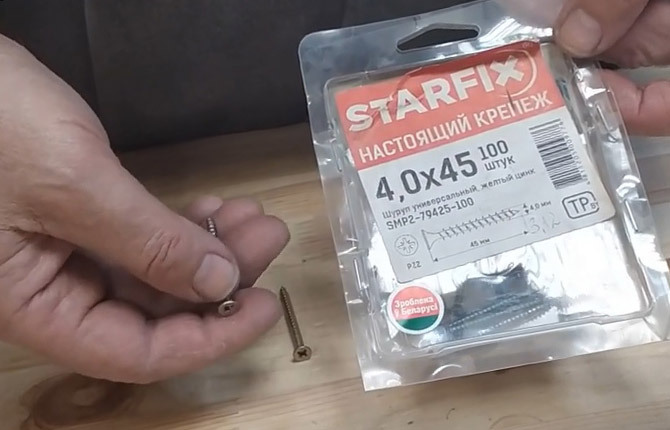
Thanks to the protective coating (zinc + cadmium), they do not rust even on the roof, which means that the starling house will last for a long time.
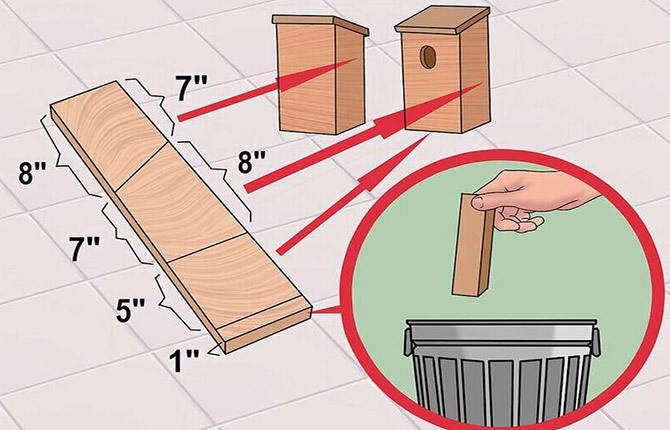
Material cutting
For construction, you will need to cut the board as shown in the drawing of the birdhouse. It will be necessary to cut carefully, the ends of the blanks must be perpendicular to the plane of the blanks, otherwise, after assembling the house, huge gaps form at the joints.
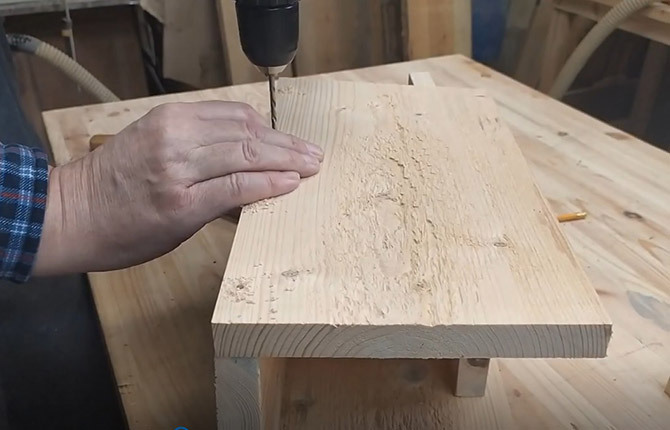
In the workpiece of the front wall, they immediately mark out and drill a tap hole with an annular drill.
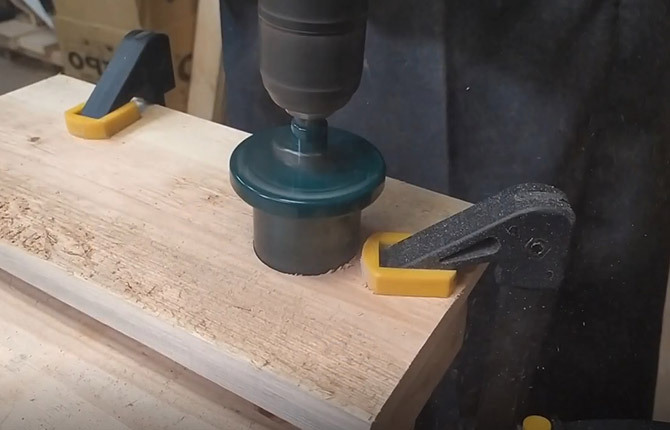
After drilling along the edge of the hole, you need to chamfer so that the birds do not injure their paws. If possible, it is necessary to remove all burrs on the ends and side edges of the roof.
When properly marked, the material of the board is consumed quite economically.
Birdhouse assembly
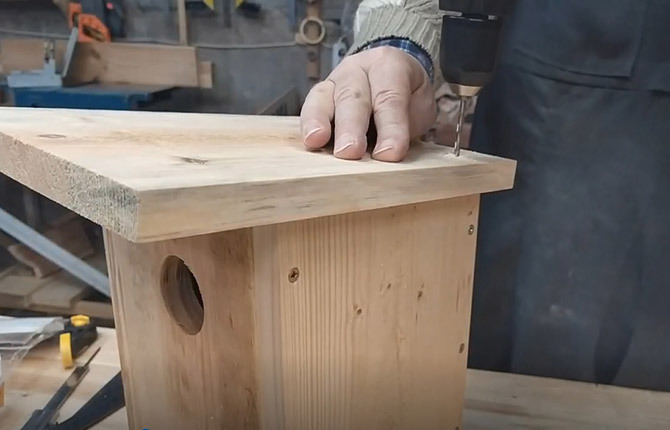
Now we connect the back wall with the side. Before tightening the fasteners, the sidewall must be supported on the stand, and centering holes must be drilled in the places where the self-tapping screws are screwed in.
The thickness of the board is only 25 mm, so it is necessary to drill, otherwise you can split the tree.
Next, we fasten the second wall and the front board of the birdhouse. Then the roof is sewn on. In addition to the visor over the notch, you will need to make a small overhang over the back wall, it will come in handy later in preparation for attaching the birdhouse to the tree.
On the facade in front of the notch, we sew a small perch. Its dimensions are reduced to a minimum. The shape has changed - instead of the traditional pin, a shelf of reduced sizes is used.
This design does not allow large birds to land: magpies, crows, owls.
Lastly, the bottom is nailed, it is made recessed into the body of the house. The bottom part is fastened with only two self-tapping screws, so if necessary, the bottom can be easily pulled out of the case.
Features of building a birdhouse with a double roof
In general, the technology of a house with a gable roof is the same as that of the classic version. The only difference is in the roof assembly sequence:
- Initially, we attach one of the slopes to the body of the birdhouse. The edge must match the ridge of the roof.
- We lay the second slope on the body with an overlap on the end of the previously laid one. The self-tapping screw will have to be screwed across the fibers of the tree, so you need to pre-drill the hole.
- The next two screws are wrapped into the roof so that they enter the back and front (front) walls of the birdhouse.
Points for fasteners must be applied with a center drill. Then deepen with a thin drill 50 mm. Only then can the screw be screwed in. If you try to wrap it without preparation, then the self-tapping screw will go askew and come out on the outer or inner surface of the case.

Another feature - when planning a birdhouse with a gable roof, it is better to do the eaves and overhangs with a reach increased to 70-80 mm. This will protect the front wall from getting wet during rain.

Seams and joints do not need to be sealed. If the birdhouse is planned to be installed in the sun, then in the upper part of the back wall (under the roof itself) you will need to make a vent and close it with a mesh.
At the final stage, it is necessary to attach a vertical rail to the back wall. This will be the stand for the house. The weight of the box with the roof will be at least 1.5-2 kg, depending on the thickness of the walls and the dimensions of the roof.
Therefore, for the manufacture of the rack, a rail with a cross section of at least 40x40 mm is selected, preferably pine or spruce. The rail is laid “on the back” of the birdhouse so that the upper edge (end) rests against the rear slope of the roof, after which it is fixed with 50 mm self-tapping screws.
Where is the best place to hang it?
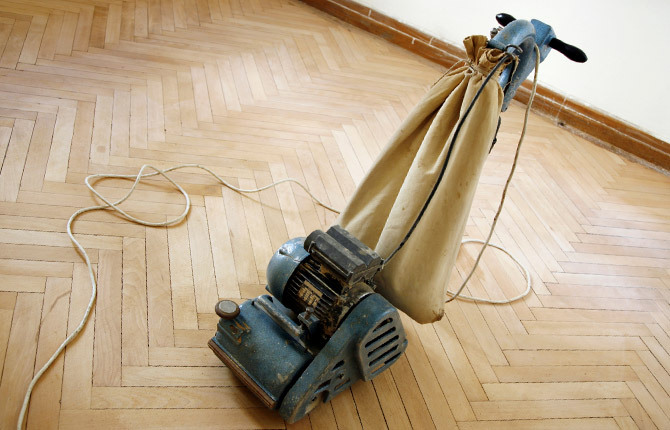
Upon completion of the assembly, the outer surface of the box can be sanded with a hand machine to remove the edges, to make the wood smoother. Garden birdhouses are not painted, if the installation element, for example, is located in front of the gate to the local area, then it is better to paint the box and the roof, you can use acrylic paint.
No one will rent a house for starlings for the winter, it will stand in the yard for many years. But in case birds settle in it (sparrows very often “drop in”), then it’s better to paint with acrylic, and not with nitro enamel.
Outdoor installation
Often houses for starlings and other birds are deliberately installed next to the trees, but separately from the crown. A fence post or an old trunk of a once dried tree (without a crown and branches) can serve as a support.
Mounting a garden birdhouse directly on a wooden support is not recommended. It is necessary to find a steel pipe, at least a meter long, it can be water pipe. It is attached to a wooden support with steel wire, and the birdhouse itself is inserted inside and wedged with a couple of wedges.
Advice! No feeders, bottles of food can be installed under the birdhouse.
The height of the correct birdhouse at the soil level should be at least 2.5 m. A meter steel pipe ensures that no cat, ferret, weasel, especially mice, will reach the birdhouse.
But installation on a pole has one drawback: the walls of the house, the roof will be very hot in the sun. Therefore, the outer surface is either sealed with light paper (but not foil), or even at the construction stage, the tree is bleached with hydrogen peroxide (bleach).
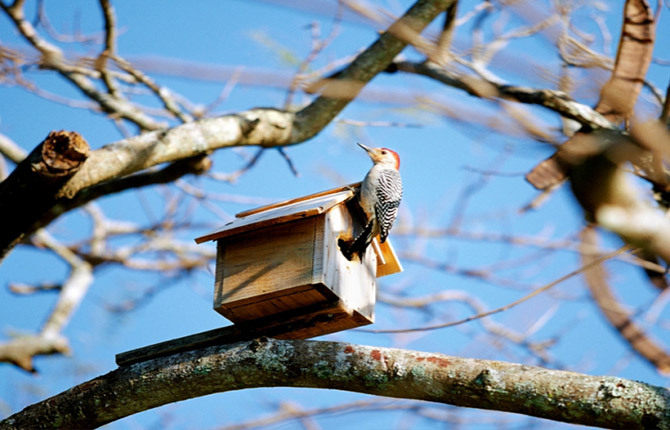
Tree mounting
More familiar is the installation in the crown of a tree. The most difficult thing is to choose the right place for fastening. The best place is considered to be a fork between two thick horizontal branches extending from the trunk.
In this case, a jumper board is mounted (attached) between the branches, to which the rack is attached. It is important that there are no branches on the left, right, and bottom that could be used by predators as a support before an attack. The front wall with a notch should be deployed in the direction from the tree trunk.
In addition, two loops are wrapped around the roof and two or three extensions are made to large branches located above. Such fastening will withstand even the strongest wind, guarantees the protection of birds from predators.
House wall
Often, birdhouses are placed side by side directly on the brickwork of a private house. It is clear that in this case the house is not intended for starlings, they cannot stand the neighborhood with a person. In the home birdhouse, most likely, tits or, which happens less often, swallows, swifts will settle.
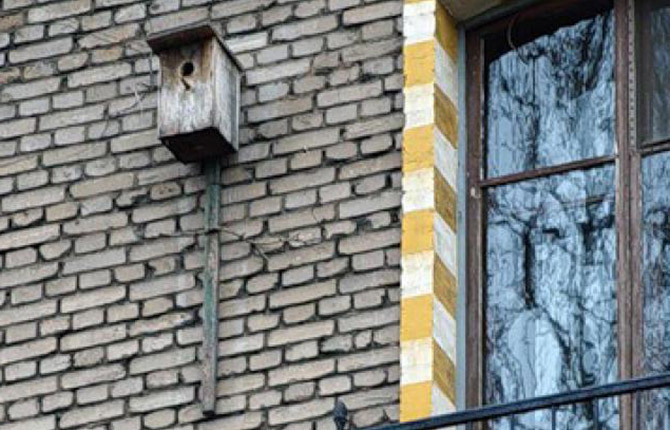
The box is simply nailed with dowels to the vertical stand. If the roof overhangs protrude far enough, then no further action is required. With short overhangs over the house, you will need to make a canopy. Otherwise, in the rain, the birdhouse will be flooded with water splashing out of the gutters. Usually it is a sheet of rubber or plastic sewn over the roof onto the wall above the house.
Results
It will not be difficult to make a birdhouse with your own hands, if you do not save on materials and do not try to give it an unusual shape, to implement “new” design ideas. A standard classic bird house has been serving birds for decades, and no one has come up with anything better than a classic.
Tell us about your experience building houses. What mistakes should be avoided in the first place? Also save the article to bookmarks and share it on social networks.