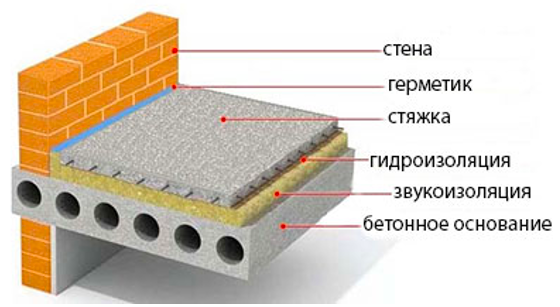
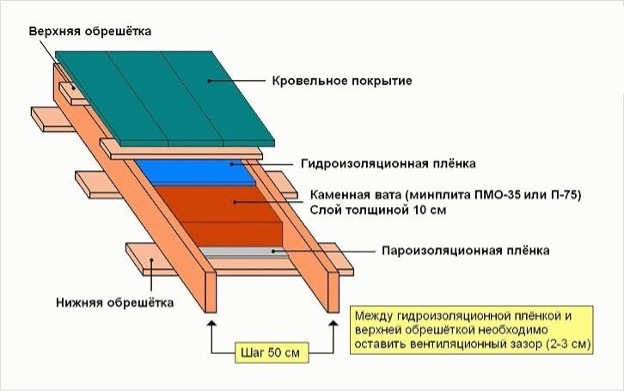
The device of the floor along the logs involves the installation and fastening of the bars at intervals of 50-60 cm or a little more. Insulation, hydro- and vapor barrier are usually laid between them. The structure of the floor may vary slightly depending on the base. A description of the features of this design and instructions for its construction can be found below.
The content of the article
- Requirements for lags
-
Floor device
- On the ground
- On a concrete base
- For overlap
- Step by step instructions for laying the floor
Requirements for lags
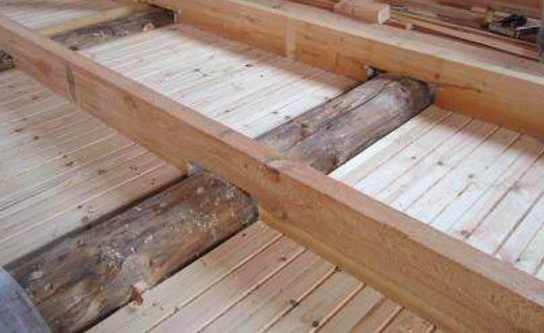
As a rule, the floor on the logs in a private house is made of a wooden beam, the cross section of which is a rectangle. Moreover, its length should be 1.5-2 times greater than the width, as shown in the diagram.
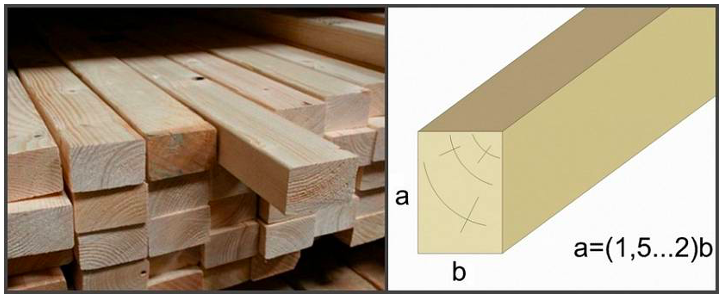
There are several important requirements for the material, among which are the following:
- wood moisture within 12% - you need to make sure that the storage conditions are carefully observed;
- thickness from 20 to 50 mm, depending on the load;
- material treated with an antiseptic.
Floor device
The device of floors on logs depends on what basis they are installed on. In private houses, they are usually placed on concrete, on the second floor - on the ceiling. In baths and other outbuildings, it is allowed to lay directly on the surface of the soil.
On the ground
Plank floors on logs are one of the simplest installation methods, especially if laid on the ground. In this case, the logs are placed on brick columns, which serve as a columnar foundation. They are placed at the same interval, which depends on the thickness and length of the lags. Usually they plan a distance of 50 to 100 cm with mandatory waterproofing, as shown in the diagram.
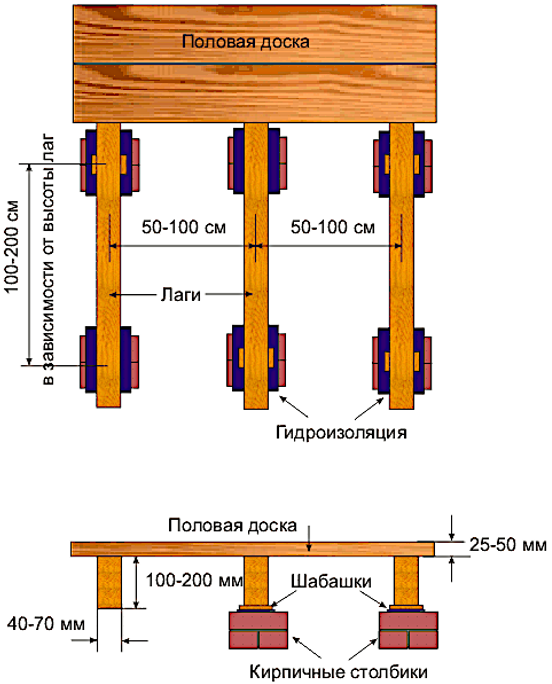
The design of the floors involves the installation of brick pillars directly into the ground. They are pre-aligned using the building level so that each column has the same parameters, i.e. height and surface area. Next, a layer of cement is poured onto it and logs are placed. At the same time, several rules are observed:
- A waterproofing material, for example, roofing material, is laid between the columns and the cross member.
- Next, a beam is laid, retreating from the surface of each wall at least 30 mm.
- The flooring on the logs is done so that there is a minimum distance of 3 cm between each wall and the timber.
- Be sure to provide for thermal insulation - sand, crushed stone or expanded clay are poured between the tree.
On a concrete base
In capital buildings, warm floors are laid on wooden logs directly on a concrete base, i.e. on a monolithic foundation. The technology provides for fastening with dowels. They are screwed into the base, lags are installed on top through a rubber compensator. Bitumen or cardboard impregnated with bitumen is used as waterproofing. On top of it is a board of wood and finishing.
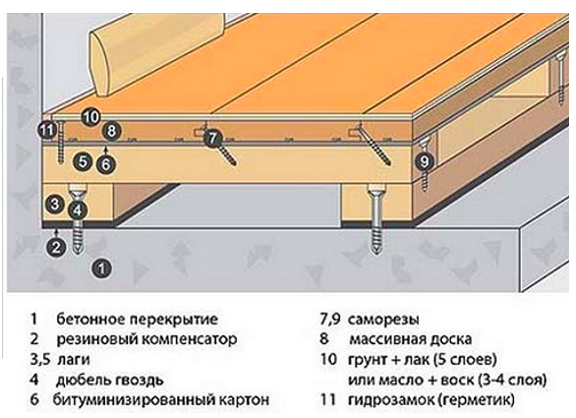
The warm floor along the logs in a wooden house is laid at intervals of 50-60 cm. Although if it is planned to use tiles as a finishing coating, then the step is reduced to 30 cm.
For overlap
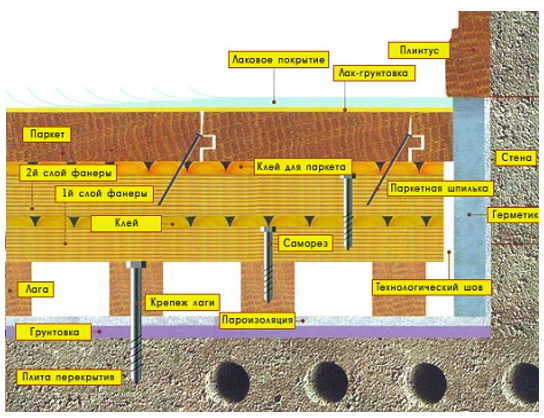
As part of this method, the installation of a plank floor along the logs is even simpler, because brick columns do not need to be installed on the floor. Laying is the same as described above. The following scheme can be taken as a basis.
Step by step instructions for laying the floor
Floors on wooden beams of the 1st floor are laid in several stages. First you need to prepare materials and make calculations, then they process the base and put the logs directly on the subfloor or on brick pillars. The step by step guide looks like this:
- Using a tape measure, determine the length and width of the room, calculate the number of lags and their length. Make markup, checking the dimensions several times to avoid mistakes.
- The floor on the logs in the house begins to be laid from a beam running along the wall. If there is already a subfloor, the logs can be laid directly on it. To do this, use metal corners with special holes (perforation). One end of the log is placed on the mark on the wall, just like the second. The correctness of the work is checked using the building level.
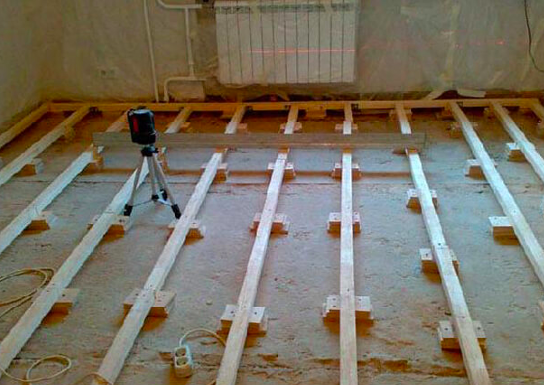
- Pull the rope between the extreme lags. It creates a reference point by which you can put all the other bars. The position is controlled by level - the difference should be within 2 mm.
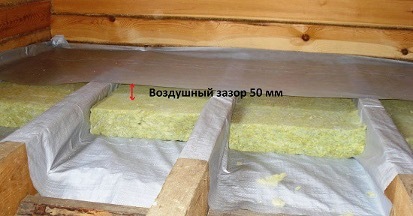
- If the design of the floor on the logs involves the use of insulation, you will also need to lay waterproofing and vapor barrier. The interval between the bars is calculated in advance, focusing on the size of the insulation. Often use mineral wool or polystyrene, as well as bulk materials. For good air exchange, it is important to leave a small gap of 5 cm, as shown in the photo.
- After covering with a vapor barrier, the view of a wooden floor from above will be like this.
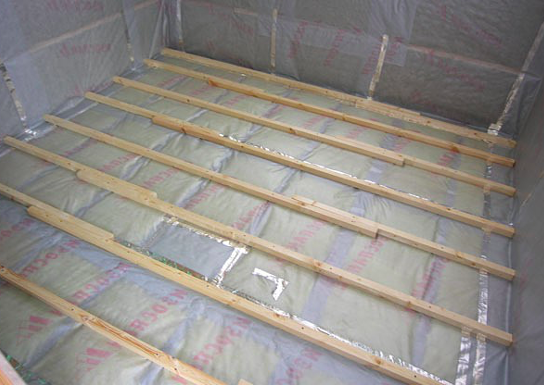
This is followed by finishing, such as parquet, laminate or board. Making the installation is quite simple if you correctly perform the preliminary calculations. The technology of installing the floor along the logs is universal and can be used both in residential premises and in outbuildings.
