Motoblocks have become the most common technique for owners of subsidiary plots. And this is not at all surprising, because such units are universal, simple in design, do not require large financial investments, and they help incredibly in work.
Inconvenience in management is the only significant minus of the walk-behind tractor. It takes a lot of effort to move it. This is often a waste of time and effort. A special adapter can simplify the laborious process of work - a cart-type device, thanks to which you can work while sitting. It is not necessary to go to the store and spend money: you can make an adapter yourself, even if you do not have a technical education!
The content of the article
- Varieties of adapters by type of attachment
- Design, features of the rear adapter
-
Manufacturing process
- Preparation
- Frame creation
- Chassis manufacturing
- Manufacturing of the coupling mechanism
- Seat installation
- The final stage
Varieties of adapters by type of attachment
Classification by only two types:
- Front - located in front.
- Rear - located, respectively, at the back.
This article will focus on making a simple rear adapter.
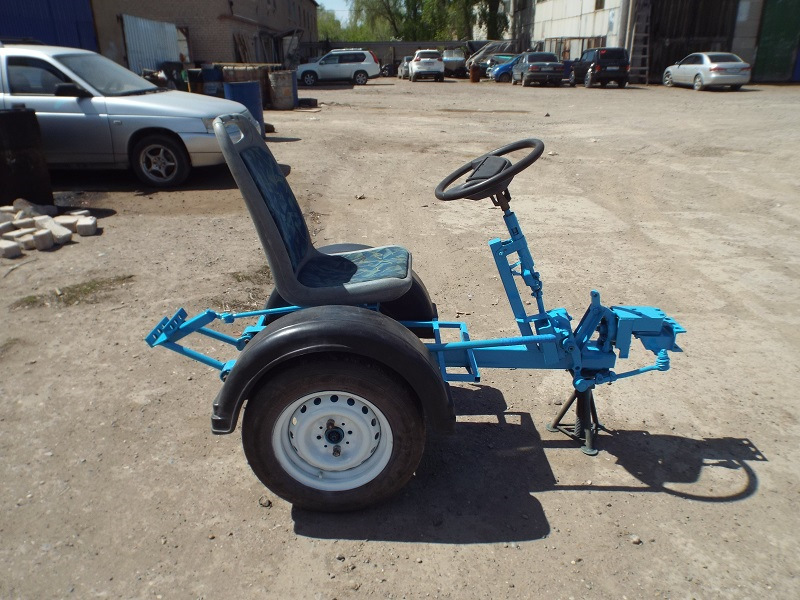
Design, features of the rear adapter
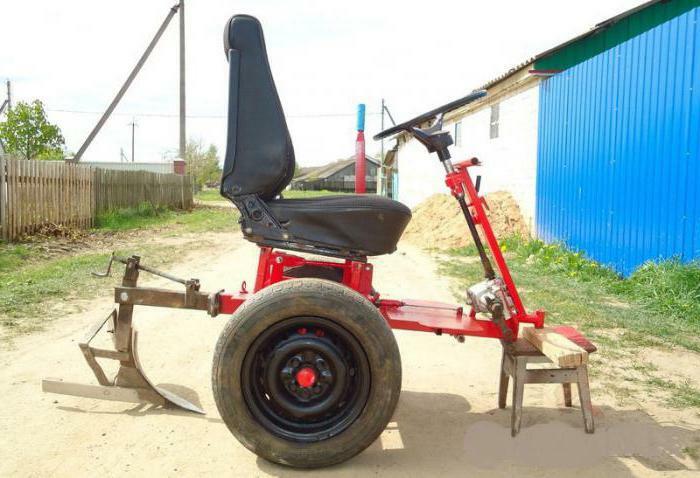
It is desirable that the structure of the adapter be as simple as possible. Try to find the perfect balance between functionality and ease of manufacture. The design includes the following main elements:
- The metal frame is the main part of the entire device.
- Wheels of the same diameter.
- seat.
- Foot rest.
- Hitch (what will connect your adapter to the walk-behind tractor).
The steering wheel can also be included in the adapter design. Let's be honest, its use will require additional effort, knowledge, time and money in the manufacture. The main elements of the adapter are always the same.
@drive2.com
Manufacturing process
Although the design seems simple, it is not so easy to make it yourself.
Preparation
First of all, you need to draw a high-quality and understandable drawing, prepare the necessary tools and materials:
- square pipes of the same diameter (for the frame);
- seat;
- file;
- welding;
- hitch;
- steel sheet;
- drill;
- electric cutter;
- other accessories.
Frame creation
As mentioned above, the frame is the main structural element, so much attention must be paid to its manufacture.
First, a fixture must be welded to the central pipe, to which the hitch bracket will be attached. The next step is to weld the frame. Choose the design at your discretion, based on the initial requirements for operation. Try not to miscalculate. After that, a steel sheet of a certain size should be welded to the frame. This completes the frame.
Chassis manufacturing
Decide on the width of the wheel axle. Here, as elsewhere, there is no single standard. The width of the axle depends on the initial parameters of the walk-behind tractor and on your preferences. Pay special attention to balance: if there is no balance, using a homemade product can be not only inconvenient, but also dangerous. To make the chassis, you will need a pipe of the appropriate diameter and size with installed bushings and bearings on which the wheels will be fixed.
Manufacturing of the coupling mechanism
In our case, the hitch will be the bracket. This mechanism must ensure a reliable connection between the adapter and the walk-behind tractor itself.
Here is a small algorithm for making a swivel bracket:
- First, give the workpiece the desired shape and weld it.
- Then weld two steel bushings that will rotate in both directions.
- Attach one side of the bracket to the end of the frame, and the other to the walk-behind tractor itself.
- Weld a handle to the hitch. This will provide additional convenience when using the bracket.
Seat installation
You can install a ready-made seat or make your own. Again, it all depends on individual preferences and requirements. It is possible to fix the seat by welding or fixing fittings.
The final stage
It remains to couple the resulting device with a walk-behind tractor. This can be done using a rounded pin, having previously drilled a hole of the desired diameter. To make the adapter last as long as possible, paint it with a corrosion-resistant paint or varnish for metal.
@fb.ru
You can start operating. Before the first use, check the reliability of the design. I hope the article was useful to you!