Heat-insulating plaster is a mixture with porous components (vermiculite, expanded polystyrene), which provide protection from heat and absorb sounds. Such compounds are more expensive, but they are durable. The main pros and cons and finishing technology are described below.
The content of the article
- Features of heat-insulating plaster
- Applications and types of material
- Pros and cons of warm plaster
- How to apply plaster
Features of heat-insulating plaster
Plaster with thermal insulation properties basically contains the same components as ordinary plaster. But it also includes porous mixtures, which are characterized by low thermal conductivity. The material contains a lot of air bubbles, which extremely poorly transmit heat, keeping it inside the room. In addition, the cavities increase sound insulation, which is especially important for city apartments.
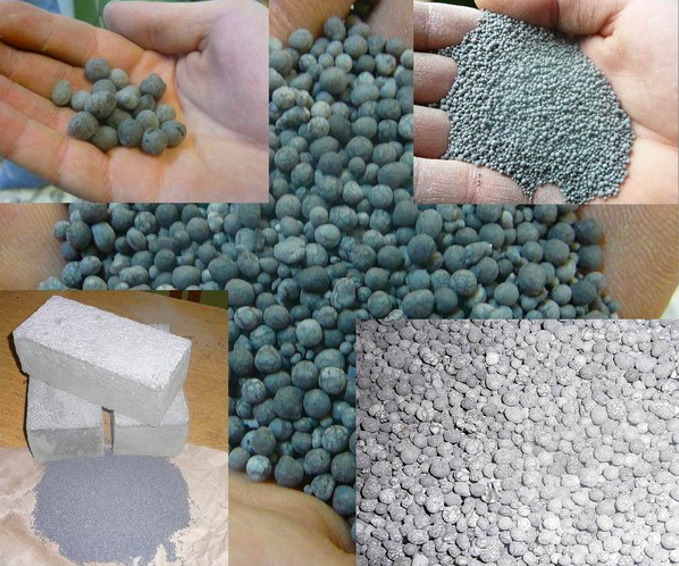
Warm plaster for outdoor use contains the following mixtures as additional components (in the photo from left to right):
- expanded clay (small crumbs in the form of granules);
- perlite sand (passes the swelling stage);
- vermiculite (also expanded).

Heat-insulating plaster for outdoor use may also contain expanded polystyrene or foam glass in the form of granules. They not only retain heat, but also create sound insulation and provide high permeability. Despite the fact that the material is artificial, it “breathes” well and, thanks to this, forms an optimal microclimate in the room.
Applications and types of material
Insulation plaster is used for different types of work:
- Internal wall finishing for leveling the surface, increasing heat and sound insulation.
- Finishing facades for similar purposes, as well as to create a decorative coating.
- “Well masonry” - in this case, a mixture of warm plaster for the facade is prepared with your own hands. The resulting composition is not used for surface treatment, but as a heater. They fill the voids directly during the construction of the walls.
- Plaster is often used as a heater for interior work. For example, door and window openings are filled with such a composition.
Based on the composition, several types of insulated plaster are distinguished:
- Perlite - it is made from natural volcanic glass. The material is resistant to temperature extremes, bacteria, fungi, but can absorb quite a lot of moisture.
- Expanded polystyrene in the form of granules is affordable, retains heat well and provides sound insulation.
- Foam glass is a material of natural origin from quartz sand. It is well resistant to water, so it can be used for finishing rooms with a humid microclimate. However, the thermal insulation is not the highest.
- Often used insulating plaster for outdoor work from vermiculite. The mixture after hardening gives a very durable surface, resistant to the effects of fungi and bacteria. But it absorbs moisture well, so it cannot be used for wall decoration, for example, in a bathroom or kitchen.
Pros and cons of warm plaster
The main advantage of this composition compared to the classic one is that it really increases thermal insulation. The mixture can be used at all stages from the construction of walls to processing after the removal of old material. Along with this, plaster for wall insulation from the inside has other advantages:
- Simple application - in fact, exactly the same as in the case of a conventional composition. However, it is worth considering that the layer should be much thicker.
- Plaster for wall insulation gives a continuous coating without seams. Thanks to monolithic processing, it is possible to eliminate "cold bridges" through which a lot of heat is lost.
- The composition is universal, it can be applied to any base - brick, concrete, gas silicate, etc.
- As already mentioned, do-it-yourself warm plaster provides not only heat, but also sound insulation.
- Reliability and a long service life - at least as many years as a conventional composition.
- Warm plaster is resistant not only to temperature changes, but also to bacteria and mold.
But it should be borne in mind that such mixtures also have disadvantages:
- High consumption due to the need to apply a thick layer.
- Higher price - compared to conventional compositions, plaster with insulation costs 1.5 times more.
- The composition is not suitable for finishing, as it absorbs moisture well. For the same reason, it should not be used in the bath, bathroom, kitchen.
- Since the layer is thicker, you will need to wait more time until it dries.
- Some types of plasters (based on polystyrene) are flammable.
How to apply plaster
Now it’s clear what warm plaster is. It remains to figure out how to properly lay it in order to provide maximum wall insulation. The work is carried out in several stages, the sequence is as follows:
- Prepare the mixture according to the instructions, knead with a construction mixer or a drill with the appropriate type of nozzle.
- Prepare the surface - dismantle the previous coating, as well as get rid of all relatively large defects - seams, cracks and others.
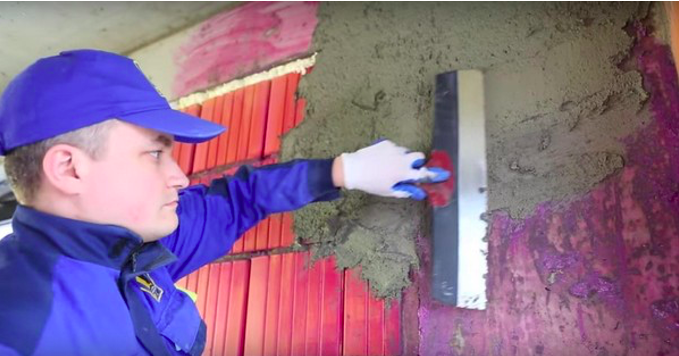
- Take a trowel or spatula and begin to apply the composition.
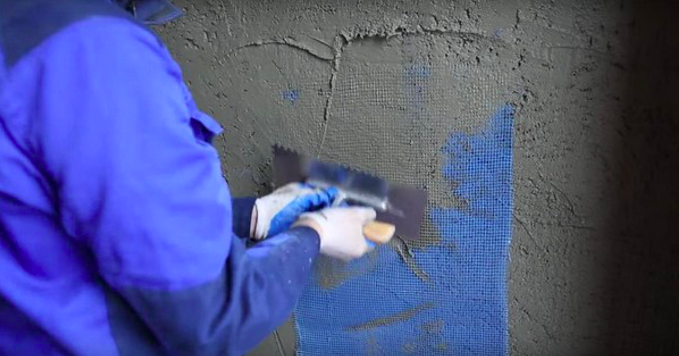
- A fiberglass reinforcing mesh is sunk into it. Its individual layers are overlapped with an intersection of at least 10 cm.
- Moving vertically, throw in small slides of the mixture with an interval of about 50 cm.
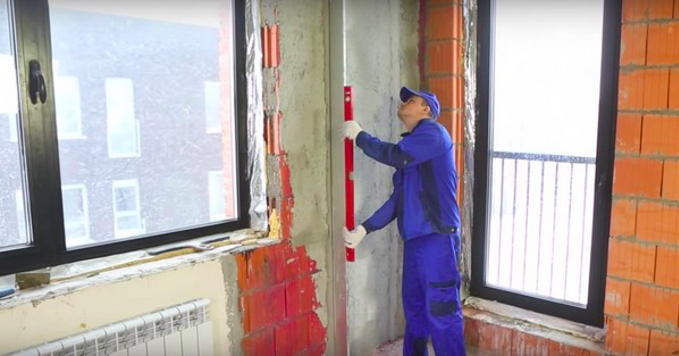
- The profile is slightly recessed into the composition, adjusting its position according to the building level.
- The voids under the lighthouse are filled with plaster.
- The remaining beacons are attached in the same way.
- After the reinforcing layer has set and the beacons are securely in place, the mixture is thrown in to fill all the space between the profiles. In this case, the composition should protrude more than the level of the beacons.
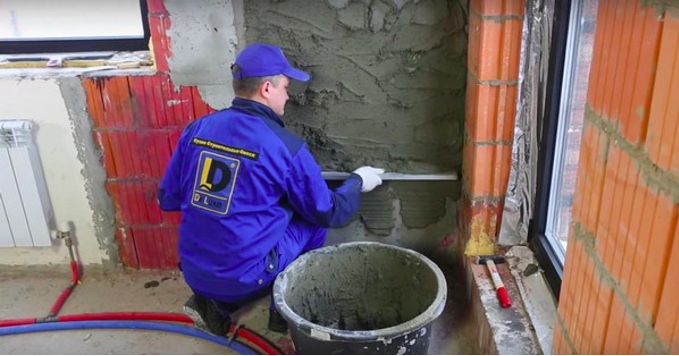
- Continue applying the compound until the surface is even. The beacons are removed, and the cracks are also filled with plaster.
At the last stage, finishing is done, for example, laying a tile, a plastic panel or a decorative mixture. These materials can be laid even on a rough surface, which avoids puttying.
Heat-insulating plaster involves the use of a mixture in large quantities to create a dense layer, so the cost of such work will cost more than with conventional material. On the other hand, increasing thermal insulation saves on heating.