A floor screed repair is usually required due to poor installation, such as missing shrink joints, poor surface preparation, or air bubbles. Although sometimes the old base cracks due to wear, especially with heavy use of the floor. A description of the main reasons for the repair, as well as the procedure for carrying out work, can be found in this article.
The content of the article
- Types of defects and their causes
- Materials and tools
-
Step-by-step instruction
- small cracks
- deep cracks
- Pothole repair
Types of defects and their causes
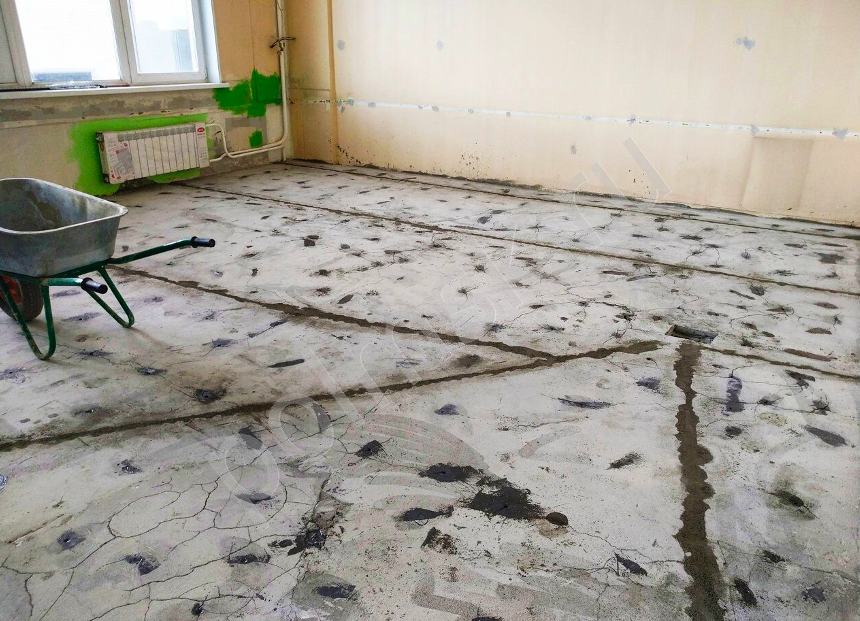
Repair of the screed is carried out in different cases when it is necessary to eliminate large or even small defects. The surface must be solid, because even due to small cracks it begins to collapse. The main types of flaws are:
- Potholes and cracks - arise due to an error in laying the screed, when shrinkage joints were not provided in the thickness of the floor. But even if they were, such defects can still appear due to an incorrect consistency or weak reinforcement of the base.
- Small holes throughout the floor appear due to air bubbles during pouring. Most often this indicates the absence of priming the surface. Then you need a repair mixture for floor screed.
- The surface begins to peel off - the reason is associated with poor cleaning before starting work. Similar phenomena are observed due to improper preparation of the base.
- Also, the repair mixture for the screed is useful in case of dusting of the surface due to natural wear and tear. Usually this happens only over time, but it can happen literally in a year due to the use of low-quality concrete.
Materials and tools
Do-it-yourself floor screed repair begins with the selection of materials and tools. The easiest way is to purchase a ready-made mixture, although it can be made independently on the basis of cement, sand and plasticizers. As for the tools, you need to use the following:
- trowel;
- drill with mixer nozzle;
- bucket;
- putty knife;
- hammer;
- chisel;
- construction level;
- rule;
- Bulgarian;
- epoxy primer;
- construction or household vacuum cleaner;
- concrete shoes (put on feet so that when walking on the surface there are no traces left).
Step-by-step instruction
The work is carried out in several stages - first, the repair compound for the floor screed is prepared, then the cracks are filled. First, small defects are eliminated, after which - larger ones. The algorithm of actions is the following.
small cracks
Repair of a cement screed begins with the elimination of small defects. The area is preliminarily cleaned of dust, and then the crack is expanded with a hammer and chisel so that a depth of 1 cm is obtained. Now the defect should have the shape of a cone, the sharp end of which goes down. After that, the floor surface is again cleaned, dust is removed.

You can use a sandblaster or a vacuum cleaner. The surface must be treated with an epoxy primer compound, which is diluted 10 times with a solvent. Then the floor must dry completely, after which it is polished and cleaned again.
deep cracks
To eliminate deep defects, the same repair composition for the screed is selected. Large cracks also need to be expanded, but already to a depth of 5 cm. For such purposes, use a grinder with an appropriate nozzle. Deep furrows are made on both sides of the gap.
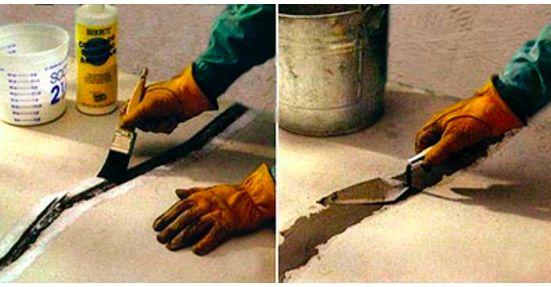
After that, they take a hammer and a chisel, with the help of which they remove the chips of concrete and deepen the crack. Dedusting and treatment with an epoxy primer is carried out. Moreover, the solution must be applied in 2-3 layers, each time allowing the previous one to dry. In order for the restoration of the floor screed to be successful, the reinforcement is laid and grinding is performed.
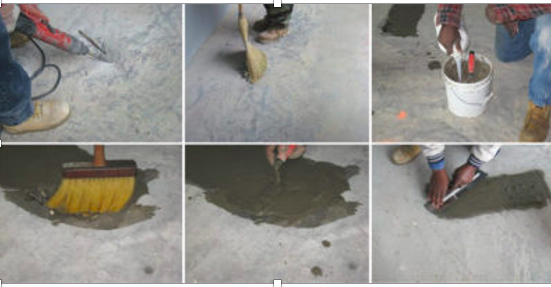
Pothole repair
The same repair composition for the floor is also used to eliminate potholes. To do this, the area with delaminations is cleaned to a depth of 2 cm using a grinder. Concrete is completely removed to this depth - to extract it, they work with a perforator.
Do the cleaning with a vacuum cleaner and go through the primer. Then the actual repair of the old floor screed begins - the cavities are filled with a solution, leveled and polished, after which they are cleaned again.
Thus, the repair of the cement-sand screed can be done independently. But even if all the work is carried out with high quality, there may be a problem associated with the appearance of dust, especially with intensive use of the floor. Therefore, it is advisable to stock up on mixtures like Ashfor or Elakor for timely processing.