Puttying the plasterboard ceiling for painting is an obligatory stage of finishing work before finishing. They can be done independently with a set of spatulas, sickles and other materials. First, the surface is cleaned and primed, after which it is applied to the joints, the heads of the screws, and then to the main part. A step-by-step description of the actions is presented in this article.
The content of the article
- Selection of mixture and materials
- Preparatory work
- Main works
- Joint finishing
Selection of mixture and materials
Before you figure out how to putty a plasterboard ceiling for painting, you should choose the right composition, as well as find the required tools and tools at hand. The choice of mixture is important, since not every one of them is suitable for all rooms, premises. All compositions are divided into 2 types:
- dry;
- liquid.
It is quite clear that it is better to choose dry putty for finishing drywall sheets, because it does not collapse under the influence of temperature changes and moisture, and also retains the material itself.
Also studying how to putty a plasterboard ceiling, it is worth studying the composition of the raw materials. On this basis, mixtures are classified into 3 types:
- based on gypsum;
- with the addition of organic polymers;
- cement base.
You can work with drywall with any composition, but you need to take into account the features of the room. If it is too humid there (kitchen, bath), it is recommended to use cement or universal putty. They do not break down under the influence of water. But if you have to work in an ordinary living room, for example, in a living room or bedroom, you can also consider a gypsum mixture, which is more affordable and of quite high quality.
It’s easy to figure out how to putty plasterboard on the ceiling if you prepare a set of tools and materials in advance:
- brush (to brush off dust);
- sandpaper of fine-grained fraction;
- knife with a sharp blade;
- a set of spatulas;
- grater for sandpaper;
- actual putty;
- primer composition;
- drill with mixer (nozzle type);
- sickle.
Preparatory work
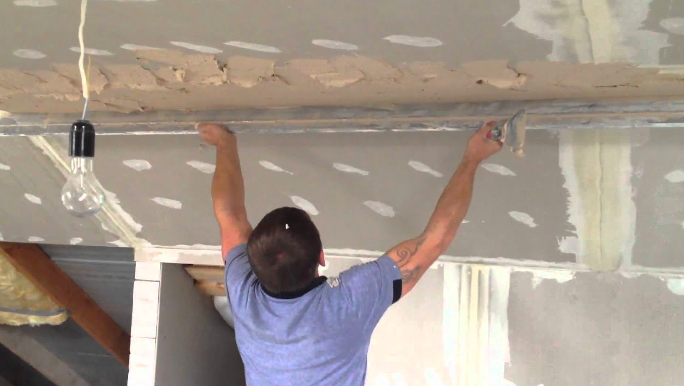
Instructions on how to putty plasterboard ceiling for painting, first of all recommends preparing the ceiling surface. The work is carried out in 2 stages associated with cleaning and priming. The main actions are:
- First you need to carefully inspect the surface in good light. If there are protruding screws or other fasteners, the caps are twisted flush with the ceiling, but not recessed in the sheet.
- Dedust the surface with a brush with hard bristles - the plasterboard ceiling for painting must first be cleaned well.
- A small volume of the mixture is prepared to cover all the seams and holes that remain from the self-tapping screw.
- The seams are covered with sickle. You can also use paper tape, and it must be pressed well so that the plasterboard ceiling putty for painting completely covers the object.
- After finishing the seams, apply the composition to every second layer using the widest spatula.
- When the mixture dries, you can begin another important finishing process - a primer. The prepared solution is applied with a roller, it should be wide enough. You can also use a brush as a substitute. It is better to work with joints, as well as the surface of self-tapping screws with a small brush.
Main works
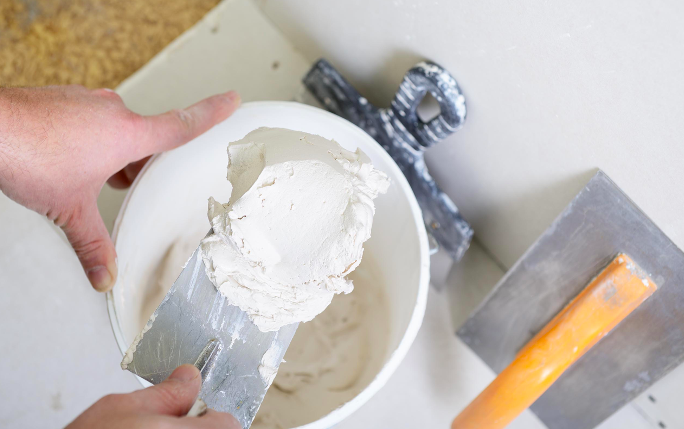
Now it's time to figure out how to putty drywall on the ceiling for painting. To do this, first prepare the solution:
- A small amount of water is poured into the bucket - within a third.
- Gradually add the mixture and stir with a mixer attachment attached to a drill.
- When the solution takes on the consistency of thick sour cream, the batch is stopped and allowed to stand for 5 minutes.
- Then beat again with a mixer and proceed to the main work.
Regardless of how to putty the plasterboard ceiling for painting, the solution should be prepared only in small volumes in order to immediately use it for finishing. The main steps are:
- They take a wide spatula, and with a smaller tool put the mixture on it.
- Apply the tool to the ceiling surface at an acute angle of 20 degrees and apply the composition crosswise so that there are no traces of the strip.
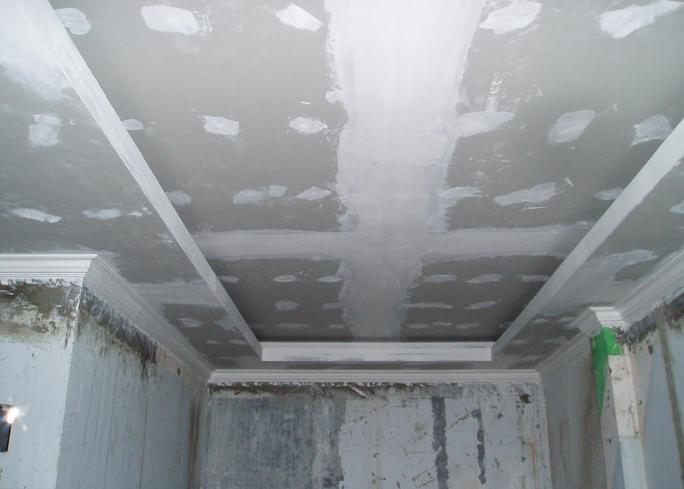
- Next, the ceiling is allowed to dry and inspected with a flashlight. If there are cavities, fill with liquid putty.
Joint finishing
It is clear how to prepare a plasterboard ceiling for painting - for this you need to prepare the surface, primer, then knead the solution and evenly distribute it. However, the work does not end there, because the corners also need to be trimmed. Despite the fact that their area is much smaller, processing will be more difficult. The reason is that the corners converge at right angles to the wall, i.e. it's 2 surfaces.
Therefore, the instruction on how to putty a plasterboard ceiling consists of the following steps:
- They take 2 spatulas for work - with a wide and narrow type blade. They go one corner. The composition is applied at an acute angle, but it is not recommended to press hard.
- Wait until the surface is completely dry.
- Treat the other side of the corner in the same way.
At the very end, finishing is carried out, for which it is better to use the appropriate putty. The layer should be very thin - literally 12 m and no more. The ceiling is allowed to dry for 1-2 days, after which you can start painting.