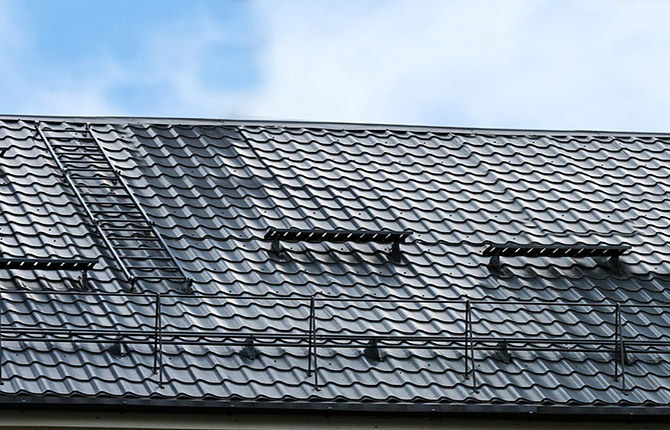
Such a simple roof detail as a snow retainer may seem completely unnecessary and even spoil the appearance of the roofing. In fact, the benefits of the device are enormous provided that a design suitable for a particular roof is chosen and the device is installed correctly.
The content of the article:
- Why are roof barriers needed?
-
Which design should you choose?
- Corner and lattice models
- Shoes and tubular snow guards
- What materials can it be made from?
-
Where is best to place
- Homemade snow guard on high roofs
- DIY snow guards for roofs with a slight slope
- Snow barriers for a regular roof
- Where does the snow fall?
-
How to make a snow guard with your own hands
- Materials and tools
- We make supports
- Installation work
- Results
Why are roof barriers needed?
Any additional structures on the roof slopes not only spoil the appearance, but also increase the risk of roof leaks. If the winters are snowless, then perhaps you can do without roof barriers. But this is only in theory. As a rule, during the winter months the weather is pleasant for at least a couple of weeks with snow drifts and heavy snowfalls.
In such a situation, a snow guard will help:
- correctly distribute the load on the surface of the roof slope;
- prevent piercing of the roofing in the central part of the slope;
- protect roof overhangs from destruction;
- protect the residents of the house from powerful snow caps and avalanches.
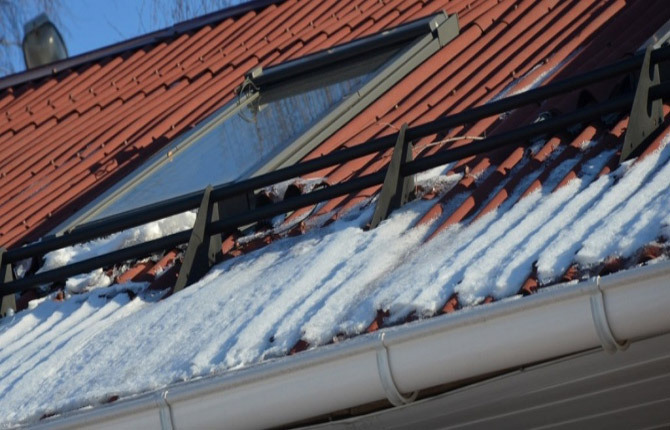
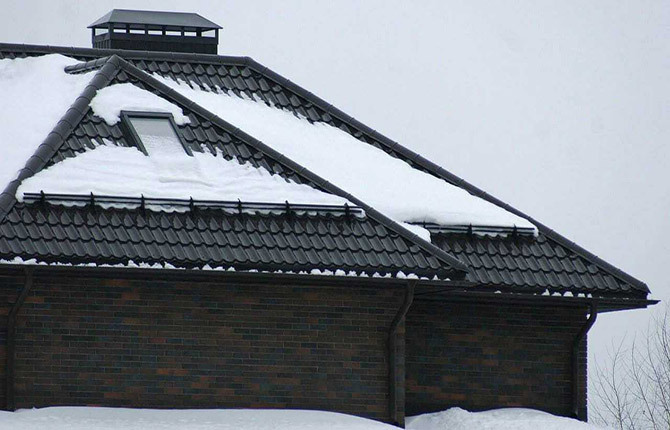
Even on high roofs with a large angle of inclination of the slopes, the snow retainer, if not blocking the snow removal, then at least breaks one powerful charge into several small and relatively safe streams. They come off slowly and are not capable of causing damage.
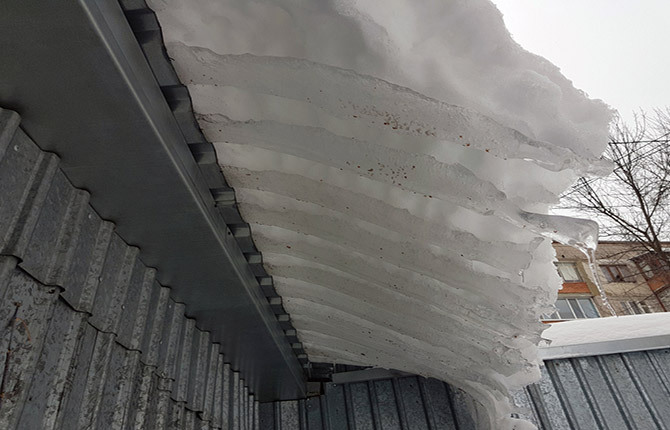
But the main reason for installing snow guards remains the threat of snow caps for overhangs. From drainage systems, the lower edge of the roof turns into a concentrator for a large amount of snow. Without a snow retainer, the rafter fillets, as well as the overhang trim, can be broken.
Which design should you choose?
Damage to the roof truss frame can be avoided by trapping snow charges and caps along the support line of the rafters onto the wall mauerlat. At this point, the roof frame can withstand a threefold overload. At the same time, the drainage gutters will remain free of snow. The snow mass accumulated on the snow retainers will safely and slowly melt, turning into thin streams of water.
Before you make snow guards with your own hands, you need to choose a scheme and installation method. For snow retention purposes, four main types of roof barriers are used:
- corner;
- lattice;
- tubular or rod;
- "shoes" or point models.
The specific model is selected depending on the slope, installation pattern and type of roofing. You should not blindly copy the snow guard model from the advertisement. Most models have their disadvantages and advantages, which are also important to know and take into account. In addition, there are certain requirements for the design of the roof itself.
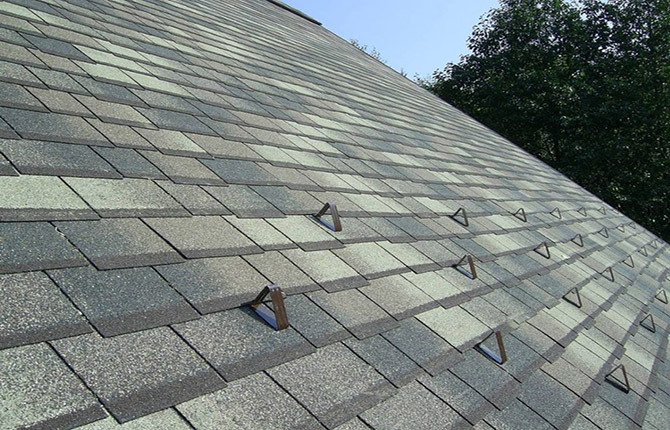
Corner and lattice models
Snow guards for the roof in the form of a corner are the easiest to make and install with your own hands. Their efficiency is quite high, but only for dense, compacted snow. On fluffy and light snow covers, corner snow retainers cannot always stop a broken layer completely. But even in the event of an avalanche, the corner often works as a springboard. The flow of snow is reflected from the corner and flies off the roof at a distance of up to half a meter from the overhang.
It is necessary to install corner snow guards only with a reinforcing strip and always with fastening the supporting surface to the wooden lath of the sheathing.
Lattice structures can only accumulate snow in small portions. They are not able to stop an avalanche or a broken stream. If you need a snow retainer of this particular type, then only for metal tiles or bitumen shingles. It is not suitable for seam roofs, corrugated sheets, metal slates or corrugated sheets.
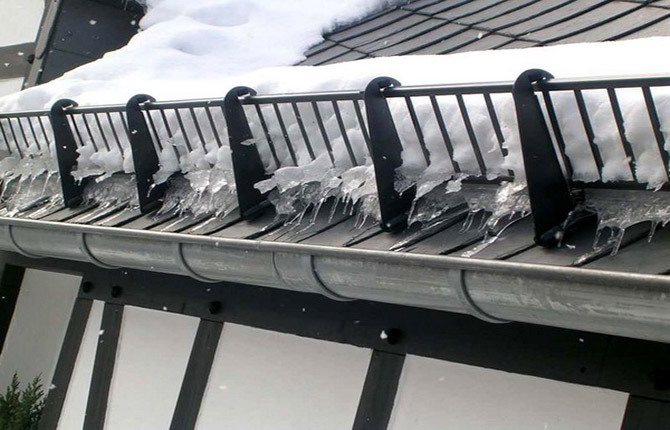
Shoes and tubular snow guards
Shoe or yoke models are installed evenly over the entire roof surface. The task of such a snow retainer is to prevent the entire snow cover that has accumulated on the surface of the slope from falling off at the same time, that is, to prevent the formation of an avalanche.
The shoes are easy to make; all you need to do is bend a strip of steel into a triangle. The supporting part is made elongated. This will provide additional stability to the snow guard, especially for the lower rows that have to stop the flow of ice and compressed snow.
This type of snow retainer is installed on any roof covering, even on seam roofs. But you can only attach it to the sheathing board.
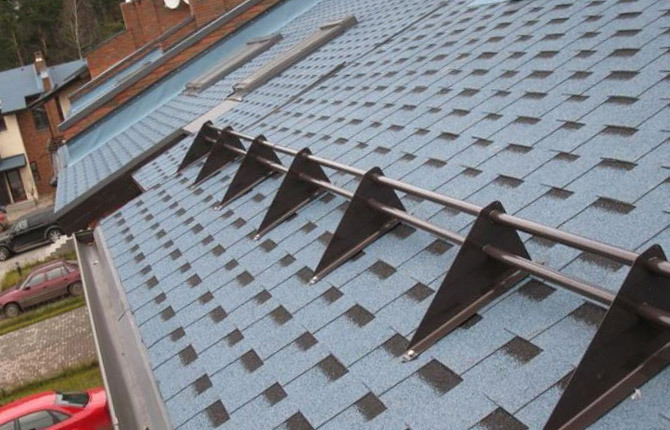
Tubular snow retainers are considered the most popular. They reliably hold even thick cover, are not afraid of impacts, and are easy to repair. If necessary, the horizontal rods can be removed for roof repairs.
What materials can it be made from?
The choice depends on the material from which the roofing is made. For metal roofs, there are no problems with choosing a material for snow retention.
The material selection scheme is approximately as follows:
- For painted sheet steel roofing, primed but not galvanized, any steel can be used to make snow guards. No aluminum, copper or zinc.
- Non-metallic roofing coverings: slate, ondulin, shingles, polycarbonate, bitumen tiles, galvanized steel and aluminum alloys are allowed. If gratings are supposed to be made, then only from fiberglass reinforcement.
- For seamed copper roofs, snow guards can only be made of copper. Steel, aluminum and alloys, galvanized roofing iron cannot be used. In this case, you need to look for sheet copper for the brackets, and also separately make fence pipes from copper water pipes.
According to reviews, tubular snow guards for copper roofs are often made from fiberglass-reinforced polypropylene water pipes for hot water. The pipe will hold the onslaught of snow, but the brackets in any case should be copper or impact-resistant plastic.
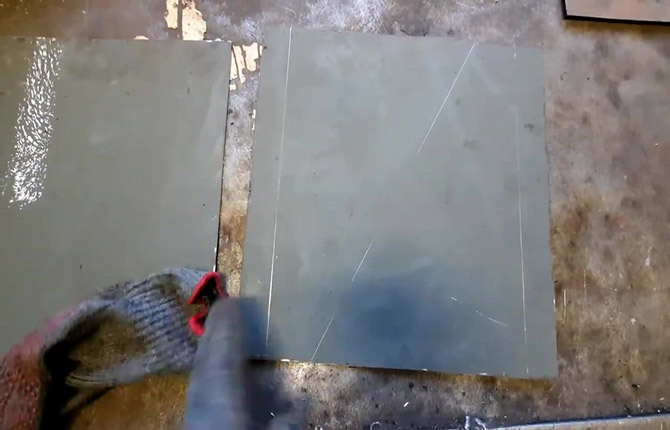
If you plan to produce shoe-type snow retainers, then a 50x5 mm strip of soft, annealed steel is best suited. It is used in electrical equipment and industrial construction for arranging grounding buses. All that is required is to drill holes in the “tongue” and bend the strip according to the template.
Where is best to place
The installation scheme for snow guards is selected in winter based on the results of monitoring the snow collecting on the roof. You can, of course, simply install a pipe barrier along the Mauerlat line or several point “shoes”, but the effectiveness of this kind of barrier will be low.
First of all, you need to find out in which part of the slope the largest amount of snow collects, what is the thickness of the layer and how the snow falls off the roof.
Homemade snow guard on high roofs
There is an opinion that on roofs with a slope of more than 30O no barriers needed. For seam roofs, this is indeed true, but only if the roofing pie and ceiling are thoroughly insulated with a vapor barrier device. Otherwise, the snow will freeze in places where heat leaks and freezing water condensate. Such places are clearly visible in winter due to stripes of snow and ice.
Despite the fact that home owners have deliberately made a large slope for the removal of even small snow charges, snow still accumulates on the roof slopes. Moreover, this situation is much more dangerous than in the case of a roof with an angle of 15-20O or almost flat roofs, especially for hip or broken designs.
The accumulated snow cover can be torn off even with a slight vibration of the rafters. In this case, the flow of snow flies at tremendous speed, knocking down lattice and tubular snow retainers on its way. Therefore, for high roofs, a more successful solution would be two rows of homemade corner snow guards of a reinforced type.
DIY snow guards for roofs with a slight slope
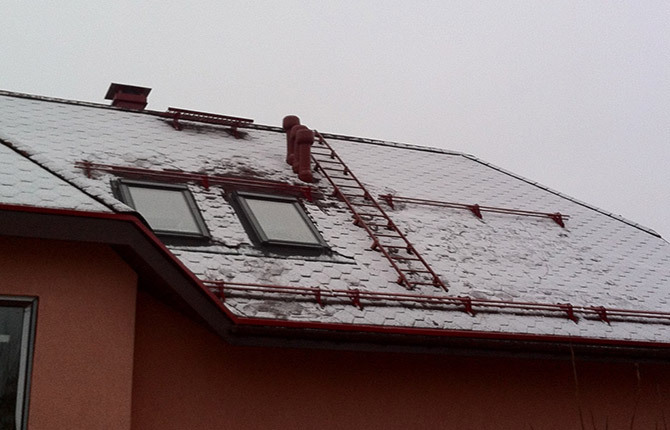
On roofs with a slight slope, the problem is removing the accumulated layer of snow. Therefore, they usually choose lattice or tubular snow retainers and place them on the line of the walls and above at least a meter and a half. In this case, the lower edge of the roof slope, as well as the snow retention grill itself, is equipped with a heating system.
As a result, most of the snow load that has accumulated at the very edge of the roof can be released in a controlled manner using the heating system. It is clear that the system is turned on only during the day, when the sun is warm, at a time when there is no one under the roof overhangs. The remaining part is held by snow retainers, it melts and comes off in small streams of water.
Snow barriers for a regular roof
If the slope and roof covering are chosen taking into account the climate and amount of precipitation, then it is enough to install one or two rows of tubular snow retainers of a standard design on the roof. One row is for a roof with a rafter length of up to 4 m, two rows are placed alternating for a roof of 4-6 m. In other cases, it is necessary to make protection with the additional installation of “shoes” and corners.

Where does the snow fall?
Most private home owners are concerned about where exactly the snow falls. Sometimes they put up protective canopies made of simple corrugated sheets, but they don’t last long. Installing a Borge snow guard is usually more efficient and less expensive.
How to make a snow guard with your own hands
A simple version of the barrier can be made from several windproof or eaves strips, as well as kits for filing overhangs on metal roofs. The most budget-friendly options for snow guards are cut from a regular galvanized steel profile for installation of plasterboard cladding.
But the best option for snow retention is still a tubular (rod) barrier model.
Materials and tools
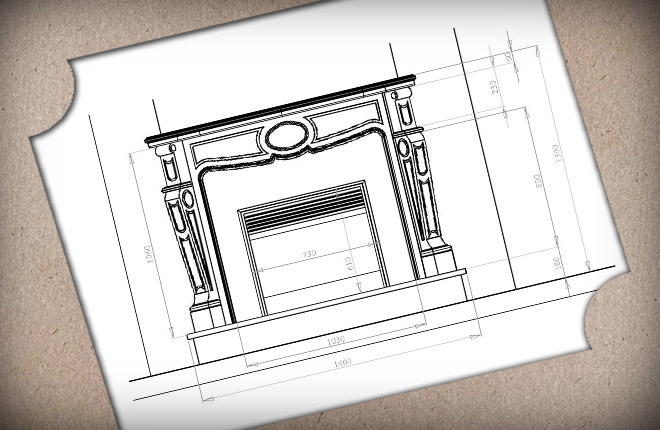
To build snow barriers, you will first need pipes. You can use ¾-inch steel ones if the step between the brackets does not exceed 95-100 cm. A drawing of a simple model is shown below.
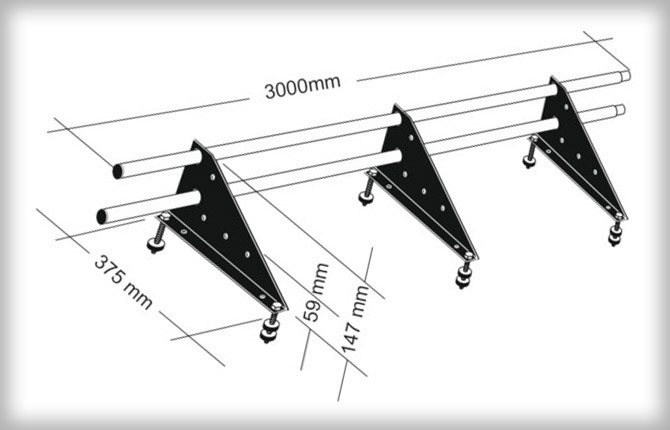
There is no point in installing inch ones; they are heavy and quite expensive. If you need to make a reinforced snow retainer, you can put polypropylene or polyethylene pipes for garden water supply on top of pipe blanks with a three-quarter diameter. According to reviews, thanks to the polyethylene shell, they fit better and do not crack in severe frost.
If you make a heated snow guard, you will need to lay a special type of heating cable inside. It is used to defrost gutters. The polypropylene shell can not be removed, the heating temperature is low, and the plastic will protect the metal from freezing of melted water and wet snow.
In addition, you will need a corner and steel plates to make brackets.
We make supports
The fastening for horizontal pipe crossbars must be resistant to both frontal and lateral loads. Therefore, supports for snow retainers must be made of plates with a thickness of at least 3 mm.
The number of supports is selected depending on the length of the cornice. There must be at least three brackets on one two-meter section.
The next step is to mark the position of the holes on the workpiece. The markings are transferred from the drawing, but there are no strict requirements for the location. Usually marked so that the distance from the edge of the hole to the cutting line is at least 10 mm.
Holes in one workpiece must be drilled with special care. It will be used as a template (conductor). Drilling is performed on a desktop machine, with several diameters: 3 mm and 10 mm.
Now a package of 4-5 blanks is folded into a package, clamped in a clamp or vice and drilled through all the plates. Then repeat with a diameter of 10 mm.
The most difficult part of making the supports is making the large diameter holes, 21 mm (3/4 inch). If the workshop has a lathe and a suitable drill, then it is better to cut it using a machine method. But not everyone has such capabilities, so holes (smaller in size) are first cut with a jigsaw with a metal blade, then expanded to the desired diameter using a reamer.
After drilling, the pipe should fit into the hole in the snow retainer bracket without tension.
The next step is to cut the support shelves from a 25x25 mm corner, 375 mm long. On one of the shelves of each corner you need to drill 5-6 mm holes. Through these holes the snow guard will need to be installed on the roof.
Next, the corner is fixed with clamps to the longest base of the triangular workpiece and welded by electric welding.
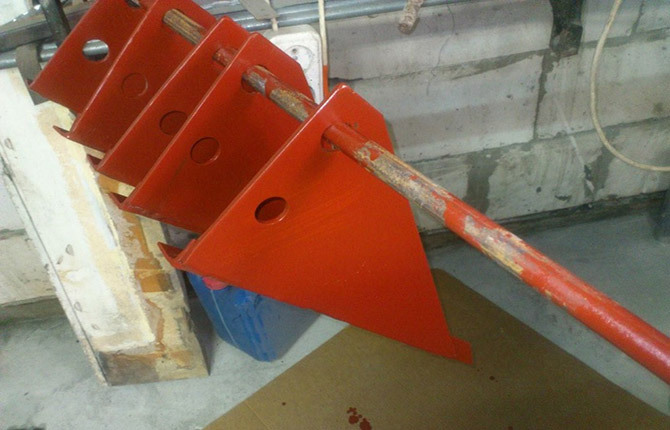
The last stage is painting. The snow retention brackets and pipes must be treated with a phosphate protectant, dried, primed and painted with polyester paint. It is best to use two-component automotive paint.
Installation work
The snow guard must first be assembled on the floor in the workshop. This is necessary to ensure that there are no problems with the holes in the brackets and the diameter of the rods.
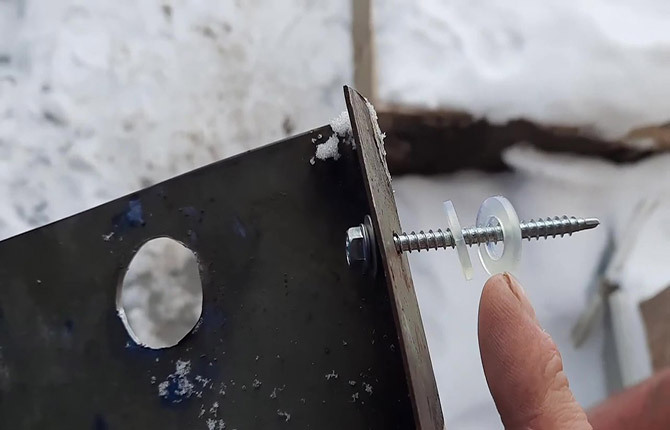
To install the snow guard, carpentry fasteners are used - a self-tapping screw with a hex head. It is screwed into the sheathing wood. If the barrier is installed on a steel profiled roof, then a silicone gasket will need to be placed under the supporting surface.
According to the instructions, the location for installing the snow guard is chosen no more than 50 cm from the side edges of the slope and 70-80 cm from the bottom line of the overhang.
Results
Making such a device with your own hands is relatively simple, even in a home workshop. In terms of costs, such a design will be an order of magnitude cheaper than conventional tubular barriers made by stamping from 0.8 mm galvanized sheet metal. Moreover, the service life of homemade products is usually three times longer than purchased barriers.
Tell us about your experience making snow boots. Which models do you think are most effective? Also share the article on social networks and bookmark it.