Building a gazebo is a task that can be completed by a craftsman with minimal carpentry skills. To simplify the construction process, first review the drawings and diagrams during the planning stage, and also watch educational videos on this topic.
Studying the article will help you imagine how a gazebo project is drawn up, the amount of materials used is calculated, and a gazebo is built from a log yourself.
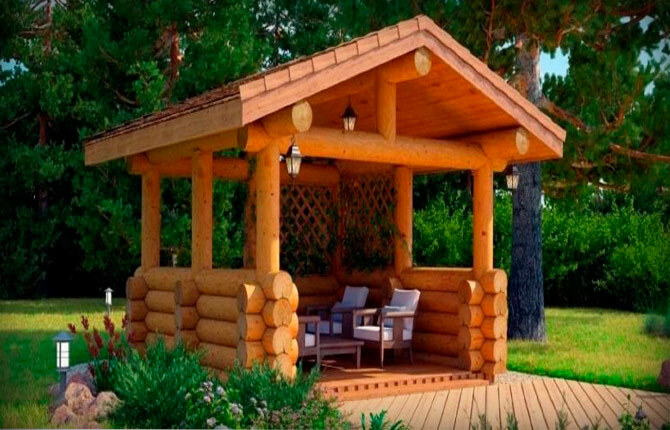
A wooden gazebo built on the site will decorate the garden.
The content of the article:
-
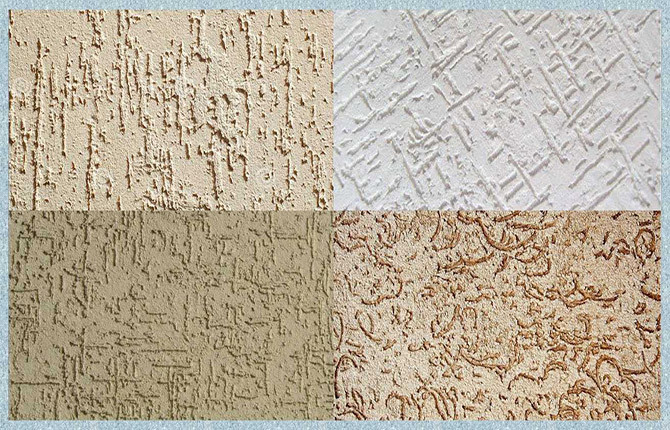
Which log to choose for building a gazebo - pros and cons
- Carriage
- debarked
- scraped
- Planed
- Rounded
-
Step-by-step construction instructions
- Drawings and dimensions
- Foundation - which one to choose
- Bottom harness
- Laying and fastening of logs
- Roof and roofing
- Floor
- In custody
Which log to choose for building a gazebo - pros and cons
Those who are familiar with the practice of constructing wooden structures should know that only there are 5 types of logs, which can later be used as the main material of the house or gazebos. Amateurs probably don’t even imagine that the log cannot be anything other than rounded.
Which one is better for building a gazebo is determined based on the budget and features of the gazebo. With a modest cash reserve, there is no better option than a rounded log.
If finances allow, then choose scraped or debarked varieties of building material. Therefore, let’s get acquainted with each type and consider their main differences, as well as their pros and cons.
Carriage
A similar style of processing logs is used in Norway. The originality of the method is that the tree is sawn on both sides. This is half beam, half log. On the one hand, the definition of timber is suitable for it, but the rounded, unbarked sides do not allow this to be done with full right. On the other hand, it is also impossible to call the carriage a log, because it lacks two hemispheres that determine the shape of the solid log.
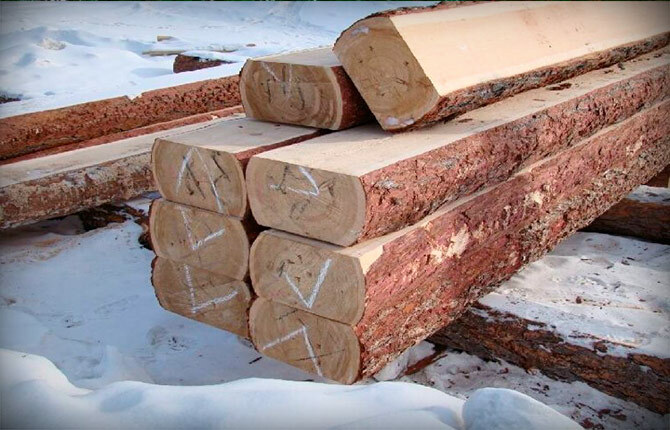
Carriage is a material that is less common in Russia.
Since the log is cut closer to the central part, it suffers less from the formation of cracks. Another advantage is that the finished material fits perfectly on a flat surface, increasing the quality of adhesion and the overall stability of the residential building.
Advantages:
- The structure, assembled from Carriage, will last for decades.
- The wall thickness is approximately the same in all parts of the wall. The flatness eliminates as much as possible the penetration of cold air between the laid structural elements. Consequently, a gazebo built from a gun carriage is much warmer.
- A wooden gazebo made from a log carriage is flat in shape.
Flaws:
The only negative is the unaesthetic appearance. For this reason, gazebos assembled from gun carriages are not as common as those made from other materials.
debarked
A simple log gazebo is assembled from debarked wood. Such buildings belong to the economy class. Rough cleaning by removing the bark makes the treated surface unattractive.
Unfortunately, the processing of a debarked log cannot be called complete, since after removing the bark the slightest irregularities are revealed to the eye. However, depending on what style of gazebo the owner wants to get, rough and uneven shapes may match the finished structure.
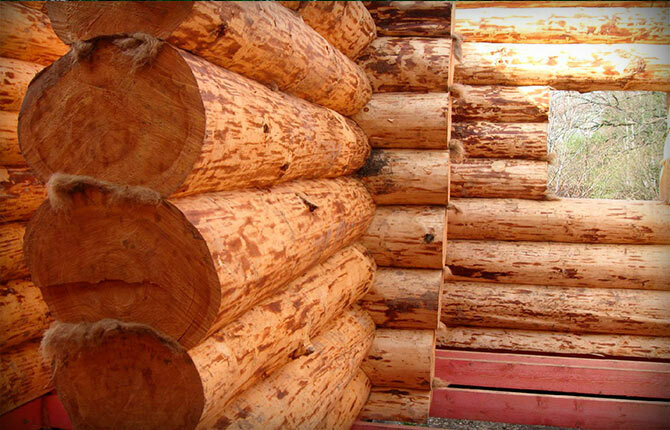
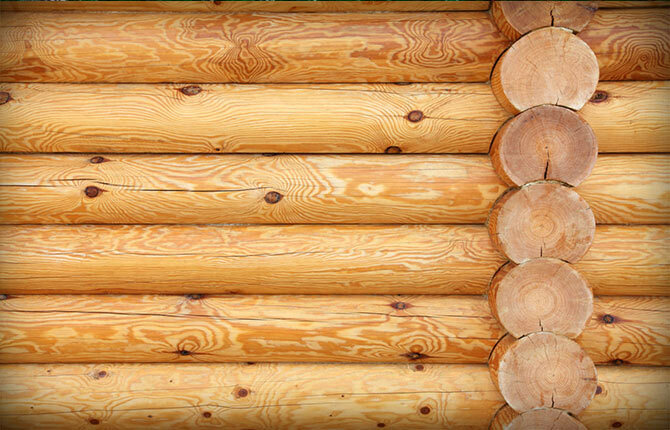
The image shows that the debarked version preserves the wood as much as possible in its natural form: with knots and particles of bark.
The construction of a gazebo from debarked logs can cause indignation for an inexperienced carpenter - it is difficult to fit different materials. However, with sufficient accumulated experience, the work does not evoke any emotions other than positive ones. The finished structure will please both the craftsman and the customer.
Advantages:
- looks nice;
- the constructed structure is reliable and can last for decades;
- if the gazebo is closed, then you can spend time in it on winter days;
- more affordable than other options.
Flaws:
- Without construction experience, fitting logs takes a lot of time.
scraped
Unlike debarked logs, this option goes through an additional stage of processing. In addition to removing the bark, the tree is sanded. This is done with a special tool - a cycle. Despite the fact that this method of surface preparation also cannot be called complete, its final appearance is still slightly better than that of a debarked log.
The scraping is carried out using a cycle. The wood takes on a more noble appearance.
Advantages:
- This method of wood processing, scraping, has been known for a very long time and has stood the test of time. The constructed structure can last for more than 100 years.
- Resistant to mechanical damage. Even if a slight abrasion appears on the surface, it will be almost invisible.
- Although the cost increases slightly due to the inclusion of additional processing, it still remains within the range of affordability.
Flaws:
- adjustments need to be made.
Planed
The bark is removed from the tree, after which it undergoes the final stage of processing with an electric planer. The appearance of the gazebo, built from planed logs, is attractive and aesthetically pleasing. The light surface with occasional knots adds sophistication and charm to the structure.
Advantages:
- almost perfectly smooth surface;
- the reliability of the finished structure made of planed logs is superior to other types;
- The walls from the inside do not need to be finished, leaving the original appearance.
Flaws:
- As a rule, logs offered on the market have different diameters, which requires selection during construction;
Attention! You can try to buy material that is more or less suitable in diameter. However, it will cost more.
Rounded
As a result of this processing, the log is subjected to strict calibration. Launched into special equipment, it is driven through saw blades that remove the bark and part of the healthy wood. The result is a smooth, even material of the same size. For quick assembly of gazebos, a groove is provided in the log, which, thanks to a special cut, fits tightly onto the calibrated log.
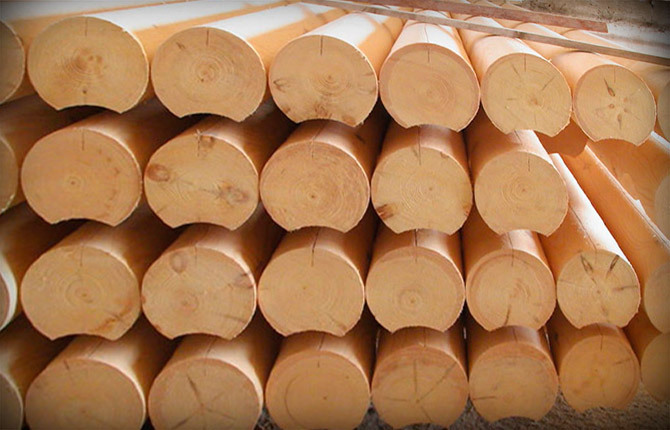
Calibrated wood is more convenient for construction without experience.
Advantages:
- the shape is even, the surface is smooth, the number of flaws is minimal;
- a gazebo made of logs can be assembled in a few hours, thanks to the provided groove;
Flaws:
- since the main protective layer of wood has been removed, it needs regular processing;
- rotting of such a log occurs earlier than in other specimens;
- to get a warm gazebo, additional insulation is necessary from the inside;
- Over time, visible cracks appear on the surface and the log becomes deformed.
Step-by-step construction instructions
Massive logs complicate the construction of a gazebo. It is better to do the work with a partner. At the same time, you must be responsible during the work process: take your time and check the dimensions several times.
Wood is a living material. Therefore, when working with it, you need to know many of the subtleties of assembling the gazebo and subsequent care. The scraped log is most resistant to precipitation.
This is explained by the fact that the smallest details of the bark, in which living insect larvae could remain, were removed from the surface. If further processing is not carried out, the material will soon become covered with small holes.
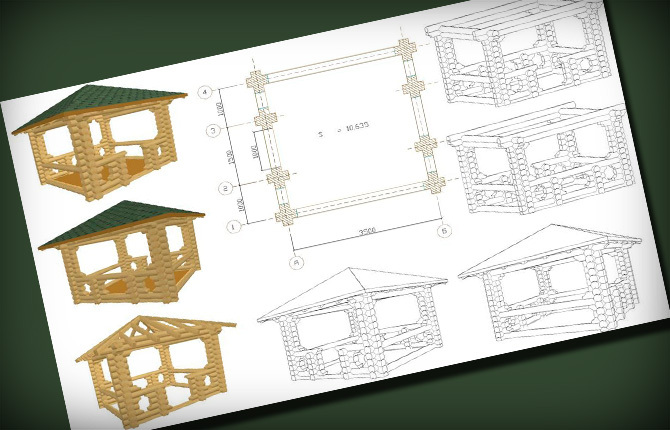
A properly designed gazebo project will help you save money on the purchase of building materials.
You need to start building a gazebo by drawing up a project and sketching a drawing. The dimensions of all parts (even minor ones) should be indicated here. The schematic drawing should be shown in several projections for ease of perception of the future object. The rest of the task consists of strictly following the step-by-step instructions. You can make one yourself on a piece of paper if you don’t have enough experience.
Drawings and dimensions
Regardless of what you plan to build, you need to start with drawing up a drawing. Everything that you want to see in the end is depicted here. Imagine in your mind a structure that has already been built and try to transfer your project onto a piece of paper. To get started, a simple schematic sketch is enough.
Go outside and choose a place where the log gazebo will be installed. If any interference is found, make adjustments to the future structure. After making sure that the sketch you compiled is true, make a full-fledged drawing with verified dimensions.
Correct calculations will help determine the material consumption for the construction of a recreational shelter:
- how many cubes of wood will be used;
- how much concrete needs to be ordered or produced independently to pour the foundation;
- what material to choose for the roof and what the purchase costs will be;
- other little things for forming floors and finishing the gazebo.
Foundation - which one to choose
The question of choosing a foundation for each area is purely individual. In this case, it is necessary to take into account the characteristics of the soil and climate of the local region.
Columnar
For conditions with a damp climate, where in the spring the groundwater in the area rises above the usual values, it is recommended to consider the option of a columnar foundation. This installation method has its own difficulties. For example, to install bored piles it is necessary to call specialized equipment, and this in turn leads to unnecessary costs for the construction of a gazebo made of logs.
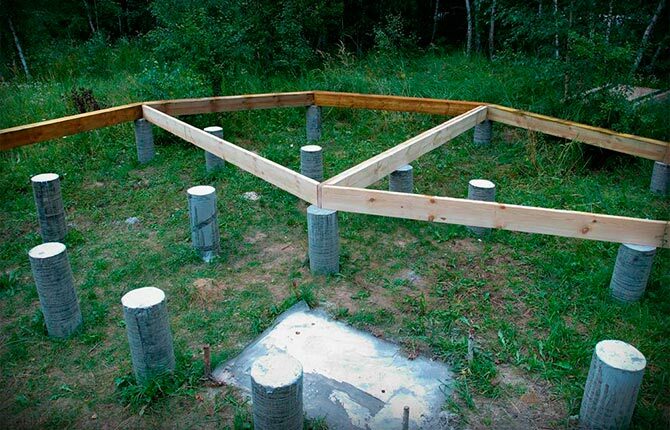
An example of laying a columnar foundation for a gazebo.
To realize the desire to install a gazebo made of logs on the edge of a steep slope, another type of columnar foundation is suitable - these are screw piles. The inclusion of metal in the structure makes them more reliable in terms of resistance to loads. However, after some time of use, persistent traces of corrosion appear on the surface.
Tape
This method of arranging a foundation is common in central Russia, where the soil is dense and spring floods do not occur. The shape of the concrete pour determined the name itself - the base is poured with a tape along the perimeter, bypassing the central part of the building. This method allows you to slightly raise the gazebo above the ground, leaving a small space for ventilation of the lower part of the wooden structure.
Making such a foundation with your own hands is quite simple. It is enough to have a small concrete mixer in your household so as not to knead the solution by hand. The filling process itself looks like this:
- A trench is dug. The strip foundation should be 10 cm wider than the base of the log gazebo on each side.
- The formwork is being installed. The most convenient way to do this is from panel material: boards, plywood.
- A sand-crushed stone cushion is being prepared. Sand is poured into a layer of 10-15 cm. When spilling water, perform a light tamping. After drying, the sand is covered with a layer of crushed stone. 5-7 cm is enough, ultimately the pillow should remain 10-20 cm below ground level.
- Reinforcement is being carried out. Reinforced rods are laid inside and strapping is carried out. The lower level should rise 2 cm above the pillow.
- The concrete solution is poured. This should be done slowly, with periodic piercing of the reinforcement with a bayonet shovel or rod. This procedure is necessary to remove air voids and make the base monolithic.
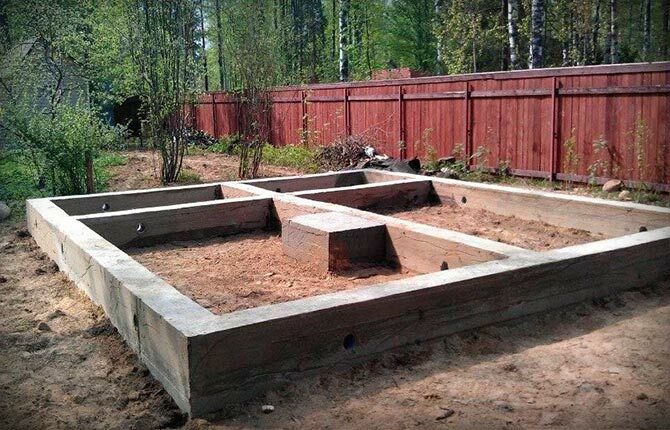
The strip foundation is capable of leveling out minor unevenness of the site. By installing a gazebo made of logs on top of such a base, you don’t have to worry about its reliability.
Bottom harness
This is a continuation of the base of the log gazebo, made of wooden beams. He begins laying for tying with a log. Guide logs are attached to the same part, followed by laying the floor.
Laying and fastening of logs
The process of laying logs still amazes some. Assembly is carried out without a single nail or screw. Users with little experience think that this method of fastening cannot be reliable. However, it is worth saying that it is the most reliable available. In order not to make a mistake and perform the installation correctly, you need to understand several points based on the fastening methods:
- Butt to the top as a technology for laying logs. Used for materials with a low level of processing: debarked, scraped and planed. For the latter, this method is used less frequently. The butt is the lower part of the tree that has a widened part. The vertex is the truncated part. The logs are laid with alternating changes in the direction of the top. This makes it possible to achieve equal heights on each side.
-
In the paw. A paw is a form of fastening where the cut of the end part is made in the shape of a trapezoid. Carpenters call it “dovetail”. The connection is tight and reliable. To implement this method of fastening, you must have sufficient experience and be attentive.

Foot fastening is the most reliable connection method for building gazebos.
- In the region Another way to fasten the logs together. The oblo is a notch in the shape of a semicircle. The subsequent logs are laid in this planting hole. The connection is tight with minimal gap. In this case, you cannot do without using a special tool. Although earlier craftsmen did all the work by hand, having only an ax, a wide chisel and a wooden mallet at hand.
Roof and roofing
The part of the engineering structure from the top of the wall to the roof ridge is called the roof. Logs are used only on the floor. The rest is assembled from timber or boards. Let's look at an example of how to make a gazebo from logs with a pitched roof:
- On top of the walls, maintaining the principle of tying the logs, a tie is installed. These are logs installed transversely, acting as a tension element for the walls.
- A shalevka is laid on top. This is a board that creates a plane for laying roofing material: slate, metal tiles and other materials.
- A waterproofing layer is installed. This could be roofing felt, water vapor barrier.
- The roof is covered with one of the roofing materials, for example metal tiles.
Floor
Laying the floor for a gazebo made of logs with your own hands is carried out according to the standard scheme:
- using metal mortgages, we attach the logs to the base of the framing beam;
- We attach a layer of water vapor barrier;
- we install the floorboard and fasten it with nails;
- To create a decorative look and protect the boards from external damage, we cover their surface with a layer of paint.
In custody
Having carefully studied the material, you can make sure that the process of building a gazebo from logs is not as complicated as it might seem at first glance. However, to begin implementing the project, you must have a minimum set of skills as a carpenter, joiner, and others. Familiarization with the general principle of building a gazebo at the dacha will help lay a small foundation for acquisition of skills and will be the impetus to try to install it on your own plot.
Have any of our readers tried to assemble a gazebo from logs on their own site? What difficulties did you have to face? Dear guests and regular users of our website, share the article on social networks and save it in your bookmarks.