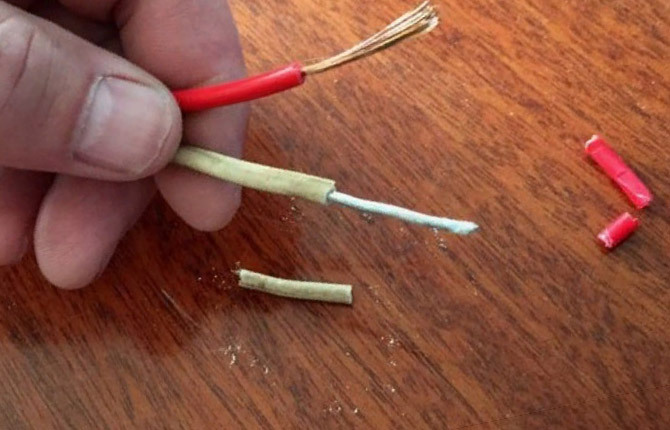
The problem of how to connect aluminum and copper wires sooner or later arises for any home electrician. Most often, you need to expand or move the socket, or connect the input from the street with an aluminum SIP cable with a transition to copper. Although copper and aluminum do not get along well, even to the point of fire. But there are more than enough ways to connect a pair of wires from different metals, you just need to choose the most suitable one.
The content of the article:
-
Crimping
- What is the secret of the sleeve's effectiveness?
- How to connect
- Screw terminal blocks
- Wago Terminals
-
Twisting followed by soldering
- Loop-rod twist
- Classic twisting and soldering option
-
Nuts
- Connectors for outdoor use
- Bolted connection
- Results
Crimping
The easiest way is to connect two wires with a regular metal sleeve. They come in several sizes and are typically used to connect 2-4 wires at once. The sleeve is made of soft copper with a tin-plated coating. Tin is a relatively inert metal and does not react with copper or aluminum conductors.
What is the secret of the sleeve's effectiveness?
It is clear that when aluminum and copper wires come into contact, a galvanic pair appears between them. Therefore, the point of contact between copper and aluminum will always corrode, no matter what or how to connect the two wires.
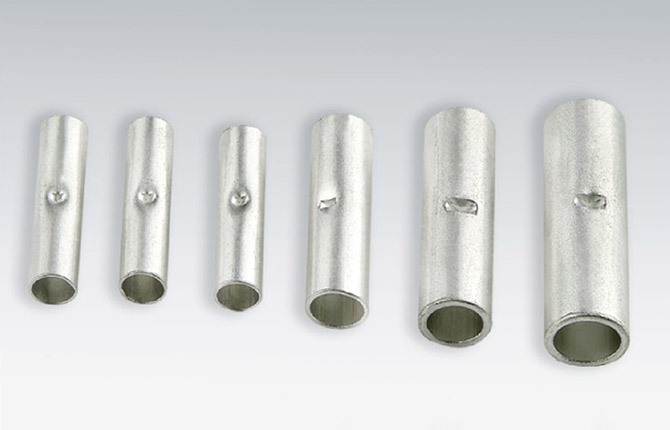
The tinned surface of the sleeve saves the situation. The current flows along the surface of the sleeve as if through a conductor; the contact of the aluminum wire with the copper wire does not disappear, but only in a dry state. Therefore, connecting with a sleeve can only be done when installing wiring indoors.
Advice! If you plan to connect two different wires, copper and aluminum, for an outlet in the bathroom, then it is advisable to pre-tin the copper wire with tin. In this way it is possible to protect the surface from oxidation.
How to connect
First you need to strip the insulation on the copper and aluminum wires. Next, select the diameter of the sleeve depending on the number of wires being connected. Put it on, push the stripped wires inside, and crimp with pliers.
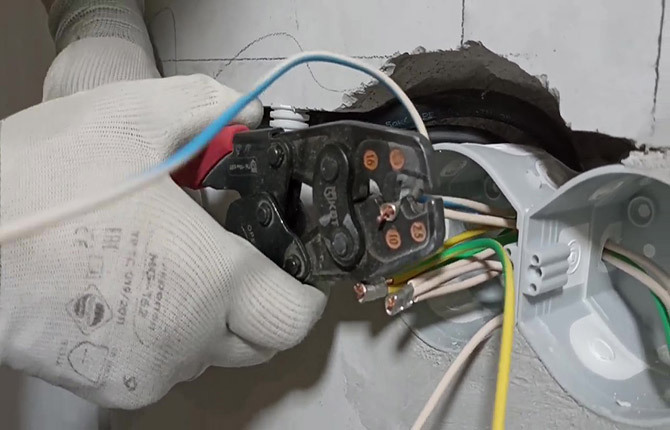
Better twice, the size of the sleeve allows you to connect the cores with double crimp.
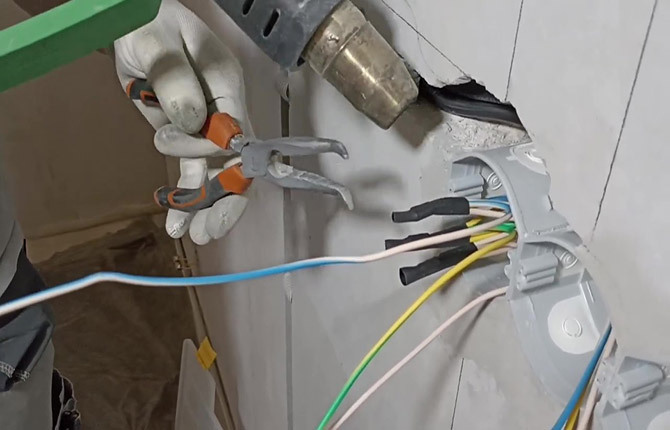
Be sure to put insulation over the connection and heat the heat shrink tube with a hairdryer.
Screw terminal blocks
The device is a metal insert with two threaded holes for screwing in two clamping screws, sealed in a propylene shell. It also performs insulation functions. The metal of the insert serves as a jumper between the connected wires.
To connect two wires, copper to aluminum, you need to unscrew the screws until they stop. Next, insert the wires, stripped of insulation, into the opposite ends of the terminal block, tighten the screws until they stop, as tightly as possible.
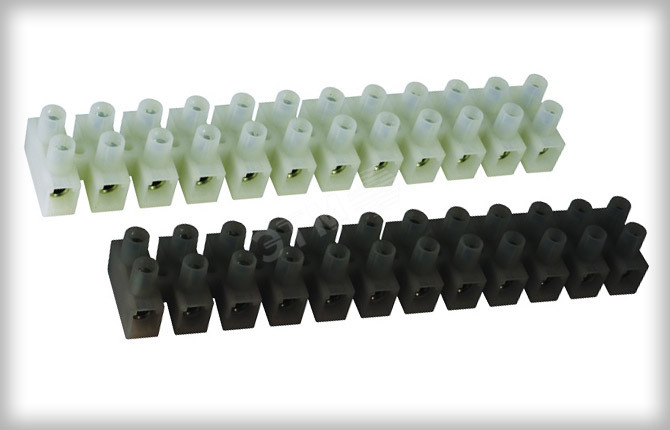
In this connection, the internal insert provides electrical contact without actual contact between the copper and aluminum.
The method is quite simple, but it has one serious drawback. Copper and aluminum are soft metals, so no matter how tightly each screw is tightened, the contact will loosen over time. Accordingly, the internal resistance increases, the terminals begin to heat up, and the plastic melts. This is a problem with all screw terminals. The marking of the clamp indicates the operating temperature of heating over a long time without loss of strength.
Therefore, large terminal blocks use locking washer screws.
In amateur practice, if you need to connect two single wires, aluminum to copper, most electricians proceed as follows:
- One section is cut from the package, designed to assemble one pair of cores, and the outer polypropylene lining is cut off;
- the copper wire is tinned and soldered to the outer surface of the metal insert;
- aluminum is simply inserted inside and secured with a clamping screw.
The metal insert is insulated with heat shrink or electrical tape. This may not be the fastest way to connect copper and aluminum wires, but it is quite reliable. Plus, the place where the two wires are spliced is small and easily fits inside the socket box.
Wago Terminals
One of the device options that allows you to quickly connect several wires into one node, without tools other than side cutters. Wago clamps are also known as quick-clamp lever terminal blocks.
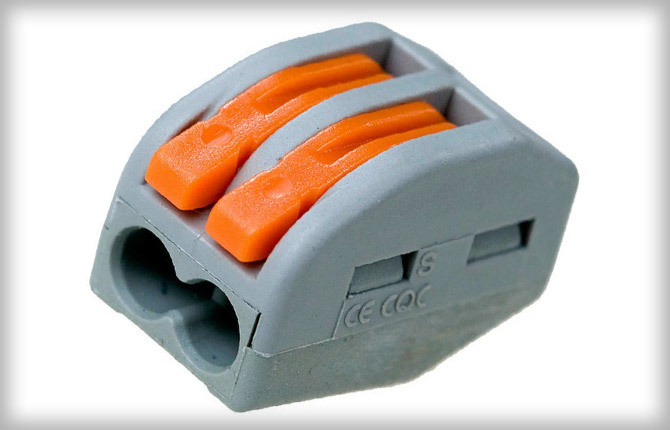
All that is required is to strip the insulation from the end of the copper and aluminum wires and apply a small amount of contact paste. Next, lift the levers, push the cores inside, and lower the clamps to their previous position.
The ends of the copper and aluminum wires will be securely pressed by the contact spring. Unlike a screw terminal block, Vago has each end spring-loaded with a plate, so it does not move away from the contact pad, even if any of the wires is subjected to external load.
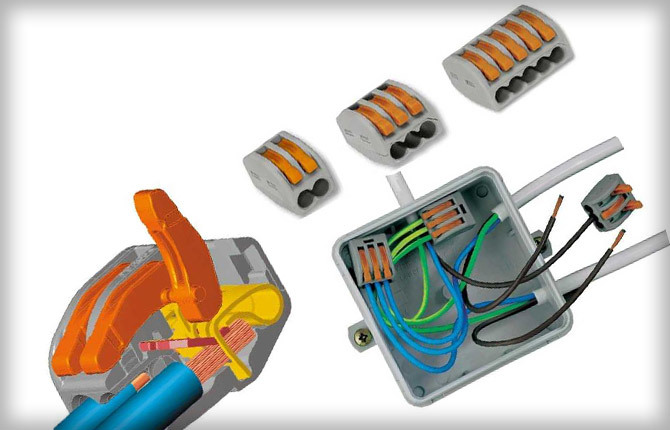
This scheme is convenient only as a temporary one; connecting copper and aluminum conductors using Wago makes sense only for a short period of time. Despite the fact that the clamp body is protected from moisture, the spring will lose its elasticity over time, so one of the wires (usually aluminum) begins to burn.
You can, of course, bend the spring and connect it to the clamp again, but the quality of the contact will remain unimportant. In such a situation, it is advisable to check the internal resistance of the contact with a tester. The device should show 0 when the knob is positioned in kOhm.
According to reviews from amateur electricians, it makes sense to connect wires using Wago only under the following circumstances:
- the price of the clamp is low, it is possible to use them as a consumable;
- the wires are connected using contact paste;
- The quality of the clamp is quite high, the device itself is made in the European Union or the USA, then the Wago will last a very long time, without any failures.
Any other quick clamps (even those made in Taiwan or South Korea) are usually used for temporary connections. For example, you need to directly connect the carrier and the aluminum wires protruding from the socket box.
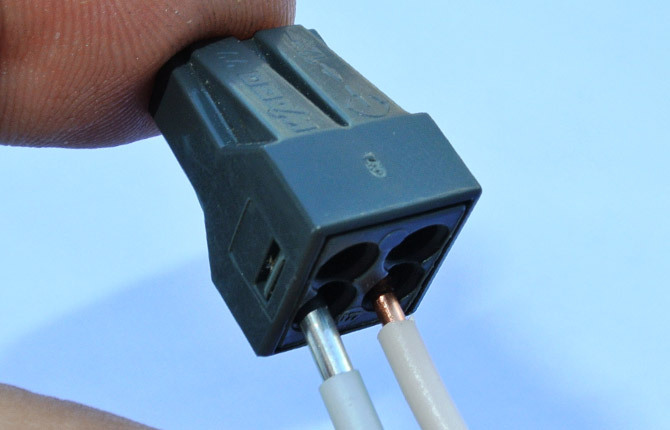
There are also disposable Vago chips; they can also connect copper and aluminum wires, but always with paste. There is no locking lever; the spring itself fixes and presses the contact point. If the load is light, the connector will last quite a long time.
Twisting followed by soldering
You can connect a copper wire to an aluminum wire directly, but only through an intermediate tinning of the contact surface of the metal. Tin is quite plastic and does not collapse even under strong bending loads. On the other hand, it is quite inert, so it does not form a stable galvanic couple with a copper or aluminum surface.
Loop-rod twist
It is well known that aluminum wires are highly brittle and brittle. It is difficult to bend them; during preparation, they do not bend the end, but simply remove the insulation at the end, 13-15 mm is enough.
Copper is very ductile, even without being annealed. Therefore, in order to connect two wires, the copper wire is first wound into a spiral onto a 150 mm nail or any round steel bar. The result is a spiral with a diameter of 5-6 mm.
To connect two contacts, you need to insert the stripped end of the aluminum wire into the copper core, treat it with flux, and then solder it with lead-tin solder.
The whole secret of soldering lies in the brand of flux. Ordinary rosin is not suitable for soldering copper and aluminum wires; you need specialized copper-containing R-64. Before connecting with solder, just drop one or two drops onto the surface of the copper wire, and then immediately tin it with a soldering iron. The result is a slight thickening, but it practically does not affect the quality of further installation of the wire.
Classic twisting and soldering option
Lead-tin solder has another interesting property. If you tin the surface of any brittle metal, such as aluminum or duralumin, this will significantly increase the resistance to destruction under cyclic load.
This means that tinned aluminum and copper wires can be connected using regular twisting. But first you need to tin the aluminum, and this is quite difficult.
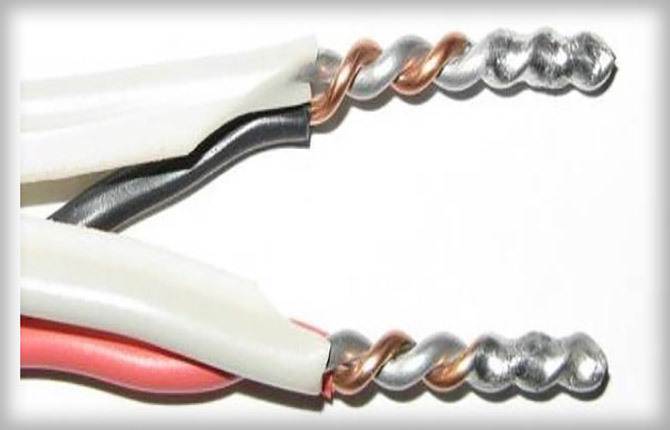
For tinning you will also need a special flux. For example, LTI-120, or you can use a material that is popularly called “dog lard”. This is a homemade, highly active flux for soldering aluminum walls of freezers.
After the aluminum and copper wires have been tinned with tin, they can be connected by twisting, but not tightly, and immediately soldered with ordinary lead-tin solder.
Nuts
This is what is often called housing quick-release connectors. This is a special type of terminal blocks, with the help of which it is convenient to connect wires of any type, including copper and aluminum.
The scheme is simple, three metal plates made of mild steel, compressed into a package, with copper and aluminum cores laid between them. It is believed that there is no direct contact, which means that the risk of burnout of the connector is minimal.
In fact, the longevity of a nut largely depends on air humidity. For heated rooms this condition is not critically important, but if you connect two cables somewhere in technological well, basement, attic, then it would be correct to additionally process the walnut body water repellent spray.
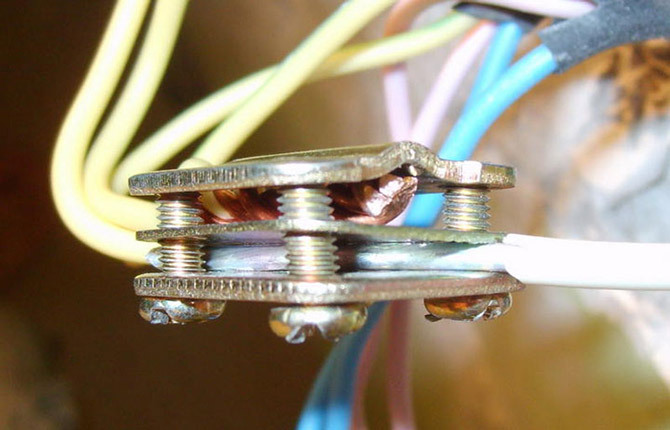
There are also models of protected nuts with sealing rubber inserts for wires. To connect the conductors, just insert the ends and tighten, you don’t even need to strip them. The plates have teeth that pierce the insulation and cut deeply into the aluminum or copper core.
Connectors for outdoor use
It is often necessary to connect an external aluminum busbar (SIP) from a pole to a copper wire at the entrance to the house. You can use protected nuts, but only on the condition that the connection is not hanging in the air under the gander, as is often the case, but is closed in a metal box on the wall. In the open air, aluminum conductors, as a rule, quickly oxidize and burn out.
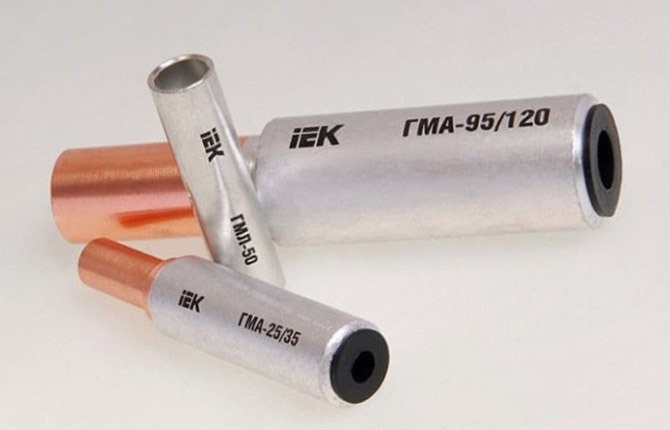
If it is not possible to do it in a protected version, then it is better to connect the wires using an aluminum-to-copper adapter. It looks like a double-sided sleeve, soldered under pressure. To splice copper and aluminum wires, you need to insert the ends inside the adapter, use paste, and then crimp them with pliers.
Bolted connection
You can connect two wires made of copper and aluminum using a regular M8 bolt with a nut, a groover (two possible) and three washers. The bolt can be taken with any thread size, the length does not really matter. Particular attention should be paid to the selection of washers; they should be twice the diameter of the bolt head.
The first thing to do is strip the insulation off the end and tin it. For an M8 bolt, you need to cut off a section of insulation on the wire at least 40 mm long.
After this, using pliers on a copper and aluminum wire, you need to bend the loop (ring). If the bolt is M8, then the inner diameter of the ring should be 8.2-8.5 mm. That is, put it on freely, but not dangle on the threaded section.
The next step will be to tin the copper end. Some electricians try to connect without tinning, but this is wrong. In this case, a small amount of moisture that gets on the bolt will instantly lead to the appearance of electrochemical corrosion of aluminum, partially on the surface of the bolt.
Now you need to connect all the parts into one unit. First, put a washer on the bolt, then an aluminum loop. Then another washer and a copper loop. All that remains is to place the last, third washer, then the bushing and tighten the nut firmly.
If the connection will be walled into the wall, then it is advisable to tin the aluminum loop as well. When using tin, the direction of laying the loops on the bolt may not be observed. If you connect pure metals without tinning, you will need to check the position of both loops. The twist of both must coincide with the direction of rotation of the nut, otherwise when tightening the wire will squeeze out from under the washers.
The washer-grower must be used without fail, otherwise the entire connection will weaken over time and the contact will disappear. After assembly, the bolt must be wrapped with electrical tape or sealed with sealant, depending on whether the joint will be used indoors or outdoors.
Results
Connecting a copper and aluminum conductor is not a particular problem. You can use soldering or a ready-made device. The quality of the joint directly depends on moisture, therefore, in addition to the strength of fixation of both conductors, you need to pay attention to protection from moisture, it is the enemy of any contact.
Tell us about your experience splicing copper and aluminum. What do you think is the easiest and most reliable way to connect cores of dissimilar metals? Also share the article on your social networks and save it to bookmarks.


