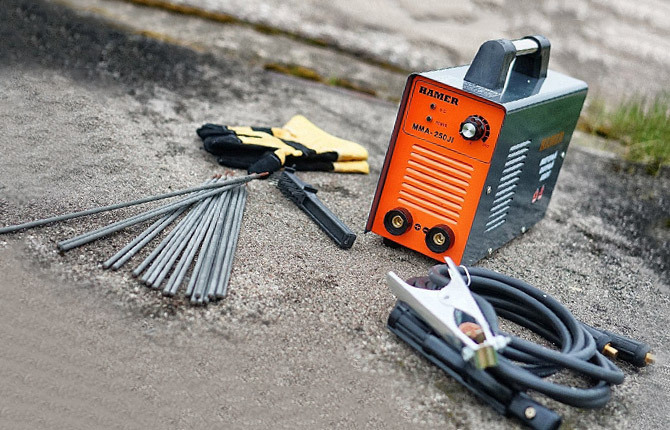
It is impossible to buy a welding machine and use it every day without additional settings. This device requires a list of preparatory work before use. Otherwise it will not work normally. How to properly set up a welding machine and what nuances should be taken into account when working with it - you need to learn about all this in advance.
The content of the article:
-
Setup recommendations
- Selection of gas mixture
- Voltage setting
- Setting the wire feed speed
- Setting the correct polarity
- Setting the wire extension
- The most common failures and their symptoms
Setup recommendations
There are several operating characteristics of the installation. Each of them affects the correct functioning of it. You need to select the gas mixture, adjust the voltage and speed at which the wire is fed. Perform polarity adjustment and wire extension adjustment.
It is reasonable to consider each stage of setting up the unit in more detail separately.
Selection of gas mixture
Consideration of the question of how to properly set up a welding machine should begin with studying the basic rules that should be followed when selecting a gas mixture.
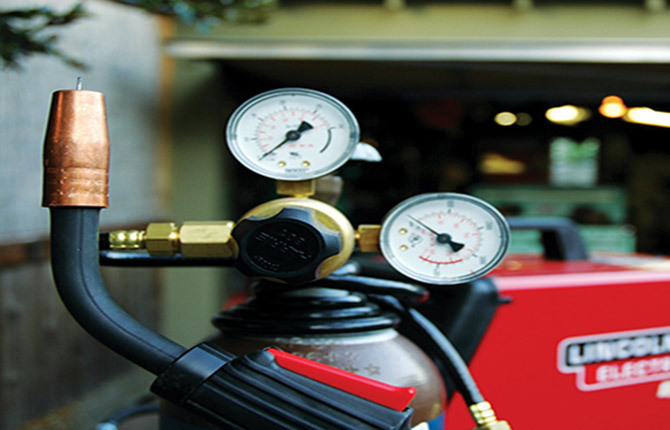
In order not to compromise the integrity of the parts being welded and the welding machine itself, they must be protected. For this, pure gas or a mixture consisting of several gases in different proportions is used - they are pumped into the welding zone only during work.
In the case of using semi-automatic welding machines, 2 gases are used:
- carbonic;
- argon.
Gases can be used both in pure form and with the addition of various combinations. To work with different alloys and the resulting seam is of good quality, you need to choose the right proportions:
- Pure carbon dioxide (carbon dioxide).They are used for connecting thick sheets and individual components of one-piece installations of different directions. The materials with which the work is performed are made on the basis of iron - cast iron and steel. In this case, with the help of this gas, the welding machine will be able to correctly form a deep penetration. The negative side of the process is the formation of many sparks. The resulting seam is uneven and aesthetically unpleasant.
- Gas mixture number 1. The working mixture contains 25% carbon dioxide and 75% argon. It should be used correctly in cases where there is a need to interact with thin metal sheets. Adjusting the mixture in these proportions allows you to achieve an even seam.
- Gas mixture number 2. Contains 98% argon and only 2% carbon dioxide. This adjustment of the gas mixture is correct when connecting sheets of metal made of stainless steel or galvanized steel. The setting is also suitable for working with copper-based alloys. The output connection result is of high quality.
If you choose the right working mixture, the parts will be connected reliably and will not open even under increased loads due to their intensive use.
Voltage setting
A different depth of penetration is always required. The thickness of the sheets and the size of the parts to be joined also differ. Therefore, you need to correctly adjust the voltage on the welding machine.
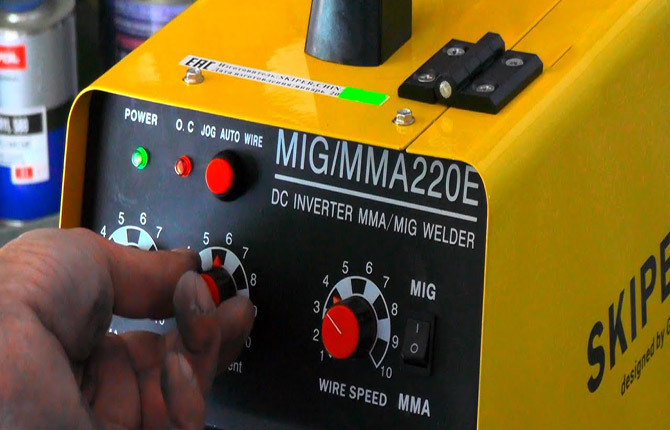
There is only one rule - as the amount of energy spent on melting the solder and alloy, as well as burning the arc, increases, the need for more voltage also increases. After all, it is voltage that is responsible for converting electric current into thermal energy.
The voltage is adjusted in steps. On modern welding machines, it is correct to adjust this parameter in 2 stages:
- First stage of setup – on the back side of the semi-automatic device, one of the installation operating modes (1st or 2nd) is started.
- Second stage of setup – selection of voltage level for a specific operating mode. Each semi-automatic welding machine always has a separate switch for working with this parameter.
The voltage on the welding machine is always selected between two modes - minimum and maximum. To make it easier to correctly adjust the voltage supply, manufacturers place a reminder on the units that allows you to adjust this parameter to the wire feed speed. Each welding machine has its own table of operating modes.
The supply voltage must be set correctly. The bottom line is that if you set it too weak, the penetration depth will not be sufficient. The formed seam will be excessively fragile. On the contrary, if you set up an installation with an excessive voltage, then the working material can be burned and it will become unsuitable for use.
Setting the wire feed speed
The speed at which the wire will be fed on the welding machine should be adjusted only after the voltage has been correctly set. The feed rate determines how quickly the material will melt. At the same time, the operation is also affected by the voltage supplied by the welding machine.
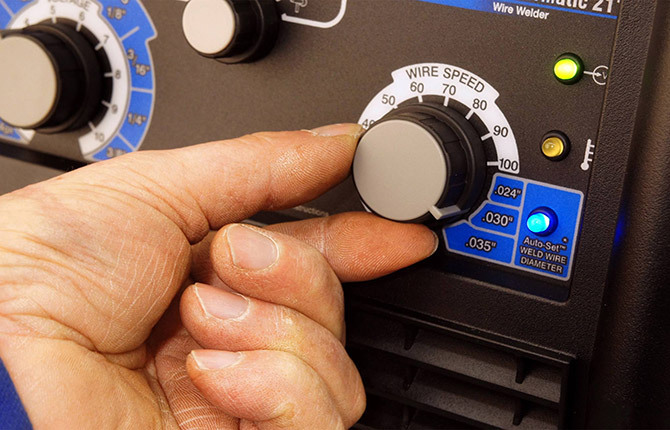
When the melting process of the welding thread starts, the speed at which it begins to move gradually decreases. It is important to configure correctly because:
- If the electrode supply setting was not performed correctly, then when it comes into contact with metal structures, its shape will begin to change before the melting process begins. The electrode of the welding machine will begin to stick to the working surface, which will provoke the formation of unnecessary sagging. The seam will be intermittent and sloppy.
- If the filament feed is adjusted so that it feeds too slowly, the electrode risks burning out before it has time to melt. At the same time, the torch tip of the welding machine becomes clogged. The resulting seam will be wavy.
On a welding machine, you have to adjust the wire feed most often, because after each change of voltage or use of other filler threads, the wire feed setting gets lost. Many models of units allow you to correctly select the electrode supply setting in automatic mode (all actions are performed electronically).
Experienced welders prefer to use the following brands of welding machines: inverter welding Resanta device (models 190, 200), Awelco (f5 - also with inverter), Vniissok (Mig-180), Fubag, Svarog, Kedr, Aurora.
There are a lot of videos on the Internet that explain models of welding machines. Therefore, if you want the unit to be equipped with automatic adjustments of various operating parameters and to function correctly, it is recommended that you familiarize yourself with them.
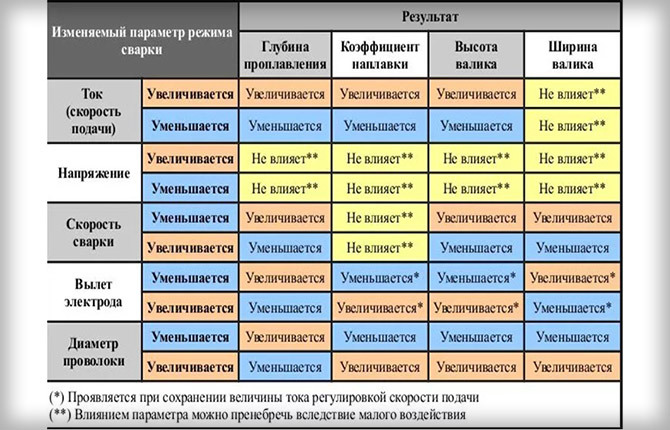
All settings are interconnected. In order to correctly understand the features of the relationships, it is wise to study the table.
Setting the correct polarity
Correctly setting the polarity on a welding machine is the easiest. Manufacturers always place signs on the housings of units that make it easy to understand which polarity (direct or reverse) is best to choose in a particular situation. It all depends on the metals and alloys with which you will interact.
To set direct polarity, correctly connect the gas burner to the terminal with the “–” sign. To set up the welding machine in reverse polarity mode, the gas torch is connected to the terminal with the “+” sign. For simplicity, these terminals are called “positive” and “negative”.
The polarity is adjusted depending on what type of thread is used on the installation at a particular time. There are 2 options:
- The wire is simple. In this case, it is solid. To use it for interaction with different metals, it is necessary to use a shielding gas. The thread does not have any additives. The working surface must be absolutely clean. It is permissible to use simple wire only indoors. Using it, you can count on the formation of an even, thin seam.
- The wire has flux. The central part of the thread has a special additive. It is designed to form a gas that performs a protective function. Therefore, there is no need to additionally use other protective gases. It is also not at all necessary to thoroughly clean the work surface. You can interact with such solder outdoors - a strong wind will not prevent you from achieving an even seam. True, as a result, a large amount of slag is formed, which will need to be disposed of.
If you use a regular thread made of copper, it is correct to always observe reverse polarity, and also connect to the positive terminal. But in this case, a negative charge should be applied to the metal that needs to be welded. If the wire is equipped with flux, it must have straight polarity. The connection is made through the negative terminal. A terminal with a positive charge is placed on the part to be welded.
Setting the wire extension
To properly set up the welding machine, you should also take care of adjusting the wire extension. Reach refers to the distance between the ends of the tip and the wire. For simplicity, you should only consider the length that the thread extends from the tip.

If you manage to configure this system parameter correctly, during operation you will be able to eliminate a large amount of splashes that make the final seam uneven and aesthetically unattractive. The welding machine itself will also exhibit less vibration. The welding of metal structures will be carried out correctly - it will be possible to avoid burning and insufficient strength of the connection of the sheets to each other.
In the case of using small diameters, the overhang and outlet parameters are equal to each other. If the thickness of the thread increases, then the release parameter should be reduced by 1-10 millimeters (depending on the situation).
There are many departure sizes. But mainly only 3 options are used. Each of them is directly dependent on what design a particular gas nozzle has and what protective environment is used in the current welding machine.
Only taking into account these process characteristics can you correctly configure the welding machine and set the required wire extension length. Now straight to the options:
- In most situations, the release should be configured as little as possible. Average values are from 6 to 10 mm. The value is suitable in a situation where carbon dioxide (argon mixture) is used as a protective medium during steel cooking. As the amount of argon used increases, the length of the outlet also increases.
- If a decision is made to use pure argon for protective purposes, the welding machine thread overhang should be correctly adjusted so that it is more than 10 mm. In some models, the release is adjusted automatically to obtain the greatest efficiency in welding materials.
- If the nozzle tip is located directly in the body of the welding machine (recessed into it), then if you set the overhang to be too short, the required level of melting will not be achieved. This is why it is so important to configure this element correctly.
To better understand how to properly set up a welding machine, it is best to always keep this table at hand.
The most common failures and their symptoms
It is important to set up the welding machine correctly. Otherwise, the quality of the seam will suffer greatly. Or, even worse, the welding machine itself will fail. Below are some recommendations from experienced locksmiths. Before you set up the welding machine yourself, it’s worth studying them.
- If the supplied voltage is insufficient, the weld will not penetrate deep enough.
- If the material is not cleaned well enough before welding, the seam will form jerkily.
- Don't move the burner too far away. If during welding it is located at a distance of more than 12 mm from the material, then the seam will form intermittently.
- If a high voltage is applied, but the materials being joined are not thick enough, there is a high probability of them being burned through. All this will lead to additional time and resource costs aimed at eliminating the problem.
- If there is no shielding gas in the welding zone, the seam becomes porous, acquiring a greenish tint. Porosity is known to negatively affect the overall strength of a structure. That is why its education should not be allowed.
- You should work with the welding machine only after diagnosing its condition. A visual inspection should always be carried out. Check whether there is any violation of the integrity of live parts.
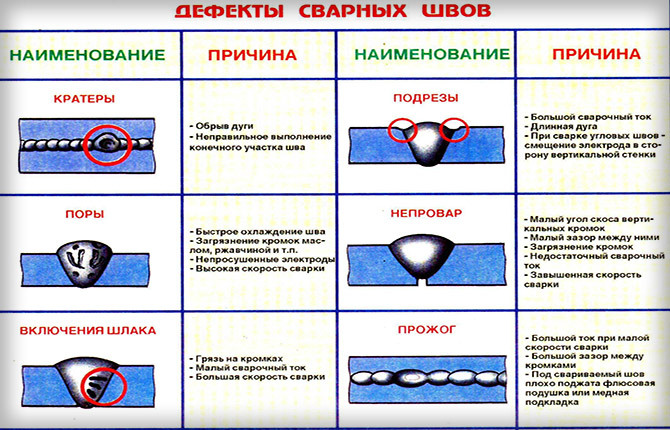
It is impossible to work without special protective welding masks that darken the flashes. Chameleon masks act as a light filter to protect against high-brightness flashes. You cannot work without them - you can seriously damage your eyes.
Now questions about how to properly set up the welding machine should not arise. You must strictly follow the instructions and recommendations presented in the article. Only in this case will the unit function correctly.
How much attention do you pay to setting up the installation before work? Be sure to share your opinion in the comments. Save the article to your bookmarks. Perhaps it will help you set up your device too.


