Sanding a log house with your own hands is a procedure that allows you not only to preserve the attractive appearance of the building, but also to extend its service life. There is an opinion that not all types of logs need such treatment. For example, chopped logs or rounded ones. Yes, they already look attractive, but sanding the frame will further protect the wood.
The process of sanding logs requires preparation, selection of tools, consumables and personal protective equipment. Technology is also important. It is possible to do everything yourself, although it is difficult if you are new to this matter. Step-by-step instructions will help you cope.
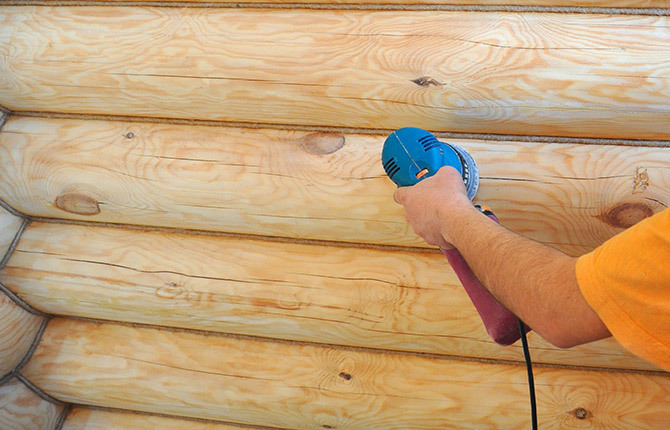
The content of the article:
- Why sand the frame?
- When to polish a log frame
-
How log houses are polished
- How to choose a good tool
- Log grinding technology
Why sand the frame?
Once upon a time, people built their houses and other buildings from wood. Gradually, this natural material was replaced by others - brick, stone, concrete and others. But still, today people build their houses (especially country houses, dachas) from timber. This is because this material has several advantages:
- appearance;
- environmental friendliness;
- high wear-resistant qualities;
- Wooden walls are easy to care for;
- wood is resistant to deformation;
- the degree of thermal conductivity is low;
- good sound insulation properties;
- the tree has a pleasant aroma that lasts for a very long time;
- resistance to low temperatures;
- natural ventilation.
Log houses also have disadvantages:
- low level of fire safety - wood ignites quickly and burns well;
- the natural shade is lost over time;
- Microorganisms, fungi, beetles, rodents and others can live and multiply in a tree.
But all these disadvantages can be leveled out if the raw materials that will be used to build the house are properly processed.
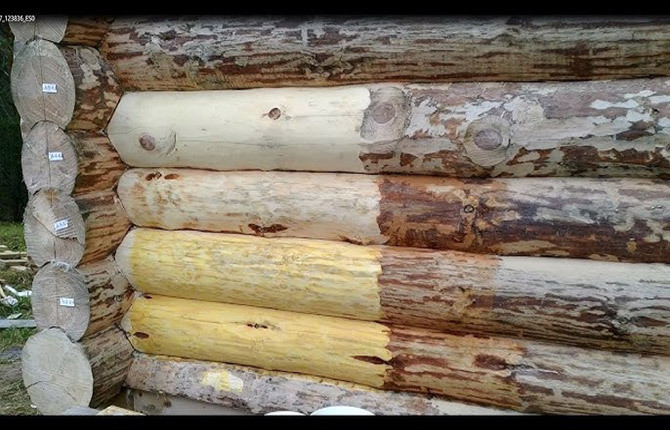
The frame needs sanding. This treatment increases the wood's resistance to moisture, insect activity, and also protects it from rotting. During grinding, all defects are removed from the surface of the walls outside and inside the house, and unevenness is smoothed out. Another treatment will protect the log house from mold.
The surface of an unpolished log, even after treatment with paint, varnish, antiseptics and impregnations, will still darken over time and lose its attractiveness. Sanding will avoid this.
Advantages of log grinding:
- Increases the resistance of raw materials to insect activity and moisture.
- Allows you to preserve the natural color of the logs. If the walls are not sanded, they will soon begin to darken under the influence of sunlight and moisture.
- During the treatment, the top layer of the log house, in which fungus or mold could grow, is cleaned off.
- After grinding, the frame becomes even and smooth, no defects are visible on it.
- Cleaning from dirt that may have accumulated on the material during its transportation to the installation site.
- Grinding improves the penetration of antiseptics, fire retardants and other compounds into the log house, which makes it possible to reduce their volume.
- The paint and varnish materials lie smoothly on the treated surface and do not form waves, spots, or streaks.
It is possible to do the grinding yourself. But the process is too labor-intensive and requires knowledge of technology and proper preparation and selection of tools. It is important to strictly follow the stages and sequence. We must not forget about our protection. During operation, a lot of dust is generated. Eyes and respiratory tract must be protected.
It is because of all these nuances that many people who have built or are building log houses prefer to use the services of professionals. But if you study the technology and prepare properly, you can handle it yourself.

When to polish a log frame
Usually, sanding of a log house is done after the built house has settled and the wood has completely dried. This process is not fast. Most often he studies for more than a year. The term is influenced by many factors - the quality of the raw materials, its humidity, as well as the climatic conditions in the area where the building is erected.
Profiled timber, as a rule, is made from freshly sawn timber, so it takes up to 12 months for buildings made from it to shrink. Glued wood has a much lower moisture level, so it can be sanded immediately after construction.
Adviсe:
- During the cold season, external sanding of log walls is not carried out. The reason is that after this procedure the tree needs to be treated with antiseptic agents. This is necessary to protect it from the negative effects of moisture and ultraviolet radiation. Application of such products is permissible only in warm weather.
- Sanding of log walls inside a house can be carried out at any time of the year, but the condition must be observed - the rooms must be warm (plus temperature).
- A damp log house is not sanded. If you try to do this, the surface will become scratched or even damaged beyond repair.
You need to plan the sanding of a log house based on these tips and recommendations. Otherwise, you can simply damage the walls and shorten their service life.
How log houses are polished
Before grinding a log house, you need to prepare tools and protective equipment for yourself. This is a necessary stage, without which further work makes no sense.
What tools can be used to polish a log frame:
- Belt sander. Suitable for grinding rough surfaces. In such a machine, a special abrasive belt is attached to 2 rotating rollers. Its grain size can be different, which is important during the grinding process.

- Brush sander. It is classified as a type of tape. Its attachment is a special brush. It is used for rough processing of timber or for cleaning it from old coating (for example, paint).

- Vibratory sander. This is an instrument that has a flat base (sole). The abrasive is attached to it. The shape of the sole can be either round or triangular. The latter is convenient for grinding the frame in the corners, at joints, etc.

- Grinder or angle grinder. This is the most commonly used tool for sanding logs. They go over the surface of the wood with special sanding discs with sandpaper. Its grain size may vary. The type of abrasive is selected depending on the stage of work.
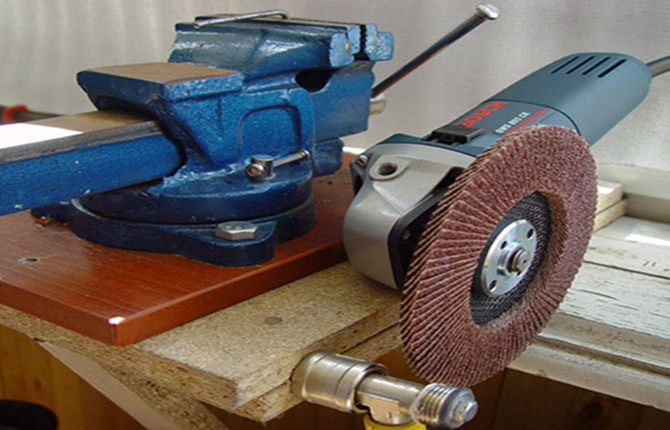
- Eccentric sander. It has a round base (sole). An abrasive is attached to it. Suitable for delicate polishing. It also works well on curved surfaces.

- Drill. This is a universal basic tool. In order to grind a log frame, you need to use two attachments. The first is circles covered with sanding paper. The second is in the form of abrasive petals.
You will also need:
- chisel (use it to go through hard-to-reach places);
- flame retardants, acrylates, antiseptics and other agents;
- brushes for applying wood treatment products;
- if necessary - oil impregnations, paint.
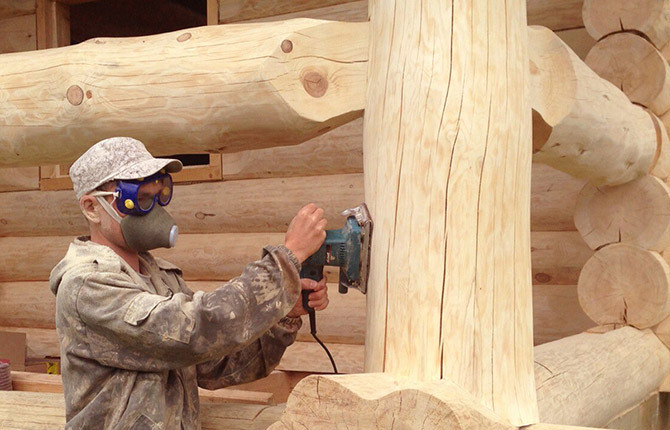
Since during the process of polishing a log house there will be a lot of dust and shavings, the organs of vision and breathing must be protected from all this. Therefore, you need to prepare protective equipment:
- protective glasses;
- respirator;
- gloves;
- vacuum cleaner for collecting dust.
After preparation, you can proceed directly to processing.
How to choose a good tool
There are many tools for grinding, so it’s difficult to immediately decide which one to buy. Masters advise relying on the type of material from which the building is constructed. But you also need to take into account your skills in working with the device.
If the house was built from hand-cut logs, then it is better to buy or borrow an angle grinder. You can use a drill with attachments.
Features:
- Grinding wheels No. 30-60 (coarse-grained) - option for rough processing.
- Nozzles No. 80-120 (fine-grained). It is a suitable tool for basic and final sanding.
- Cup brush (coarse abrasive). The tool is suitable for cleaning old coatings, blue spots on the surface or dark spots.
- Nylon brush. Tool for basic grinding of a log house. The advantage of using it is the ability to get a brushing effect.
Tools for processing material with a smooth surface:
- Eccentric sander. Suitable for those who are doing grinding for the first time, as it has a special block that is triggered if a person applies excessive force and puts pressure on the device.
- Angle grinder. Using this tool requires skill. If you press too hard on it during work, a depression will form in the surface of the log house.
During operation, you will have to change the nozzles. Abrasive is not a permanent coating. It is erased. It can also become clogged with dust and tree resin.
After assembling the tools, you can move on to studying the stages and processing technology.
Log grinding technology
Grinding of the log house is carried out before the main finishing of the building, installation of ceilings, doors, windows. Before you begin, you need to protect your hands, eyes and respiratory tract by wearing a respirator, gloves and safety glasses.
Inspect the log walls carefully. Remove the peeling material, and then treat such areas with an adhesive composition. Give it time to dry. This will take about a day.
The next step is to check the caulk. If cracks have already formed, caulk them again. Resin is removed from coniferous logs, as it can clog the abrasive. Then you can move on to the main part of the procedure. The work is done from top to bottom.
Stages:
- Rough processing. You need a tool with coarse-grain abrasives. With its help, remnants of bark, knots, bulges, and other defects are removed from the surface of logs. If the walls are not only erected, but darkened, then you first need to remove the old coating (for example, paint) and start sanding. First, the main surface of the logs is treated, and only then hard-to-reach areas.
- Basic sanding. Sandpaper with medium-grain abrasive is put on the tool. After the first stage of processing, the surface of the logs is rough and linty. All this is removed, leveling the frame.
- Final sanding. You need a tool with a fine abrasive, but you can grind it manually (with fine sandpaper). Polish until the surface of the frame becomes completely smooth.
- Hard-to-reach areas are processed using a chisel (the cutting element should be about 2 cm) or sanding paper.
- After work, remove dust and shavings from inside the building.
- The last work is coating the surface of the logs with protective compounds. Special treatments are required for the ends, since these places are most susceptible to moisture. After the antiseptic or fire retardant has dried, you can proceed to coating with paints and varnishes.
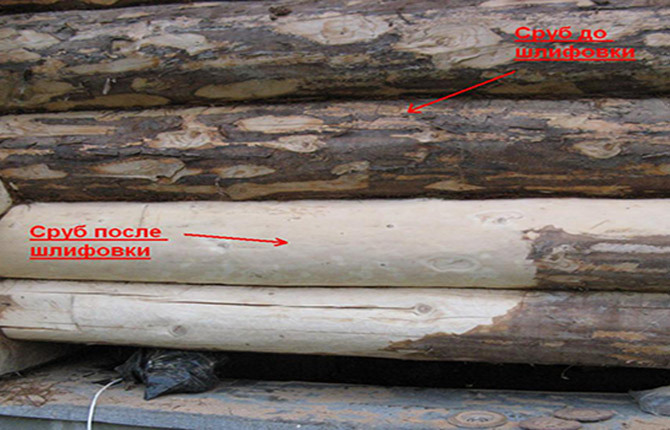
If a person is polishing a log house for the first time, some advice from professionals will help him:
- At the stage of removing the bast layer, there is no need to increase the rotation speed of the sanding disc. This can cause deep grooves and gouges in the tree.
- You need to sand to a smooth surface. If, after the paint and varnish coating is applied to the logs, the pile rises, everything will have to be redone.
- Resin from coniferous trees must be removed. If this is not done, grinding will be impossible. The resin will simply spread across the surface of the log.
- Installation of doors and windows should only be carried out after sanding.
- Processing is carried out in one direction - along the wood fibers.
Sanding a log frame is a labor-intensive process that is difficult to do with your own hands if you do not have experience or the necessary tools. That’s why many people turn to specialists for help. But still, if you choose the right tools and study the technology, everything will work out. It may take you longer than the masters, but the job will be done.
Have you ever sanded a log frame before? What tools did you use for this? How long did it take? Share your experience in the comments. Perhaps he will help others cope with this work. Save the article in your bookmarks to have access to useful information at any time, and also repost it on social networks and instant messengers.


