For heating of temporary constructions, garages, greenhouses, back room the potbelly stove is often used. But it also emits combustion products, a lot of smoke from burnt wood or other fuels.
Therefore, you need to decide how to make a chimney for the stove and where it is better to install it so that it is inexpensive and efficient. Moreover, it can be done by hand. Moreover, everything is not as difficult as it may seem at first glance.
To make it easier for you to deal with the assembly and installation of the chimney, in this article we covered the step by step the process, starting with the choice of material and assembly, and completing the performance test of an already mounted system.
The content of the article:
-
What can make a chimney?
- Types of chimney pipes
- Recommendations for choosing a pipe for stoves
-
Instructions for the construction of the chimney
- Stage # 1 - Chimney Assembly
- Stage # 2 - Measurement
- Stage # 3 - installation of all components of the structure
- Stage # 4 - System Check
- Features of chimney maintenance
- Conclusions and useful video on the topic
What can make a chimney?
To use the stove, will need to take care of the abstraction of smoke. To do this, have to build a chimney, choosing the best material.
For work, you can invite experts, and you can do everything on your own - especially since the amount of work is small.
Types of chimney pipes
For the manufacture of the pipeline for the discharge of smoke using a variety of materials.
Initially, depending on the material of manufacture, there are 2 options:
- Take ready-made pipes manufactured at the factory;
- To make pipes from sheets of stainless steel or other sheet metal.
The cheapest way is to make pipes yourself. Here, the undoubted advantage is that the pipe will be the right diameter, which is especially important for homemade burgers.

For the chimney stove you can make not only ordinary pipes, but also double pipes - sandwich pipes. To do this, you need 2 pipes of different diameters and heat resistant insulation
The second advantage of homemade pipes - the cost. For their manufacture, you can use the improvised material, or purchase metal sheets with a thickness of 0.6 mm. And better in 1 mm.
Moreover, you can make and insulated pipe for the chimney, making for this of the sheets 2 pipes of different diameters. Or take the finished metal of different diameters.
In addition to self-manufacturing of pipes for the chimney, you can stay at a simpler and faster option - buy ready-made pipes from the desired material.
Among the materials most common are:
- Brick. This is the cheapest material. From it lay out the chimney on the spot, but it will require skill;
- Steel. Stainless, galvanized, alloyed (carbon) pipe can be used as a chimney;
- Ceramics. Ceramic products are high cost, which eliminates installation ceramic chimney in the garage or utility room;
- Asbestos cement. Asbestos-cement products are affordable, but not suitable as material for the construction of the chimney. Although often they can be seen in this role;
- Vermiculite These pipes are made of stainless steel with a 5 cm layer of vermiculite deposited on the inner surface of the pipe.
In addition to these options, the market offers many other products. So, it is possible to meet pipes from heat resisting glass from which it is quite possible to build an exotic chimney. But this is done very rarely - you need skill to install and connect the individual elements of the structure to each other.

For potbelly stove inappropriate to buy expensive pipes. To make a chimney it is enough to buy metal heat-resistant pipes and adapters for mounting the whole structure.
Recommendations for choosing a pipe for stoves
To make a stovepipe for the stove, it is not necessary to construct pipes from metal sheets with your own hands. To do this, you need a certain skill and time.
After all, the sheets will first need to be rolled into the tube of the desired diameter, and then tightly secure the seam using rivets and heat-resistant sealant. It is much easier and faster to buy the right products made at the factory.

To assemble the entire structure of the chimney and tightly fasten its individual components, you need to use heat-resistant sealant that can withstand temperatures from 1000 degrees Celsius.
As for the material, you should not take cheap asbestos-cement pipes for these purposes - this material will not stand if the temperature in the process of heating rises above 300 degrees Celsius. And the pipe itself is quite heavy.
It will also absorb condensate. And to make a hole to clean soot or remove condensate will be problematic.
Making a chimney for a stove from a brick is an unreasonably high cost. First, rarely one of the home craftsmen knows how to make the correct laying. And secondly, it is a cumbersome design, requiring additional strengthening of the foundation. The potbelly stove is a temporary heating equipment.
It is optimal to take metal pipes made of stainless steel, and better, from alloy steel. The construction of this material can serve as a chimney for 7-10 years. This is provided that the pipes of sufficient thickness - 6-10 mm or more. And the build quality of all elements of the system that displays smoke plays an important role.
Another undoubted advantage of metal pipes is their lightness. Low weight allows you alone to perform all the work on the construction of the chimney for the stove.
Image Gallery
A photo of

Brick - a good material for the chimney, but not for the stove. This stove requires a simpler and easier construction to remove smoke.

When choosing between asbestos-cement and metal pipe, the latter should be preferred - the alloyed metal can last for about 10 years.

The length of the chimney and the pipe material will depend on the type of fuel that is supposed to be burned in the furnace. If it is waste oil, but forget about asbestos pipes.

For the stove installed in a residential area, should be especially carefully constructed chimney, following all safety rules

Brick for chimney

Metal pipe

Potbelly stoves on the fulfilled oil

Indoor pot stove
We also recommend that you familiarize yourself with more complete information on Choosing a chimney pipe.
Having decided on the material of the future chimney, you can proceed to the purchase of all components and the construction of a proper and workable design.
Instructions for the construction of the chimney
The complexity of the construction of the chimney for the stove depends on where the stove is installed. After all, cutting a hole in the roof is more difficult than passing a pipe through a window.
Therefore, the complexity and time of making the correct chimney for the stove completely depends on the individual characteristics of a particular household.
Stage # 1 - Chimney Assembly
The simplest version of the construction of the chimney - if the stove to be used on the street. Here it is important to choose the optimal place for the installation of the stove, so that no flammable objects come into contact with it. Yes, and the pipes themselves must be heat resistant.

For the stove on the street, it is enough to attach a pipe of the required diameter, through which smoke will escape. This will increase traction and protect the user from exposure to smoke.
If the pipeline for the removal of smoke will be constructed indoors, then you need to follow a number of safety rules that will help protect themselves and their loved ones from fire.
First, the pipes must withstand high temperatures — preferably 1000 degrees Celsius and above. After all, the smoke released in the process of combustion of fuel in the stove can have a rather high temperature.
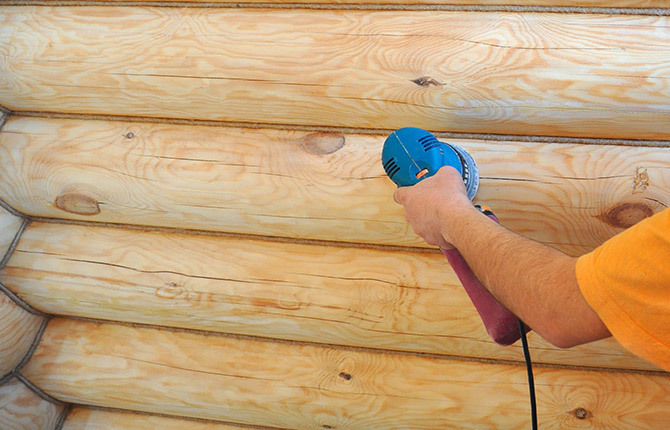
Secondly, it is important to position the stove itself so that it does not come into contact with surfaces that can catch fire. If the walls are finished with clapboard or plastic, then additional work remains to be done to protect yourself from a fire-hazardous situation.

The floor under the stove must be of a material that cannot ignite. If a burning log accidentally falls out of the firebox, it will protect the room from fire.
Thirdly, the place of entry of the pipe into the ceiling or wall must be properly decorated.
To do this, it is important to maintain the distance to nearby objects and walls - during the operation of the stove, the temperature of the pipe will increase and objects that are nearby may flare.

It is important to carefully isolate all places of contact between a chimney pipe and a tree, insulation or other combustible materials. Otherwise, fire can not be avoided.
Fourthly, only one stove can be connected to one chimney. For the second stove in the next room, it is better to lay a separate pipeline to remove smoke.
Stage # 2 - Measurement
At the preparatory stage to determine the desired diameter of the pipes and their overall length. At first it is necessary to calculate the diameter of the pipe. Correctly, if it is 2.7 times larger than the volume of the combustion chamber.
So, if the stove is 50 liters, then the diameter of the chimney should be: 50 * 2.7 = 135 mm.
So, if you take a pipe with a diameter of 100 mm, it will not cope with the emitted smoke. As a result, weak traction and effective work from such a stove will be useless.

Also calculate the required number of fittings - knees, tees and other components
In addition, it is necessary to measure the length of the future pipeline to remove smoke. For this it is important to choose a permanent location of the stove in the room.
Then determine where the pipe will go out. An important point - in the process of smoke in the chimney passing on the street, condensate will accumulate. Its removal should be taken care of.

To remove condensate, you should install a tee that will help to cope with this problem.
Now we have to measure the distance of the pipeline in the street and do not forget that the chimney will rise, on average, by 1.5 meters above the ridge of the roof.
It should also be foreseen that during the installation process you will need knees, tees, a cup glass, butt elbows, heat-resistant sealant, asbestos cord, pipes of the desired diameter, pipe clamps or welding to connect all components into a single chimney design.
All this must be purchased on time, when all measurements will be taken. The presence of the necessary materials will allow you to proceed to the installation of the chimney for the stove.

The hole under the glass is also made in advance. It is important to carefully remove all materials that can catch fire.
It is still necessary to decide in advance exactly where the pipe will go out:
- through the window;
- through the wall;
- through the ceiling.
From this will depend on where to open the hole. Most often, the pipe is allowed through the wall or ceiling. To ensure safety in this place, a special pass node is to be bought - a glass. It is made and heat-resistant material that will save from fire.

Passing glass is installed first. And only then to be assembled chimney design
Stage # 3 - installation of all components of the structure
When it comes to the stove, which works on the street, it is important to take a pipe of the desired diameter, corresponding to the pipe coming from the stove.
The chimney needs to be put on the nozzle. This is important, because if it is inserted into the pipe, the smoke can leak out at the junction. Nothing more will not have to be mounted - the stove can be used to prepare or heat food.
If we are talking about the arrangement of the chimney in the back room, in the garage or greenhouse, then the order of work will be more difficult. First you need to take a piece of pipe and carefully fix it on the chimney hole / nozzle of the stove. It is important to put a pipe on this pipe.
Then you have to lengthen the pipeline using the knee. The goal is to reach the wall / ceiling. There is already waiting for the passing glass through which the chimney will pass.

Insulation and other materials that may catch fire must be removed around the glass.
Next, the pipeline goes into the roof space and on the roof or through the wall to the street. It is important that the street pipe be insulated. Also, when the pipe goes outside, it is necessary to provide for the removal of condensate. To do this, put a tee and make a revision window to simplify the cleaning of the chimney.
It is important to fix all connections firmly, to maintain the distance to the walls and other objects that can easily catch fire.
Image Gallery
A photo of

The stove and the chimney must be located remotely from the wall so that the walls will not be damaged when the stove is working

Asbestos cord can be used for insulation, which has sufficient heat resistance to withstand high temperatures.

Welding can be used to connect all the structural elements of the chimney together. The main thing is not to burn holes in the pipes

For insulation on the roof, you can buy a finished product - flash unit. This is a convenient waterproofing that will protect not only from the ingress of water, but also has a high level of heat resistance

The stove and chimney stand remotely from the wall

Asbestos cord for insulation

Weld for joining chimney elements

Flash flush for isolation
Stage # 4 - System Check
When all the components of the chimney are assembled and firmly interconnected, you can proceed to the final stage - the installation of the hood and testing the performance of the structure.
So, sparks can fly out of the stove during the process of burning fuel.

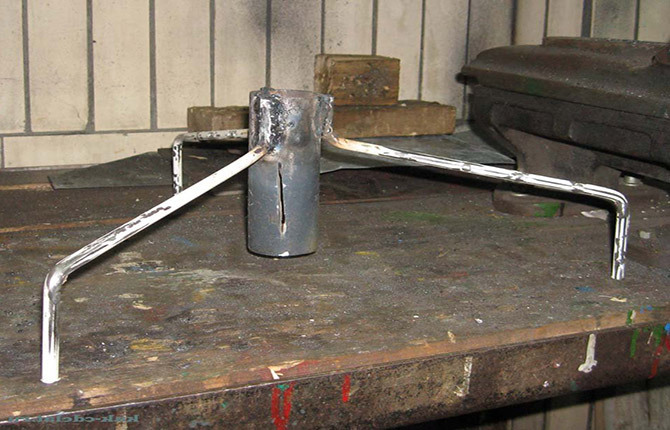
Often you can see the sparks emitted from the chimney in the process of furnace - from them will protect the spark arrester. It can be made with your own hands, having built a skirt on a usual cap
As spark arrestor You can use a grid with small cells, the size of which is up to 5 mm. This is especially true if the roof or nearby structures are made of flammable materials.
If there is no danger of a fire, you can do with a simple cap, which is put on the end of the chimney and fixed there with a hose clamp or carefully fastened with rivets.
To increase traction, you can use the deflector, choosing one of the options on the market, or collecting their own hands. We suggest to get acquainted with the detailed instruction for independent production. chimney vent.

The cap for the chimney stove can be made independently using the available materials. To do this, fit a dense sheet of steel with a thickness of 5 mm.
When the cap is installed, you can begin to test the performance of the entire chimney structure. To do this, load the fuel, set it on fire and see how it will burn and how smoke will go.
If it starts to leak through any connection, it means there is not tight. This problem is to be corrected using heat-resistant sealant or welding.

If the work was carried out qualitatively and all the joints are tight, then the chimney will perfectly remove the smoke. And the smell of smoke will not appear in the room
Features of chimney maintenance
The stove chimney needs maintenance - inspecting the external state of the structure and cleaning the interior of the pipe. The frequency of service depends entirely on the material.
If this is an asbestos cement chimney, then it will have to be cleaned more often. All because of the rough inner surface of the pipe, where soot accumulates with double force.
Also, asbestos chimney, if it is installed to remove smoke from the stove, may soon become stained or completely burst during operation. This will lead to additional costs - will require replacement of the chimney pipe.

Spots appearing on the asbestos pipe, not only create an unpleasant impression of their appearance, but also are harbingers of unpleasant odors
For a metal chimney, the frequency of cleaning the pipe is on average 1 time per year. It is also important to inspect the external state of the material - it is possible that some areas may be burned out.
To remove soot from a metal pipe, you can:
- burn aspen wood;
- process the burned logs with a special chemical composition that is easy to buy;
- make a hook for the delicate removal of soot.
Compositions for getting rid of soot are easy to use. They do not require special skills - it is enough to process the wood using a sachet and ignite the stove, as usual. Combustion products will not contain harmful impurities. This is a safe way to clean a metal pipe.

Consumption means and the method of its application to the logs is specified in the manufacturer's instructions. It is important to read the recommendations carefully and follow them clearly.
In a metal pipe that removes smoke, soot often accumulates in a section that runs horizontally.
Experienced users of such chimneys found a convenient solution - to drill a small hole and build a hook construction to remove soot. Such an adaptation of the pipe wall can not be damaged, and clean the accumulated fumes will work.

The hook design is simple to manufacture, and it is quite convenient to use it. Most often it is a section of the pipeline located on the street.
A thorough examination of the external condition of the chimney will allow time to diagnose the need for the replacement of a particular area. Do not neglect this measure - after all, through the holes in the chimney the smoke will go into the room, and the further operation of the heater will be impossible.
Regular cleaning of the internal walls of soot will help extend the life of the pipeline that removes smoke. Yes, and the traction will always be at the right level, which positively affects the efficiency of the stove.
On our site there are also other articles containing detailed information about the best methods of chimney cleaning and recommendations on the choice of cleaning products. We invite you to familiarize yourself with them:
- How to clean the chimney soot: how to properly clean the smoke channel
- Chimney cleaners: the best way to clean the chimney soot
- Log "Chimney sweep" for cleaning chimneys: the composition of the tools and rules of application + reviews of the owners
Conclusions and useful video on the topic
The subtleties of self-assembly chimney construction shown in the video clip:
If the chimney draft is too strong, you can build a device to adjust it. How to do this is shown in the video:
Inexperienced craftsmen often make mistakes when installing the chimney. On the most common problems tells the video clip:
If there is a problem with the exit of smoke into the room, then it can be quickly and easily solved. The video demonstrates how to do this:
To service the metal chimney stove, you can use a simple method of delicate physical cleaning:
To make a stovepipe for the stove is easy if you approach the task responsibly and do everything correctly. Only in this case, the compact stove will serve for a long time, without requiring additional attention to itself..
Yes, and the quality of its work will always please, the main thing - in a timely manner to clean the chimney from soot and other combustion products.
Do you use a stove equipped with an improvised chimney? Share your build experience and photo of the finished chimney in the comments block. Tell us what material you used for the chimney and how difficult was the task of making the chimney for you.