- Preparation: choose the finishing materials for the kitchen
- Determine the sequence and start repairing
- Installation of a sink, mixers, exhaust hoods, lamps, sockets and switches
- Finishing finishing stage
Finishing the kitchen with your own hands is more complicated and responsible than repairing any other room. We have to face the need for plumbing, household electrical appliances, furniture, and communications in a relatively small area. With his hands to perform all such work, and even with high quality, it is quite difficult, but possible. It is necessary to take into account the variety of finishing materials for the kitchen, to think over various options for finishing the kitchen, and also to study the features and sequence of repairs.
So, where to start repairing the kitchen?
Preparation: choose the finishing materials for the kitchen
Paul in the kitchen: which is better?
The best materials for floor covering are:
- Ceramic tile.It is resistant to moisture, is immune to dirt and physical stress. The variety of floor tiles is huge, which allows you to choose a unique option, for example, with imitation of old wooden floor, metal, marble, etc. Lack of coverage in the complexity of laying and low thermal insulation;
- Linoleum.It is considered the most popular material for the kitchen. You can easily lay it yourself. Linoleum is notable for its low cost, long service life, immunity to spilled liquids. It differs by its heat capacity, composition, and the presence of the liner. Disadvantage - the possibility of cuts and punctures with sharp objects;
- Cork floor.This is the most pleasant material for the floor. Moreover, it is considered the most environmentally friendly and warm coating. Coverage is extremely useful for people who have problems with the spine. The plug does not absorb moisture and cooking fumes. It is laid on a substrate of fiberboard or plywood. From above the cork is covered with impregnation and a layer of varnish. The disadvantages include the possibility of the appearance of stains from dyes or grease, as well as low mechanical strength;
- Laminate.It easily fits and is distinguished by its strength. However, one should not take into account the high resistance of the material to the liquids spread on the floor. Getting into the joints between the laminate, the moisture gradually leads to the swelling of the plates;
- Parquet board or parquet.If you provide a normal care for the wooden floor, then this coating can serve for decades. However, wood does not tolerate high humidity, which can lead to its gradual deterioration and discoloration.
Than to finish the walls in the kitchen?
Walls in the kitchen are usually subject to more intense contamination. It is reasonable to use those wall coverings that can be easily washed. It is recommended to use the following finishing materials for the kitchen:
- Washable wallpaper.Beautifully behave wallpaper, covered with a layer of protective film that facilitates the care of them. Also, you can use dyed fleece wallpaper;
With the help of wallpaper, you can easily give the desired pattern or shade to the kitchen walls, hide all their defects. The lack of wallpaper is manifested in a low resistance to mechanical damage. A special type of coating for walls - liquid wallpaper, is a thick mass applied to the wall by a spatula;
- Paint.The decoration of the walls in the kitchen with paint is considered an inexpensive and simple method of repair. Use a semi-mat washable paint that will hide the main wall defects. The painted surface can be quickly repainted in a different color. The drawback of the paint is that different defects will be visible on the walls, and the surface itself will quickly become dirty;
- Decorative plaster.It is able to hide all the unevenness of the walls. With its help create unique compositions and drawings on the walls of the kitchen. The plaster is safe for health, well cleaned and perfectly complements any interior. But it is difficult to dismantle during subsequent repairs;
- Ceramic tile.Usually only the kitchen apron is laid out with the tiles, and the main walls are finished with one of the above materials.
These recommendations should help you determine how to trim the walls in the kitchen.
Than to finish the ceiling in the kitchen?
There are several options for decorating the kitchen ceiling:
- Suspended ceiling,the main material of which are plastic panels or moisture resistant gypsum board. Plastic is not afraid of drops of fat, steam and moisture, and care for it is almost not required. Drywall is just as good, it allows you to create even multi-level designs, but it requires whitewash, which you periodically need to update. The general lack of such ceilings is an indent of a dozen centimeters from the rough ceiling. For apartments with low ceilings, this is important. But in the resulting gap, you can hide all communications;
- Stretch ceiling.It almost does not take up places under the ceiling, and the PVC material is not afraid of evaporation, moisture and fat. The cloth is cleaned well in case of contamination. Let's note the possibility to choose not only a white ceiling, but also any other shade and texture. The vulnerability of the canvas to sharp objects and the complexity of the installation with their own hands are the main design drawbacks;
- Ceiling tiles.Made of expanded polystyrene, such a tile is the cheapest option for finishing the ceiling. Plates perfectly hide all the ceiling defects. If necessary, it changes rapidly. But choose only laminated tile, which is easy to clean and not so dirty. The disadvantages include the need for frequent care and sensitivity to heat from incandescent lamps.
Determine the sequence and start repairing
When you have decided on the choice of building materials, kitchen finishing should be carried out in a certain sequence, excluding the return to the previous stages and rework of some discovered shortcomings.
Sequence of kitchen repair:
- Initially, the kitchen is freed from all furniture and old communications, including wiring.
- The roughing work on leveling and finishing the ceiling, walls and floor is performed. If necessary, the old floor covering is removed.
- At the same stage, all windows and doors are replaced, if necessary.
- New communications are being laid.
- Installation of the ceiling, finishing of walls, flooring of the floor covering is carried out.
Rough finishing kitchen
How to start a kitchen repair:
- Arrangement of new pipes, installation of water meters (if necessary), connection of the heating system.
- In place of old metal pipes are installed polypropylene or metal-plastic analogs. These modern materials are convenient not only because they are not clogged with sediments, but also because they allow you to make the installation yourself.
Attention! It is forbidden to transfer gas communications independently!
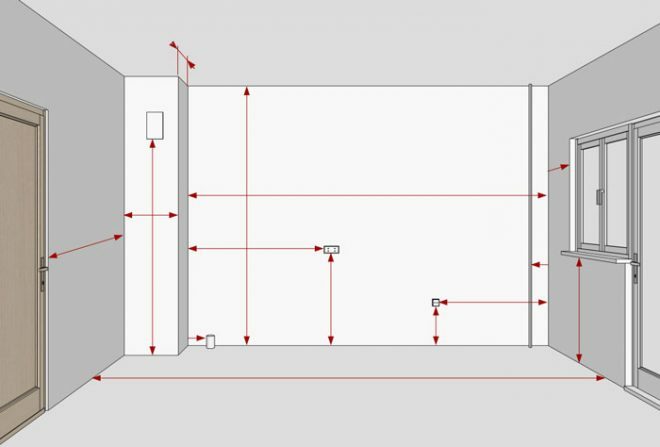
- In the walls and ceiling it is necessary to lay a new wiring, choosing the appropriate cable cross-section. Consider the supply of electricity to several places in the room, including the kitchen apron.
- The skeleton of the ceiling is mounted or its leveling is effected by plastering.
The walls are also to be leveled with plaster mixtures.
After the plaster hardens, the surfaces are cleaned. For leveling the walls, it is possible to use gypsum board, by means of which even very large irregularities are eliminated. You can install it on a prepared frame or glue. Gypsum plasterboard surfaces are plastered and sanded.
- If there is a concrete screed on the floor, then it is leveled to the ideal state. When there are boards on the floor, they are strengthened. Often boards from above are covered with sheets of fiberboard for insulation and removal of cracks.
Installation of windows and doors
Until the final finishing of the room is done, it is recommended to replace the windows and doors. Windows are preferable to prefer plastic, although some people like modern wooden structures more. It's difficult to change windows with your own hands, if you are not a master in this area, so take care of summoning the gage in advance. Please note that the windows will be manufactured about two weeks.
The door to the kitchen can be made of any material. This is wood, and chipboard, and plastic. Your choice should correspond to the general idea for interior design of the kitchen. The design of the door can also be different. This is a traditional door on hinges, and a sliding model in the style of a wardrobe, and a folding door, an accordion.
Exterior finish
At this stage, the final finishing of the room. Works start from the ceiling. There, on the frame or without it, the selected material (plastic, expanded polystyrene tile) is fixed, or the specialists install a stretch ceiling. The walls undergo priming, painting, whitewashing, applying decorative plaster. Or the wallpaper is glued. One of the selected materials is the kitchen apron.
Lastly, the floor covering is laid. If laying is carried out on a concrete screed, it is necessary to provide for the presence of waterproofing and insulation underneath the floor covering.
Options for finishing the apron
There are several options for decorating the kitchen apron:
- Ceramic tile.It is durable, not afraid of dirt, easy to clean. Mounted on the wall with their own hands. For a small kitchen, a small tile should be preferred. For example, 10 x 10 cm;
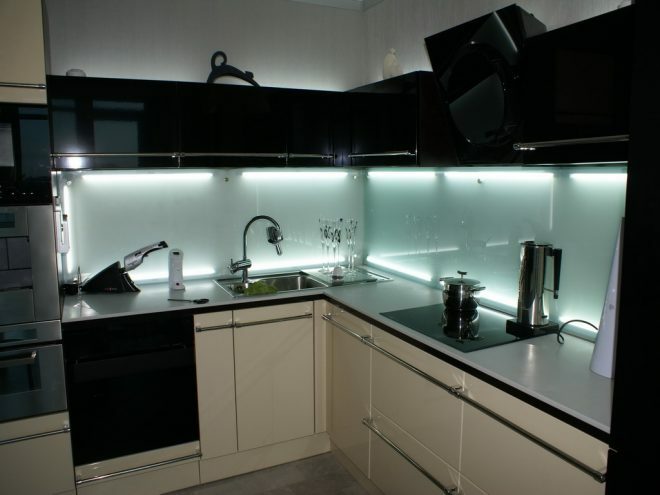
- Glass.This is the most progressive choice. The glass is quickly laundered, it allows creating a unique highlight. You can place a picture or photo on this apron. Glass is used hardened. Option with matt or tinted glass. The absence of seams facilitates the care of the apron. The disadvantage is the fragility that can manifest itself during the installation or operation;
- MDF.Easily cleaned of dirt. The color of the apron can be chosen based on the coloring of the rest of the furniture. Modern MDF panels are able to simulate many building materials, such as brick, marble, tile, stone. But there is one limitation. Since the board is wood, it is undesirable to use it in the presence of a gas cooker.
Installation of a sink, mixers, exhaust hoods, lamps, sockets and switches
At this stage, all the missing devices are mounted. On the prepared places switches and sockets are installed, fixtures, a sconce and a chandelier are fastened and connected.
The kitchen hood is installed. If you buy more and new furniture, then in advance, choose the color, size and design of the hood so that it harmoniously combined with the furniture.
Installation of a sink, connection and check of sanitary devices is carried out.
Finishing finishing stage
The kitchen is almost finished. It remains only to install floor skirting, hang on the windows blinds or baguettes for curtains and curtains themselves.
The room is filled with kitchen furniture and is placed in its place. On the walls hung cupboards.
Finishing the kitchen, done by yourself, will be a matter of your pride, and also save a lot of money. It is important only to adhere to certain construction technologies and use high-quality materials.
. Loading...
Read also:
- . The correct size of the apron is the secret to a comfortable kitchen.
- . Corner kitchen sink - choice and installation.
- . Plastic panels in the decoration of the kitchen apron and walls.
- . Basic rules for connecting kitchen appliances to the power grid.
- . Choose a mixer for the kitchen.


