Any modified device that makes electrical control more comfortable, is quickly becoming popular. Especially it concerns the domestic sphere. Appeared regulators have not so in demand as conventional breakers, but surely found their niche.
Consider how to connect a dimmer switch by yourself, with the rules and observe not make mistakes.
The content of the article:
- Types of dimmers and design features
- Analysis of wiring diagrams
-
Step by step instructions for replacing
- Step 1 - the lighting circuit off
- Step 2 - the dismantling of a conventional switch
- Step 3 - Set the control instrument
- Tips for selecting and using
- Conclusions and useful videos on the topic
Types of dimmers and design features
Dimmer or, in other words, the dimmer makes a point to set different lighting modes. Unlike dvuhklavishnogo switchWhich may carry up to 3 positions intensity, this device gradually changes the brightness of one or more light sources from the weakest to the maximum.
To properly install it, you must understand the structure. But this raises the complexity of dealing with various kinds. In commercially available devices with different control method.
The most famous is the swivel mechanism, but apart from him can stumble on the button, electronic, remote, and even acoustic.

The main active component of the model is turning the handle you want to turn on / counter-clockwise to decrease or increase the power of light
Like the switch, the simplest design light controller connected to the two-wire cable in the power circuit.
Hull shape it resembles a standard electrical installation - outlet or switch - can therefore be mounted in the Escutcheon, or just the free wall niche. Fixing occurs by elastic metal struts or foot-two feet, and the contacts are also standard.
The first contact for incoming phase extending from junction box, the second - for exiting the load conductor, which is directed to the light source. As the lighting can be a table lamp, floor lamp, chandelier, wall lamp or a group of spotlights.

Manufacturers supply the devices with detailed connection diagrams to follow. They are printed on paper and directly on the plastic housing
Push-button control looks like a normal switch: briefly pressing the button you can turn on / off the lamp. However, if you hold the button for 1-2 seconds, the light intensity changes smoothly.
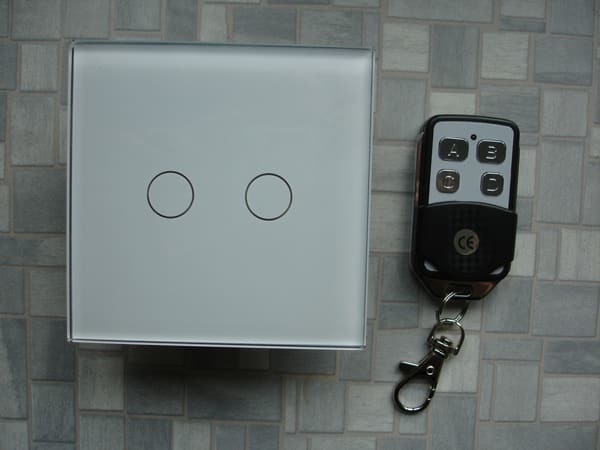
Modern electronic model can control multiple luminaires (2 to 5), installed in different rooms. Remote devices equipped with remote control / y. But you need to remember - the wider functionality of the dimmer, the higher its value.
If we talk about the differences in the installation, the installation and connection of electronic devices is almost the same, except for nuances specific to individual manufacturers.
Analysis of wiring diagrams
Selecting the scheme depends on many factors, including the dimmers, Ways to connect - separate or switches, dimmers, or the number of lighting devices.
You should also take into account a very important point: for incandescent lamps, LED lamps and strips of low-voltage halogen light sources use different instruments.

Testing dimmer with d / y, connected to the LED strip. Tape LED successfully used to illuminate suspended two-, three-tier construction of plasterboard
The most basic wiring diagram of the dimmer can be easily confused with the switch mounting scheme, because it really is one in one repeats it.
Wiring is usually carried out a two- or three-conductor wire, depending on the earthing system. In new houses are recommended cord with three strands - VVGng with a cross section of 1.5 mm².

From machine in switchboard stretch three cores: earth - metal housing for the lamp or chandelier, zero - to the lamps, and phase - a dimmer, an input terminal
But often the fixture has a plurality of arms, a dimmer is used to control a group of lamps arranged separately.
In this case it is advisable to install a single device instead of two, to be able to control the illumination level of two separate groups.

The fundamental difference - in the amount of the load wires. The controller is supplied by one common phase, and the output - two phase wires directed to different groups of fixtures. Accordingly, zero is also divided into two
How is the connection, if, instead of the control settings for normal or energy-saving lamps should be established LED adjustment?
Typically, complete with ribbons or luminaires with dimming adapter is with 220 12 V. This can be a power unit, which is inserted into the socket.

The two wires from the converter is drawn to the dimmer is attached according to the diagram to the right connectors and with the output terminal is supplied to one or more lighting device, connected in parallel fixtures
Paired with dimmer often use one or more walk-through switches - the grid with the set becomes more advanced, in terms of ease of use.
Place the switch is determined in different ways: it can stand between the shield and between the dimmer or dimmer and the luminaire.

Schematics passthrough devices differs from the standard instrument, and this must be taken into account when connecting. Focuses on accession phase lived in both instruments
Finally, consider the order of the wires and terminals with a standard dimmer connected - yet that it is the most popular in everyday life.

A simple scheme that could serve as a benchmark for connecting a standard controller. Phase conductor is input to and output from adjacent terminals, extends to the lamp
These examples - only a small portion of all possible mounting schemes for the device. To implement error-free connection, it is necessary to use the manufacturer's instructions as the main guide.
Step by step instructions for replacing
to purchase new dimmerInitially trying to find out what type of bulbs it will serve. Then, based on the allocated budget, or buying a cheap Chinese model or design of a trusted manufacturer - Makel, Schneider, Legrand.
If you want to establish a new, just bought the instrument produce the same actions as when installing the switch:
- change the wiring, or convinced of the suitability of the old cable;
- if there is no separate machine in switchboard, set it;
- prepare the space for installation;
- operate the installation.
But more often it is necessary to replace, ie to dismantle the switch housing and in its place establish a dimmer. Consider this option.
Step 1 - the lighting circuit off
Any manipulation of the electrical devices in the apartment should start with the forced shutdown electricity in the instrument, or located on a common platform, or inside the apartment, in the corridor (Hallway).
It provides standards of safety and preserves in good condition of all connected devices and cables. But the main goal - the protection of their own health.

To manually disconnect the load, it is sufficient to switch the machine arm. If replacement avtovyklyuchatelya or other electrical work on the instrument, you should call an electrician, house maintenance
For extra insurance should always be at hand, or tester, screwdriver or test for determining the voltage.
Checking the power line - this is the first action that should be performed at the beginning of the installation or removal of the power plant, when connecting wires. It is recommended to use insulated tools and gloves coated with a thin dielectric layer of polymer.
Step 2 - the dismantling of a conventional switch
To remove the old device is necessary to prepare a screwdriver. dismantling process takes only a few minutes and is a sequential removal of first decorative outer portion, then the internal mechanism connected to the wire.
image gallery
Photo of

The main thing at this stage - to find the right way to remove fragile parts without damaging them. If you can not pick up the key fingers, use a narrow object such as screwdriver

Remove the first element is difficult, and the second is much easier, since released the working environment and can easily capture the detail of the fingers and remove it from the seat

Frame, framing mechanism of the switch, usually installed a simple click, so removing it is necessary to produce the opposite effect

Corpus mechanism is held by screws that unscrewed a simple screwdriver. There may be two - at the center, or four - on the sides

Step 1 - determining method dismantling

Stage 2 - the removal of management tools - keys

Step 3 - Removal decorative frame

Step 4 - untwisting mechanical part
The last responsible moment - disconnecting the wires. Veins gently removed from the terminals by slightly loosening the holding screws or clamps.
You need to save the integrity of the exposed ends, so as not to cut the wire again, and not to reduce their already limited length.
Step 3 - Set the control instrument
If the wires are in good condition, you do not need to do anything to prepare. We must start with the study guide, which lists the requirements for installing the basic tehharakteristiki devices, and most importantly - there wiring diagram lived.
Dimmer parse familiar with the construction and parts mounted on the seat switch.
image gallery
Photo of

To loosen the lock nut, which can be found right in the center, under the handle, use pliers or clippers with a narrow seizure

Uninstalling the nuts turn allows to remove decorative parts - outer plastic cover and frame. Nut preserve, not to get lost

The inner part which is inserted into the mounting box consists of two major components - the housing, and an operating mechanism. their share

The element of interest mechanism are terminals which are located on the reverse side. The face of the operating control device is arranged

On the reverse side of the wiring can be found, which indicates which terminal is input, and which - leaving

A stripped wire ends are inserted into the right terminal and tighten them. Then return mechanism in a housing which is placed in a mounting box

Body fixing is carried out by two small screws, which are inserted laterally in their intended mounting holes

The finishing step includes alternately donning and snap the plastic frame and the panel, and the last thing - the rotary knob

Step 1 - loosening the fastening element - locknuts

Step 2 - dimmer disassembly into individual parts

Step 3 - disassembly of internal parts dimmer

Stage 4 - the study of the elements to connect

Step 5 - verification of the wiring circuit

Step 6 - Connect live to contacts

Step 7 - fixing housing on the wall

Step 8 - the final assembly of the dimmer
After installation, perform diagnostics. To do this, connect the power supply, include a dimmer and try to change the intensity of lighting by turning the knob.
If the work is done properly, the brightness of the light increases smoothly and as smoothly decreases.
Tips for selecting and using
Dimmer often take to significantly reduce the cost of electricity. It should be understood that a large economy does not work, but in 15-17% reduction in costs would still be able.

When choosing a model, pay attention to the design. Manufacturers offer a variety of collections, differing not only technical specifications, but also the external design - color, form, decorative panel dimensions
Remember that regulators mechanisms are sensitive to any excess of the temperature in the apartment, it is usually limited to a value of +27 to -28 ° C.
For the normal functioning of the appliance A minimum load of 40 W, otherwise the working mechanism to quickly fail.
If you try to connect to dimmer lighting devices not listed in the guide, it will not work. Device power must necessarily correspond to the total wattage.
Conclusions and useful videos on the topic
Deal with simple designs and to get acquainted with complex dimmers help informative and helpful videos taken by professional electricians and home masters.
Familiarity with the purchase made on the Internet. Device Diagnostics:
Connect the built-in universal dimmer to switch:
In what sequence to Install:
All stages of the installation of the dimmer, from purchase to diagnostics can be performed independently. The main points that should be given special attention - is the choice of the correct wiring diagrams and matching devices for lighting equipment characteristics.
Do you have practical skills in the installation of the dimmer and you can share advice with our visitors? Or maybe there were questions about the topic of the article? Please share your experiences, ask questions in a section block.