Broken switch - unpleasant situation that requires speedy solutions. In order not to wait for the electrical and lighting restored quickly, it is desirable to be able to repair the unit. Agree, this is not only convenient, but also practical from a financial point of view.
The device design is not particularly difficult, so the fix is available to virtually any home handyman, who has at least a little experience in dealing with the electrician. First you need to figure out how to make out the light switch, and then determine the cause of failure and eliminate it.
We offer to find out what features of dismantling keyboards, rotary and touch models, as well as learn the most likely reasons of failure of the switching device.
The content of the article:
- Where to begin work
-
How to disassemble switch
- Dismantling keyboard devices
- What to do with a rotary switch
- Features of repair touch models
- Recommendations for repairs
- Conclusions and useful videos on the topic
Where to begin work
If the key is pressed, the light does not come on, is not always the reason for failure is the switch, do not immediately begin to disassemble it. First, it never hurts to check the presence of voltage in the network, as well as the state of the incandescent lamp. If no voltage is likely to switch to the right.
Need to find out what is wrong with the network (short-circuit, light off, Damage to the supply cable, etc.) and eliminate the breakage. With a light bulb it is still easier - it needs to be replaced. If the network and the lamp in the manner it is time to take a closer look at the switch.
First you need to find at the distribution board machine, which is connected through this particular switch, and move the lever to "down", ie turn it off. After that, you should check with a tester the presence / absence of voltage at the output.
The procedure is simple and does not take much time, do not neglect it even if you have full confidence that the device accurately disconnected from the mains.
To make an assumption about the nature of damage can be even before the repairs. A common problem - the oxidation of the contacts inside the device. If the switch does not work only occasionally, most likely, the reason is a bad contact, who have just cleaned.
In addition to "sheath" oxidation and soot may accumulate on the metal plate switch. It is also possible to clean from savings to restore the device.
Serious damage can be caused by improper installation of the switch. The inexperience of some amateur wizard connects to the machine does not phase and zero conductor. As a result of the switch such as up and running, but the entire lighting circuits connected in such a way, it remains energized.
It happens that a simple replacement of a light bulb in such a network can result in electrocution. It is enough to fix the circuit to make it work properly.

Before disassembling the switch need to de-energize a separate line on which power is supplied to the device, or the whole apartment
These installation errors can lead to the fact that the line will remain after turning off the machine under tension. This is one of the reasons why you should always check even shut off the device.
If voltage is present, it is necessary to disconnect an apartment or house. If every time you turn on and off switch inside sparks appear, it usually indicates that the device contacts of inferior quality.
In some cases it is necessary to replace the entire switch to the same, only new. Usually replacement picked the exact same model that is suitable for Enclosures, and to the interior.
If for some reason you want to install a different model, you must ensure that the already existing opening for her. Otherwise it is necessary to re mount new podrozetnik.
The reason for the frequent fluctuations in the mains voltage can be not only the general state of the power supply, but also a large number of high-power electrical appliances that are connected at the same time. On this occasion, you can consult a qualified electrician may need to make adjustments to the existing scheme.
How to disassemble switch
Before starting the disassembly and repair switch to stock up the necessary tools: a screwdriver indicator or multimeter insulating tape, sandpaper, a Phillips screwdriver, and a straight, a marker, a pair of pliers and etc.
Do not interfere, and any capacity for storing small items such as fasteners.

After disassembling the switch to remember the color-coded wires and circuitry connecting them. Detailed pictures can be a great help
Another useful item in the performance of such work - a camera or mobile phone with a camera. The whole process is recommended to remove. Detailed images can be particularly useful during start-masters feedback device assembly.
The procedure works depends largely on the light switch type.
Dismantling keyboard devices
Step 1. Dismantling of one-, two- or three-key start with disconnecting switch keys. Typically, each of them need to hook a small screwdriver or other device, and just take off. Some manufacturers are doing on the keys are small protrusions or recesses in order to facilitate the dismantling process.
step 2. It is necessary to carefully remove the decorative frame. To do this, push the latch to hold it. Now, the front part of the switch mechanism is available for inspection.

During disassembly of the switch with two or three keys need to mark a place of connection of the supply wires and remember the color of the wires, or mark the appropriate wire marker
step 3. Recommended tester arm and make sure the power switch on the terminal is missing. If work is carried out with mnogoklavishnym device experienced masters recommend a marker to mark the power cord, the total for all keys.
step 4. It is necessary to remove the fastening tabs or unscrew the bolts that hold the switch mechanism Escutcheon. Now you can get to a more detailed inspection and repair device.
The old keyboard switches are arranged somewhat differently. On the case of such devices, the front or on one of the side panels, there is a fixing bolt, which is necessary to unscrew. Then you can remove the entire enclosure.
For old and new switches use different types of Enclosures. This point should be borne in mind if you plan to upgrade the device.

The keys and switches are usually decorative framework provides small protrusions that allow the hook element with a flat screwdriver and quick to remove it without damage (+)
Sometimes too rigid mounting prevents the installation of keys, then the bolts need to loosen a bit, it usually helps. During disassembly of the switch is not always necessary to remove the key, if it does not interfere with carrying out the necessary repairs.
In this case it is sufficient to disconnect only the frame. Fixing elements in the form of side spacers can be reduced.
ends wires clean and secured in the terminals. To ensure that the works are executed correctly, you need the wire after fixing a little tug. Any mechanical damage or damage to the cable - a good reason to replace it.
Locations where there is damage to the insulating layer should be re-insulated. But if there are too many areas, it is better to replace the cable completely, or soon will have to repair the switch again.
By the end of switch repair need to reconnect to the correct wiring, following the scheme and avoid the mistakes that were made earlier. If you post replacement, should insulate unused protective conductor.
Followed by a lock switch mechanism is again in Enclosures and tighten the fixing bolts. Then return to the place of keys and a decorative frame.

You should not over-tighten the mounting screws during reassembly, it can change the position of the device and make it difficult to install keys
Now you need to check the operation of the circuit breaker. To do this, it turns on and off a few times. For two- and three-key device checks each key separately, and all at the same time. If the device is not a spark, and the light bulbs do not flicker, the work can be considered successful.
On our site there is a block of articles detailing the single connection, two- and three-key switches, we advise to read:
- Wiring diagram dvuhklavishnogo switch and step by step guide on how to install
- How to select and connect the three-key switch correctly
- How to connect a switch with one button: the rules and connection schemes
What to do with a rotary switch
Rocker switches - this is the most common and simple models. With other versions of some difficulties may arise devices. Sometimes you have to fix problems with the so-called rotary switchesWhich is also called dimmers.

rotary switch Dismantling begins with removing the knob. It should just pull forward, while holding the device body
Such devices are also susceptible to voltage drops in the network and short circuits, as well as their "counterparts" with keys. Very often in the triac dimmers breaks. Repair of the item can not be, but it can be replaced. To begin dismantling the rotary switch is necessary to remove the adjustment knob.
It is mounted on the semi-circular elements such as "male-female" or special slots. It is necessary to hold with one hand switch housing and the other gently but firmly pull the handle toward you. Twist it is not necessary.
Under the handle is mounting lock nut, it is also necessary to unscrew. Sometimes the attachment is carried out using a screw.

Once the lock nut is unscrewed dimmer or the fixing screw, the housing can be removed and access to the inside thereof
Unscrew any of these items should be counter-clockwise. Now you need to remove the plastic cover and the frame, if necessary. Then loosen the elements that hold the mechanism inside the dimmer and it can be removed from the Escutcheon.
First, you need to check all contacts, connections and wiring, which appeared clean and soot oxidation, repair damaged insulation, replace the broken wire, etc.

If you broke a triac rotary switch, it must be replaced by another serviceable element with exactly the same dimensions and characteristics
Spoiled triac must be removed and attributed to the electrical shop to find a new, exactly the same. The assembly of the repaired unit is performed in reverse order.
As is the case with the key switch, before dismantling need to de-energize the line, check the contacts of the tester and fix the process in the form of photos, so do not mix up during assembly.
Features of repair touch models
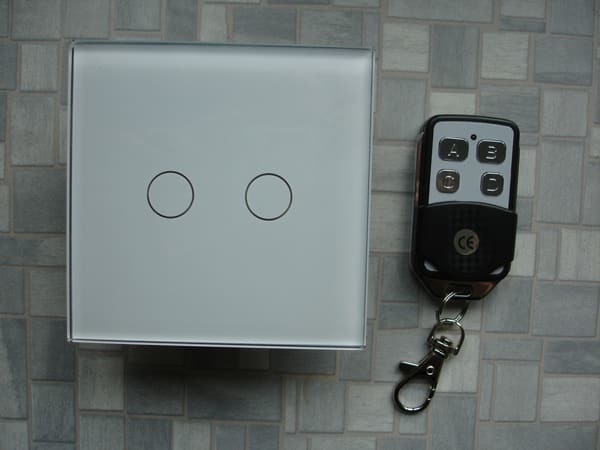
Things get a bit more complicated when it comes to touch switch, Which includes not pressing a key or by turning the handle and touch.
Such models are usually equipped with radio control, they have not only electromechanical filling, but also the board with chips that provide device management.

To detach the front panel touch switch, you can use a regular straight screwdriver, but it should act cautiously so as not to damage the element
To repair such a complex device novice electrician skills may not be enough. To eliminate complicated breakdowns have invited craftsmen who understands not only in electrical engineering, but also in electronics.
Quality sensor switches break down is rare, but if it happened, we first need to examine the manufacturer's instructions to disassemble the touch switch correctly.
First it is necessary to remove the decorative glass plate. Under it there is a panel with one or more sensors, depending on the number of lines (one, two or three) serving this particular model.
Typically sensor location indicated by circles, as shown in the decorative panel region, sensitive to touch.

Under the decorative cover is touch switch panel with sensors and control boards. Under this panel are connectors to which the wires are connected
Under decorative panel are LEDs that indicate switch state: red - inclusive, blue - off. Under the panel with sensors and switch boards is the mechanism that connects the wires.
To deal with the entry and exit is quite simple, about the same as for a conventional key switch. The sensor plate is fixed to this part of the clips. To remove it, you need to simply disconnect.
The main part of the switch, which is installed in Enclosures, usually does not have any clips. As the fastener using conventional bolts. To see places of connection wires, unscrew the screws and remove the switch from the Escutcheon. If the failure is related to the wiring, it will be easy to remove.
You need to check the voltage at the individual veins, to find the faulty cable and replace it. Here, just as you would with other types of switches it makes sense to clean the oxidation on the contacts, if any.
Reassembly is not difficult to perform: to connect to the main power supply, install it in the Escutcheon and fix it with screws, then attach the panel with sensors and a decorative plate.
Protective mechanisms of the switches on the failure to respond is a power failure. Even if you just burn out light bulb, the switch turns to "off", which does not change even if the lamp has been replaced.
In this case, after the repair you just need to touch the plate to turn on the light. If other breakdowns are not available, touch switch will work properly.
Recommendations for repairs
Contact problem resolved simply. First they need to inspect. If they have a layer of oxidized metal, remove it, and then establish contact in place.
If the contacts are not simply oxidized, and have expressed traces of melting, usually can not be repaired, it is necessary to replace the device completely. Remove carbon deposits with the contacts is very simple, you can use the knife or the end of a flathead screwdriver.

Visual inspection of the wires in podorozetnike and in terminal boxes will help to identify and eliminate the cause of failure. It is necessary to restore the damaged components or replace them completely
When working with the wires need to pay attention not only on the state of the non-insulated ends, but also on the quality of the wire. For example, fragile veins can easily break off, fracture and the like In this case, the wiring of the need to be replaced.
Among the common causes weakening and violations of the contacts can be noted:
- high humidity that promotes the oxidative processes;
- wrong, for example, is too weak fastening of wires;
- excessive strain, as evidenced sparking buzz, pops and other similar symptoms;
- voltage is greater than the permissible level;
- frequent power surges, etc.
To reduce problems with carbon deposits on the switch contacts, experts recommend the use energy-saving lampsRather than traditional incandescent bulbs. It reduces the load on the network and components wear out more slowly.
Conclusions and useful videos on the topic
The process of disassembly and repair of conventional switch with two keys presented in this sequence:
Here you can see the device and disassembly features proximity switch:
This video shows the disassembly of the unit and the rotary switch:
The proper dismantling of the circuit breaker - an important stage of repair work. It must be remembered about the security measures, as well as careful to remember or take pictures every step of the process to reverse the assembly was also performed without any problems.
Have experience disassembling the switch? Or do you want to ask questions on the topic? Please comment on the publication and participate in discussions. the feedback unit is located below.