Almost every room in our home uses light bulbs that help any work in the dark or just makes spending time in the room much more enjoyable. But there are situations when the lamp burns out and bursts. In this situation, you get not only an unpleasant scattering of fragments on the floor, but also the remains of the light bulb in the cartridge. Most ordinary people who come across this immediately look for a way to unscrew the bursting bulb from the cartridge.
Content
- Safety comes first
- Ways to remove a broken bulb
- Video instructions
Safety comes first
The first thing to do in such a situation is to ensure the safe execution of the work. Do not forget that the lighting device is powered from a 220 V network, and in a burst lamp, live elements become exposed. Therefore, before approaching the cartridge, be sure to remove the voltage.
It should be noted that simply pressing the switch from which this chandelier was turned on is not always enough. Since the switching device may not break the phase circuit, but break the zero. This option is acceptable only in situations where you have an indicator screwdriver to ensure that there is no potential. Or if you will unscrew a bulb from a cartridge in dielectric gloves.
The best option is to turn off the introductory machine in the apartment. If you have partitioned power supply for rooms or consumers, you can turn off the desired lamp with a separate machine, leaving all other nodes energized. If you turn off the power supply for the entire apartment, please note that there will be no lighting and there will be nothing to connect to. Therefore, take a portable flashlight in advance or light a candle so as not to cut yourself on the sharp edges of the bursting bulb in the dark.
Ways to remove a broken bulb
There are several ways in which you can remove the remains of the bulb and base from the cartridge. Choose a particular one of them should be based on the current situation and the available funds.

Method number 1. Use of pliers.
The most common way to unscrew a bursting bulb from a cartridge is with pliers, thin-nose pliers or other derivatives of this tool. But, this method is relevant in those situations when, after the glass bulb is broken, the base protrudes slightly outside the cartridge, otherwise there is a high probability of damage to the cartridge itself. And you will have to change not only the light bulb, but also the cartridge.
The whole procedure consists of the following actions:
- Remove voltage from the lamp;
- If glass fragments peek out from the cartridge, select the area where they are not there or break out the area under the pliers, as in the process of unscrewing the glass will begin to crumble and you may cut yourself;
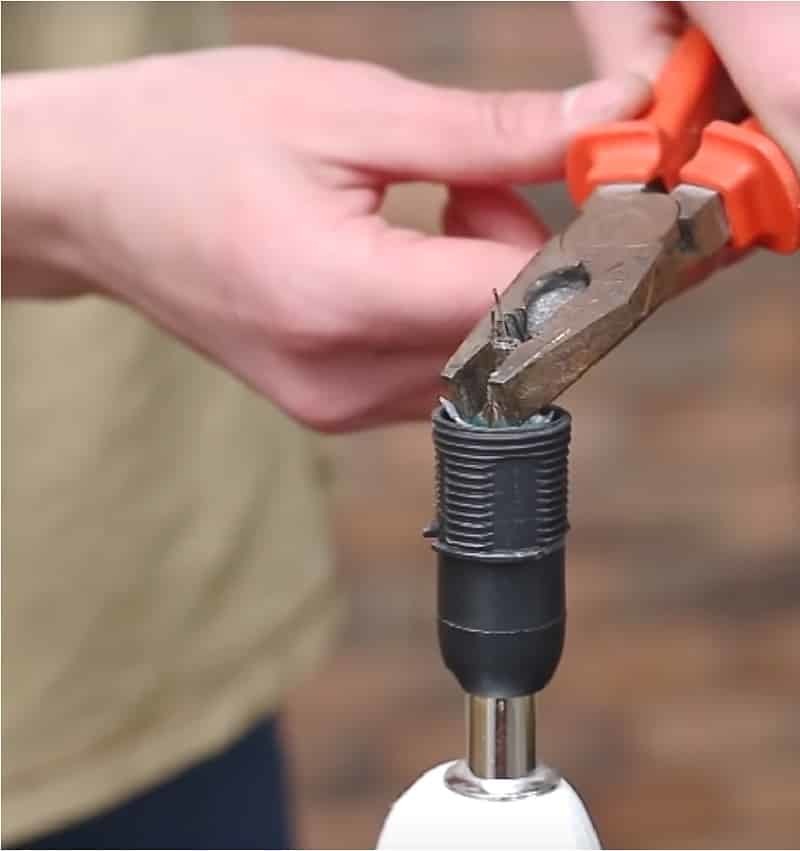
- Use a pair of pliers to grasp the edge of the base, if the edge is recessed into the cartridge, you can pre-bend it with a screwdriver in order not to damage the cartridge sleeve;

Fig. 2: Grasp the pliers over the edge of the cap - Carefully unscrew the base, if it does not immediately give in, then the remainder of the lamp could stick to the cartridge and for its removal must be made a great effort, if you are afraid to break the cartridge, use another method.
Method number 2. Disassembly of the cartridge.
The most optimal way is to disassemble the cartridge, it allows you to safely remove the stuck base, but this option is not suitable for all models of fixtures. Those of them in which the cartridge is not removable or it is covered by chandelier elements, do not allow to unscrew the burst by this method. Structurally collapsible models consist of a housing and a contact plate, the housing can be divided into two parts.
To apply this method you will need:
- Disconnect the voltage at the entrance to the apartment;
- Unscrew the case into two halves - as a result, you should have contacts with the cover, and the shirt should be unscrewed with the base and the rest of the light bulb;
- After which you will see that the base is twisted into a sleeve, if it has stuck to it, it should be tucked with thin-nose pliers, a screwdriver or slightly hit from the back;
- Unscrew the remaining bulbs when the cartridge is in your hands, much easier.
Method number 3. Plastic bottle.
If, due to the design features of a lamp or shade, you cannot reach the wreckage of a lamp with a tool and remove them, an ordinary plastic bottle and a lighter will help you. The entire extraction process consists of the following steps:
- Unscrew the cap from the bottle;
- Heat the neck of the bottle with a lighter so that the plastic begins to melt;

Fig. 3: heat the neck of the bottle - Insert the bottle into the broken light bulb and wait 10 to 20 seconds until the plastic grasps;

Fig. 4: insert the bottle into the broken light bulb - Gently turn the bottle to unscrew the rest of the bulb.
This method is good because it allows you to maintain the integrity of the cartridge and its elements. But you can only unscrew the lamp with the base E27.
Method number 4. Champagne cork.
This method is suitable for those situations when, when the bulb is destroyed, a leg (ram) has also fallen out of it or it can be pulled out painlessly.
- Pre-disconnect the voltage;
- Using a knife, sharpen the edge of the cork so that it fits snugly into the hole in the cap;

Fig. 6: insert the cork into the base - When you feel that the cork is firmly pressed against the inner surface of the bursted bulb, start turning it slowly.
As a result, the remainder of the bulb get out together with the cork. It should be noted that if glass fragments remain at the edges, they must be removed so as not to damage the fingers during twisting.
Method number 5. We use potatoes.
Almost every house has fresh potatoes. This method is suitable for those cases when sharp glass fragments remain at the edges. First disconnect the voltage on the input shield.
You just need to cut the potato in half or in a different ratio so that the rest has a slice and fits comfortably in your hand.

Through the cut line, the potatoes are carefully put on the leg and planted on glass fragments so that the vegetable fits tightly.

Then it is used as a handle to unscrew the remaining bulbs from the cartridge.

It should be noted that you do not need to pre-wash or wet the potatoes. Since it will become slippery and a tightly seated basement may not succumb. The potato itself is already wet in the place of cut, so be sure to wipe everything after twisting surfaces and wait for them to dry before turning the bulb in, apply voltage again and turn on shine.
You can also replace the potatoes with a piece of laundry soap, but, depending on its consistency and shape, the bar may not be suitable to unscrew the bursting bulb.
Video instructions
- How to choose LED lamps for home and apartment?
- How to make a DIY repair of an energy-saving lamp?
- How to make a do-it-yourself nightlight
- How to remove a do-it-yourself lamp for car interior lighting?